Old jeans are the houseplants of the laundry world: somehow they multiply, they take up space, and you feel slightly guilty getting rid of them. Maybe the knees are blown out. Maybe the waistband has accepted retirement. Maybe they still fit, but only in the same way a suitcase “fits” when someone sits on it. Good news: those denim veterans can become something useful, stylish, and wonderfully picnic-ready.
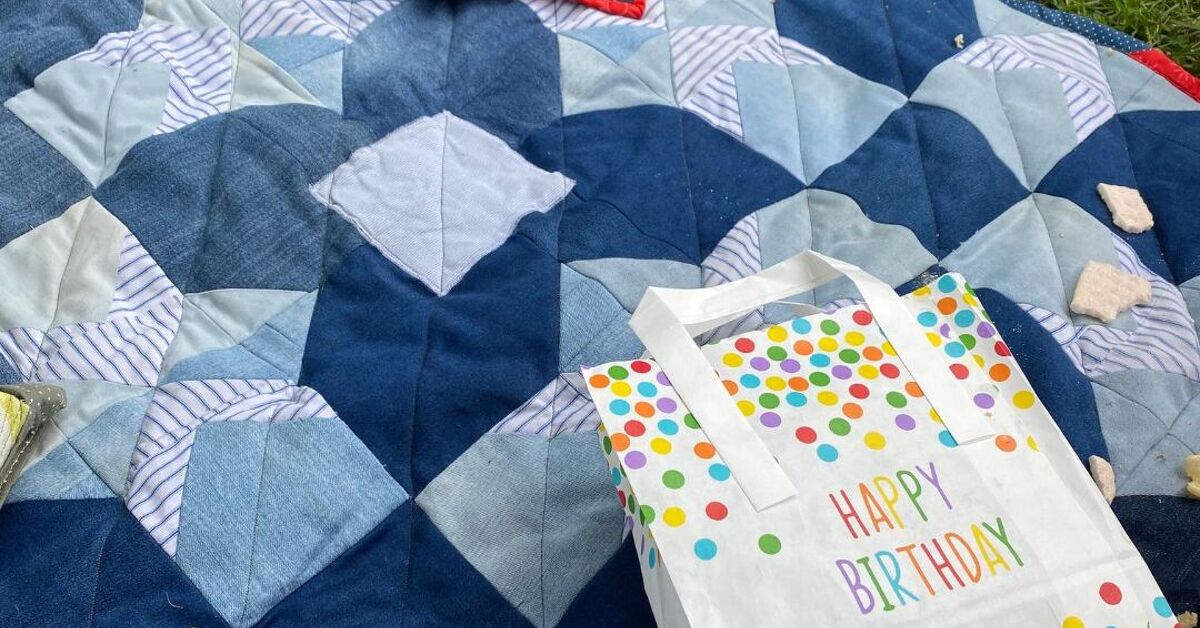
A reversible picnic blanket from old jeans is one of the best upcycling projects because denim is sturdy, washable, naturally casual, and forgiving. It already has character built in: faded thighs, worn pockets, tiny paint spots from that one weekend you became “a DIY person,” and enough texture to make a brand-new store-bought blanket look like it has no stories to tell.
This guide walks you through how to turn old jeans into a practical, reversible outdoor blanket with one denim side and one softer or water-resistant backing side. You will learn what materials to choose, how to cut denim without losing your patience, how to sew thick seams, how to make the blanket picnic-friendly, and how to add smart details like carrying straps, pockets, or a moisture-resistant layer. The result is a handmade blanket that looks charming, survives grass, handles crumbs, and gives your retired jeans a second career in the sunshine.
Why Make a Picnic Blanket From Old Jeans?
Denim is practically begging to become an outdoor blanket. It is heavier than quilting cotton, tougher than most decorative fabrics, and comfortable enough to sit on without feeling like you brought a tarp to brunch. Since jeans are usually made from durable cotton twill, they hold up well to repeated use and washing. That matters when your picnic involves lemonade, muddy shoes, strawberry juice, or a dog who believes every blanket is legally his.
Upcycling jeans also supports a more sustainable home. Textile waste remains a significant issue in the United States, and reusing clothing before sending it to the trash or recycling bin is one of the simplest ways to extend the life of fabric. A reversible denim picnic blanket gives you a practical reason to rescue jeans from the “I’ll deal with this later” pile and turn them into something you will actually use.
Another advantage is cost. A good outdoor picnic blanket can be surprisingly expensive, especially if it has a cute pattern, durable stitching, and a water-resistant underside. By using old jeans, scrap fabric, a thrifted sheet, or a vinyl tablecloth as backing, you can create a custom picnic blanket for a fraction of the price. Bonus: no one else at the park will have the same one unless they also owned your exact jeans, which would raise several questions.
What “Reversible” Really Means for This Project
A reversible picnic blanket has two usable sides. In this project, one side is made from old jeans, usually arranged in squares, rectangles, strips, or a patchwork layout. The other side can be soft cotton, flannel, canvas, outdoor fabric, or water-resistant material. This makes the blanket more flexible: use the denim side up when you want rugged style, or flip it over when you want the softer side against your skin.
For outdoor use, the most practical version is denim on one side and a moisture-resistant backing on the other. A vinyl tablecloth, laminated cotton, coated nylon, oilcloth-style fabric, or outdoor canvas can help keep damp grass from sneaking into your picnic like an uninvited guest. If you want the blanket to be fully washable, choose backing materials that can handle gentle cleaning and avoid anything too stiff for your sewing machine.
Materials You Will Need
Basic Supplies
For a medium picnic blanket, gather four to eight pairs of adult jeans, depending on the size of the jeans and the size of blanket you want. A comfortable picnic blanket for two people might be around 50 by 60 inches. A larger family blanket may be closer to 60 by 72 inches or more. Denim varies, so treat these numbers as helpful estimates rather than a law handed down by the picnic authorities.
You will also need backing fabric, coordinating thread, fabric scissors or a rotary cutter, a cutting mat, quilting ruler, pins or sewing clips, a sewing machine, and a fresh denim needle. Clips are often easier than pins when working with thick denim layers. A walking foot is helpful because it feeds bulky layers more evenly, but you can still complete the project with a standard presser foot if your machine handles denim well.
Best Thread and Needle Choices
Denim is not the place to test that mysterious thread you found in a cookie tin from 1998. Use strong all-purpose polyester thread, cotton-wrapped polyester, or jeans thread for visible topstitching. For the needle, choose a denim or jeans needle, commonly size 16 or 18 for heavier denim. A fresh needle matters because denim dulls needles quickly, and a dull needle can cause skipped stitches, broken thread, or the kind of sewing-machine noises that make everyone in the room go quiet.
Preparing Old Jeans for Sewing
Start by washing and drying all jeans. This removes dirt, softens the fabric, and helps reduce future shrinkage. Even if the jeans look clean, wash them. Picnic blankets have a close relationship with food, skin, and grass, so “probably clean” is not the energy we want.
Next, inspect each pair. Avoid areas that are too thin, torn beyond repair, oily, or heavily stretched out. The best usable fabric usually comes from the legs, especially the lower leg panels. Save pockets, waistbands, belt loops, and labels if you want decorative features. A back pocket sewn onto the blanket can hold napkins, utensils, a phone, or emergency chocolate. Every picnic needs emergency chocolate.
Cut the jeans apart by removing thick seams first. Slice along the inseam and outer seam to open each leg into flat panels. Do not force your scissors through bulky side seams if they are fighting back like a tiny denim dragon. Instead, cut around the thickest seams and save them for straps, ties, or decorative trim.
Choosing a Design: Squares, Strips, or Random Patchwork?
Classic Denim Squares
Squares are the easiest design for beginners. Cut denim into equal pieces, such as 6-inch, 7-inch, or 8-inch squares. Larger squares mean fewer seams, less bulk, and faster sewing. Smaller squares create a more detailed quilted look but require more time and patience. If your sewing machine has a personality, and that personality is “dramatic,” choose larger squares.
Long Denim Strips
Strips are another great option. They make the blanket look modern and relaxed, and they use long leg panels efficiently. You can cut strips in different widths for a casual, scrappy design. Place light and dark denim next to each other for contrast, or arrange faded pieces toward the center and darker pieces around the edges for a framed effect.
Freeform Patchwork
Freeform patchwork is ideal if your jeans are different sizes, colors, or conditions. This design embraces imperfection. You can combine rectangles, squares, and odd shapes into a rustic blanket that looks intentionally handmade. The trick is to keep edges straight where pieces join and press seams as you go. “Freeform” means creative, not “sewn during a windstorm.”
Step-by-Step: How to Make a Reversible Picnic Blanket From Old Jeans
Step 1: Decide the Finished Size
Choose the finished size before cutting. For two people, aim for about 50 by 60 inches. For families, try 60 by 72 inches or larger. Remember that denim is heavy, so bigger is not always better. A blanket the size of a small kingdom may look impressive until you have to carry it from the car to the park.
Step 2: Cut the Denim Pieces
Use a ruler and rotary cutter for clean, accurate pieces. If using scissors, mark your lines with chalk or a washable fabric marker. Cut around worn-out knees, stains, and thick seams. Keep the grain of the fabric reasonably consistent when possible, especially if using strips. This helps the blanket lie flatter and reduces twisting after washing.
Step 3: Arrange the Layout
Lay all pieces on the floor or a large table. Mix light, medium, and dark denim so the blanket looks balanced. Place interesting details, such as pockets or faded areas, where they will show. Take a photo before sewing. This prevents the classic crafter’s tragedy: carefully designing a layout, moving one piece, and suddenly forgetting everything like a detective with amnesia.
Step 4: Sew the Denim Top
Sew pieces together using a consistent seam allowance, usually 1/2 inch for denim. A slightly wider seam allowance gives thick fabric more stability. Sew squares into rows, then sew rows together. For strips, sew long strips side by side until you reach the desired width. Press seams open whenever possible to reduce bulk. Heavy seams can make the finished blanket lumpy, and nobody wants to sit on a denim speed bump.
Step 5: Add Optional Reinforcement
If the denim top feels loose or uneven, add a few lines of topstitching along the seams. This strengthens the blanket and gives it a finished look. You can also topstitch around pockets, labels, or decorative patches. Keep the stitch length slightly longer than usual, because longer stitches often work better on thick denim.
Step 6: Prepare the Backing
Cut the backing fabric to match the denim top, adding an extra inch or two on all sides if you plan to fold the backing over as binding. For a soft reversible blanket, use cotton, flannel, canvas, or an old sheet. For a more outdoor-friendly blanket, use a vinyl tablecloth, water-resistant outdoor fabric, or coated fabric. If using vinyl, avoid ironing it directly, and use clips instead of pins to prevent holes.
Step 7: Layer the Blanket
Place the denim top and backing right sides together if you plan to turn the blanket inside out. Sew around the edges, leaving a gap for turning. Trim corners carefully, turn the blanket right side out, and push corners gently into shape. Then topstitch around the entire edge to close the gap and keep the layers flat.
If using a fold-over backing method, place the denim top wrong side down on the backing. Fold the backing edge over the denim edge twice, clip in place, and stitch around the blanket. This creates a built-in binding that is clean, simple, and sturdy.
Step 8: Add Quilting Lines or Ties
Because denim is heavy, you do not need thick batting. In fact, skipping batting often makes the blanket easier to fold, carry, and wash. To keep the two layers from shifting, sew simple quilting lines across the blanket every 8 to 12 inches, or tack the layers together at seam intersections. You can also use short yarn ties for a casual quilted look, but keep them secure so they do not catch on picnic baskets, sandals, or curious little fingers.
Smart Add-Ons That Make the Blanket Better
Built-In Carry Straps
Use old waistbands, belt loops, or strips of denim to create straps. After folding the blanket into thirds and rolling it tightly, wrap straps around the roll and secure them with buttons, snaps, hook-and-loop tape, or ties. This turns the blanket into a grab-and-go picnic roll instead of a floppy denim burrito.
Useful Pockets
Jeans pockets are too good to waste. Sew one or two onto the backing side or near a corner of the denim side. They can hold a bottle opener, sunscreen, napkins, a small card game, or a phone while you pretend you are “unplugging.”
Corner Loops
Add small fabric loops to the corners if you want to stake the blanket down on breezy days. This is helpful at the beach, campground, or park. Use simple loops made from denim strips or sturdy cotton tape.
How to Make It Comfortable
Denim is durable, but it can feel firm. To make the blanket cozier, choose a soft backing such as brushed cotton, flannel, or fleece. If you want both softness and moisture protection, consider a three-layer design: denim top, thin cotton or flannel middle, and water-resistant backing. Keep the middle layer lightweight. A thick blanket may feel luxurious at home, but once it absorbs picnic crumbs and has to be carried uphill, luxury becomes cardio.
Prewashing is important if you combine different fabrics. Denim, cotton, and flannel can shrink at different rates. Washing before sewing helps prevent puckering later. It also lets you check whether dark denim dye might rub off onto lighter backing fabric. If you are using very dark jeans, wash them separately first and consider pairing them with darker backing.
Care and Cleaning Tips
Shake the blanket outside after every picnic. This removes grass, sand, and snack evidence. For regular cleaning, wash on a gentle cycle with cold water if all materials are machine washable. Air drying is safest for mixed fabrics, especially if the backing is vinyl or coated. If the blanket has a water-resistant layer, avoid high heat because it may damage the finish.
Spot clean small spills quickly. Denim is forgiving, but fruit juice, mustard, and barbecue sauce have ambition. Use mild soap and water, blot instead of scrubbing, and let the blanket dry completely before folding it for storage.
Common Mistakes to Avoid
Do not make the blanket too thick. Denim already has weight, so adding heavy batting can turn a picnic blanket into a weighted blanket with travel issues. Do not sew over thick jean seams unless your machine can handle them. Cut around bulky seams or flatten them with careful trimming.
Avoid using weak thread. Picnic blankets get pulled, folded, sat on, washed, dragged, and occasionally used as superhero capes by children who have no respect for seam allowances. Strong thread makes a difference.
Finally, do not chase perfection. A reversible picnic blanket from old jeans should look relaxed. Slight variations in denim color, texture, and fading are part of the charm. This is not a museum quilt. It is a blanket designed for sandwiches, grass, laughter, and that one person who always spills sparkling water with dramatic timing.
Creative Style Ideas
For a farmhouse look, pair denim with red gingham, ticking stripe, or cream canvas. For a modern look, use black denim, gray denim, and a solid waterproof backing. For a boho picnic blanket, mix denim with floral cotton, embroidered patches, or colorful binding. For a patriotic summer style, combine denim with red, white, and blue backing fabric. For kids, use bright cotton prints and add large pockets for toys or snacks.
You can also personalize the blanket with embroidered initials, fabric paint, or appliqué shapes. Keep decorations low-profile so they do not make the blanket uncomfortable to sit on. A beautiful raised button design may look cute until someone sits on it and learns a lesson in three-dimensional crafting.
Extra Experience: What It Feels Like to Actually Make and Use One
Making a reversible picnic blanket from old jeans feels less like a formal sewing project and more like a memory rescue mission. Every pair of jeans brings a little history. One panel might come from jeans worn on road trips. Another might have a faded pocket outline from years of carrying a phone. A tiny paint mark might remind you of a room makeover that started with confidence and ended with takeout. When you stitch those pieces together, the blanket becomes more than fabric; it becomes a practical scrapbook you can sit on.
The cutting stage is usually the messiest part. Denim dust appears. Threads escape. Waistbands pile up like tiny blue snakes. At first, it may seem like the project will never become a neat rectangle. But once the pieces are trimmed and arranged, the transformation happens quickly. The different shades of blue start to look intentional. Light denim brings softness, dark denim adds structure, and worn areas create texture. Suddenly, the pile of old jeans stops looking like laundry guilt and starts looking like a design choice.
Sewing the denim top can be satisfying, but it teaches patience. Thick seams need slower stitching. Corners need clipping. Pressing seams open feels like a small act of discipline, but it pays off when the blanket lies flat. If your machine hesitates over bulky areas, do not panic. Lift the presser foot, adjust the fabric, and guide it gently. Denim rewards steady hands more than speed. This is not a race; it is a picnic blanket, and the sandwiches are not judging your stitch time.
The first time you use the finished blanket outdoors is the best part. It feels sturdy when you spread it over grass. It does not flutter around like a thin sheet. The denim side looks casual and cool, while the backing side adds comfort or moisture protection. If you added pockets, they immediately become useful. Someone will put napkins in one. Someone else will hide cookies in another. If you added straps, rolling it up feels strangely professional, as if you are the kind of person who has life systems instead of three reusable bags stuffed inside another reusable bag.
A denim picnic blanket also gets better with use. After a few outings and washes, it softens. The seams relax. The blanket starts to feel familiar, like an old jacket or a favorite tote bag. It is not too precious, which makes it more enjoyable. You can take it to the park, beach, backyard, outdoor concert, campground, or school field day without hovering over it like a museum guard. If it gets dirty, wash it. If it gets a new stain, congratulations: the blanket has joined the family.
The biggest lesson from making one is that handmade does not have to mean complicated. This project is useful, forgiving, and full of personality. It saves fabric from waste, costs little, and creates something you can enjoy for years. A reversible picnic blanket from old jeans is not just a craft; it is proof that worn-out things can still have excellent second acts. Especially when snacks are involved.
Conclusion
A reversible picnic blanket from old jeans is the rare DIY project that is practical, budget-friendly, sustainable, and genuinely fun. It turns denim that might otherwise sit forgotten in a closet into a durable outdoor blanket with charm, history, and personality. Whether you make a neat square patchwork design, a bold strip layout, or a relaxed freeform blanket, the process is simple enough for confident beginners and customizable enough for experienced sewists.
The key is to keep the design usable: choose sturdy denim, reduce bulky seams, use the right needle and thread, add a comfortable or water-resistant backing, and finish the edges securely. Add pockets, straps, or corner loops if you want extra function. Then pack your picnic, roll up your blanket, and enjoy the small satisfaction of sitting on something you made with your own hands from jeans that were ready for retirement. Not every old pair of pants gets a scenic second life, but these do.