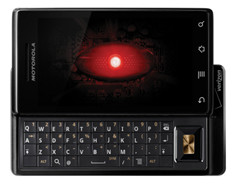
If you have a Motorola Droid sitting in your hand and a little voice in your head whispering, “I wonder what would happen if I had full control,” welcome to the ancient, noble, mildly chaotic tradition of Android rooting. Rooting a Motorola Droid can give you deeper access to the system, remove stubborn bloat, enable advanced backup tools, and open the door to custom tweaks that stock software never intended to allow. It can also turn a perfectly good afternoon into a support-group meeting with your USB cable.
That is why a good rooting guide should do two things at once: show you the path, and point out the potholes. This guide does both. It is written for real people, in standard American English, and built around what modern Motorola rooting actually looks like today. For most supported Motorola phones, rooting is no longer about random “one-click root” magic. It is usually a more deliberate process involving an unlockable bootloader, ADB and Fastboot tools, the correct stock firmware image, and Magisk to patch the boot image.
One important reality check before we begin: the title says Motorola Droid, but the exact process varies wildly depending on whether you own an old-school Droid-era device like the original Motorola Droid or Droid X, or a newer Moto-branded Motorola phone. Older Droid models often relied on exploit-based methods and recovery tricks from the Froyo and Gingerbread days. Newer Motorola devices generally follow a bootloader-unlock-plus-Magisk workflow. So think of this article as the smart map, not a reckless treasure hunt.
What Rooting a Motorola Droid Actually Means
Rooting gives you superuser access on Android. In plain English, it lets you do system-level things that a normal user account cannot do. That includes editing protected files, running advanced automation tools, blocking ads at a deeper level, using specialized backup apps, changing kernels, and sometimes installing custom ROMs.
But rooting is not the same as unlocking a carrier-locked phone. That is a common mix-up. Carrier unlocking lets a phone work on different mobile networks. Bootloader unlocking lets you modify the software more deeply. Rooting usually comes after bootloader unlocking, not instead of it. If you confuse those two, your weekend project can go sideways before you even type your first command.
Why People Still Root a Motorola Droid
Even in 2026, people still root for a few solid reasons. Some want to remove junk they never asked for. Some want deeper control over battery behavior or performance tuning. Others want full-device backups, better file access, or the freedom to keep an older phone useful long after the manufacturer has emotionally moved on.
There is also the classic Android hobbyist reason: because it is your device, and you would like your phone to behave less like a rental car and more like something you actually own. That motivation has powered the Android modding world since the original Droid era.
Before You Root: The Warnings You Really Should Not Skip
1. Not every Motorola device can be unlocked
Motorola supports bootloader unlocking for many devices, but not all of them. Carrier-exclusive models and certain network-restricted variants may be blocked. So the first real step is not downloading random files from the internet. It is confirming whether your exact model is eligible.
2. Unlocking can void warranty and support
Motorola has been very clear about this for years: unlocking the bootloader and altering the software can void warranty coverage and end normal support expectations. In short, once you go off the stock-software path, you become your own tiny IT department.
3. You can lose your data
Bootloader unlocking commonly wipes user data. That means photos, messages, app data, login sessions, and the random screenshot you took of a meme three months ago because “this will be useful later.” Back up first. Future-you will be grateful.
4. Some apps may stop behaving
Banking apps, streaming services, games with integrity checks, and mobile wallet features can detect root or an unlocked bootloader. Magisk can help in some situations, but this is no longer the easy hide-and-seek game it used to be. Google’s device integrity checks have become stricter, so assume that some secure apps may complain.
5. There is always some brick risk
If you flash the wrong image, interrupt the process, patch a file that does not match your exact build, or improvise when you should have paused, you can bootloop or soft-brick the phone. Hard bricks are less common than internet horror stories make them sound, but they are not mythical creatures either.
What You Need to Root a Motorola Droid
- A Windows, Mac, or Linux computer
- A reliable USB data cable
- The latest Android SDK Platform-Tools for ADB and Fastboot
- Motorola USB drivers or the correct OEM driver setup, especially on Windows
- Your exact Motorola model number and current software build number
- A copy of the matching stock firmware, especially the correct
boot.imgorinit_boot.img - The latest Magisk APK
- A full backup of anything you care about
- Patience, which is not downloadable but is very much required
It is also smart to have Motorola’s Software Fix utility in your back pocket. Think of it as the fire extinguisher you hope to admire from a distance.
How to Root a Motorola Droid Step by Step
Step 1: Identify the exact model and software build
Go to Settings > About phone and write down the model number and build number. This matters more than most beginners expect. “Motorola Droid” is not specific enough for firmware work. A patched image from the wrong build can turn your root attempt into an accidental experiment in boot failure.
Step 2: Confirm bootloader unlock eligibility
Before you do anything serious, check whether your exact phone supports Motorola’s bootloader unlock process. Some models do. Some carrier-specific versions do not. If the device is not unlockable, stop there and do not force the issue with sketchy methods unless you enjoy unnecessary suffering.
Step 3: Back up your data
Save photos, documents, downloads, contacts, and anything else you care about. Copy important files to a PC or cloud storage. A clean backup is not optional if the unlock process wipes the phone, which it often does.
Step 4: Enable Developer Options, USB Debugging, and OEM Unlocking
Open Settings > About phone and tap Build number seven times to reveal Developer Options. Then go to System > Developer options and enable USB debugging and OEM unlocking. On some devices, the OEM unlocking toggle may be missing, delayed, or restricted by carrier policy. That is your clue that the phone may not be a good rooting candidate.
Step 5: Install ADB, Fastboot, and drivers
Download the latest Platform-Tools package. On Windows, install Motorola Device Manager or the proper USB driver so the phone is recognized correctly. A huge percentage of “rooting problems” are really “my computer and my phone are refusing to acknowledge each other” problems.
Step 6: Verify your phone is detected
Connect the phone by USB, approve the debugging prompt on the device, and open a terminal or command prompt in your Platform-Tools folder. Then run:
If you see your device listed in both ADB and Fastboot, congratulations. The digital handshake has occurred.
Step 7: Unlock the bootloader
This is the part where the phone gets serious. Motorola’s unlock flow generally requires pulling unlock data from Fastboot, submitting it through Motorola’s unlock process if the device is eligible, receiving an unlock code, and then running the unlock command Motorola provides. On many Motorola devices, the command is similar to:
Follow the phone prompts carefully. Read the warnings. Do not speed-click your way through this like you are dismissing cookie banners on a shopping site. Once unlocked, the phone may wipe itself and reboot.
Step 8: Get the correct stock boot image
After unlocking, get the exact matching firmware for the software currently installed on the device. Then extract the proper partition image, usually boot.img on many devices, or init_boot.img on some newer ones. If you patch the wrong file, the phone may bootloop faster than you can say “I definitely downloaded the right one, I think.”
Step 9: Patch the image with Magisk
Copy the boot image to the phone. Install the Magisk APK. In Magisk, tap Install, choose Select and Patch a File, and select your copied image. Magisk will create a patched output file, usually in the Downloads folder.
Then move that patched image back to your computer with ADB:
If Magisk outputs a file with a slightly different name, use that exact filename instead.
Step 10: Flash the patched image
Reboot back to Fastboot mode if needed, then flash the patched image to the correct partition. Examples:
On some devices, the correct target may be init_boot instead of boot. Use the partition that matches your device’s firmware layout. This is not a “close enough” moment.
Step 11: Open Magisk and verify root
Once Android boots, open Magisk and finish any environment setup it requests. Then verify that root is active. If everything went well, you now have root access on your Motorola Droid. If everything did not go well, skip the dramatic sighing and go straight to troubleshooting.
What About Older Motorola Droid Models?
If you are rooting a truly old Motorola Droid, Droid X, Droid 2, Droid 4, or similar legacy model, the process may not match the modern Magisk workflow exactly. Some of those phones were rooted with exploit-based tools, recovery-based packages, or firmware-specific methods tied to older Android versions like 2.1, 2.2, or 2.3.
That is why you should always search for a guide that matches your exact model and Android version. A method for a modern Moto G or Motorola Edge device should not be copy-pasted onto a Droid-era handset. That is like using airplane instructions to repair a bicycle. Yes, both involve motion. No, that does not make them interchangeable.
Troubleshooting Common Rooting Problems
Your PC does not detect the phone
Try another USB port, another cable, and reinstall drivers. Make sure the phone is unlocked and set to file transfer when needed. Also make sure you approved the RSA debugging prompt on the device.
Fastboot sees nothing
Update Platform-Tools, reinstall drivers, and confirm you are actually in bootloader mode rather than just staring confidently at the wrong screen.
Bootloop after flashing Magisk
This usually means the patched image did not match the installed build, or the wrong partition was flashed. Your safest recovery route is often flashing back the original stock image or reinstalling the stock firmware. Motorola Software Fix can be helpful here.
Root works, but apps complain anyway
That is increasingly common. Some apps can detect root, an unlocked bootloader, or failing device integrity checks. In 2026, this is less about “doing Magisk wrong” and more about Android security tightening around modded devices.
You want to unroot later
The most reliable way is usually to flash the original stock firmware or restore the stock boot image for your exact build. That is the cleanest path back to normal.
Is Rooting a Motorola Droid Still Worth It?
For the average person, probably not. Modern Android is already far more flexible than it was in the original Droid years. You can do a lot without root now, including better file management, sideloading, advanced launchers, and system customization. Rooting today is more for enthusiasts, tinkerers, privacy experimenters, ROM lovers, and people trying to breathe extra life into aging hardware.
But for that audience, rooting can still be worth it. A rooted Motorola phone can become a lab, a backup machine, a test device, or a second life project for hardware that would otherwise end up in a drawer beside old chargers and emotional regret.
Extended Experience: What Rooting a Motorola Droid Feels Like in Real Life
People love to talk about rooting as if it is only a technical procedure, but that is not really true. Rooting a Motorola Droid is also an experience, and it usually follows a predictable emotional arc. First comes optimism. You charge the phone, line up your files, open fifteen browser tabs, and tell yourself this will only take twenty minutes. That is adorable.
Then comes the recognition phase. You start learning how many tiny details matter: the exact build number, whether the phone uses boot or init_boot, whether your cable is data-capable, whether the driver is installed properly, whether your carrier variant is secretly the party-pooper of the lineup. This is the point where many first-timers realize rooting is less like installing an app and more like carefully performing software surgery while reading the instructions twice.
Once the phone is recognized by ADB and Fastboot, confidence returns. You start to feel powerful. Terminal windows are open. Commands are working. The bootloader screen appears, and suddenly you are no longer just using the phone. You are negotiating with it. That shift is one reason rooting remains so satisfying for Android enthusiasts. It changes the relationship between user and device.
The most nerve-racking moment is usually the first reboot after flashing the patched image. That boot animation feels longer than it really is. You become spiritually aware of every second. If it boots, you feel like a genius. If it hangs, you instantly begin bargaining with the universe and promising to do proper backups forever.
For older Motorola Droid owners, there is also a nostalgia factor. The original Droid era was a weird, wonderful chapter in Android history. Back then, rooting felt rebellious in a way that modern smartphone customization often does not. People rooted to enable hidden features, remove carrier nonsense, overclock hardware, install custom themes, and prove that the device in their pocket could do more than the official software allowed. Today, that same spirit still exists, but it is wrapped in stricter security checks, more locked-down ecosystems, and a lot less tolerance from finance apps.
The people who enjoy rooting long-term usually learn the same practical lessons. They keep copies of stock firmware. They label files carefully. They avoid mismatched images. They stop trusting random one-click utilities. They read device-specific community threads before flashing anything. Most of all, they become calmer troubleshooters. A failed root attempt feels catastrophic the first time. By the third or fourth time, it feels more like a puzzle.
That may be the real appeal of rooting a Motorola Droid. Yes, it can unlock deeper control. Yes, it can extend the usefulness of old hardware. But it also teaches you how Android actually works under the hood. You learn what a bootloader does, why firmware versions matter, how partitions are flashed, why USB drivers can ruin a good day, and why preparation beats panic. Not bad for a phone project that started with, “I just wanted more control.”
Conclusion
If you want the cleanest possible answer to how to root a Motorola Droid, here it is: confirm your exact model, verify bootloader unlock eligibility, back up everything, unlock the bootloader, patch the correct stock boot image with Magisk, flash the patched image through Fastboot, and verify root. Simple in theory, precise in practice, and absolutely not a place for guesswork.
Done carefully, rooting can still be a smart and satisfying project, especially on older Motorola hardware. Done carelessly, it becomes a fast route to bootloops, broken app compatibility, and a renewed appreciation for factory firmware. Choose your adventure wisely.