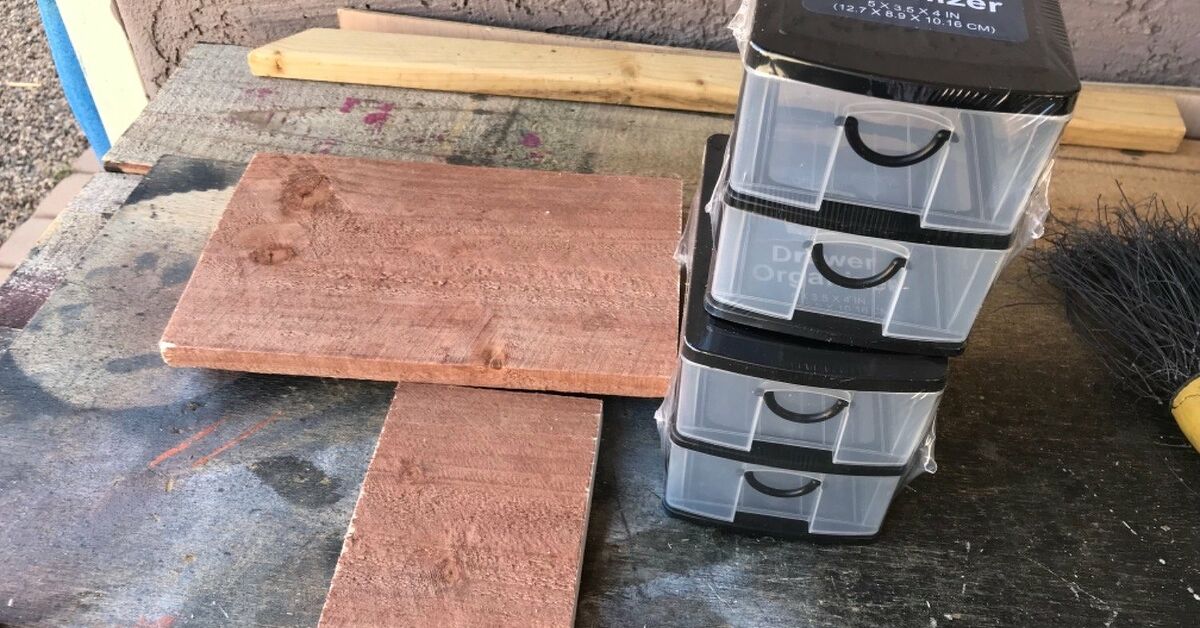
Some home projects begin with a power saw, a design board, and a budget that mysteriously triples by lunchtime. This one begins in the dollar store aisle, where a plain plastic drawer organizer is quietly waiting to become the most useful little makeover in your home. A dollar store drawer organizer may not look glamorous at first glance, but with a few decorative touches, it can turn a messy drawer into a tiny, well-behaved storage kingdom.
The best part? You do not need to be a professional crafter, own a garage full of tools, or speak fluent “Pinterest.” This DIY drawer organizer project is affordable, beginner-friendly, and surprisingly satisfying. Whether you want to organize makeup, office supplies, kitchen tools, jewelry, craft materials, bathroom essentials, or the famous junk drawer that currently contains three mystery keys and one battery of unknown destiny, this guide will show you how to decorate a dollar store drawer organizer so it looks custom, polished, and practical.
In this article, we will walk through materials, design ideas, step-by-step decorating methods, styling tips, mistakes to avoid, and real-life experience from trying this kind of project at home. By the end, that plain plastic tray will no longer look like something you grabbed while buying paper towels. It will look like a thoughtful little organizing upgrade.
Why a Dollar Store Drawer Organizer Is Worth Decorating
A dollar store drawer organizer is already useful on its own. It creates compartments, separates small items, and keeps things from sliding around every time you open a drawer with the confidence of someone who forgot there are loose paper clips inside. But decorating it adds another layer of value.
First, decoration makes the organizer feel intentional. A plain plastic tray can look temporary, while a decorated one feels like part of your home style. Second, adding color, labels, liner, or trim can make it easier to use. When each section has a purpose, you are less likely to throw random objects into the nearest empty space. Third, this project lets you upgrade your home without spending much money. That is the sweet spot of DIY: low cost, high satisfaction, and no need to explain a huge receipt to anyone.
Drawer organizers are especially helpful because drawers naturally become clutter magnets. The minute a drawer is empty, the universe begins sending it pens, receipts, lip balm, charging cables, rubber bands, tape, scissors, and one tiny screw that “might be important.” A decorated organizer gives those items a boundary. And boundaries, as every drawer desperately knows, are healthy.
Best Places to Use a Decorated Drawer Organizer
Before you start decorating, think about where your organizer will live. The drawer’s location will help you choose the best materials, colors, and finish.
Kitchen Drawers
In the kitchen, drawer organizers work well for tea bags, measuring spoons, bottle openers, snack clips, small utensils, and food storage labels. For a kitchen drawer, choose wipeable materials such as adhesive vinyl, contact paper, or sealed paint. Avoid decorations that may peel easily if exposed to crumbs, moisture, or frequent handling.
Bathroom Drawers
A decorated bathroom drawer organizer can hold hair ties, cotton rounds, skincare samples, travel toothpaste, makeup brushes, tweezers, and nail tools. Since bathrooms can be humid, use waterproof or water-resistant finishes. Clear sealant, laminated labels, and vinyl are better choices than untreated paper.
Desk and Office Drawers
For a desk drawer, you can organize pens, sticky notes, binder clips, stamps, USB drives, cables, and chargers. This is a great place to use labels because office supplies multiply when unsupervised. A simple black-and-white theme, faux marble liner, or soft neutral color can make the drawer feel calm and professional.
Bedroom and Vanity Drawers
Use a dollar store drawer organizer for jewelry, watches, perfume samples, makeup, hair clips, or small accessories. This is where decorative details shine. Try velvet-look liner, gold paint pen edges, floral contact paper, or small peel-and-stick gems for a pretty vanity upgrade.
Craft Drawers
Craft drawers are perfect for decorated organizers because they already contain the supplies needed for the makeover. Use organizers for beads, stickers, glue sticks, scissors, washi tape, paint pens, and ribbon. A colorful organizer can make craft storage more cheerful and easier to maintain.
Materials You May Need
You do not need every item on this list. Choose supplies based on your style, where the organizer will be used, and how much time you want to spend. A simple project can take less than an hour, while a more detailed decorated drawer organizer may become a weekend craft session with snacks involved.
- Dollar store drawer organizer or plastic storage tray
- Contact paper, peel-and-stick wallpaper, or adhesive vinyl
- Acrylic paint or spray paint made for plastic
- Fine-grit sandpaper or sanding sponge
- Rubbing alcohol or mild dish soap for cleaning
- Mod Podge or decoupage medium
- Decorative scrapbook paper or wrapping paper
- Paintbrush or foam brush
- Scissors or craft knife
- Ruler or measuring tape
- Labels, label maker tape, or printable stickers
- Clear sealer for extra protection
- Felt pads, rubber bumpers, or museum putty
- Washi tape, ribbon, trim, or metallic paint pens
If you are working with sharp tools, hot glue, or spray paint, use common sense and ask for help if needed. Work in a ventilated area, protect your surface, and do not rush the drying process. DIY confidence is wonderful; DIY fingerprints permanently sealed into wet paint are less wonderful.
Step-by-Step: How to Decorate a Dollar Store Drawer Organizer DIY
Step 1: Measure the Drawer and Organizer
Before decorating anything, measure your drawer. Measure the width, depth, and height. Then measure the organizer. This sounds obvious, but many ambitious DIY dreams have ended with the phrase, “Why won’t this drawer close?”
If you are using multiple dollar store organizers, arrange them inside the drawer first. Mix different shapes if needed. A long rectangular tray may hold pens or makeup brushes, while smaller square compartments may work better for clips, rings, batteries, or hair ties. Take a quick photo of the layout before removing the organizers to decorate them. That photo will save you from playing organizer Tetris later.
Step 2: Empty, Sort, and Declutter the Drawer
A decorated drawer organizer works best when it is not asked to perform miracles. Empty the drawer completely and sort everything into categories. Keep only what belongs there. Throw away dried-out pens, expired coupons, broken hair ties, empty packaging, and anything that makes you say, “I have no idea what this is, but it feels official.”
Group similar items together. For example, in a desk drawer, create categories such as writing tools, sticky notes, clips, chargers, and tape. In a bathroom drawer, sort by skincare, hair accessories, dental care, makeup, and grooming tools. This step helps you decorate the organizer based on real storage needs rather than wishful thinking.
Step 3: Clean the Organizer
Even a new dollar store organizer should be cleaned before decorating. Plastic can have dust, fingerprints, or residue that prevents paint or adhesive from sticking well. Wash the organizer with mild dish soap and water, then dry it completely. For a final wipe, use rubbing alcohol on a soft cloth.
Clean surfaces are especially important if you are using adhesive vinyl, contact paper, or spray paint. Skipping this step may not seem like a big deal until the corner of your beautiful faux marble liner starts peeling up like it has somewhere better to be.
Step 4: Choose a Decorating Style
Now comes the fun part: deciding the look. A decorated dollar store drawer organizer can match your room, add a pop of color, or create a clean, high-end look. Here are a few easy style ideas:
- Minimalist: Clear organizer, white labels, simple black text.
- Modern glam: White or blush base with gold trim.
- Farmhouse: Neutral liner, kraft paper labels, soft gray or cream paint.
- Color-coded: Different colors for different categories.
- Boho: Warm earth tones, cane-print paper, or woven-style vinyl.
- Playful: Bright patterns, polka dots, washi tape, and cheerful labels.
For small drawers, lighter colors and clear materials can make the space feel bigger. For deep drawers, labels and bold color-coding can make items easier to find.
Step 5: Add Contact Paper or Adhesive Vinyl
Contact paper is one of the easiest ways to decorate a drawer organizer. It comes in patterns like marble, wood grain, floral, terrazzo, linen, and solid colors. You can apply it to the inside bottom of each compartment, the outside sides, or both.
Measure each section carefully, then cut the paper slightly smaller than the compartment base. Peel back a small section of the backing, line it up, and press slowly from one side to the other. Use a credit card or small scraper to smooth bubbles. If the paper wrinkles, gently lift and reposition it.
For a clean look, use the same pattern in every compartment. For a more creative design, use different but coordinating patterns. For example, a vanity drawer might combine blush pink, white marble, and gold dots. A craft drawer could use rainbow colors so every section feels like it got invited to the party.
Step 6: Paint the Organizer
If you want to change the color of a plastic organizer, use paint designed to adhere to plastic. Lightly sanding glossy plastic can help paint grip better. After sanding, wipe away dust and make sure the surface is dry.
Acrylic paint can work for small decorative details, especially if sealed afterward. Spray paint can create a smoother finish, but it should be used outdoors or in a very well-ventilated area. Apply several light coats instead of one heavy coat. Heavy coats may drip, bubble, or create a sticky finish that refuses to behave like a civilized craft supply.
Let the paint dry fully before placing items inside. For organizers that will be handled often, add a clear protective sealer. This helps reduce scratches and keeps the finish looking fresh longer.
Step 7: Try Decoupage for a Custom Look
Decoupage is a great method if you want to use scrapbook paper, wrapping paper, old book pages, maps, or printed designs. Cut the paper to fit the organizer section. Brush a thin layer of decoupage medium onto the surface, place the paper carefully, and smooth it from the center outward to reduce wrinkles.
Once the paper is dry, brush another thin layer over the top to seal it. Let each layer dry before adding another. Thin layers are better than thick, gloopy layers. Thick glue may create bubbles, cloudiness, or texture that looks less “custom boutique” and more “craft night got emotional.”
Decoupage works best on flat surfaces, such as the bottom of compartments or the outside panels of a small drawer unit. If your organizer has curved edges, use flexible paper and work slowly.
Step 8: Add Labels That Actually Help
Labels are not just decorative. They help maintain the system. When a compartment says “chargers,” it becomes slightly harder to toss in a gum wrapper and pretend it belongs there.
You can use a label maker, printable labels, chalkboard stickers, vinyl lettering, or simple handwritten tags. For a bathroom organizer, labels such as “hair ties,” “skincare,” “cotton,” and “nails” work well. For a desk drawer, try “pens,” “clips,” “notes,” “tech,” and “stamps.” In a kitchen drawer, use labels like “tea,” “clips,” “measuring,” “openers,” and “snacks.”
Keep label wording short. Long labels can make a small organizer look cluttered. If you prefer a cleaner look, label the bottom of each compartment instead of the front edge.
Step 9: Add Decorative Trim
Small details can make a dollar store organizer look more expensive. Try adding washi tape around the top edge, metallic paint pen along the rim, tiny adhesive gems on the corners, or thin ribbon on the outside panels.
For a modern look, use gold or black trim. For a soft cottage style, try floral tape or lace ribbon. For kids’ drawers or craft drawers, bright washi tape can make the organizer fun and easy to spot. Just make sure trim does not prevent the drawer from closing.
Step 10: Keep the Organizer from Sliding
A drawer organizer that slides every time you open the drawer is technically organized, but emotionally annoying. Add small felt pads, rubber bumpers, museum putty, or a piece of non-slip drawer liner underneath. This helps the organizer stay in place.
Non-slip liner is especially useful in kitchen, bathroom, and desk drawers. It protects the drawer surface and keeps compartments from shifting. If you are using several small organizers together, a liner can make them feel like one coordinated system.
Creative Decoration Ideas for Different Rooms
For a Makeup Drawer
Use marble contact paper on the bottom of each compartment and add gold trim around the edges. Label sections for lip products, eye products, brushes, and skincare minis. If you want extra softness, place a thin piece of felt in compartments that hold jewelry or delicate items.
For a Kitchen Junk Drawer
Choose a wipeable liner and simple labels. Use compartments for tape, scissors, batteries, rubber bands, pens, and small tools. Stick with neutral colors so the drawer looks clean, even when it contains the usual collection of “very important random things.”
For a Home Office Drawer
Paint the organizer matte black, navy, or soft gray for a polished workspace look. Add white labels and use one compartment for each category. If you work from home, this tiny upgrade can make your desk feel less chaotic and more like a place where productive thoughts might actually happen.
For a Kids’ Art Drawer
Use bright colors, stickers, and easy picture labels. Create sections for crayons, glue sticks, safety scissors, stickers, markers, and erasers. A decorated organizer helps children understand where items belong and makes cleanup less dramatic.
For a Craft Supply Drawer
Decorate each compartment with a different color of adhesive vinyl. Use labels for beads, buttons, thread, clips, tape, and stamps. Because craft supplies are colorful already, a clear or white organizer with colorful labels can keep the drawer cheerful without becoming visually overwhelming.
Common Mistakes to Avoid
The biggest mistake is decorating before measuring. Always confirm that the organizer fits the drawer after decoration, especially if you add trim, handles, or raised embellishments. A beautiful organizer that blocks the drawer from closing is just a tiny storage sculpture.
Another mistake is using the wrong paint. Not all paint sticks well to plastic. If you use regular paint without surface prep or sealer, it may scratch or peel. For best results, clean the plastic, lightly sand glossy areas, use paint suitable for plastic, and allow proper drying time.
Do not overdecorate the inside of compartments that will hold messy or frequently used items. For example, glitter paper may look cute under paper clips, but it may not be ideal for a kitchen drawer with crumbs. Choose beauty and function together. The goal is not just to make the drawer look good on day one; it should still look good after real life gets involved.
Finally, avoid creating too many tiny categories. If every paper clip color gets its own compartment, the system may become too fussy to maintain. Keep categories simple and realistic.
How to Maintain Your Decorated Drawer Organizer
A decorated dollar store drawer organizer is easy to maintain if you build a simple habit. Once a week, take thirty seconds to remove anything that does not belong. Wipe crumbs, dust, or makeup powder from the compartments. Put items back in their labeled sections.
For bathroom organizers, check for product spills and moisture. For kitchen organizers, shake out crumbs and wipe with a damp cloth. For desk organizers, remove old receipts and dried-out pens before they form a tiny office supply museum.
If contact paper starts lifting at the corners, press it down with a small amount of adhesive or replace that section. One advantage of this project is that it is inexpensive and easy to refresh. You can change the look seasonally or whenever your style changes.
Budget-Friendly Design Combinations
One of the best things about this DIY project is how flexible the budget can be. A basic version may only require a drawer organizer and a roll of contact paper. A more detailed version might include paint, labels, trim, and sealer.
Simple and Clean
Use a clear drawer organizer, white adhesive labels, and a non-slip liner underneath. This is perfect for minimalists and renters who want an easy, no-mess upgrade.
Glam on a Budget
Use white spray paint or white adhesive vinyl, then add gold paint pen trim. Pair it with clear labels or small black script labels. This look works beautifully for vanity drawers and bedroom storage.
Color-Coded Family System
Give each family member a color. Use colored vinyl or washi tape on each section. This works well for shared bathroom drawers, homework stations, and entryway drawers.
Natural and Calm
Use wood-look contact paper, kraft labels, and neutral trim. This style works well in kitchens, home offices, and farmhouse-inspired spaces.
My Experience Decorating a Dollar Store Drawer Organizer DIY
The first time I tried decorating a dollar store drawer organizer, I was overconfident in the way people are right before they learn why instructions exist. I had a plain plastic tray, a roll of peel-and-stick marble paper, a pair of scissors, and the powerful belief that measuring was optional. It was not optional.
I started by cutting pieces of contact paper for each compartment. The first piece was too big, the second was too small, and the third looked like it had been cut during a small earthquake. Eventually, I realized the easiest method was to make a paper template first. I placed a piece of scrap paper inside each compartment, creased the edges, trimmed it to size, and used it as a pattern for the contact paper. Suddenly, the project went from “craft disaster documentary” to “home organization influencer, but approachable.”
The biggest lesson was to work slowly. Contact paper is forgiving, but only if you do not attack it like you are wrapping a sandwich in a tornado. Peeling back only one inch of backing at a time helped prevent bubbles. I used an old gift card to smooth the paper as I went. For tiny bubbles, I pressed them toward the edge. For stubborn bubbles, I gently lifted that section and laid it down again.
I used the finished organizer in a desk drawer that had become a crowded neighborhood of pens, sticky notes, earbuds, tape, and mystery receipts. Once the organizer was decorated and labeled, the drawer immediately felt calmer. The marble pattern made it look nicer, but the labels did the real work. “Pens,” “clips,” “notes,” and “tech” were simple enough that I could keep the system going without thinking too hard.
On a second project, I decorated a bathroom drawer organizer with soft pink adhesive vinyl and small white labels. This one taught me that bathroom projects need more durable materials. A paper label near skincare products did not last long because moisture and product residue made the edge curl. Replacing it with laminated-style labels solved the problem. I also learned that makeup powder finds its way into every corner, so smooth, wipeable surfaces are better than textured decorations.
My favorite version was a kitchen junk drawer organizer. I used a neutral gray liner in the drawer, then placed several dollar store trays on top. Instead of decorating every surface, I added black labels and a thin strip of washi tape along the front edge of each tray. It was simple, but it made the drawer look organized without becoming too precious. That mattered because junk drawers need to be practical. Nobody wants to gently place batteries into a drawer like they are rare museum artifacts.
The experience also changed how I shop for organizers. I used to buy the first tray that looked “about right.” Now I measure drawers and think about the actual items first. Long compartments are better for pens, brushes, utensils, and cords. Small square compartments are better for clips, rings, batteries, erasers, and tiny tools. Deep organizers are useful for bulky items, but shallow ones are better when you want to see everything at a glance.
Another helpful discovery was that decorating only the visible parts can be enough. You do not always need to cover every inch. A strip of contact paper on the bottom, neat labels, and non-slip liner underneath can make a big difference. This is good news for anyone who likes beautiful DIY projects but also enjoys finishing them before the next ice age.
Most importantly, this project made organizing feel less boring. A drawer organizer is functional, but decorating it adds personality. It turns a basic storage item into something you actually enjoy using. And when an organizing system feels pleasant, you are more likely to maintain it. That is the real magic of this dollar store drawer organizer DIY: it is not just about making plastic look pretty. It is about making everyday routines easier, cleaner, and a little more cheerful.
Conclusion
Decorating a dollar store drawer organizer is one of those small DIY projects that delivers a surprisingly big payoff. It is affordable, customizable, beginner-friendly, and useful in almost every room. With contact paper, paint, labels, trim, or decoupage, a plain plastic tray can become a stylish storage solution for makeup, office supplies, kitchen tools, bathroom essentials, craft materials, and more.
The key is to balance beauty with function. Measure first, clean the surface, choose durable materials, keep categories simple, and use labels that make sense for real life. A decorated organizer should not just look good for a photo; it should help you find your scissors, your favorite lip balm, or that one charger everyone keeps borrowing.
In the end, this project proves that home organization does not have to be expensive or complicated. Sometimes the best makeover starts with a dollar store find, a roll of contact paper, and the brave decision to finally face the junk drawer.
Note: This article was written as original, web-ready content based on practical home organizing and DIY crafting best practices. Source links are intentionally not included in the body, as requested.