Orchids have a reputation for being the divas of the houseplant world: gorgeous, expensive-looking, and supposedly ready to collapse if you water them 11 minutes late. Fortunately, that reputation is mostly unfair. Many orchidsespecially the enormously popular moth orchid, or Phalaenopsisare surprisingly forgiving once you understand that they do not want to be treated like ordinary potted plants.
The biggest secret to successful orchid houseplant care is simple: think about the roots. Many commonly grown orchids naturally live attached to trees rather than buried in dense soil. Their roots expect moisture, but they also expect plenty of air. Give them bright indirect light, good drainage, reasonable humidity, and an intelligent watering routine, and an orchid can remain healthy for years while producing spectacular repeat blooms.
Know What Type of Orchid You Have
Before creating a care routine, identify your orchid if possible. The orchid family is enormous, and different genera can have noticeably different requirements.
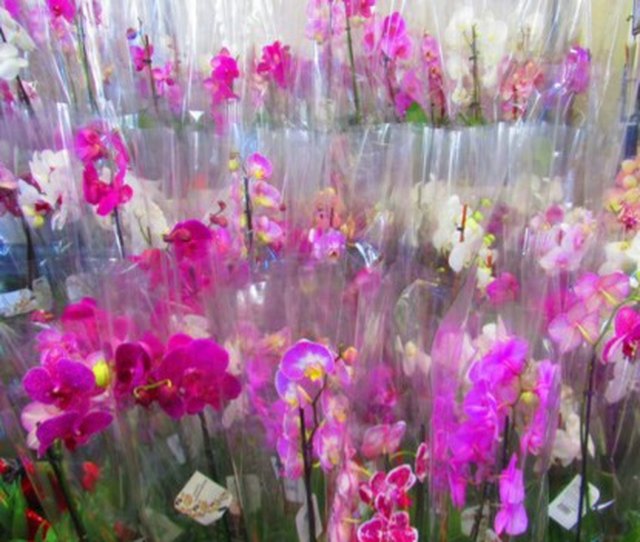
The Phalaenopsis, or moth orchid, is the variety most commonly sold in supermarkets, garden centers, and home-improvement stores. It usually has broad, thick leaves and tall arching flower spikes covered with butterfly-like blooms. Phalaenopsis orchids tolerate normal household temperatures and relatively modest light levels, making them one of the best orchids for beginners.
Other frequently grown types include Cattleya, Dendrobium, Oncidium, and Paphiopedilum. Cattleyas and many Oncidiums generally appreciate stronger light than Phalaenopsis, while Paphiopedilums often tolerate somewhat shadier conditions.
If your plant still has a tag, congratulationsyou have already won the first small battle of orchid ownership. Keep it.
Give Your Orchid Bright, Indirect Light
Light is one of the most important factors in how to care for an orchid houseplant, particularly if you want the plant to bloom again rather than simply maintain an impressive collection of leaves.
Choose the Right Window
For Phalaenopsis orchids, an east-facing window is often an excellent location because it provides gentle morning sunshine without the intense heat of late-afternoon sun. A shaded southern or western exposure can also work.
Avoid leaving most orchids in intense direct summer sunlight. Strong sun through glass can scorch leaves surprisingly quickly. If your only available window receives harsh afternoon sun, use a sheer curtain or move the orchid slightly away from the glass.
Let the Leaves Help You Judge Light
Your orchid carries a primitive but useful light meter: its foliage.
- Very dark green leaves: The orchid may need more light.
- Medium grassy or olive green: Light levels are generally appropriate.
- Yellowish, reddish, or bleached areas: The plant may be receiving excessive light.
An orchid receiving too little light may survive perfectly well but refuse to flower. It is essentially saying, “I appreciate the accommodations, but I’m not putting on a show.”
Consider a Grow Light
If your home lacks suitable windows, full-spectrum LED grow lights can provide adequate illumination. Positioning and duration depend on the fixture, but orchids grown under artificial lighting generally benefit from a consistent daily light period rather than being illuminated around the clock.
Water an Orchid ThoroughlyBut Not Constantly
Overwatering is one of the most common reasons indoor orchids decline. Unfortunately, “water once a week” is not a universal rule.
How quickly an orchid dries depends on its pot size, growing medium, temperature, humidity, season, airflow, and light level. An orchid in coarse bark near a warm window may dry considerably faster than one packed tightly in sphagnum moss.
Check Before You Water
For a typical Phalaenopsis, water when the potting medium is approaching dryness rather than automatically reaching for the watering can every Sunday morning.
You can judge moisture by touching the medium, lifting the pot to feel its weight, or inserting a wooden chopstick into the mix. Clear plastic pots are especially convenient because they allow you to monitor both moisture and root condition.
Healthy Phalaenopsis roots are typically firm and plump. Roots exposed through a clear container often become greener after watering and turn silvery as they dry.
How to Water an Orchid Properly
Take the orchid to a sink and thoroughly wet the growing medium with room-temperature or lukewarm water. Allow water to flow freely through the drainage holes. Then let the container drain completely before returning it to its decorative outer pot or saucer.
Never allow the root system to remain submerged in standing water. Orchid roots need oxygen, and permanently waterlogged media create ideal conditions for root rot.
Also avoid leaving water sitting in the crownthe central point where Phalaenopsis leaves meet. If water collects there, blot it away with a paper towel, particularly in cool conditions.
What About Watering Orchids With Ice Cubes?
The ice-cube method has become popular because it is convenient, but room-temperature water remains the more natural and controllable approach. Running water through the medium thoroughly wets the root zone and helps flush accumulated fertilizer salts.
In other words, your tropical orchid does not require a weekly miniature iceberg to understand that you love it.
Use Orchid Potting Mix, Not Regular Soil
One of the easiest ways to accidentally damage an orchid is to repot it in conventional houseplant soil.
Many popular orchids are epiphytes. In nature, their roots grow around tree bark or other surfaces with abundant exposure to air. Dense garden soil or ordinary moisture-retentive potting soil can suffocate these roots.
Appropriate orchid potting media may contain:
- Fir or other coarse bark
- Sphagnum moss
- Perlite
- Horticultural charcoal
- Other coarse, porous materials
Bark dries relatively quickly and provides excellent airflow. Sphagnum moss holds much more moisture, which can be useful in dry homes but also makes overwatering easier. A bark-and-moss combination can provide a useful middle ground.
Maintain Comfortable Temperature and Humidity
Fortunately, Phalaenopsis orchids enjoy many of the same temperatures humans do. Typical household temperatures in roughly the mid-60s through 80s Fahrenheit generally work well, although exact preferences vary among orchids.
Avoid extreme temperature swings. Keep flowering orchids away from freezing windows, exterior doors that regularly blast them with winter air, fireplaces, heating vents, and air-conditioning outlets.
Humidity Matters, but Don’t Build a Swamp
Many orchids appreciate moderate to relatively high humidity. Indoor environments, especially heated winter homes, can become much drier than orchids prefer.
You can increase humidity by grouping plants, using a room humidifier, or setting plants above a pebble tray containing water. If you use a pebble tray, the orchid pot should sit above the water rather than in it.
Humidity should also be paired with gentle air circulation. Stagnant, wet conditions encourage disease. A small fan running gently in the room can help, but you do not want orchid leaves flapping around as though they are attempting takeoff.
Fertilize Lightly During Active Growth
Orchids need nutrients, but they are not especially heavy feeders. More fertilizer does not equal more flowers and can instead damage sensitive roots through salt accumulation.
A balanced water-soluble fertilizer or fertilizer labeled for orchids works well. Many experienced growers use dilute fertilizer more frequently rather than applying strong concentrations occasionallythe familiar “weakly, weekly” strategy.
A practical approach is to use approximately one-quarter of the labeled strength during periods of active growth, adjusting according to the fertilizer manufacturer’s directions and the orchid species. Periodically water with plain water to flush excess mineral salts from the potting medium.
Reduce feeding when growth slows substantially. Fertilizer is food, not CPR; pouring extra fertilizer onto an unhealthy orchid rarely fixes the actual problem.
Repot Your Orchid When the Medium Breaks Down
Orchids do not necessarily need frequent moves into larger pots. Repotting is often performed because their growing medium is decomposing rather than because the plant desperately wants more real estate.
Coarse bark gradually breaks into smaller pieces. As the mix deteriorates, it holds more water and less air, increasing the risk of unhealthy roots.
Many Phalaenopsis orchids benefit from fresh media approximately every one to three years, with around two years being a useful general guideline. Repot sooner if the medium has become compacted, smells sour, drains poorly, or the plant has root problems.
How to Repot a Phalaenopsis Orchid
- Wait until flowering has finished when possible.
- Remove the orchid gently from its container.
- Shake or rinse away old potting material.
- Inspect the entire root system.
- Trim mushy, hollow, or obviously dead roots with sterilized scissors.
- Place the orchid in fresh commercial orchid mix.
- Choose a container only large enough to accommodate the healthy roots.
A giant pot may look generous, but excessive potting material stays wet longer and can encourage root rot. Orchids generally prefer a fairly snug fit.
What to Do After the Orchid Flowers Fade
Eventually those elegant flowers will fall. This does not mean the plant is dying. It simply means the flowering cycle has ended.
For many orchids, a finished flower stalk can be cut near its base using sterilized pruning tools. Phalaenopsis is somewhat unusual because a green flower spike can occasionally produce another branch and bloom again.
After the last Phalaenopsis flower drops, you may cut the green spike above a lower node to encourage a possible secondary flowering. Alternatively, cutting the old spike near the base lets the plant direct its energy toward leaves and roots before producing an entirely new flower stalk.
If the spike turns yellow or brown, remove it near the base.
How to Encourage an Orchid to Rebloom
A healthy orchid that refuses to rebloom frequently needs more light rather than more fertilizer.
First examine the leaves. Very dark green foliage can indicate insufficient light for good flowering. Move the orchid gradually into brighter indirect light if necessary.
Many orchids also respond to seasonal temperature changes. Phalaenopsis plants can be stimulated to initiate flower spikes by experiencing somewhat cooler nighttime temperatures for several weeks, often with nighttime temperatures roughly 10 to 15 degrees Fahrenheit cooler than daytime conditions.
Do not freeze the plant or subject a budding orchid to dramatic fluctuations. The goal is a gentle seasonal cue, not botanical boot camp.
Watch for Common Orchid Problems
Yellow Leaves
An occasional older bottom leaf turning yellow and dropping can be normal. Multiple yellowing leaves, however, may indicate excessive watering, root trouble, inappropriate light, nutrient problems, or environmental stress.
Wrinkled or Limp Leaves
Dehydrated-looking leaves do not automatically mean the orchid needs more water. Damaged or rotting roots may be unable to absorb water even when the potting mix is wet.
Whenever an orchid looks severely dehydrated, inspect its roots before simply increasing watering.
Brown, Mushy Roots
Soft brown or black roots frequently indicate excessive moisture and poor aeration. Remove severely rotted roots during repotting and correct the watering or drainage problem.
Mealybugs, Scale, and Spider Mites
Inspect orchids regularly, especially around leaf joints, underneath leaves, on flower spikes, and around new growth. Sticky residue, cottony white material, bumps attached to stems, fine stippling, or webbing can indicate pests.
Isolate a suspicious plant immediately so pests do not turn your houseplant collection into an all-you-can-eat buffet. Appropriate horticultural oils, insecticidal soaps, or other products labeled for indoor ornamental plants may be useful depending on the pest. Always follow product directions.
A Simple Orchid Houseplant Care Routine
If all of this sounds complicated, reduce orchid care to a short routine:
- Place your Phalaenopsis in bright, indirect light.
- Check the potting medium rather than watering strictly by the calendar.
- Water thoroughly and let the container drain completely.
- Keep water from sitting in the crown.
- Provide moderate humidity with gentle airflow.
- Feed lightly during active growth.
- Inspect roots and leaves regularly.
- Replace decomposed potting medium as needed.
- Provide brighter light and a modest nighttime temperature drop if the orchid will not rebloom.
Experience-Based Lessons for Caring for Orchids at Home
The most useful lessons about orchid houseplant care usually become obvious after living with a plant for several months. One of the first is that a schedule is less valuable than observation. Two apparently identical Phalaenopsis orchids can require water at different intervals simply because one is growing in bark and the other is tightly packed in sphagnum moss.
A common beginner experience goes something like this: the orchid arrives flowering beautifully, receives a small amount of water every few days because the owner is determined to be attentive, and several weeks later the leaves become limp. Naturally, the owner assumes the orchid is thirsty and adds more water. Unfortunately, the actual problem may be roots that have rotted from staying constantly wet.
The lesson is enormously useful: look at the roots before diagnosing the leaves. Firm roots are encouraging. Mushy, hollow, foul-smelling roots are not. Once you begin checking the root system, orchid problems become much less mysterious.
Another lesson growers quickly discover is that flowers are not the only measure of success. After an orchid finishes blooming, it may spend months producing roots and leaves without showing the slightest interest in another flower. That can feel disappointing when the plant originally arrived looking like a floral fireworks display.
Yet new root tips and fresh leaves are excellent signs. They indicate that the orchid is accumulating energy for future growth. Constantly moving, repotting, fertilizing, and otherwise “helping” a healthy plant during this period often causes more problems than simply providing stable conditions.
The Window Experiment
Moving a non-blooming orchid to a brighter location can sometimes create one of the most satisfying experiences in indoor gardening. A Phalaenopsis may sit for months near a dim window producing dark green leaves but no flowers. After gradual relocation to brighter indirect light and exposure to cooler fall nights, a tiny pointed structure may eventually appear between the leaves.
At first it is easy to mistake a flower spike for a new root. Then it starts growing upward, and suddenly the orchid that seemed to be doing absolutely nothing becomes the most closely monitored object in the house.
The important lesson is not to chase flowers with heavy fertilizer. Correct light and temperature are often more important.
Learning When Not to Water
Perhaps the greatest skill an orchid grower develops is the ability to walk past the plant without watering it.
Beginners tend to associate care with action: watering, misting, feeding, trimming, or repotting. Orchids often reward restraint. If the medium is still moist, waiting is care. If healthy aerial roots are wandering outside the pot, leaving them alone is care. If the plant has just finished blooming and is quietly growing leaves, patience is care.
Once that mindset changes, orchids become far less intimidating. Instead of following a rigid checklist, you begin responding to what the plant is actually showing you.
Why the Second Bloom Feels Better Than the First
The flowers on a newly purchased orchid were produced under professional greenhouse conditions. They are beautiful, but someone else did most of the work.
When the orchid produces a new spike in your home months later, the experience is different. That flower spike is evidence that the combination of light, water, temperature, fertilizer, and patience has worked.
And that is probably how one orchid becomes three orchids, then eight orchids, followed eventually by a conversation in which someone in your household asks why every usable window now appears to be occupied.
Conclusion
Learning how to care for an orchid houseplant is less complicated than its glamorous flowers suggest. For beginner-friendly Phalaenopsis orchids, success mostly comes down to bright indirect light, an airy potting medium, thorough watering followed by good drainage, moderate humidity, light fertilization, and patience.
Pay particular attention to the roots and leaves rather than blindly following a watering calendar. Repot when the growing medium deteriorates, watch for pests, and remember that several months without flowers can be completely normal.
Once you understand the rhythm of the plant, an orchid stops feeling like a delicate botanical celebrity and starts behaving like what it really is: a tough, fascinating houseplant capable of rewarding good care with remarkable blooms year after year.
Note: Orchid requirements vary among genera, species, hybrids, climates, and indoor environments. This guide emphasizes Phalaenopsis, the moth orchid most commonly grown as a houseplant, while providing general principles useful for many indoor orchids.