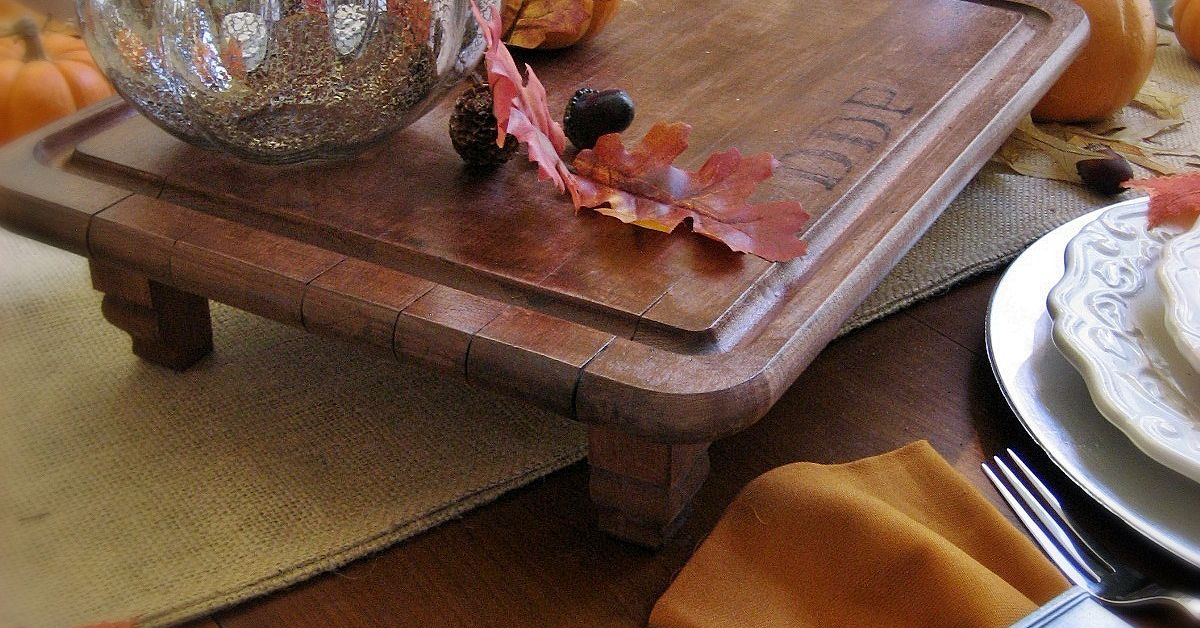
A thrift store can look like a museum of questionable decisions: chipped mugs, mysterious candle holders, framed geese in bonnets, and at least one wooden board hiding under a pile of holiday placemats. But every so often, the bargain bin hands you a small miracle. That scratched, forgotten cutting board or paddle-shaped tray might be one sanding session away from becoming a rustic monogrammed serving board worthy of cheese, fruit, warm bread, and compliments from guests who suddenly believe you are “crafty.”
Turning a thrift store find into a personalized serving board is the perfect DIY project because it combines sustainability, creativity, and a tiny bit of dramatic before-and-after magic. Instead of buying a brand-new decorative board, you rescue a solid piece of wood, clean it properly, smooth it down, add a monogram, and finish it with food-safe care. The result feels handmade, useful, and personalwithout requiring a workshop the size of a barn or a budget that makes your wallet whimper.
Why a Thrifted Serving Board Is Worth the Hunt
The charm of a thrifted wooden board is that it already has a story. Maybe it once lived in a farmhouse kitchen. Maybe it spent ten years under a waffle maker. Maybe it was purchased with big culinary dreams and then abandoned after one ambitious charcuterie night. Whatever its past, good wood can often be refreshed beautifully when it is structurally sound.
Rustic serving boards are popular because they bring warmth to the table. Wood softens the look of modern dishes, pairs beautifully with stoneware and linen, and makes even store-bought crackers look like they attended culinary school. Add a monogram, and the board becomes more than a tray. It turns into a custom piece for weddings, housewarmings, birthdays, holidays, or your own kitchen counter because, yes, you are allowed to gift yourself nice things.
What to Look for at the Thrift Store
Not every wooden board deserves a second life as a food-serving piece. Some belong in the “decor only” category, and some should politely retire. When shopping, look for solid wood rather than particleboard or laminated mystery material. Maple, walnut, cherry, acacia, and bamboo boards are common choices for kitchen use. A heavier board often signals better quality, though weight alone is not proof.
Choose Boards With Good Bones
Inspect the board carefully. Light scratches, dullness, faded finish, or minor stains can usually be improved. Deep cracks, black mold-like spots, splintering, separation at glued seams, or strong odors are red flags. If the board smells like old onions, basement, or “grandma’s garage in July,” leave it behind unless you plan to use it strictly as wall decor.
Also check the shape. Paddle boards, rectangular boards with handles, round boards, and small butcher-block-style boards all work well. Boards with handles are especially useful for serving because they are easier to carry from kitchen to table. If the board has a groove around the edge, it may be better for juicy foods, but for cheese and snacks, a flat surface is easier to style.
Food Safety Comes First, Even When the Board Is Cute
A rustic serving board should be beautiful, but it should also be safe. Before you serve anything edible on a thrifted board, clean and evaluate it properly. Wash it by hand with hot, soapy water, rinse it well, and dry it thoroughly. Avoid soaking wooden boards because prolonged moisture can encourage warping and cracking. The dishwasher is also a bad vacation destination for wood; heat and water can damage the board faster than you can say “but it was only the quick cycle.”
If a board has deep grooves that cannot be sanded smooth, use it for decorative display rather than food. Cracks and hard-to-clean cuts can trap debris and bacteria. For a serving board, the goal is a clean, smooth surface that can be maintained with routine washing and oiling.
Supplies You’ll Need
You do not need a professional shop to make a rustic monogrammed serving board. Most supplies are simple and affordable:
- Thrifted solid wood board
- Mild dish soap and sponge
- White vinegar or lemon for deodorizing
- Fine-grit sandpaper, such as 120, 180, and 220 grit
- Clean cloths or paper towels
- Food-grade mineral oil
- Optional beeswax board cream
- Letter stencil, vinyl decal, or printed monogram template
- Pencil for light marking
- Wood-burning tool, food-safe engraving method, or decorative paint for non-food areas only
If you use a wood-burning tool or any power sander, follow the tool instructions and work with proper ventilation. For younger DIYers, this is the part where an adult should help. A monogram is charming; a surprise trip to urgent care is not part of the aesthetic.
Step 1: Deep Clean the Board
Start with a basic wash. Use warm water, mild dish soap, and a sponge or soft brush. Scrub both sides and the edges. Rinse thoroughly and dry it with a clean towel. Then stand the board upright so air can circulate around both sides. Let it dry completely before sanding or oiling.
For lingering odors, rub the surface with half a lemon and a little coarse salt, then rinse and dry. White vinegar can also help deodorize. Avoid harsh household cleaners that are not intended for food-contact surfaces. If the board has a heavy old finish, sticky residue, or unknown coating, sanding becomes even more important before you decide whether the piece is suitable for food presentation.
Step 2: Sand Away the Past
Sanding is where the thrift store board begins its makeover montage. Start with 120-grit sandpaper if the surface is rough or stained. Move with the grain of the wood rather than against it. After the worst scratches and discoloration are reduced, move to 180 grit, then finish with 220 grit for a smooth touch.
Do not over-sand in one spot or you may create uneven dips. Sand the front, back, edges, and handle. Slightly rounding sharp edges gives the board a softer, handmade look and makes it more comfortable to hold. Wipe away dust with a clean cloth between grits. When the board feels smooth and looks refreshed, you are ready for the fun part.
Step 3: Plan the Monogram Design
A monogram should look intentional, not like it wandered onto the board during a craft-room tornado. Decide where the letter or initials should go. Popular placements include the lower corner, the handle, the center of a round board, or the top edge above the serving area.
For a rustic look, choose classic serif letters, farmhouse-style block fonts, or simple script. Keep the design readable. Tiny swirls and ultra-thin lines may look pretty on a computer screen, but they can become a smoky blur when burned or painted onto wood.
Single Letter or Full Initials?
A single large letter feels bold and modern. Three initials feel traditional and gift-worthy. A family name can work too, especially on a longer paddle board, but keep the design balanced. If the board is small, a single initial is usually cleaner.
Step 4: Add the Monogram
There are several ways to personalize the board. Wood burning gives the most classic rustic effect. A stencil helps keep the lines crisp. Tape the stencil in place, lightly trace the design, and burn slowly along the outline before filling in thicker areas. Keep your hand steady and resist the urge to rush. Wood burning is not a race; it is more like handwriting with a tiny dragon.
Engraving is another option if you have access to the right tool or a local maker service. For paint, use caution. Painted designs are best kept on handles, edges, or areas that will not touch food unless the product is specifically labeled for the intended use and fully cured according to directions. When in doubt, keep decoration away from the food zone.
Step 5: Create the Rustic Finish
Once the monogram is complete, wipe away any dust. Apply food-grade mineral oil with a clean cloth, covering the entire board: front, back, sides, and handle. Let the oil soak in for several hours or overnight, then wipe off excess. Dry-looking boards may need more than one application. If the board drinks oil like it just crossed a desert, give it another coat.
A beeswax-based board cream can add an extra layer of protection and a soft sheen. Rub it in after oiling, let it sit briefly, and buff with a clean cloth. The finish should feel smooth, not sticky or greasy. This simple oil-and-wax routine helps reduce drying, cracking, and water absorption over time.
How to Style a Rustic Monogrammed Serving Board
Now comes the moment when your rescued board becomes the star of the snack table. For a balanced board, think in groups: something creamy, something crunchy, something sweet, something salty, and something colorful. Try cheddar cubes, soft cheese, grapes, dried apricots, nuts, crackers, olives, and a small bowl of jam or honey.
For a breakfast board, use mini bagels, berries, cream cheese, sliced fruit, and pastries. For a cozy movie night, arrange popcorn, pretzels, chocolate pieces, and cookies. For a holiday board, add rosemary sprigs, cranberries, orange slices, and spiced nuts. The rustic wood makes simple ingredients look intentional, which is excellent news for anyone whose cooking style is “assemble beautifully and hope no one asks too many questions.”
Serving Board vs. Cutting Board: Know the Difference
A thrifted monogrammed board is best used as a serving board unless you are absolutely confident it is clean, properly restored, and made from food-suitable solid wood. Even then, once you add a decorative monogram, you may want to avoid heavy chopping on it. Knife marks can damage the design and create grooves that are harder to clean.
Use the board for bread, cheese, fruit, pastries, appetizers, and dry snacks. Use a separate everyday cutting board for raw meat, poultry, and seafood. This keeps your pretty board looking good and helps prevent cross-contamination. In other words, let the monogrammed board be the charming host, not the hardworking prep cook.
Care and Maintenance
After each use, remove food promptly and wash the board by hand with hot, soapy water. Rinse, dry with a towel, and stand it upright to finish air-drying. Do not soak it in the sink. Do not put it in the dishwasher. Do not leave it under a pile of wet plates and then act surprised when it warps like a potato chip.
Reapply food-grade mineral oil whenever the wood looks dry or feels rough. For many homes, monthly oiling works well, but frequency depends on use and climate. A board used every weekend may need more attention than one displayed on a shelf and brought out for special occasions.
Gift Ideas for a Monogrammed Serving Board
A rustic monogrammed serving board makes a thoughtful handmade gift. For a wedding, add the couple’s shared last initial. For a housewarming, pair the board with a small jar of local honey, a cheese knife, and a linen towel. For a holiday gift, wrap it with ribbon and tuck in a handwritten card with care instructions.
You can also create themed boards. A coffee-lover’s board can hold biscotti and sugar cubes. A baker’s board can be used for displaying muffins or scones. A picnic board can be paired with small jars, napkins, and reusable utensils. Personalized gifts feel special because they show effort, but this one is still practical enough to avoid the dreaded “thanks, where do I put this?” reaction.
Common Mistakes to Avoid
The first mistake is choosing a board in poor condition. If it is cracked, moldy, badly warped, or smells suspicious, skip it. The second mistake is using the wrong finish. Food-grade mineral oil and board creams made for wooden kitchenware are reliable choices. Vegetable oils and olive oil can become rancid, leaving unpleasant odors and flavors.
The third mistake is decorating the main food surface with products that are not suitable for food contact. If you are unsure, place the design on the handle or use the finished piece for decorative display only. The fourth mistake is forgetting the back and edges when oiling. Wood absorbs moisture unevenly, so sealing all sides helps the board behave itself.
Budget Breakdown
This project can be surprisingly affordable. A thrifted board may cost just a few dollars. Sandpaper is inexpensive, and a bottle of food-grade mineral oil can last through multiple projects. Stencils, decals, or printed templates are low-cost, especially if you already have basic craft supplies at home. Even if you buy a small wood-burning tool, you can reuse it for ornaments, tags, coasters, and future gifts.
Compared with custom boards sold online or in boutiques, a DIY version can save money while giving you more control over the final look. More importantly, it gives you a story. “I made this from a thrift store find” is much more fun than “I clicked add to cart while eating cereal.”
Extra Experience: What This Project Teaches You
Making a rustic monogrammed serving board from a thrift store find teaches patience in a very practical way. At first, the board may not look promising. It might be dull, scratched, and dusty. But once you clean it, sand it, and oil it, the wood grain begins to show again. That transformation is satisfying because it proves that good materials do not always need replacing. Sometimes they need attention.
The project also teaches you to slow down and evaluate quality. In a store full of random objects, you begin to notice details: the weight of real wood, the difference between surface scratches and structural cracks, the shape of a handle, the direction of grain, and the way a board might look after sanding. These small observations build confidence. The next time you thrift, you will not just see old stuff. You will see possibilities.
There is also a creative lesson in restraint. It is tempting to add every decorative idea at once: giant lettering, painted borders, floral vines, a quote, a date, and possibly a tiny rooster for personality. But rustic design usually works best when it feels simple. One clean monogram, a smooth finish, and warm wood grain can say more than a crowded design. The board should look handmade, not attacked by a craft drawer.
Another experience this project offers is the joy of making something useful. Many crafts are fun but end up living in a closet. A serving board earns its place. You can use it for guests, family snacks, weekend brunch, or a quiet evening when dinner is basically cheese and crackers arranged with dignity. Every time you bring it out, you get a reminder that creativity does not have to be complicated or expensive.
This project is also a gentle introduction to woodworking skills. You learn how sanding changes texture, how oil deepens color, how wood grain affects design placement, and how finishing protects the surface. These are foundational skills that can lead to more advanced projects later. Today it is a serving board. Tomorrow it might be shelves, trays, coasters, or a full furniture flip that makes your friends ask when you became the neighborhood carpenter.
Finally, the experience makes gifting feel more meaningful. A monogrammed board is personal without being overly sentimental. It fits many styles, from farmhouse to modern rustic, and it works for people who love hosting, cooking, decorating, or simply eating snacks in an organized fashion. Handmade gifts carry time and thought, and those two things never go out of style.
Conclusion
Transforming a thrift store find into a rustic monogrammed serving board is a rewarding DIY project with style, function, and personality. With careful selection, proper cleaning, smooth sanding, a tasteful monogram, and a food-safe finish, an overlooked wooden board can become a beautiful piece for entertaining or gifting. The process is simple enough for beginners, flexible enough for creative makers, and charming enough to make people ask, “Where did you buy that?” You can smile, pass the cheese, and say, “Actually, I made it.”