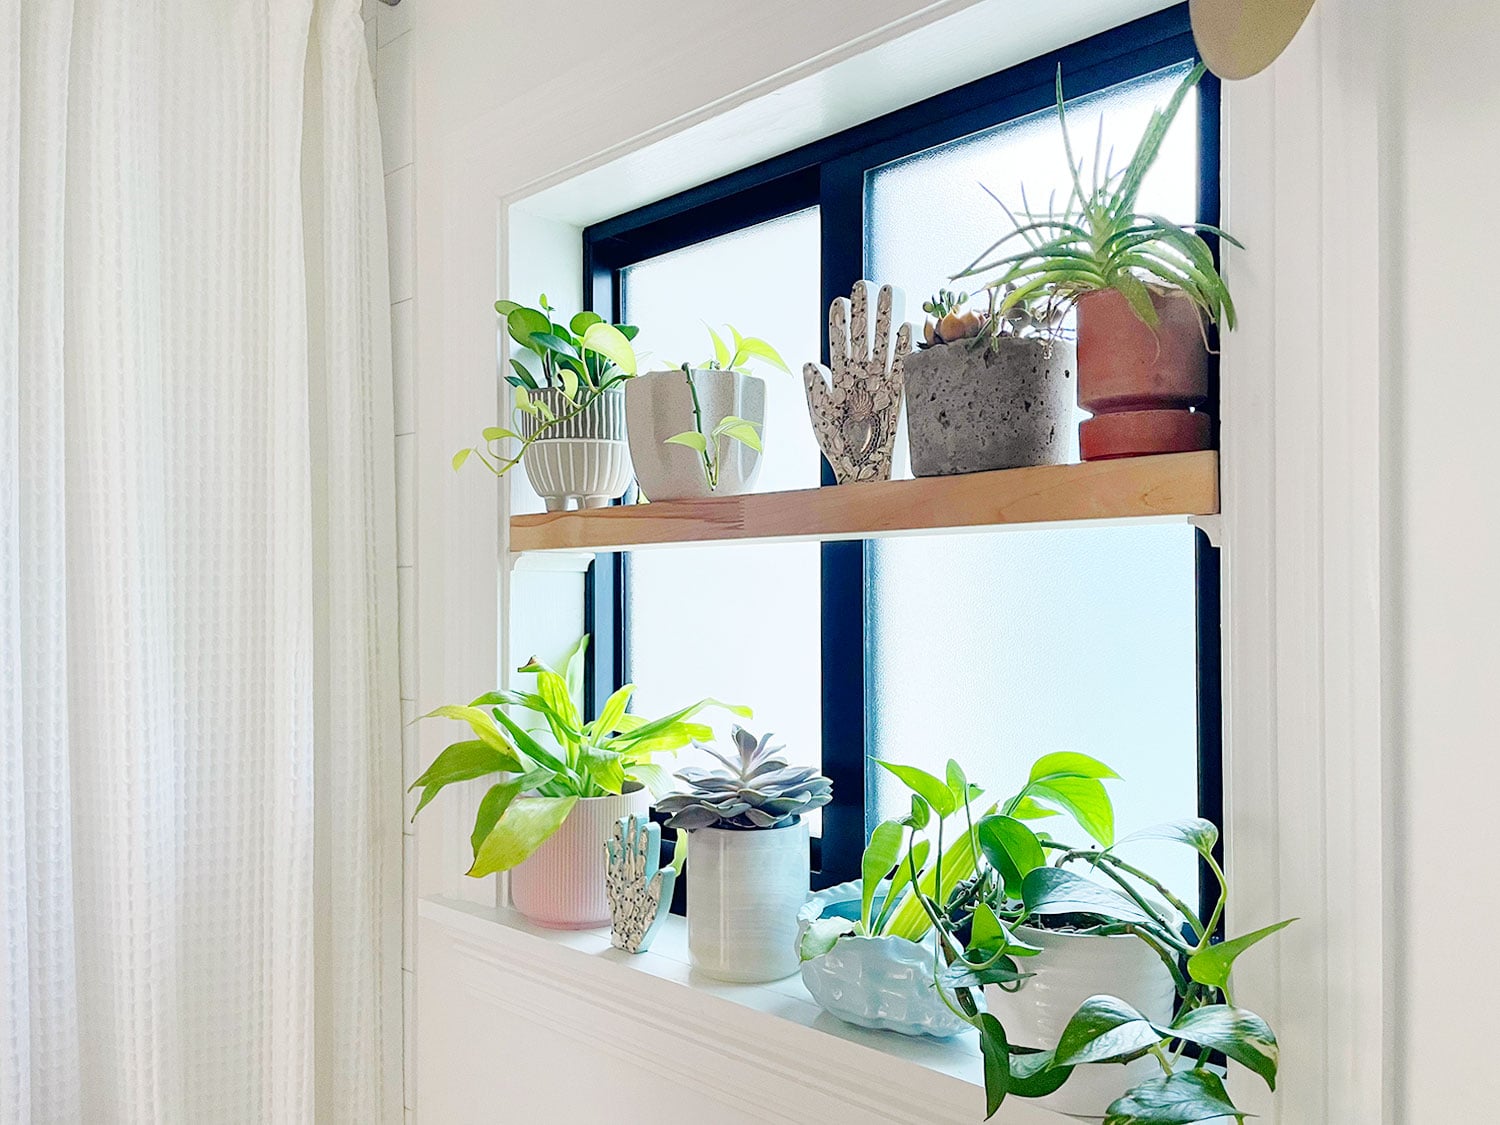
A sunny window is basically prime real estate for plants. Unfortunately, most windowsills are built for one tiny succulent, one confused spider plant baby, and maybe a mug you forgot about three days ago. If your houseplants are crowding the sill like commuters at rush hour, an easy DIY window plant shelf is the upgrade your indoor jungle has been quietly begging for.
The good news: you do not need a garage full of power tools, a contractor uncle, or a dramatic home makeover montage. A simple window plant shelf can be made with basic lumber, brackets, screws, paint, and a little patience. It can turn unused vertical window space into a bright, practical, beautiful display for herbs, succulents, trailing vines, and small houseplants.
This guide walks you through how to build a beginner-friendly window shelf, choose materials, measure correctly, install it safely, style it beautifully, and keep your plants happy once they move into their new sunny apartment.
Why Build a DIY Window Plant Shelf?
A window plant shelf solves three problems at once: light, space, and style. Plants need the right amount of light to grow well, and windows are often the best natural light source in a home. A shelf lets you use that light more efficiently by stacking plants vertically instead of spreading them across tables, counters, and every flat surface you once used like a normal person.
It is also one of the most affordable indoor garden ideas. Instead of buying a large plant stand, you can customize a shelf to fit your exact window width, décor, and plant collection. Small apartment? Deep kitchen window? Bathroom window with humidity-loving plants? There is a version of this project for all of them.
Best Windows for a Plant Shelf
Before cutting wood, choose the right window. Not every window provides the same kind of light, and not every plant wants to bake in the sun like a vacationing lizard.
South-Facing Windows
South-facing windows usually provide the brightest light. They are great for succulents, cacti, jade plants, some herbs, hoyas, and other sun-loving plants. Just remember that strong afternoon light can dry soil quickly and may scorch delicate leaves.
East-Facing Windows
East-facing windows are gentle and forgiving. They offer morning sun and bright indirect light, making them excellent for pothos, philodendrons, African violets, peperomias, and many beginner-friendly houseplants.
West-Facing Windows
West-facing windows can be warm and bright, especially in the afternoon. They work well for plants that enjoy stronger light, but you may need a sheer curtain during hot months.
North-Facing Windows
North-facing windows usually provide lower light. They are better for ZZ plants, snake plants, peace lilies, cast iron plants, and other low-light tolerant options. If your plants start leaning dramatically toward the glass like they are auditioning for a soap opera, rotate the pots weekly.
Choose Your Window Plant Shelf Style
There are several ways to make a DIY window shelf. The best one depends on your window, your lease situation, and how much weight you want the shelf to hold.
1. Simple Wood Shelf with Brackets
This is the easiest and sturdiest version for most homes. A wood board sits on two or three brackets mounted into studs or secure anchors. It is ideal for kitchen herbs, small pots, propagation jars, and decorative planters.
2. Floating Window Shelf
A floating shelf has a cleaner look because the hardware is mostly hidden. It works beautifully in modern spaces, but it must be installed carefully. Always follow the manufacturer’s weight rating and secure it into studs whenever possible.
3. Clear Acrylic Window Shelf
Acrylic shelves are popular because they let light pass through, which helps lower plants receive more brightness. They create a “greenhouse wall” effect without visually blocking the window. They are especially nice for small plants and propagation bottles.
4. Tension Rod Plant Shelf
For renters, a tension rod setup can be a clever no-drill option. Lightweight shelves or hanging planters can be supported by heavy-duty tension rods placed inside the window frame. Keep the load light, check the rods often, and do not trust a $6 tension rod with your prized monstera unless you enjoy indoor avalanches.
Materials and Tools You Will Need
For a beginner-friendly wood shelf with brackets, gather the following supplies:
- One wood board, such as pine, poplar, or finished project board
- Two or three shelf brackets rated for the expected weight
- Wood screws
- Wall screws or anchors suitable for your wall type
- Stud finder
- Level
- Tape measure
- Pencil
- Drill and drill bits
- Sandpaper or sanding block
- Paint, stain, or waterproof sealant
- Clear saucers, trays, or cork mats for plant protection
For most small plant shelves, a board between 6 and 10 inches deep works well. A 6-inch shelf is tidy and minimal. An 8-inch shelf gives more room for small pots. A 10-inch shelf can hold larger planters but needs stronger brackets and better support.
How to Build an Easy DIY Window Plant Shelf
Step 1: Measure the Window
Measure the width of your window opening or the wall space beside the window. Decide whether the shelf will sit inside the window frame, across the trim, or on the wall in front of the window. Leave enough room to open blinds, curtains, or the window itself.
If the shelf will go inside a recessed window, measure the depth carefully. Do not assume both sides are perfectly square. Older houses love surprises. Some of them are charming. Some of them require caulk.
Step 2: Choose Shelf Height
Place the shelf high enough to catch light but low enough that you can water plants comfortably. If you want multiple shelves, leave enough vertical room for the tallest plants. A good rule is to place trailing plants on higher shelves and compact plants on lower shelves.
Step 3: Find the Studs
Use a stud finder to locate wall studs near the window. Mounting brackets into studs gives the shelf the strongest support. If studs are not available where you need them, use high-quality wall anchors rated for more than the total weight of the shelf, pots, soil, and water.
Remember: wet soil is heavier than dry soil. A shelf that holds six cute little pots today may be carrying a surprisingly chunky load after watering day.
Step 4: Cut and Sand the Board
Cut your board to the desired length. If you do not own a saw, many home improvement stores can cut boards for you. Sand the edges until smooth, especially if the shelf is near curtains, kids, pets, or your own sleeves.
Step 5: Seal the Wood
Plants and water are best friends. Water and unfinished wood are not. Seal the shelf with paint, polyurethane, spar urethane, or a water-resistant stain. Let it cure fully according to the product instructions before adding plants.
White paint keeps the look clean and reflects light. Natural wood feels warm and organic. Black or deep green creates a dramatic plant-shop vibe. Choose the finish that makes you smile when you walk into the room.
Step 6: Mark Bracket Placement
Hold the shelf in place and mark where the brackets will go. Use a level. Then use it again. A slightly crooked shelf becomes very noticeable once you add round pots that slowly migrate toward the edge like tiny ceramic escape artists.
For light to medium loads, brackets are commonly spaced no more than about 24 inches apart. For longer shelves or heavier pots, add more brackets and choose stronger hardware.
Step 7: Drill Pilot Holes
Drill pilot holes for your screws. Pilot holes reduce the chance of splitting wood and make installation easier. If you are drilling into studs, use wood screws long enough to bite securely into the framing. If you are using anchors, follow the anchor manufacturer’s directions exactly.
Step 8: Install the Brackets
Attach the brackets to the wall first. Recheck that they are level before tightening everything fully. Then place the board on top and screw the brackets into the underside of the shelf.
Step 9: Test the Shelf
Before adding plants, gently press down on the shelf. Add weight gradually. If anything wiggles, shifts, or makes a suspicious noise, stop and reinforce it. Your goal is “peaceful indoor garden,” not “soil confetti.”
Step 10: Add Plants and Protection
Place waterproof saucers, trays, cork pads, or silicone mats under every pot. Even sealed wood can suffer from standing water. If a pot has drainage holes, never let it sit in a full saucer for long. Empty excess water after watering.
Best Plants for a Window Plant Shelf
The best plants depend on your window’s light level, but these options are reliable choices for many homes:
- Herbs: basil, thyme, oregano, parsley, chives, mint, and rosemary
- Succulents: echeveria, haworthia, jade plant, string of pearls, and aloe
- Trailing plants: pothos, heartleaf philodendron, string of hearts, and hoya
- Compact foliage plants: peperomia, nerve plant, pilea, and baby rubber plant
- Low-light tolerant plants: snake plant, ZZ plant, peace lily, and cast iron plant
For a kitchen window plant shelf, herbs are especially useful. There is something deeply satisfying about snipping fresh basil while cooking pasta and pretending you are the calm, garden-owning version of yourself.
Design Tips for a Beautiful Window Plant Shelf
Use Matching Pots for a Clean Look
Matching pots make the shelf feel intentional, even if half your plants were rescued from the clearance rack. White ceramic, terracotta, matte black, or clear glass containers all work well.
Mix Heights and Textures
Combine upright plants, trailing plants, and compact rosettes. Put taller plants near the sides so they do not block too much light. Let vines trail from the ends for a relaxed, natural look.
Leave Room for Airflow
Do not pack plants so tightly that air cannot move around the leaves. Good airflow helps reduce mildew, pests, and the mysterious sticky situations that appear when plants are crowded.
Add a Propagation Station
A few small glass bottles filled with pothos or philodendron cuttings look beautiful in a sunny window. They also make you feel like a botanical scientist, which is a delightful bonus.
Watering and Maintenance Tips
Watering plants on a window shelf requires a little strategy. Small pots dry out faster than large pots, and sunny windows can increase evaporation. Check soil with your finger before watering. If the top inch feels dry, many common houseplants are ready for water. Succulents and cacti usually prefer to dry out more thoroughly.
Water plants in the sink when possible, let them drain completely, and then return them to the shelf. This prevents water from collecting on the shelf or dripping onto the floor. If you water in place, use a narrow-spout watering can and go slowly.
Rotate pots every week or two so plants grow evenly. Clean the window glass occasionally because dusty glass blocks light. Wipe leaves with a damp cloth when they look dusty. Plants use their leaves to gather light, and a clean leaf is a happy leaf.
Common Mistakes to Avoid
Using Weak Hardware
Do not underestimate the weight of plants. Ceramic pots, wet soil, and water add up quickly. Use brackets and anchors rated for the job.
Skipping the Level
A crooked shelf may look quirky for five minutes. Then gravity joins the conversation. Use a level before drilling.
Forgetting About Drainage
Every plant pot should either have drainage holes or be used as a decorative cachepot with a nursery pot inside. Standing water can damage both the plant and the shelf.
Blocking the Window Completely
A plant shelf should improve the room, not turn it into a leafy cave. Use clear containers, acrylic shelves, or careful spacing if you still want natural light in the room.
Real-World Experience: What I Learned Building an Easy DIY Window Plant Shelf
The first thing you learn when building a DIY window plant shelf is that plants are heavier than they look. A tiny pothos in a nursery pot feels harmless. Put it in a ceramic planter, water it thoroughly, add five plant friends, and suddenly your adorable shelf is carrying the emotional weight of a small bookstore. That is why I always recommend choosing hardware first and decorating second.
In my experience, the best window plant shelf is not the fanciest one. It is the one you can actually maintain. A shelf that looks stunning but is too high to water comfortably will become annoying fast. If you have to stand on a chair every time your basil looks thirsty, you will eventually resent both the chair and the basil. Place shelves where your hands can reach the pots easily.
I also learned that saucers are not optional. At first, it is tempting to think, “I will be careful.” This is a beautiful sentence, but water does not care about optimism. A single overenthusiastic watering session can leave rings on wood, drip down the wall, or create a tiny puddle behind a pot where no one notices until the shelf starts looking sad. Clear plastic trays, ceramic saucers, or a long waterproof liner make the whole setup easier to live with.
Another useful lesson: not every plant deserves the VIP window seat. Some plants love direct sun. Others act personally offended by it. I once placed a delicate fern in a bright window because it looked charming there. The fern disagreed immediately. Its crispy edges made its feelings clear. Now I group plants by light preference instead of by looks alone. Succulents and herbs get the brightest spots. Pothos, philodendrons, and peperomias get bright indirect light. Low-light plants stay a little farther back.
Spacing matters, too. The shelf looks lush when plants are close together, but if they are packed too tightly, watering becomes awkward and pests can spread faster. Leave enough room to lift each pot without knocking over its neighbor. Future you will be grateful, especially when future you is carrying a watering can and trying not to bump a cactus.
One of the best small upgrades is painting or sealing the shelf before installation. It is much easier to finish a board on a table than to paint around brackets, windows, and plants later. A sealed surface wipes clean quickly and stands up better to humidity. For a bright kitchen, I like a white shelf because it reflects light and keeps the space feeling airy. For a cozy living room, stained wood adds warmth and makes green leaves pop.
Finally, a DIY window plant shelf changes how a room feels. It brings life to an empty window, creates a cheerful morning routine, and makes even a small apartment feel more connected to nature. It also gives you an excellent excuse to buy “just one more plant,” which is both dangerous and completely understandable.
Conclusion
An easy DIY window plant shelf is one of the simplest ways to create more indoor growing space without spending much money. With a sturdy board, reliable brackets, careful measuring, and the right plant choices, you can turn a plain window into a bright little garden. Keep the shelf level, protect it from water, match plants to the available light, and give every pot enough room to breathe.
Whether you are growing herbs in the kitchen, succulents in a sunny bedroom, or trailing vines in the living room, a window plant shelf adds beauty, function, and a little everyday joy. And yes, your plants may look happier. They are not smiling, exactly, but those new leaves are definitely showing off.