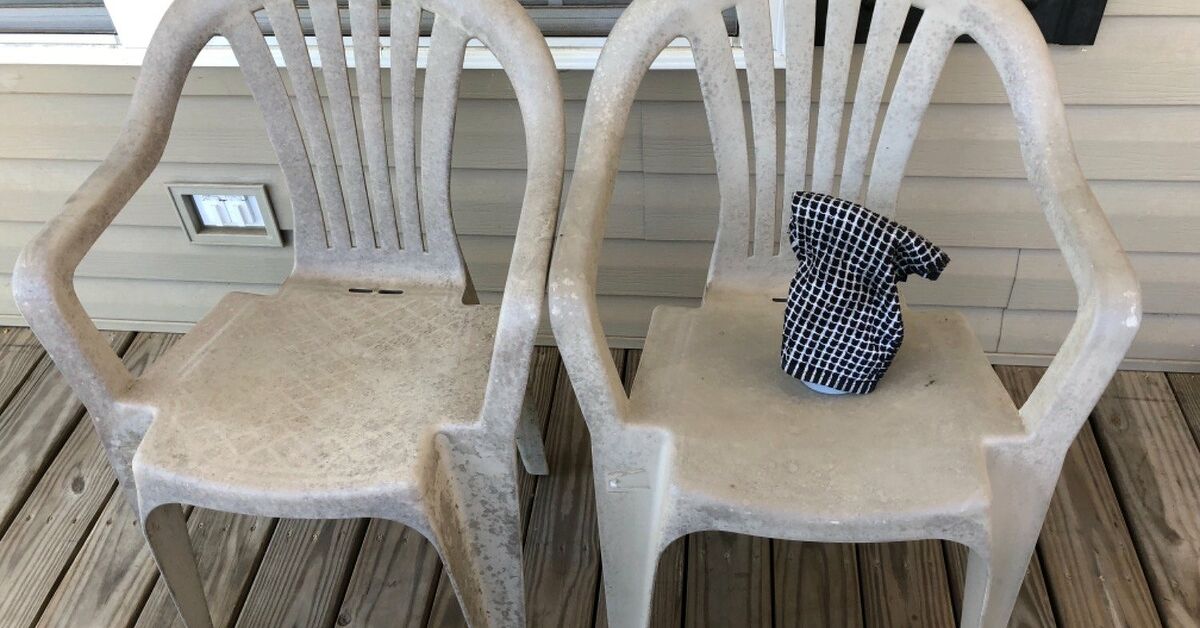
Plastic chairs are the golden retrievers of outdoor furniture: loyal, affordable, always there when you need extra seating, and occasionally guilty of looking a little too comfortable in their old age. Whether your chairs are faded from the sun, scratched from years of backyard barbecues, or simply too plain for your current taste, a DIY plastic chair makeover can turn them from “garage sale leftover” into “wait, where did you buy that?”
The best part is that plastic chair makeovers do not require a workshop, a giant budget, or mysterious tools with names that sound like superhero gadgets. With the right cleaning, surface prep, paint, and design plan, you can refresh plastic patio chairs, dining chairs, kids’ chairs, or garden seats in a weekend. This guide covers practical, stylish, and budget-friendly DIY plastic chair makeover ideas that work indoors and outdoors.
Why Plastic Chairs Are Perfect for DIY Makeovers
Plastic chairs are lightweight, easy to move, and usually inexpensive enough that you can experiment without feeling like you are repainting a museum artifact. They also come in many shapes, from basic stackable patio chairs to molded modern seats and Adirondack-style outdoor loungers. That means your makeover can go in almost any direction: coastal, modern, farmhouse, boho, retro, minimalist, or full “tropical vacation without the plane ticket.”
The catch is that plastic is not the easiest material for paint to grip. Most plastic chairs have a slick surface, and outdoor chairs may have dirt, pollen, sunscreen residue, mildew, or oxidation. If you skip preparation, paint can peel faster than a banana in a smoothie shop. If you prep correctly, however, the finish can look smooth, clean, and surprisingly professional.
Before You Start: The Plastic Chair Makeover Prep Checklist
Every successful plastic chair makeover begins before the first glamorous spray of color. Think of prep work as the boring friend who saves the party. You may not thank it in the moment, but it prevents disaster later.
1. Clean the Chair Thoroughly
Wash the chair with warm water and mild dish soap. Use a scrub brush to remove dirt from corners, grooves, legs, and the underside. For outdoor plastic chairs with mildew or greenish grime, a vinegar-and-water solution can help loosen buildup. Avoid harsh cleaning shortcuts that may damage plastic or leave residue behind.
After washing, rinse well and let the chair dry completely. Water hiding in seams can cause paint bubbles, streaks, and sad little blotches that look like the chair got nervous.
2. Lightly Sand Glossy Plastic
Most plastic chairs are glossy, and glossy surfaces are famously unfriendly to paint. Lightly sand the chair with fine-grit sandpaper, such as 180- to 220-grit, just enough to dull the shine. You are not trying to carve your initials into it. You are simply creating a slightly rough surface so primer or paint can bond better.
3. Remove Dust and Residue
Wipe the chair with a damp cloth or microfiber towel after sanding. For extra cleaning, use a small amount of rubbing alcohol on a cloth to remove fine dust and oily residue. Let the surface dry again before painting.
4. Choose Paint Made for Plastic
Use spray paint designed for plastic, resin, or outdoor furniture. Many modern spray paints include primer, but a separate plastic bonding primer can help on older chairs, slick molded plastic, or pieces that will live outside. For outdoor plastic chair makeovers, choose exterior-rated paint that can handle sunlight, humidity, and changing temperatures.
5. Work in Thin Coats
Spray paint rewards patience and punishes drama. Hold the can about 8 to 12 inches from the surface, move steadily, and apply several thin coats instead of one heavy coat. Heavy coats drip, pool, and make your chair look like it melted emotionally.
DIY Plastic Chair Makeover Ideas That Actually Look Good
Once your chair is clean, dry, and ready, the fun begins. Here are creative plastic chair makeover ideas for patios, balconies, kitchens, craft rooms, dorm spaces, and backyard hangouts.
1. The Classic Spray Paint Refresh
The simplest makeover is also one of the most effective: repaint the entire chair in a fresh solid color. Black, white, charcoal, navy, sage green, terracotta, and warm beige are excellent choices for a modern patio. Bright yellow, coral, turquoise, or apple green can make a plain chair feel playful and summery.
For a high-end look, choose a satin finish. Satin hides minor imperfections better than gloss and feels polished without shouting, “I am very shiny and need attention.” Matte paint can look modern but may show scuffs more easily, while gloss works well if you want a bold, retro finish.
2. Two-Tone Color Blocking
Color blocking is perfect if you want a designer look without designer spending. Paint the seat and back one color, then paint the legs or lower half another color. Try white and tan for a coastal feel, forest green and black for a modern garden look, or blush and burgundy for a stylish indoor chair.
Use painter’s tape to create crisp lines. Press the tape down firmly, especially around curves, and remove it carefully while the final coat is slightly tacky or after it has dried according to the paint instructions. Test your timing on a small hidden area if you are unsure.
3. Faux Dipped Legs
Dipped legs are a charming way to make a cheap plastic chair look intentional. Paint the whole chair one base color, then tape off the bottom few inches of each leg and paint that section in a contrasting shade. White chairs with gold-look dipped legs, black chairs with terracotta tips, or pastel chairs with cream legs can all look stylish.
This idea works especially well for molded dining chairs or kids’ chairs. It gives the piece a custom detail without requiring advanced artistic skills. Your chair gets tiny fashionable boots. Honestly, good for the chair.
4. Stenciled Seat or Back Design
Stencils can add pattern to the seat, backrest, or outer shell of a plastic chair. Choose simple patterns such as leaves, stripes, arches, stars, checkerboards, or geometric shapes. For outdoor chairs, keep the design bold enough to read from a distance.
After your base coat cures, tape the stencil in place and apply light coats of paint. Avoid overloading the stencil, or paint can bleed underneath. A stencil brush, sponge, or controlled spray technique can help. Finish with a compatible clear coat if the chair will be handled often.
5. Modern Monochrome Makeover
A monochrome makeover means painting the chair, nearby side table, planter, or even a matching stool in the same color family. For example, paint four mismatched plastic chairs in the same soft black or clay color. Suddenly, the set looks collected instead of rescued from three different basements.
This is one of the smartest budget patio refresh ideas because it unifies pieces that do not match. The shape differences become interesting rather than chaotic. Add matching cushions or a patterned outdoor rug, and the whole setup looks planned.
6. Boho Rope-Wrapped Details
For a cozy boho plastic chair makeover, add rope or cord accents after painting. Wrap weather-resistant rope around the arms, upper back, or lower frame using strong adhesive suitable for outdoor use. Natural jute looks beautiful indoors or in covered spaces, while synthetic outdoor cord is better for exposed patios.
Do not wrap areas where people place weight unless the rope is secure and comfortable. Focus on decorative edges and arms. The goal is texture, not turning the chair into a craft store obstacle course.
7. Add a Tie-On Cushion
Sometimes the makeover is not only about looks. Plastic chairs can be practical, but comfort varies from “pleasantly supportive” to “why is this chair shaped like a punishment?” A tie-on cushion adds softness and style.
Choose outdoor fabric for patio chairs, or washable cotton for indoor chairs. You can buy cushions, sew simple pads, or recover old ones with new fabric. Pick patterns that contrast with the chair color: striped cushions on navy chairs, floral cushions on white chairs, or black-and-white cushions on bright chairs.
8. Decal and Vinyl Sticker Makeover
Vinyl decals are great for indoor plastic chairs, kids’ rooms, craft corners, classrooms, and party seating. Add names, simple shapes, botanical designs, or playful icons. Use removable decals if you like changing your decor often.
For outdoor use, choose weather-resistant vinyl and place it on smooth areas where it will not constantly rub against clothing. Clean the surface first so the decal sticks properly. A decal on a freshly painted chair should be applied only after the paint has fully cured.
9. Faux Terrazzo Effect
Terrazzo is fun, colorful, and forgiving, which makes it a great DIY pattern. Paint the chair in a light base color, then use small brushes or paint markers to add irregular chips in muted colors such as clay, sage, charcoal, peach, and cream. Keep the shapes random and uneven.
The result looks modern and artsy, and the pattern hides tiny scuffs better than a plain solid color. It is also a relaxing project if you enjoy slow, detailed work. Put on music, paint tiny blobs, and pretend you are an Italian flooring designer with a very specific plastic chair assignment.
10. Garden-Themed Chair Makeover
For a garden corner, paint plastic chairs in nature-inspired shades such as moss green, slate blue, warm sand, or sunflower yellow. Add leaf stencils, floral decals, or painted vines along the chair back. Pair the chair with potted herbs or a small outdoor table.
This makeover works especially well for older plastic chairs that are still structurally sound but faded. Instead of trying to make them look brand-new, lean into the garden mood and give them character.
Best Colors for Plastic Chair Makeovers
Color can completely change the mood of a plastic chair. For a clean modern patio, try matte black, soft gray, olive green, navy, or warm white. For a cheerful backyard, use coral, turquoise, lemon yellow, or grass green. For indoor dining chairs, consider cream, dusty blue, clay, charcoal, or muted pink.
If your chairs sit in full sun, remember that dark colors may get hotter to the touch. White and pale colors stay cooler but can show dirt more quickly. Medium tones like sage, terracotta, taupe, and denim blue often balance style and practicality.
Common Plastic Chair Makeover Mistakes to Avoid
Skipping Cleaning
Paint does not stick well to dust, grease, sunscreen, pollen, or old patio grime. Cleaning may feel like the least exciting step, but it is the step that keeps your makeover from peeling in defeat.
Painting in Bad Weather
Avoid painting in extreme heat, high humidity, wind, or direct blazing sun. Mild, dry weather is best. Wind can blow dust onto wet paint, while high heat can make paint dry too quickly on the surface and behave badly.
Using the Chair Too Soon
Dry to the touch does not always mean fully cured. Let the paint cure according to the product label before stacking chairs, adding cushions, or inviting Uncle Dave to sit down with a plate of ribs.
Applying One Thick Coat
Thick paint coats are the root of many DIY regrets. Use light, even coats and allow proper drying time between them. The finish will look smoother and last longer.
How to Maintain Your Made-Over Plastic Chairs
Once your plastic chair makeover is complete, simple maintenance will keep it looking fresh. Wipe chairs regularly with a soft cloth and mild soap. Avoid abrasive scrubbers on painted surfaces. Store chairs indoors or under cover during harsh weather when possible. If the chairs live outside year-round, consider furniture covers to reduce sun fading and dirt buildup.
Touch up scratches as soon as you notice them. Keep a small amount of the original paint or note the exact product and color. Future you will be grateful, especially when one chair leg gets scraped during a dramatic patio furniture shuffle.
Budget-Friendly Plastic Chair Makeover Plan
If you want a practical weekend plan, start with four stackable plastic chairs. Clean and sand all of them on Friday evening. On Saturday morning, apply primer if needed, followed by two or three light coats of plastic-friendly spray paint. Let each coat dry according to the product instructions. On Sunday, add simple cushions, stencil details, or rope accents.
For a cohesive outdoor setup, paint all chairs the same color and add patterned cushions. For a playful look, paint each chair a different shade within the same palette, such as desert colors, beach colors, or garden greens. This approach is affordable, cheerful, and perfect for renters because you can upgrade a space without permanent changes.
Real-Life Experience: What DIY Plastic Chair Makeovers Teach You
The first thing you learn from a DIY plastic chair makeover is that the chair will reveal every shortcut you tried to hide. If you rush cleaning, a mysterious smudge will appear right where everyone can see it. If you skip sanding, the paint may act like it has somewhere better to be. If you spray too close, drips will form and look at you with judgment. The project is simple, but it has standards.
One practical experience is that older outdoor chairs often need more cleaning than expected. A chair may look “just dusty” until you scrub the underside and discover an entire documentary about pollen, mud, spiderwebs, and last summer’s lemonade. Cleaning takes time, but it changes everything. Once the chair is truly clean and dry, sanding feels easier and paint goes on more smoothly.
Another lesson is that color looks different outside. A soft beige that looks elegant in the garage may look nearly white in bright sunlight. A bright coral may become extremely enthusiastic at noon. Testing paint on the underside of the chair is worth the few extra minutes. It helps you see how the color behaves in natural light before you commit to painting the whole chair.
Spray technique also improves quickly. The first chair may feel awkward, but by the second chair, you start to understand the rhythm: shake the can well, start spraying slightly before the edge, move steadily across the chair, and release after passing the other edge. This prevents heavy spots at the beginning and end of each pass. Thin coats may feel slow, but they build a better finish. It is a little like frosting a cake, except the cake is a chair and nobody should eat it.
Makeovers also teach you that small accessories can carry a lot of design weight. A plain black plastic chair can look sharp with a striped cushion. A sage green chair can feel cozy with a natural rope accent. A white chair can turn playful with a terrazzo pattern or a painted seat. You do not always need a complicated transformation. Sometimes one good color and one thoughtful detail are enough.
The most satisfying part is seeing a forgotten chair become useful again. Instead of sending faded plastic furniture to the curb, you give it another season, another purpose, and another chance to host coffee, conversation, homework, cookouts, or quiet evenings outside. That is the real charm of upcycled plastic chair ideas: they save money, reduce waste, and make your space feel personal. Plus, every time someone compliments the chair, you get to say, “Thanks, I made it over myself,” which is basically the DIY version of a victory parade.
Conclusion
DIY plastic chair makeover ideas prove that inexpensive furniture does not have to look boring, faded, or forgotten. With proper cleaning, light sanding, plastic-friendly paint, patient coats, and a little creativity, a basic chair can become a stylish patio seat, colorful kitchen accent, garden feature, or personalized kids’ chair. Whether you choose a classic spray paint refresh, two-tone color blocking, stencils, rope accents, decals, cushions, or a faux terrazzo pattern, the best makeover is the one that fits your space and your personality.
The secret is not perfection. The secret is preparation, patience, and choosing materials that match how the chair will be used. A chair that sits outside needs outdoor-rated products and extra curing time. A chair for an indoor corner can be more decorative and playful. Either way, your old plastic chair has more potential than it gets credit for. Give it a scrub, give it a color, give it a second chance, and it might become the hardest-working seat in your home.