If your coffee table has been begging for a glow-up, cement coasters might be the tiny, stylish upgrade it deserves. They look expensive, feel satisfyingly weighty, and somehow make even tap water seem more sophisticated. Better yet, they are surprisingly easy to make at home. Add pigment dye to the mix, and suddenly you are not just making coastersyou are creating custom little slabs of functional art.
The best part is that this project sits in the sweet spot between craft and home improvement. It is simple enough for beginners, but there is plenty of room to experiment once you get the hang of it. You can make marbled coasters, terrazzo-inspired coasters, earthy minimalist coasters, or bold modern sets that look like they wandered out of a designer boutique and into your kitchen.
In this guide, you will learn exactly how to make cement coasters with pigment dye, what materials work best, how to mix color without turning your batch into a muddy mystery, and how to finish your coasters so they are durable enough for real life. Because yes, a coaster should survive iced coffee season.
Why Cement Coasters Are Such a Great DIY Project
Cement coasters are one of those rare DIY wins that look impressive without requiring a garage full of tools or a suspiciously high level of patience. They are affordable, beginner-friendly, and useful. That last one matters. A lot of crafts are cute until they become clutter. Coasters, however, earn their keep.
They also make excellent gifts. A hand-poured set in soft terracotta, smoky charcoal, sage green, or dusty blush can look polished and personal at the same time. You can match a friend’s décor, create seasonal colors, or make a batch that coordinates with your own kitchen, patio table, or home office.
And because the pieces are small, they are ideal for testing color ideas and cement finishes without committing to a larger project like planters, stepping stones, or trays. Think of coasters as the appetizer platter of decorative concrete.
What You Need to Make Cement Coasters With Pigment Dye
Basic Materials
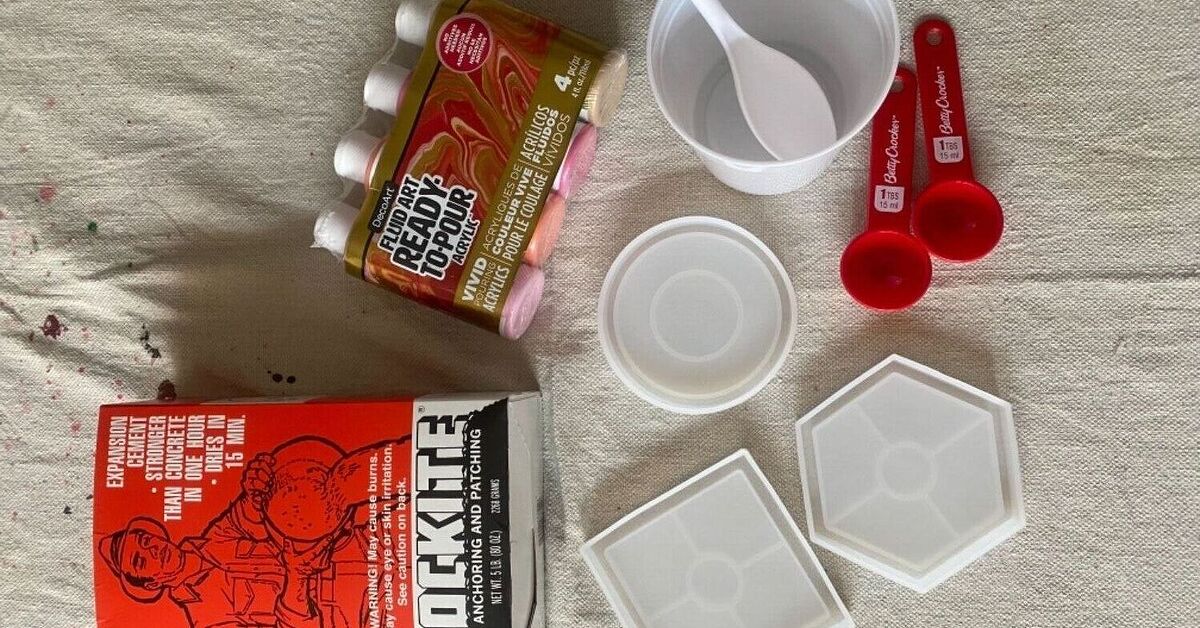
- Cement-based mix or fine concrete mix
- Pigment dye made for cement or concrete
- Water
- Silicone coaster molds or other flexible molds
- Mixing bowl or bucket
- Mixing stick, putty knife, or craft spatula
- Measuring cup or digital scale
- Rubber gloves
- Dust mask and eye protection
- Sandpaper in medium and fine grits
- Concrete or masonry sealer
- Cork, felt, or rubber pads for the bottom
Optional Supplies for Fancy-Person Energy
- Painter’s tape for clean edges
- Rubbing alcohol in a spray bottle to reduce surface bubbles
- Small scoop or piping bag for neater pouring
- Extra pigment colors for layering or marbling
- Gold leaf, terrazzo chips, or pressed texture inserts
Choose the Right Mix Before You Start
Let’s clear up a common point of confusion: people often say “cement” when they really mean a cement-based concrete mix. For a project like coasters, what matters most is using a mix that cures hard and can be poured or packed into small molds.
If you want a smoother, more refined finish, choose a fine mix with smaller aggregate. Chunky gravel-heavy mixes can work, but they usually create rougher surfaces and edges. That can look rustic, but if your dream coaster style is “sleek Scandinavian café,” go with the smoother option.
Also, resist the urge to add too much water. This is the beginner mistake that shows up in almost every small concrete craft. A soupy mix may feel easier to pour, but it can weaken the final coaster, increase shrinkage, and affect color consistency. Aim for a texture similar to thick pancake batter or creamy oatmeal, depending on the product you use.
How Pigment Dye Works in Cement
Pigment dye for cement is designed to color the material throughout the mix instead of just sitting on top like paint. That means the color feels more natural, wears better, and still looks good if the surface gets lightly scuffed later.
The key is consistency. If one batch gets more water, less mixing time, or a different pigment amount than the next, you may end up with coasters that are “close enough” in the way siblings in family photos are “matching.” Similar, yes. Identical, no.
For the cleanest results, pre-measure your dry mix, water, and pigment for each batch. If you are making a set of four or six coasters, it is often better to mix one larger batch instead of several tiny guesswork batches. Your future self will appreciate not owning five nearly-but-not-quite shades of mauve.
Step-by-Step: How to Make Cement Coasters With Pigment Dye
Step 1: Prep Your Work Area
Cover your table or countertop with plastic, kraft paper, or an old tray. Cement dust and slurry are not ideal décor. Set your molds on a flat, stable surface where they can stay undisturbed while curing. Wear gloves, eye protection, and a dust mask before opening the dry mix.
Step 2: Prepare the Molds
If you are using silicone molds, you usually do not need much mold release. A light mist or a very thin wipe of oil can help, but use it sparingly. Too much can affect surface detail. Place the molds on a cutting board or baking sheet so you can move them without wobbling the fresh mix everywhere like a tiny concrete earthquake.
Step 3: Mix the Pigment With Water
Instead of dumping pigment straight into the dry cement and hoping for the best, stir the pigment into your measured water first. This helps distribute the color more evenly. Mix thoroughly until the water looks uniform. If you want a richer shade, increase the pigment gradually rather than going all-in immediately and creating a coaster that looks like it came from a volcanic event.
Step 4: Combine the Colored Water and Dry Mix
Add the colored water to the dry cement mix a little at a time, stirring constantly. Work until you get a smooth, lump-minimized consistency. Scrape the sides and bottom of the bowl as you mix so no dry pockets remain. The mixture should be thick but workable, not watery.
Step 5: Pour Into the Molds
Spoon or pour the mixture into your molds. Fill them slowly and tap the molds gently on the table several times to bring trapped air bubbles to the surface. You can also tap the sides with a spoon or wiggle the tray back and forth. If bubbles appear on top, pop them with a toothpick or give the surface a very light mist of rubbing alcohol.
Level the tops with a putty knife or spatula. Remember, the part facing up now will often become the bottom later, depending on your mold type. So if you care which side is prettier, plan accordingly.
Step 6: Let the Coasters Cure
Set the molds aside in a dry, moderate-temperature area. Most small cement crafts need at least 24 hours before demolding, though some mixes benefit from longer. Do not rush this part. Cement has a long memory and punishes impatience with chipped corners and sad regrets.
Once the coasters are firm enough, remove them gently from the molds. If they still feel cool, damp, or fragile, let them continue curing another day or two before sanding or sealing.
Step 7: Sand the Edges
After demolding, use medium-grit sandpaper to soften rough edges and flatten any uneven spots. Follow with fine-grit sandpaper for a smoother finish. Wipe away dust with a dry or slightly damp cloth and let the pieces dry completely before sealing.
Step 8: Seal the Coasters
This step is not optional if you actually plan to use your coasters. Cement is porous, which means it can absorb moisture, pick up stains, and develop water marks. A clear sealer helps protect the surface and can deepen the color slightly in a very satisfying way.
Use a sealer compatible with cement or concrete. Apply thin, even coats according to the product directions and allow full dry time between coats if needed. For indoor coasters, many makers prefer a low-sheen or matte finish so the piece still looks natural instead of suspiciously plastic.
Step 9: Add a Soft Backing
Stick cork, felt, or rubber pads to the bottom of each coaster. This protects your furniture and gives the coaster a more finished feel. It also prevents the awkward moment when your beautiful handmade coaster scratches the table it was literally created to protect.
Best Color Ideas for Pigment-Dyed Cement Coasters
Minimalist Neutrals
Try charcoal, warm gray, taupe, buff, or creamy off-white. These shades work almost anywhere and look especially good in modern, industrial, or Scandinavian interiors.
Earthy Tones
Terracotta, rust, olive, clay pink, and sand colors feel warm and organic. These shades pair beautifully with wood furniture, woven accents, and houseplants you are desperately trying not to overwater.
Bold Modern Colors
Navy, black, forest green, mustard, and deep red can create dramatic coasters that look contemporary and graphic. These are great if your décor leans moody or if you simply believe beige has had enough opportunities.
Marbled and Layered Effects
To create marbling, make two shades of mix and swirl them gently in the mold with a skewer. For layered color blocking, pour one color first, let it stiffen slightly, then add the second color. Do not overmix once it is in the mold unless your design goal is “abstract weather map.”
Common Mistakes to Avoid
Using Too Much Water
This is the classic error. Extra water may make pouring easier, but it can reduce strength, lighten color, and leave a chalkier finish.
Skipping Safety Gear
Wet cement is alkaline and can irritate skin and eyes. Gloves and basic protection are not overkill. They are the difference between a fun afternoon craft and an unexpected lesson in why product labels exist.
Demolding Too Early
If the coaster feels soft or fragile, wait longer. Small chips along the edges often happen because the piece was removed before it had enough strength.
Forgetting to Seal
Unsealed coasters may absorb condensation from cold drinks and end up stained or blotchy. Seal first, sip later.
Inconsistent Batches
If you are making a set, measure carefully every time. Even slight differences in pigment, water, or mixing can change the final shade.
How to Customize Cement Coasters for a More Designer Look
Once you have the basic method down, it is easy to make your coasters look more expensive and unique. You can press a textured mat, lace, leaf, or ribbed fabric into the surface before the mix sets to create subtle pattern. You can inlay terrazzo-style fragments, add metallic foil after sealing, or paint a thin geometric stripe around the edge with masonry-safe paint.
Another smart option is shape. Round coasters are classic, but arches, hexagons, scallops, and organic pebble shapes can make the set feel more custom. Pair a strong shape with a muted pigment and the result looks intentional, not crafty. There is a difference.
How to Care for Handmade Cement Coasters
To keep your coasters looking good, wipe them with a soft damp cloth instead of soaking them. Avoid harsh cleaners, especially if you used a matte sealer. If the surface starts to look dull after months of use, clean it thoroughly, let it dry, and apply a fresh coat of sealer if the product allows reapplication.
Store them flat, and do not leave them outside unless your mix and sealer are suitable for exterior conditions. These are small concrete pieces, not heroic patio pavers.
Real-World Experience: What Making Cement Coasters Actually Feels Like
The first time you make cement coasters with pigment dye, there is a good chance you will experience a tiny emotional roller coaster of your own. At first, everything seems suspiciously easy. You gather the molds, mix the color, stir the cement, and think, “Wow, I am absolutely the kind of person who makes boutique home décor now.” Then the bubbles appear. Then you wonder if the color is too dark. Then you tap the mold so enthusiastically that you splash a little mix on the table and realize you may still be a normal person after all.
That is part of the charm. Cement crafts feel wonderfully hands-on. The material has weight. It has texture. It demands a bit of patience and rewards a steady approach. Unlike many fast crafts that are done in an hour and forgotten by next week, this one feels slow in a satisfying way. You mix. You pour. You tap. You wait. You come back the next day like a child checking whether cookies somehow became furniture.
One of the most interesting parts of the process is how the pigment changes from wet mix to cured piece. Freshly mixed cement often looks darker and slightly dramatic, like it is trying out for a soap opera. Once cured, the color softens and becomes more mineral-like. This is why making a test coaster first is such a smart move. The final shade often has more depth and subtlety than you expect. Sometimes that is a happy surprise. Sometimes it is how you discover that your “soft sage” turned into “stern government office green.” Better to find out with one coaster than six.
There is also a weirdly delightful moment when you sand the edges. Before sanding, the coaster can look a bit rough, unfinished, maybe even a little grumpy. A few passes with sandpaper and suddenly it looks intentional. Refined. Like it has opinions about espresso. Add sealer and the color deepens, the surface gains richness, and the whole project levels up from “weekend experiment” to “I could absolutely gift this without apologizing first.”
People also tend to discover their own style through this project. Some love clean, solid colors with razor-sharp edges. Others prefer marbling, freckles, tiny air-pocket texture, and all the irregularities that make each piece feel handmade. There is no single correct finish. If anything, the project teaches you to embrace the fact that cement has personality. It is not resin. It is not clay. It does not behave like frosting or paint. It cures with its own quiet logic.
And that, honestly, is why so many makers get hooked. A simple set of coasters often turns into a tray, then a planter, then a candle holder, then a suspicious number of silicone molds arriving at your door. You start out wanting four coasters and end up with a minor concrete design phase. It happens. No judgment.
If you are new to cement crafts, start simple, measure carefully, and enjoy the imperfections that still look beautiful in the end. If you already love DIY décor, this is one of the easiest ways to create something custom, useful, and surprisingly elegant. Also, it gives you an excellent excuse to say things like “I am waiting for my coasters to cure,” which sounds far more impressive than “I am trying not to poke them every fifteen minutes.”
Final Thoughts
Learning how to make cement coasters with pigment dye is one of the easiest ways to dip into decorative concrete without taking on a huge project. With a good mold, a measured mix, a little patience, and the right sealer, you can create coasters that are sturdy, stylish, and genuinely useful.
Whether you want soft earthy tones, dramatic modern shades, or subtle marbled patterns, pigment dye gives you the flexibility to make the design your own. Start with a simple batch, keep your measurements consistent, and do not be afraid to experiment once you understand the basics. Your coffee table is ready. Your iced latte is ready. The only thing missing is a coaster that looks like it came from a very expensive little shop and not your kitchen counter.