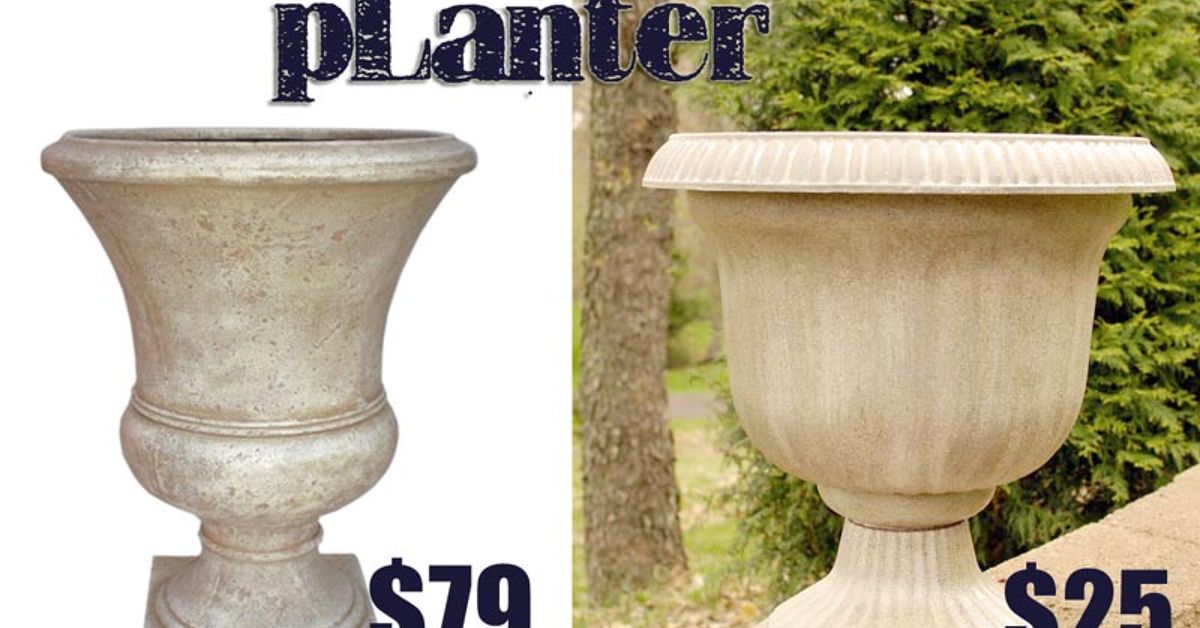
A beautiful planter has a sneaky little superpower: it can make a plain porch look styled, a balcony feel like a garden room, and a sad corner of the living room suddenly act like it has a design degree. The only problem? Designer planters often cost more than the plant, the soil, the fertilizer, the matching saucer, and possibly your emotional stability during spring garden season. That is where the thrifty DIY planter knockoff comes in.
This project is not about making a fake version of a specific branded product. It is about studying the expensive lookmatte finishes, sculptural shapes, stone-like texture, earthy colors, pedestal bases, oversized scaleand recreating that same high-end feeling with inexpensive materials. Think of it as a “look-for-less” planter makeover, except the “less” part is the budget and not the charm.
With a thrifted pot, a plastic nursery planter, an old basket, a discount-store bin, or even a forgotten container from the garage, you can create a custom planter that looks like it wandered out of a boutique home store wearing sunglasses. The trick is to combine good design choices with real container gardening basics: drainage, plant size, potting mix, and weather-safe finishes. A planter can be pretty, but if it turns your fern into swamp soup, it has failed its one job.
Why Thrifty DIY Planter Knockoffs Are So Popular
The popularity of DIY planter ideas makes perfect sense. Container gardening works for renters, homeowners, apartment dwellers, patio gardeners, and anyone whose “yard” is technically a windowsill with ambition. Planters are portable, flexible, and instantly decorative. They also allow you to garden in places where digging is not possible, such as balconies, decks, porches, small patios, and indoor corners with good light.
At the same time, home decor trends have made planters more sculptural and expensive-looking. Large concrete pots, fluted ceramic planters, matte black urns, aged stone vessels, woven basket covers, and modern pedestal planters are everywhere. They are gorgeous, but the price tags can make a budget-conscious gardener whisper, “Absolutely not, my pothos has not earned that lifestyle.”
A budget planter makeover solves the problem. You get the visual impact of a designer planter dupe while keeping control over size, color, texture, and cost. Better yet, upcycled planters reduce waste by giving old containers a new purpose. A cracked basket can become a cachepot. A plastic pot can become faux stone. A thrift-store lamp base can become a pedestal. A basic terra-cotta pot can become a textured statement piece with paint and patience.
What Makes a Planter Look Expensive?
Before you start painting everything in your home “warm limestone beige,” study what makes high-end planters feel high-end. Most designer-style planters share a few visual ingredients.
1. Simple Shapes
Expensive planters usually avoid fussy details. They rely on clean cylinders, bowls, tapered urns, cubes, troughs, or rounded forms. If you are shopping secondhand, look for good silhouettes first. Color can be changed. Texture can be added. But a strong shape does half the work before you even open the paint can.
2. Matte or Stone-Like Finishes
Glossy plastic often gives away a cheap planter. Matte finishes, limewash effects, chalky paint, stone-textured spray paint, mineral colors, and slightly imperfect surfaces create a more elevated look. A little texture hides flaws and makes a lightweight container feel substantial.
3. Neutral, Earthy Colors
Black, charcoal, cream, terracotta, mushroom, sand, olive, clay, taupe, and weathered gray all work beautifully. These colors look natural beside greenery and blend with most decor styles, from farmhouse to modern organic to boho patio jungle.
4. Scale
A larger planter often looks more luxurious than a tiny one, even when it started life as a plastic storage tub. Oversized containers frame entrances, fill empty corners, and give plants room to shine. Just remember that big planters need proper drainage and may require filler in the lower portion if the plant does not need the full soil depth.
5. A Finished Base
Planters look more intentional when they sit on feet, a short stand, a thrifted stool, or a pedestal. Raising a pot slightly also helps drainage outdoors by keeping the bottom from sitting flat against a wet surface.
Supplies for a Budget Planter Makeover
You do not need a workshop, a pottery wheel, or a mysterious relative with a kiln. Most thrifty DIY planter knockoff projects use easy-to-find supplies:
- Old plastic planter, terra-cotta pot, metal bucket, basket, thrifted vase, storage bin, or nursery pot
- Drill with appropriate bit for drainage holes, if needed
- Sandpaper or sanding sponge
- Dish soap, water, and a rag for cleaning
- Primer suitable for the planter material
- Outdoor spray paint, chalk-style paint, acrylic craft paint, or exterior paint
- Texture material such as baking soda, joint compound, spackling, sand, stone spray, rope, raffia, or cane webbing
- Painter’s tape for patterns
- Clear outdoor sealer, especially for painted decorative surfaces
- Potting mix designed for containers
- A plastic nursery pot to use inside decorative containers without drainage
The best version of this project starts with what you already have. Check the garage, shed, recycling bin, thrift stores, yard sales, and clearance aisles. The winning container may not say “planter” on the tag. It may say “ice bucket,” “trash can,” “basket,” “lamp shade,” or “why did I buy this in 2018?” That is part of the fun.
How to Make a Thrifty DIY Planter Knockoff
Step 1: Choose the Right Base
Start with a container that has the size and shape you want. Plastic pots are lightweight and easy to paint. Terra-cotta is classic and breathable but can crack in freezing conditions. Metal containers look stylish but can heat up in full sun, so they work best with a liner or as decorative cachepots. Baskets add warmth and texture but need protection from moisture. Ceramic pieces are beautiful, but drilling them can be risky unless you have the correct bit and experience.
For the easiest beginner project, choose a plastic or terra-cotta pot with existing drainage. For the most dramatic designer planter dupe, look for a tall plastic planter, a large nursery pot, or a thrifted container with a sculptural profile.
Step 2: Clean It Like You Mean It
Paint does not enjoy sticking to dust, grease, sticker residue, mildew, or the mysterious film that appears on old plastic pots. Wash the container with dish soap and water, rinse well, and let it dry completely. If it has a glossy surface, lightly scuff it with sandpaper. You are not trying to punish the pot. You are simply giving primer and paint something to grip.
Step 3: Handle Drainage Before Decorating
Drainage is not optional for most container plants. Roots need oxygen, and waterlogged soil can lead to root rot. If your container has no holes and the material is safe to drill, add drainage holes in the bottom before painting. If drilling is not practical, use the container as a cachepot: keep the plant in a smaller nursery pot with drainage holes, set that pot inside the decorative container, and remove it for watering so excess water can drain away.
This one step separates a smart DIY planter from a decorative plant coffin. Pretty matters. Plant survival matters more.
Step 4: Add Texture for the High-End Look
Texture is the secret sauce of a thrifty DIY planter knockoff. A flat plastic pot can look surprisingly expensive when it has a plastered, stone-like, or hand-thrown finish. Try one of these methods:
- Baking soda paint: Mix a small amount of baking soda into paint to create a chalky ceramic texture.
- Joint compound skim coat: Apply a thin, uneven coat for a rustic stone effect, then sand lightly once dry.
- Stone-texture spray: Use light coats to create a faux concrete or granite finish.
- Rope wrap: Wrap the lower half of a pot with jute, sisal, or cotton rope for a coastal or boho style.
- Vertical fluting: Attach half-round dowels, wood trim, or flexible molding to create a fluted designer look.
Do not chase perfection. Real ceramic and stone often have subtle irregularities. A slightly uneven surface can look handmade, while a perfectly smooth plastic shine may look mass-produced.
Step 5: Prime and Paint in Thin Coats
Primer is especially helpful when painting plastic, metal, glossy ceramic, or previously painted surfaces. Choose a product designed for your material and the planter’s location. Outdoor planters need paint that can handle sun, moisture, and temperature changes.
Spray paint works well for curved planters because it avoids brush marks, but the secret is patience. Use several light coats rather than one heavy coat. Heavy coats drip, sag, and create the kind of finish that says, “I got impatient in the driveway.” Let each coat dry according to the product directions.
Step 6: Seal the Finish
If the planter will live outdoors, add a clear exterior sealer after the paint cures. This helps protect decorative finishes from rain, UV exposure, and normal wear. For indoor planters, sealing is still useful if the pot may be exposed to water splashes.
Step 7: Plant It Properly
Use a potting mix made for containers, not heavy garden soil. Container mixes are designed to hold enough moisture while still allowing excess water to drain. Choose a plant that fits the pot’s size and light conditions. A tiny succulent in a giant deep pot may struggle with too much moisture, while a thirsty fern in a shallow pot may dry out faster than your patience on a hot July afternoon.
Designer Planter Dupe Ideas to Try
Faux Concrete Planter
Start with a plastic pot, sand it lightly, prime it, then apply gray paint mixed with a bit of baking soda or fine sand. Dab on a second shade of gray or beige with a sponge for dimension. Seal it with a matte outdoor clear coat. The result looks like concrete without the back injury.
Fluted Modern Planter
Use a plain cylinder pot and attach thin half-round wood trim vertically around the outside. Paint the entire piece in matte black, warm white, or clay brown. This creates the ribbed look seen in high-end modern planters.
Woven Basket Cachepot
Line a basket with a plastic saucer or use it only as a decorative cover for a nursery pot. This is ideal for indoor plants. The texture softens a room instantly and hides basic grower pots like a stylish little secret.
Thrifted Bowl Succulent Garden
A shallow ceramic serving bowl can become a succulent display if you can provide drainage or use it as a decorative tray for small nursery pots. Choose succulents with similar light and watering needs. Add gravel on top for a polished finish, but remember that top dressing is decorative, not a substitute for drainage.
Pedestal Planter from a Bowl and Base
Combine a thrifted bowl with a sturdy candlestick, lamp base, or short stool. Use strong adhesive appropriate for the materials, then paint everything one color so it looks like a single sculptural piece. This works especially well for indoor faux plants or real plants kept in a removable nursery pot.
Best Plants for DIY Planters
The best plant depends on the container, location, and your watering habits. For sunny outdoor planters, try geraniums, lantana, petunias, dwarf peppers, herbs, or ornamental grasses. For part shade, consider coleus, begonias, caladiums, impatiens, or ferns. Indoors, pothos, snake plants, ZZ plants, philodendrons, peperomias, and peace lilies are popular choices, though each has its own light and watering preferences.
Match the plant to the pot rather than forcing a dramatic plant into a container that cannot support it. Large plants need heavier pots or stable bases. Edibles need adequate soil volume, sunlight, and consistent moisture. Succulents prefer fast-draining conditions. Moisture-loving plants should not share a pot with desert plants unless you enjoy botanical disagreements.
Common Mistakes to Avoid
Skipping Drainage
A decorative container without drainage can work only if you double-pot or water with extreme care. For most plants, direct planting in a hole-free container is risky.
Using Garden Soil in Pots
Garden soil can become compacted in containers, reducing airflow and drainage. Use potting mix formulated for container gardening.
Painting Without Prep
If you paint a dirty, glossy surface without cleaning, sanding, or priming, peeling is likely. Prep may not be glamorous, but it is cheaper than repainting the same pot while muttering at it.
Choosing the Wrong Paint
Outdoor planters need products that can tolerate weather. Indoor craft paint may look charming for a week outdoors, then begin its tragic peeling era.
Forgetting Weight and Stability
Tall planters can tip in wind, especially with top-heavy plants. Add weight to the bottom if needed, use a wider base, or place the planter in a protected location.
How to Keep the Project Truly Thrifty
A thrifty DIY planter knockoff can accidentally become expensive if you buy every specialty product on the shelf. Keep costs low by starting with salvaged containers, using leftover paint, checking thrift stores, shopping end-of-season garden clearance, and choosing one “wow” detail instead of five. Texture plus paint is often enough.
Also consider making planters in batches. If you already have the spray paint, primer, sealer, and drop cloth out, makeover three pots at once. A group of coordinated planters looks more intentional than one lonely pot trying to carry the whole patio emotionally.
Experience Notes: What This Project Teaches You
The first lesson of a thrifty DIY planter knockoff is that the ugliest item in the thrift store may have the best bones. I have seen plastic pots with faded burgundy finishes turn into convincing faux stone planters, and I have seen old baskets become the warmest, most charming plant covers in a room. The trick is to squint a little. Ignore the color. Ignore the dust. Ignore the decorative grapes painted on the side in 1997. Look at shape, size, and structure.
The second lesson is that drainage deserves respect. Many beginners fall in love with a beautiful container, plant directly into it, water generously, and then wonder why the plant begins auditioning for a tragedy. A planter is not just decor. It is a tiny environment. Water has to move. Roots need air. Soil should support life, not become a cold, wet brick. Once you understand this, you start seeing every container differently. You ask, “Can I drill it?” “Can I use a nursery pot inside?” “Can I lift it on feet?” Congratulationsyou are now the person at the thrift store inspecting bowls like a horticultural detective.
The third lesson is that texture forgives almost everything. A perfectly smooth paint job can look nice, but a textured finish hides scratches, seams, dents, and cheap plastic shine. Baking soda paint, stone spray, and joint compound all create depth. Even a sponge-dabbed second color can make a pot look aged instead of flat. This is especially useful when you want a handmade look without spending handmade money.
The fourth lesson is to respect drying time. DIY enthusiasm is powerful, but wet paint does not care about your vision board. Let primer dry. Let paint cure. Let sealer set. Rushing the process leads to fingerprints, smudges, peeling, and the classic moment when a beautifully painted pot sticks to the newspaper underneath. Patience is not the fun part, but it is the reason the finished planter looks intentional instead of panicked.
The fifth lesson is that grouping matters. One budget planter is nice. Three planters in related colors look designed. Try combining a tall planter, a medium pot, and a small bowl-shaped container. Use different textures but keep the color palette connected. For example, matte black, charcoal stone, and natural basket weave can look modern and layered. Terracotta, cream, and olive feel warm and Mediterranean. White, sand, and weathered gray create a soft coastal look.
Finally, this project teaches you that style does not have to be expensive to feel personal. A store-bought planter can be beautiful, but a DIY planter carries a story. You remember finding the container, doubting it, sanding it, painting it, and then watching it become something completely different. That transformation is addictive in the best way. Suddenly, every old pot looks like potential. Every clearance aisle becomes a treasure hunt. Every plant deserves a better outfit.
Conclusion
A thrifty DIY planter knockoff is one of the easiest ways to upgrade your home, porch, patio, or balcony without draining your wallet. By choosing a good container shape, adding texture, using the right paint, protecting the finish, and respecting basic container gardening rules, you can create a planter that looks far more expensive than it is.
The best part is that no two projects need to look the same. You can go modern with matte black fluting, rustic with faux concrete, cozy with a woven basket, or playful with a painted thrift-store find. As long as the plant has the right light, drainage, and potting mix, your DIY planter can be both beautiful and practical. That is the sweet spot: designer style, gardener-approved function, and a budget that leaves enough money for one more plant. Because obviously, the planter needs a friend.
Note: This HTML body is prepared for web publishing with original, rewritten content and no source-link placeholders.