If fly fishing has one tiny skill that feels suspiciously like a magic trick, it is learning how to tie a tippet to a leader. One minute you are standing beside a perfect run, trout sipping like polite little tea guests. The next minute you are staring at two pieces of clear line, wondering why your fingers have suddenly become decorative sausages.
The good news? Connecting tippet to leader is not complicated once you understand the purpose, the best knots, and the small details that keep everything from snapping when a fish finally decides to make your day dramatic. This guide breaks down the process into 10 simple steps using beginner-friendly methods, practical examples, and a little streamside common sense.
Whether you are adding fresh 5X tippet to a tapered trout leader, extending a nymphing rig, switching from nylon to fluorocarbon, or just trying not to donate another fly to a tree branch, these steps will help you build a stronger, cleaner connection.
What Is Tippet, and Why Do You Tie It to a Leader?
In fly fishing, the leader is the tapered section of line between your fly line and your fly. It helps transfer energy from your cast so the fly turns over naturally. The tippet is the thin, final section closest to the fly. It gives you a nearly invisible connection, lets the fly drift more naturally, and allows you to replace line after changing flies without cutting your expensive tapered leader shorter and shorter.
Think of the leader as the carefully designed highway and the tippet as the quiet driveway that gets your fly right to the trout’s front door. If the tippet is too heavy, the fly may look stiff or unnatural. If it is too light, you may break off fish or struggle in wind. The trick is finding the right balance for the fly size, water conditions, and fish you are targeting.
The Best Knots for Tying Tippet to Leader
Before we jump into the 10 steps, it helps to know your knot options. You do not need to learn every knot in the fly-fishing universe. In fact, trying to memorize 37 knots before your first trout trip is a great way to become excellent at staying home.
Double Surgeon’s Knot
The double surgeon’s knot is one of the easiest and fastest ways to connect tippet to leader. It works well in cold weather, low light, and moments when your hands are wet, your patience is thin, and your buddy just hooked a fish behind you. It is especially useful when the leader and tippet are not dramatically different in diameter.
Blood Knot
The blood knot creates a slimmer, cleaner connection. Many experienced anglers like it because it passes through rod guides more smoothly and picks up less moss or debris. However, it takes more practice than the surgeon’s knot and performs best when the two lines are similar in diameter.
Tippet Ring Connection
A tippet ring is a tiny metal ring tied to the end of your leader. Once it is attached, you can connect new tippet to the ring with a clinch knot. This is handy because you can replace tippet repeatedly without shortening the tapered portion of your leader. It is a small tool with big “why didn’t I use this sooner?” energy.
Simple Ways to Tie a Tippet to a Leader: 10 Steps
Step 1: Choose the Right Tippet Size
Start by matching your tippet size to your fly and fishing conditions. For many trout situations, anglers commonly use 3X to 6X tippet. A larger fly, stronger current, or bigger fish may call for heavier tippet such as 3X or 4X. Tiny dry flies and spooky fish in clear water may require 5X, 6X, or even finer material.
One simple rule is this: the smaller the fly, the finer the tippet. But do not go too fine just to feel fancy. If you are breaking off fish or struggling to turn over a fly, your tippet may be too light.
Step 2: Decide Between Nylon and Fluorocarbon
Nylon tippet is flexible, affordable, and excellent for dry flies because it tends to float better. Fluorocarbon sinks faster, is more abrasion resistant, and is often preferred for nymphs and streamers. Both can be tied to a leader successfully, but fluorocarbon can be a bit stiffer, so careful knot seating matters.
If you are fishing dry flies, nylon is often the easy choice. If you are nymphing near rocks, logs, or deeper water, fluorocarbon may give you an advantage. Either way, fresh tippet matters. Old, sun-baked, mystery-spool tippet from the bottom of your pack is not a personality trait. Replace it when it feels brittle or curls like a phone cord from 1998.
Step 3: Cut a Fresh Section of Tippet
Cut about 18 to 30 inches of tippet for a basic setup. Use a longer section when fish are spooky, water is clear, or you need a delicate presentation. Use a shorter section when you want better turnover, more control, or are fishing heavier flies.
Make a clean cut with nippers rather than biting the line. Your dentist will appreciate this, and your knots will look less like they survived a lawn mower.
Step 4: Overlap the Leader and Tippet
Lay the end of the leader and the end of the tippet side by side, overlapping them by about 5 to 8 inches. This gives you enough material to form a knot without wasting half your leader.
For the double surgeon’s knot, the two lines should run parallel. For the blood knot, you will cross and wrap the lines around each other. In both cases, keep everything neat. A messy knot usually becomes a weak knot, and a weak knot usually waits until the biggest fish of the day to reveal its feelings.
Step 5: Tie the Double Surgeon’s Knot for the Easiest Method
To tie a double surgeon’s knot, hold the leader and tippet together as one doubled line. Form a simple overhand loop with both pieces. Pass both tag ends through the loop once, then pass them through a second time. Some anglers use a triple surgeon’s knot by making a third pass, especially with slick material or very fine tippet.
Do not tighten the knot yet. Keep the wraps organized and make sure both lines lie smoothly. If the knot twists into a tiny bird’s nest, start over. A fresh start is faster than pretending a bad knot has “character.”
Step 6: Use the Blood Knot for a Slimmer Connection
To tie a blood knot, cross the leader and tippet so they overlap. Wrap one tag end around the standing line about five times, then bring the tag back through the center gap. Repeat the same process with the other tag end, wrapping in the opposite direction, then pass that tag through the same center gap from the opposite side.
Slowly pull the standing lines to draw the wraps together. The finished knot should look compact, balanced, and straight. The blood knot takes practice, but it rewards you with a low-profile connection that moves smoothly through guides and collects less debris.
Step 7: Wet the Knot Before Tightening
Before you fully tighten any leader-to-tippet knot, moisten it with water or saliva. This reduces friction and helps the wraps seat properly. Dry knots can generate heat as they cinch, weakening the line before you ever make a cast.
Tighten slowly and steadily. Do not yank. Pull on the standing leader and standing tippet first, then snug the tag ends if needed. The knot should seat cleanly without crossing, bunching, or looking like it needs emotional support.
Step 8: Test the Connection
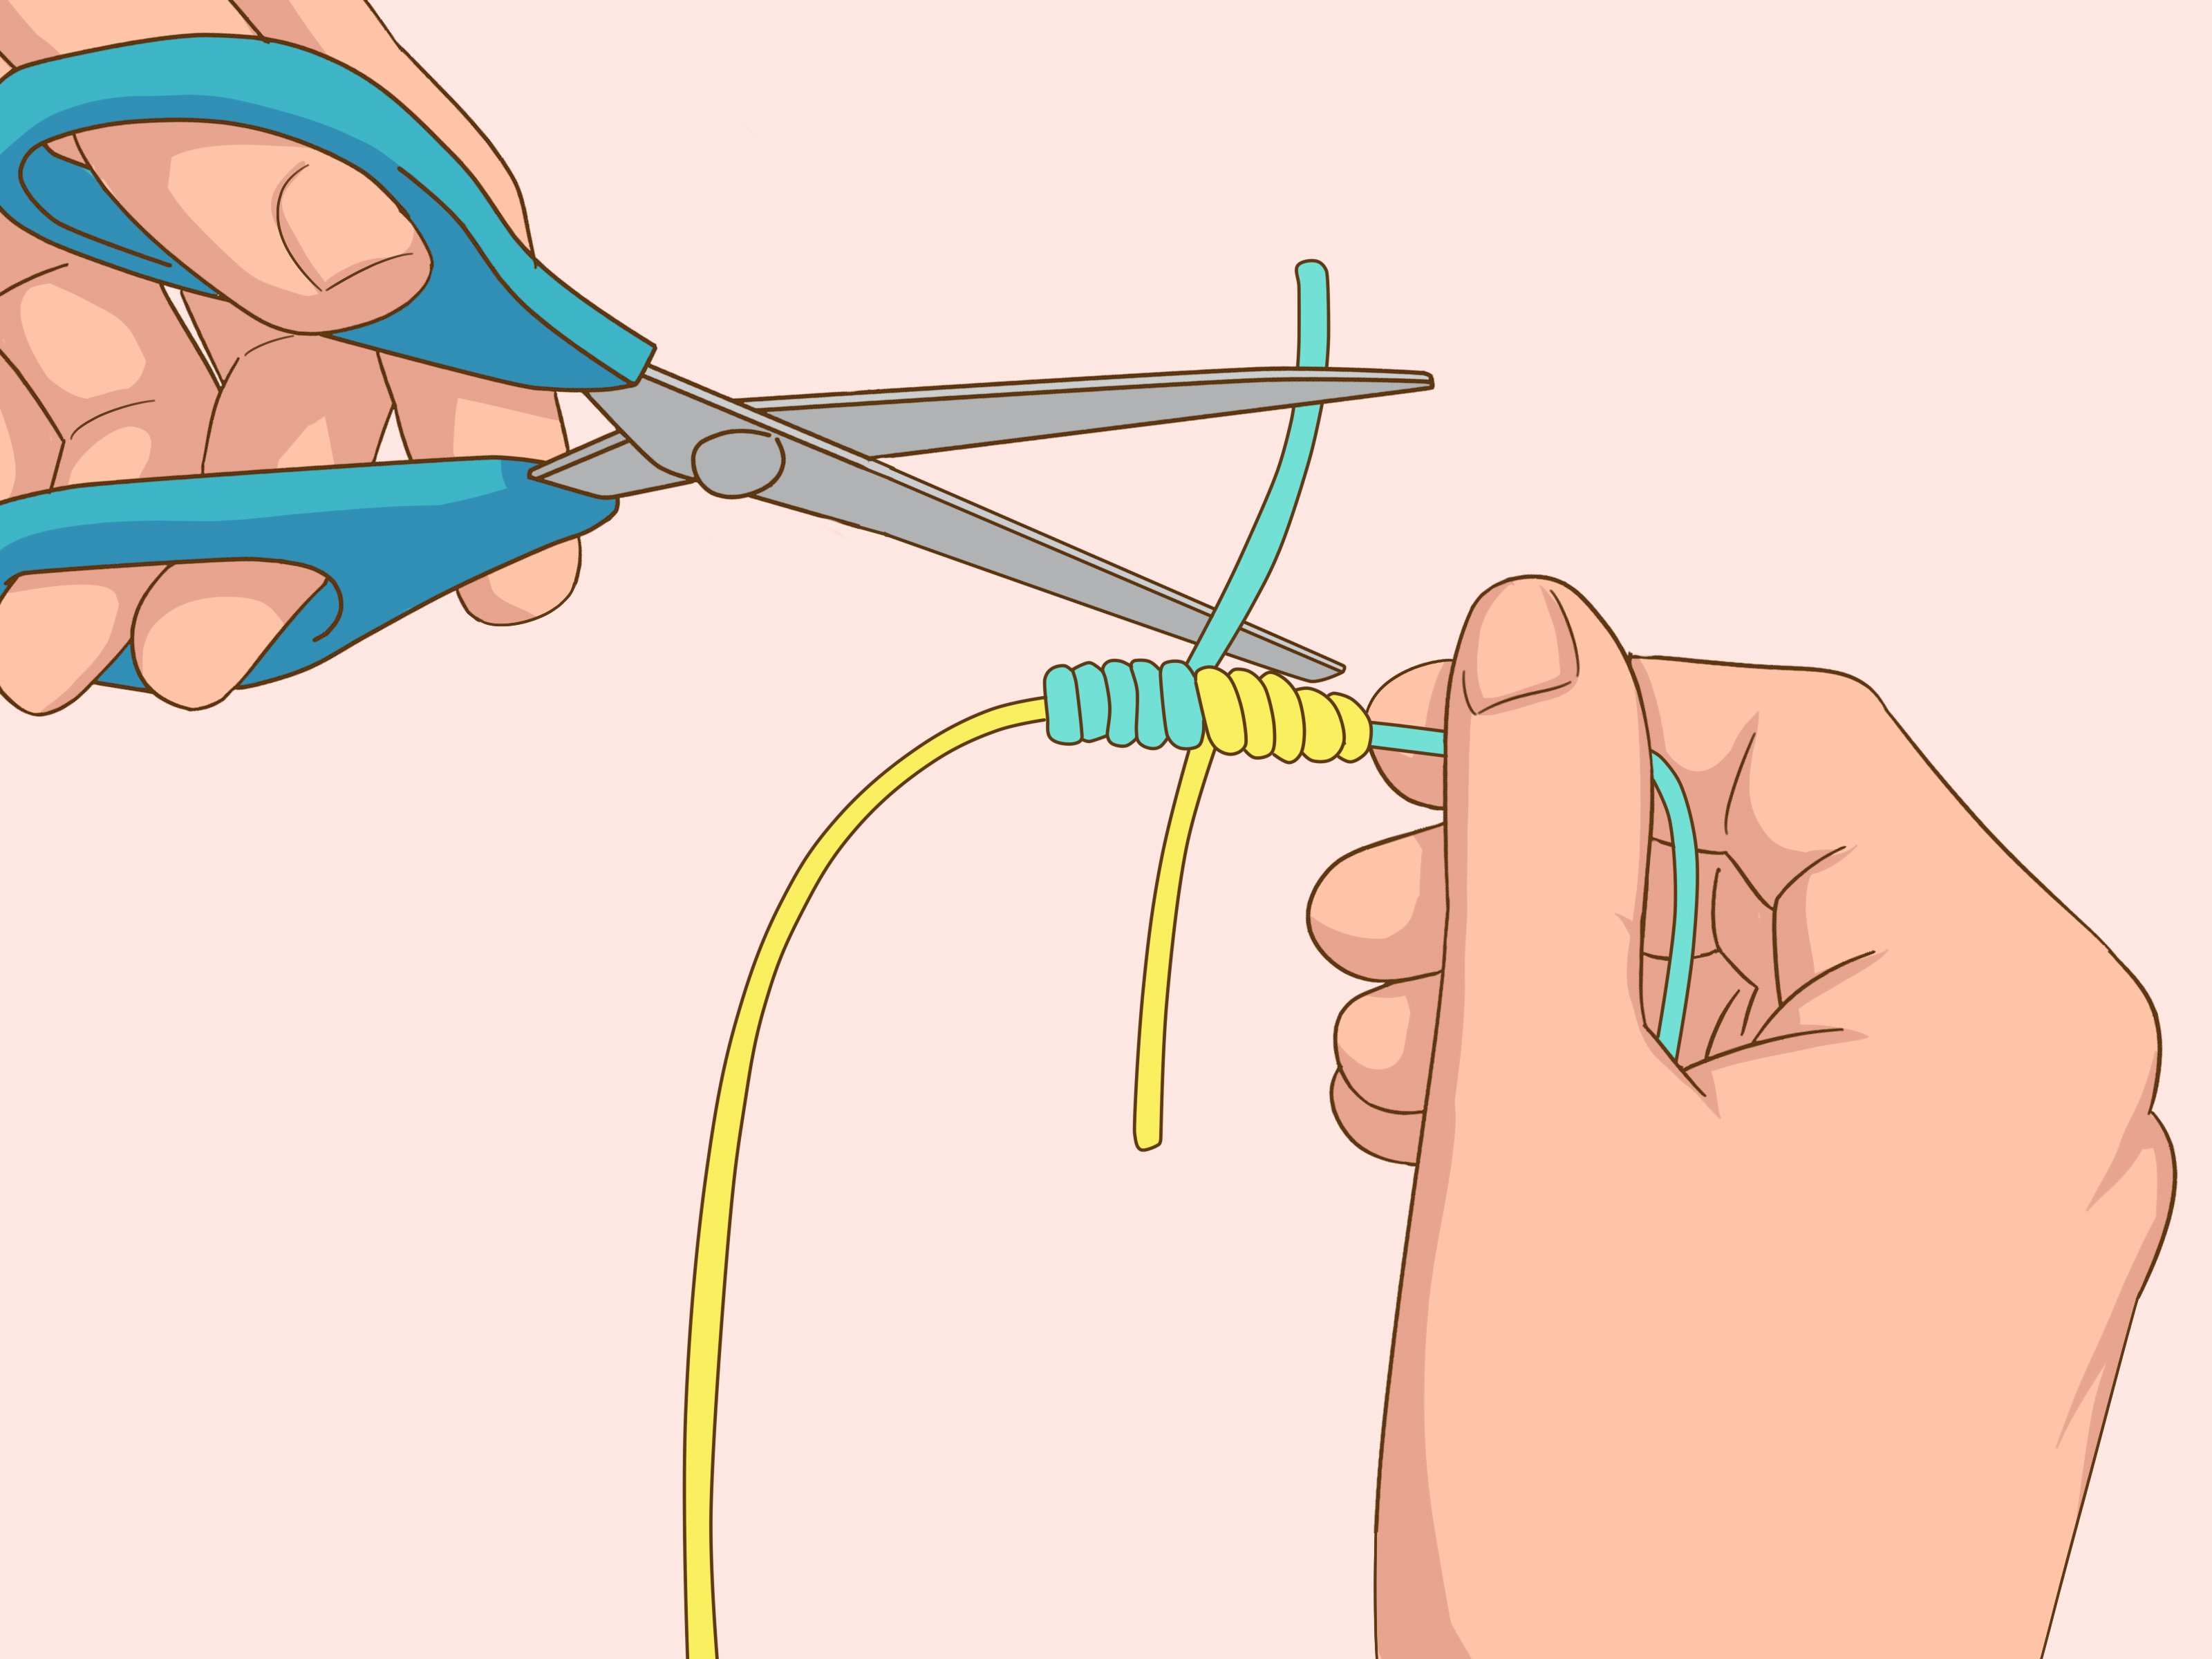
After tightening, give the leader and tippet a firm, steady pull. You are not trying to bench press a carp; you are simply checking that the knot is seated and secure. If it slips, curls badly, or breaks with light pressure, cut it off and retie it.
This tiny test can save you from losing a fish, a fly, and your dignity in one splashy moment. It is much better to discover a bad knot while standing on the bank than while watching a trout swim away wearing your favorite size 18 parachute Adams.
Step 9: Trim the Tag Ends Carefully
Use sharp nippers to trim the tag ends close to the knot, but not so close that you risk cutting the knot itself. Leave a tiny amount of tag, especially with slick fluorocarbon or when using heavier material. For most trout rigs, a neat trim keeps the connection clean and reduces the chance of snagging weeds.
Check your knot by running it lightly between your fingers. It should feel compact. If there is a sharp tag sticking out, trim it again. Fish may not judge your knot aesthetics, but floating grass definitely will.
Step 10: Add Your Fly and Recheck the Whole Rig
Once the tippet is connected to the leader, tie on your fly using a clinch knot, improved clinch knot, non-slip loop knot, or another trusted fly-to-tippet knot. Then inspect the entire setup: fly line loop, leader connection, tippet knot, and fly knot.
If you are changing flies often, remember that every fly change shortens your tippet. When the tippet becomes too short, add a new section rather than continuing to fish a stubby leader that lands like a dropped shoelace.
When Should You Add More Tippet?
You should add more tippet when your leader becomes too short, when your fly is not drifting naturally, when fish are refusing because the presentation looks heavy, or when you need to switch to a smaller fly. Many anglers begin the day with a tapered leader and add tippet as needed throughout the session.
For example, suppose you start with a 9-foot 5X leader and change flies six times while fishing small dries. You may cut away several inches with each change. Eventually, the fine end of the leader is gone, and the leader turns over too aggressively. Adding 24 inches of fresh 5X tippet restores length and improves presentation.
Common Mistakes When Tying Tippet to Leader
Using Tippet That Is Too Fine
Fine tippet can help with delicate presentation, but it is not always better. If you are throwing weighted nymphs, bushy dries, or streamers, ultra-light tippet can twist, collapse, or break. Match the tippet to the fly and conditions, not to your ego.
Skipping the Knot Test
A knot that looks fine may still be weak. Always test it. This takes two seconds and can prevent the ancient fly-fishing ritual known as “telling everyone the fish was probably huge.”
Joining Very Different Diameters
Most leader-to-tippet knots work best when the two materials are reasonably close in diameter. If you jump from a thick leader section directly to very fine tippet, the knot may seat poorly. In that case, add an intermediate section or use a tippet ring.
Forgetting to Wet the Knot
Friction weakens line. Wetting the knot helps it tighten smoothly and improves reliability. It is a small habit that makes a big difference.
Should You Use a Tippet Ring?
A tippet ring is especially useful for nymphing, Euro nymphing, dry-dropper rigs, or any situation where you change tippet often. Tie the ring to the end of your leader with a clinch knot, then tie your tippet to the ring with another clinch knot. After that, replacing tippet becomes quick and clean.
Some dry-fly anglers worry that a tippet ring will sink the leader or disturb presentation. Modern small rings are extremely light, and many anglers use them successfully even with dry flies. Still, if you are fishing tiny dries on glassy spring creek water, you may prefer a direct knot for the most delicate presentation.
Double Surgeon’s Knot vs. Blood Knot: Which One Should You Learn First?
If you are new to fly fishing, learn the double surgeon’s knot first. It is fast, strong, and forgiving. You can tie it with cold fingers, in low light, or while standing in moving water. That makes it an excellent everyday knot.
Once you are comfortable, learn the blood knot. It is slightly more elegant, slimmer, and useful when you want a clean connection between similar-diameter materials. Many experienced anglers know both and choose based on conditions. The surgeon’s knot is the reliable pickup truck. The blood knot is the sleek little sports car that behaves beautifully when handled correctly.
Practical Examples for Different Fly-Fishing Situations
Small Dry Flies on Clear Water
Use a longer section of 5X or 6X nylon tippet. Tie it to the leader with a clean blood knot or double surgeon’s knot. Keep the connection neat and avoid heavy knots that may disturb the drift.
Nymphing in Faster Current
Use 4X or 5X fluorocarbon depending on fly weight and fish size. A double surgeon’s knot or tippet ring connection works well because you may need to adjust depth, replace flies, or rebuild rigs often.
Streamer Fishing
Use heavier tippet, often 0X to 3X depending on the fish and water. A strong knot and a shorter leader help turn over larger flies. Always test the connection because streamer takes can be aggressive.
Care Tips for Stronger Leader-to-Tippet Connections
Store tippet away from heat and sunlight. Replace old spools when the material becomes brittle. Keep nippers sharp. Retie after landing fish, snagging rocks, or dragging the knot through heavy weeds. Check for abrasion by sliding the tippet between your fingers. If it feels rough, cut it back and retie.
These habits may sound small, but fly fishing is often won or lost by small details. A clean knot, fresh tippet, and good presentation can turn a slow day into a story you repeat too many times at dinner.
Field Experiences: Lessons From Tying Tippet to Leader on Real Water
The first experience most anglers have with tying tippet to leader is not glamorous. It usually happens while the fish are rising, the light is fading, and the wind has decided to become personally involved. You pull out a spool of tippet, make a few wraps, tighten the knot, and immediately create something that looks less like a fishing connection and more like modern art. That is normal. Everyone starts there.
One of the biggest lessons from real water is that speed matters, but reliability matters more. A quick knot that fails is not quick at all. When trout are feeding, it is tempting to rush the process and get your fly back on the water as fast as possible. But taking an extra 20 seconds to align the leader and tippet, wet the knot, tighten it slowly, and test it can save the next 20 minutes of frustration.
Another lesson is that conditions should decide your knot. On a calm day, sitting on the bank with warm fingers and good light, tying a blood knot feels satisfying. It is slim, tidy, and almost professional enough to make you consider buying a hat with more patches on it. But in cold weather, with numb fingers and moving water around your knees, the double surgeon’s knot often becomes the hero. It is not fancy, but it works, and fly fishing already has enough ways to humble you.
Tippet rings also earn their reputation after a long day of changing flies. Without a ring, every new tippet section or fly change eats into the leader. By late afternoon, a beautiful tapered leader can become a short, awkward piece of line that refuses to turn over properly. With a tippet ring, the main leader stays intact while the tippet gets replaced as needed. This is especially helpful for anglers who fish nymph rigs, dry-dropper setups, or technical water where small adjustments are constant.
Experience also teaches you to inspect knots after fish, snags, and bad casts. If you hook a branch behind you and perform the classic “I meant to do that” recovery, check the knot. If you drag your rig across rocks, check the tippet. If you land a fish with rough jaws or sharp teeth, check everything. Strong knots do not stay strong forever.
Finally, the best anglers are not the ones who know the most knots. They are the ones who know a few knots well and tie them carefully every time. A clean double surgeon’s knot, a reliable blood knot, and a simple tippet ring setup can handle most leader-to-tippet situations. Practice at home while watching TV, not only when trout are rising and your hands are shaking. Your future self, standing in a river with a fish feeding 30 feet upstream, will be deeply grateful.
Conclusion
Learning how to tie a tippet to a leader is one of the most useful fly-fishing skills you can master. The process is simple: choose the right tippet, overlap the lines, tie a reliable knot, wet it, tighten it carefully, trim it cleanly, and test the connection. The double surgeon’s knot is the easiest place to start, the blood knot gives you a slimmer connection, and tippet rings make frequent changes faster while preserving leader length.
Do not overcomplicate it. Fly fishing already includes bugs, currents, knots, fish with suspicious attitudes, and at least one tree that wants your fly. Master a few dependable methods, practice them until they feel natural, and you will spend less time fumbling with line and more time making good casts. That is the whole point.