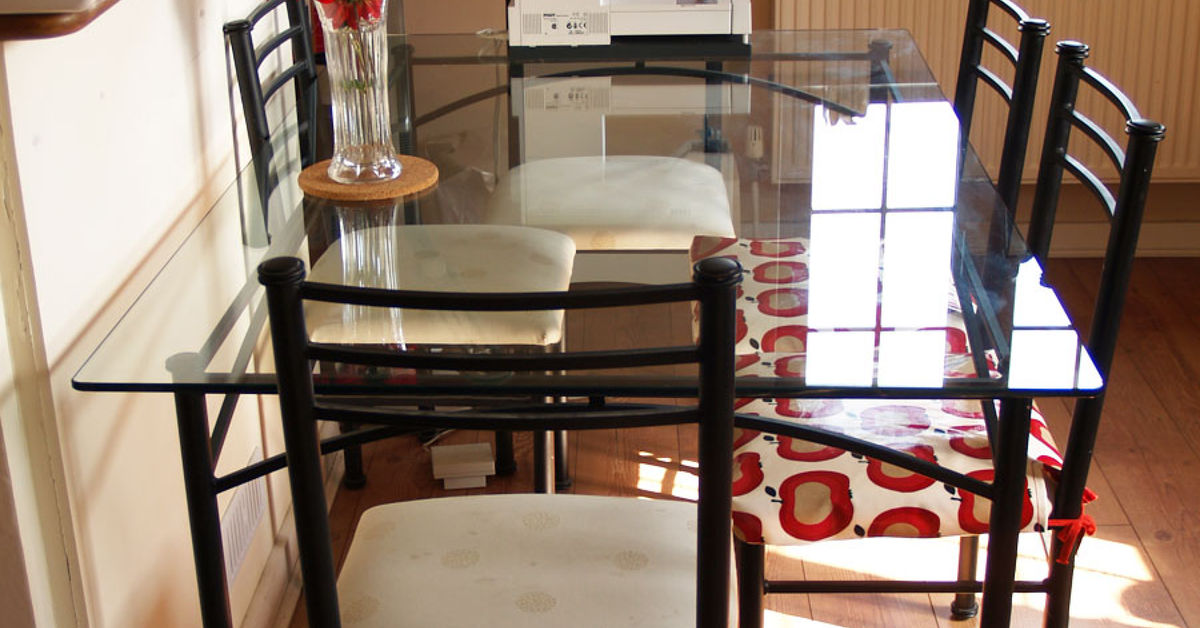
A glass table can look sleek, airy, and modernright up until it starts displaying every fingerprint, scratch, and mysterious coffee ring like an art exhibit nobody asked to see. Painting a glass table top is an affordable way to hide cosmetic wear, introduce a new color, or transform an ordinary piece into custom furniture.
The project is beginner-friendly, but glass is less forgiving than wood. It is smooth, nonporous, and generally unimpressed by paint that was not formulated to stick to it. The secret is not extraordinary artistic talent. It is choosing the correct paint, cleaning the glass obsessively, applying light coats, and allowing the finish to cure completely.
With the right approach, a dated patio table, thrift-store coffee table, or plain side table can become a polished focal point instead of looking like something attacked by a half-empty spray can.
Can You Paint a Glass Table Top?
Yes, you can paint a glass tabletop. Suitable choices include specialty glass paint, acrylic enamel labeled for glass, chalk-style furniture paint, and all-surface spray paint that specifically lists glass among its compatible materials. A high-adhesion bonding primer can also help certain coatings grip hard, glossy surfaces. Product systems differ, so always check whether your selected paint requires primer, a protective topcoat, or special curing conditions.
Before starting, inspect the tabletop carefully. Paint can disguise cloudy areas, outdated patterns, and light cosmetic scratches, but it cannot repair cracks, deep chips, or structural damage. Replace or professionally evaluate damaged glass instead of trying to hide it beneath a cheerful coat of turquoise.
The Best Strategy: Paint the Underside
For a removable clear glass top, painting the underside is usually the best approach. Once the tabletop is reinstalled, you view the color through the glass while the upper surface remains smooth and easy to clean. The glass protects the decorative coating from plates, keys, cups, and family members who believe every horizontal surface is a workbench.
Underside painting works particularly well for solid colors, metallic effects, geometric patterns, faux stone, and mirror finishes. Manufacturers of mirror-effect coatings specifically instruct users to spray the reverse side of clear glass, and numerous furniture makeovers use underside paint to create a glossy, protected appearance.
When Should You Paint the Top Surface?
Top-side painting makes sense when you deliberately want visible texture, a chalky finish, hand-painted artwork, or a frosted effect. Because the coating will experience direct abrasion, choose a durable glass-compatible product and apply a compatible sealer only when the manufacturer recommends one.
Even sealed paint is not indestructible. Use coasters and placemats, lift objects instead of dragging them, and accept that dropping a cast-iron skillet on the table remains a bad plan regardless of how premium the paint was.
Choosing the Best Paint for a Glass Tabletop
Glass-Specific Acrylic Enamel
Acrylic enamel formulated for glass is a dependable option for borders, stencils, lettering, and multicolor artwork. It generally adheres better than ordinary craft paint and can produce an opaque, washable finish.
Some glass paints offer heat-setting instructions for small heat-safe objects. A full-size tabletop should not be placed in a household oven, so select a formula that can air-cure at room temperature.
All-Surface Spray Paint
Spray paint is the easiest option for creating a smooth field of color over a large area. Choose a product whose label specifically includes glass. Multisurface formulas are available in matte, satin, gloss, metallic, and textured finishes.
The most important rule is to apply several light coats. One thick coat may appear efficient for approximately seven seconds, after which it usually begins dripping toward the floor.
Chalk-Style Furniture Paint
Chalk-style paint can adhere to clean glass and create a soft, matte, vintage appearance. It is useful when you want visible brush texture or a distressed finish. However, a tabletop receives more wear than a decorative bottle, so use the wax or lacquer system recommended by the paint manufacturer when added protection is needed.
Frosted, Sea-Glass, and Mirror Paint
Specialty sprays can imitate etched glass, translucent sea glass, stained glass, or a reflective mirror. Frosted coatings are useful for softening the appearance of minor scratches, while mirror paint creates the best effect when applied to the reverse side. Translucent products require especially consistent application because heavy passes can produce visible dark bands.
Tools and Materials
- Glass-compatible paint or a complete primer-and-paint system
- Glass cleaner or mild dish soap
- Isopropyl alcohol for the final cleaning pass
- Lint-free microfiber cloths
- Painter’s tape and masking paper
- Drop cloth, plastic sheeting, or flattened cardboard
- Nitrile gloves and safety glasses
- Respiratory protection appropriate for the selected coating
- Foam roller, soft brush, or spray-paint handle
- Optional stencil, straightedge, craft knife, or vinyl shapes
- Optional compatible clear protective coating
How to Paint a Glass Table Top Step by Step
1. Remove and Support the Glass
If the tabletop lifts out, ask someone to help move a large or heavy panel. Place it horizontally on a clean, padded surface. Folded towels, foam blocks, or cardboard can protect the edges from hard concrete and accidental impacts.
If the glass cannot be removed, mask the table frame and surrounding area thoroughly. Indoor spraying requires excellent ventilation and extensive overspray protection, so a sheltered outdoor workspace is often more practical.
2. Choose and Mark the Paint Side
Use a small piece of tape to identify the side you intend to paint. This sounds unnecessary until the glass has been cleaned and flipped twice and both sides look exactly alike.
For reverse-painted artwork, remember that the normal painting order is reversed. Fine details and foreground elements go on first. The background color goes on last.
3. Clean the Glass Thoroughly
Remove dust, grease, wax, adhesive residue, cleaner buildup, and fingerprints. Wash the surface, rinse it, and dry it with a lint-free cloth. If permitted by the coating instructions, finish with isopropyl alcohol and allow the glass to dry completely.
After the final cleaning, handle the surface only with clean gloves. Paint manufacturers consistently emphasize that a surface should be clean, dry, and free of contaminants before coating. Bonding primers are available for difficult surfaces such as glass when the selected system requires one.
4. Mask the Edges and Design
Apply painter’s tape along borders, hardware openings, and areas that should remain clear. For stripes or geometric patterns, measure from several points instead of assuming that every edge is perfectly square.
Press the tape edges down with a plastic card. Cover the opposite face and any exposed frame so drifting overspray cannot create an unwanted decorative surprise.
5. Apply Primer When Required
Some glass paints are designed for direct application. Other coatings need a high-adhesion bonding primer. Follow one compatible system rather than assembling a random collection of products simply because every container says “professional.”
Bonding primers from major paint manufacturers are specifically formulated for hard-to-coat surfaces, including glass and other glossy materials. Allow the primer to dry for the stated period before adding color.
6. Apply Thin, Even Coats
Shake spray paint for the full time stated on the label. Begin each pass beyond one edge of the tabletop, move across in a steady line, and release the nozzle only after passing the opposite edge. Keep the can at a consistent distance and overlap each pass slightly.
Multiple light applications produce more uniform coverage than one heavy coat. Consistent movement and proper drying time between coats also help prevent runs, stripes, and uneven texture.
For brushed paint, use a soft synthetic brush for details or a high-density foam roller for large areas. A roller can cover a tabletop efficiently, but avoid repeatedly rolling over paint that has begun to set.
7. Remove the Masking Carefully
Follow the paint instructions regarding tape-removal timing. Pull the tape backward over itself at a low angle. If a thick paint film has bridged the edge, lightly score the line with a sharp craft knife before peeling.
8. Let the Paint Cure Completely
Dry-to-touch does not mean ready for regular use. The surface may feel dry while the coating underneath remains soft. Leave the tabletop horizontal, protected from dust, and untouched for the entire curing period shown on the product label.
Do not reinstall rubber bumpers, clips, or supports too early. They can leave permanent impressions in paint that appears dry but has not developed its final hardness.
Creative Glass Table Painting Ideas
Solid Color Under Glass
Spray the underside in black, cream, navy, forest green, terracotta, or another opaque color. Once flipped, the glass adds depth and gloss, producing a finish that looks more polished than the painted side itself.
Reverse-Painted Faux Marble
Paint delicate veins first using gray, charcoal, brown, or metallic gold. Add soft shadows and translucent wisps before covering the entire underside with an opaque white or cream background.
When the glass is flipped, the veins appear smooth and protected beneath the surface. Faux-marble projects often become more convincing through several delicate layers rather than one heavy attempt at drawing dramatic lightning bolts.
Geometric Color Blocking
Use tape to create stripes, arches, checkerboards, borders, or asymmetrical blocks. When painting underneath, apply foreground colors first and background colors last. Build light coats along tape edges to reduce bleeding.
A Reversible Wallpaper Alternative
For a commitment-free makeover, place wallpaper, decorative paper, fabric, or a printed panel beneath the glass instead of painting it. The effect can be changed later without chemicals or scraping, making it a useful trial before selecting a permanent design.
Common Problems and How to Fix Them
Peeling Paint
Peeling usually indicates contamination, an incompatible coating system, insufficient curing, or excessive abrasion. Remove loose material, clean the glass again, and restart with a paint approved for glass. Spraying fresh paint over an edge that is already lifting is camouflage, not repair.
Drips and Runs
Let the coating dry completely. If the product instructions allow it, level the defect carefully, remove the dust, and apply another light coat. Prevention is easier: keep the can moving and do not chase full opacity during the first pass.
Patchy Frosted or Translucent Paint
View translucent coatings against an evenly lit background between applications. If an area needs more coverage, blend the correction across a wider section instead of concentrating a heavy burst on one small spot.
Paint in the Wrong Place
Fresh overspray is generally easier to remove than fully cured paint. Depending on the coating, glass cleaner, rubbing alcohol, acetone, or a suitable scraper may help. When scraping standard smooth glass, keep the surface wet and hold the blade at a shallow angle. Test first and avoid scraping coated, tinted, or textured glass unless its manufacturer confirms that the method is safe.
Care and Maintenance
Clean a painted tabletop with a soft microfiber cloth and mild cleaner. Avoid abrasive pads, powdered cleansers, and harsh scraping. On top-painted glass, use coasters and placemats and lift objects rather than dragging them.
For patio furniture, choose an exterior-rated coating and protect the table from prolonged standing water and severe weather when practical. Inspect clips, rubber bumpers, and supports periodically so the glass does not shift or place unnecessary pressure on the painted surface.
Experience Notes: What Real Glass-Table Projects Teach You
The most successful glass-table makeovers often look rather unimpressive during application. The satisfying moment arrives after the tabletop is flipped and reinstalled. A common first project is a clear side-table top painted matte black on the underside. While spraying, the coating may look slightly dull or uneven. Viewed through the glass, however, the color becomes richer and the finish appears glossy. The practical lesson is to judge underside paint from the viewing side, not the painted side.
Another common experience involves cleaning the glass with the wrong product. Someone uses a scented household cleaner, polishes the surface until it sparkles, and then discovers tiny round craters in the fresh paint. The glass looked clean but still carried fragrance, silicone, wax, or surfactant residue.
The better routine is to use the cleaning method recommended by the coating manufacturer, finish with lint-free cloths, and avoid touching the surface afterward. Gloves are much cheaper than repainting a coffee table while muttering language unsuitable for a family DIY website.
Patterned tabletops teach a different lesson: reverse painting requires reverse thinking. Suppose the goal is white faux marble with gold veins. On wood, the white base would normally be applied first. Under glass, the gold veins must be painted first because they need to sit closest to the viewer. Gray shadows come next, and the opaque white background comes last.
Many first attempts fail not because the technique is complicated, but because the painter follows the ordinary sequence out of habit. Creating a small sample on scrap glass is the easiest way to understand the layer order before committing to the full table.
Outdoor patio tables reveal the importance of edges and supports. The broad underside may remain attractive while paint around rubber bumpers or metal clips begins to wear. Those contact points experience pressure, movement, and sometimes trapped moisture.
A better approach is to avoid thick paint buildup around hardware locations, allow the coating to cure fully, and replace missing or hardened bumpers before reassembly. Those tiny supports are the table’s underappreciated shock absorbers.
Brushed top-side finishes offer another reality check. Chalky paint or hand-painted artwork can look wonderful, but it changes how the table should be used. Decorative trays, placemats, and coasters become part of the design rather than optional accessories.
A clear coating does not make every paint invincible. An incompatible topcoat can wrinkle, discolor, or soften the color beneath it. Testing the complete combination of primer, paint, and sealer on spare glass is therefore one of the most valuable habits a DIY painter can develop.
Finally, patience produces better results than extra paint. A coat that initially looks transparent may become perfect after the second or third application. A tabletop that feels dry the next morning may still develop marks beneath rubber feet. The experienced approach is to stop spraying early, wait longer than feels emotionally necessary, and let the coating develop its intended hardness. In glass painting, the most difficult tool to use is frequently the clock.
Conclusion
Painting a glass table top is a practical way to rescue dated furniture, add color, disguise cosmetic wear, or create a custom centerpiece without replacing the entire table. For most removable clear tops, painting the underside offers the best combination of appearance, protection, and easy maintenance.
Choose a coating approved for glass, remove every trace of residue, apply several controlled coats, and respect the complete curing schedule. The same basic process can produce a solid-color finish, faux marble, geometric artwork, frosted glass, or a reflective mirror effect.
Preparation may not be the glamorous part of the makeover, but neither is watching your beautiful new finish peel away in one large, strangely satisfying, deeply heartbreaking sheet.