Let’s be honest: your iPhone is basically your wallet, diary, photo album, bank lobby, shopping cart, group chat headquarters, and embarrassing search history museum all rolled into one shiny rectangle. So when a friend asks, “Can I borrow your phone for a second?” your soul may briefly leave your body.
Good news: you can put Face ID on apps on your iPhone in several practical ways. The best method depends on your iOS version, the app you want to protect, and whether you want a clean Apple-built solution or a clever workaround. On newer iPhones running iOS 18 or later, Apple finally made app locking wonderfully simple. On older versions, you can still protect sensitive information using built-in app settings, Screen Time, Notes, Photos, and Shortcuts.
This guide breaks down the three simplest ways to lock iPhone apps with Face ID, hide private apps, and make your phone feel less like an unlocked treasure chest sitting on a coffee table.
Can You Really Lock iPhone Apps With Face ID?
Yes, but there is one important detail: the method depends on your iOS version. If your iPhone runs iOS 18 or later, you can use Apple’s native app lock feature to require Face ID, Touch ID, or your passcode before opening many apps. That means you can lock social media apps, messaging apps, shopping apps, finance apps, and other private apps without waiting for the app developer to add its own lock feature.
If you are using an older iOS version, Apple does not offer the same universal “lock any app” button. However, you can still protect specific apps and content with built-in Face ID settings, app-level privacy locks, Screen Time limits, and Shortcuts automation. Is it as elegant as Apple’s newer method? Not always. Does it work well enough to keep a nosy cousin from casually opening your messages while pretending to check the weather? Absolutely.
Before You Start: Make Sure Face ID Is Set Up
Before locking apps, confirm that Face ID is active on your iPhone. Go to Settings > Face ID & Passcode, enter your passcode, and make sure Face ID is set up. You can also turn on Face ID for iPhone Unlock, Password AutoFill, Apple Pay, and supported apps.
While you are there, tap Other Apps if the option appears. This area shows apps that have requested Face ID access. If a specific app supports Face ID but is not using it, this is one place to check before accusing your iPhone of having trust issues.
Method 1: Use iOS 18’s Built-In “Require Face ID” Feature
This is the easiest and cleanest way to put Face ID on apps on your iPhone. If your iPhone has iOS 18 or later, Apple lets you lock many apps directly from the Home Screen or App Library. No extra app, no sketchy “vault” download, no complicated ritual involving three menus and emotional support snacks.
How to lock an app with Face ID on iOS 18 or later
- Go to your iPhone’s Home Screen or App Library.
- Find the app you want to lock.
- Press and hold the app icon until the quick actions menu appears.
- Tap Require Face ID.
- Tap Require Face ID again to confirm.
- Authenticate with Face ID, Touch ID, or your passcode.
After that, the app requires authentication before it opens. This is especially useful for apps that contain private messages, financial details, personal documents, health information, shopping history, or anything else you do not want someone discovering while “just checking one thing.”
How to remove Face ID from a locked app
- Find the locked app on your Home Screen or in the App Library.
- Press and hold the app icon.
- Tap Don’t Require Face ID.
- Authenticate to confirm the change.
That’s it. The app goes back to opening normally. This is helpful if you lock something temporarily, such as a shopping app before handing your phone to a child, or a messaging app before lending your phone to a friend who has the curiosity level of a raccoon near an open trash can.
Important limits of the iOS 18 app lock
Apple’s app lock is powerful, but it is not universal. Some built-in iPhone apps cannot be locked, including apps such as Settings, Camera, Clock, Contacts, Find My, Maps, Shortcuts, and a few others. Apple also limits which apps can be hidden. In general, apps that come installed with iOS cannot be hidden, while downloaded apps from the App Store usually can be.
Also, remember that locking an app is not the same as deleting its traces from the universe. Depending on the app and iOS version, some activity may still appear in places like Screen Time, battery usage, or purchase history. Face ID protects access; it does not create a secret bunker under your Home Screen.
Method 2: Hide Apps and Require Face ID
If locking an app is the front-door deadbolt, hiding an app is pulling the curtains too. On iOS 18 or later, you can hide certain downloaded apps and require Face ID to view or open them. This is useful for apps you do not want sitting visibly on your Home Screen.
How to hide an app with Face ID
- Go to your Home Screen.
- Find the app you want to hide.
- Press and hold the app icon.
- Tap Require Face ID.
- Choose Hide and Require Face ID.
- Authenticate with Face ID, Touch ID, or your passcode.
- Tap Hide App to confirm.
The app disappears from your Home Screen and moves into the Hidden folder in the App Library. To find it, swipe left past your Home Screen pages until you reach the App Library, scroll to the bottom, tap Hidden, and authenticate.
When hiding apps makes sense
Hiding apps is best for privacy, not productivity. For example, you might hide a finance app, a private journal app, a dating app, a personal document scanner, or a shopping app full of birthday gift surprises. It is also useful if you want a cleaner Home Screen without deleting apps you still use.
However, do not use hidden apps as your only security strategy. If an app contains truly sensitive information, use every layer available: a strong iPhone passcode, Face ID, two-factor authentication, app-specific security settings, and good old-fashioned common sense. Common sense is underrated software. It never gets enough updates, but it prevents many disasters.
How to unhide an app
- Swipe to the App Library.
- Open the Hidden folder with Face ID.
- Press and hold the hidden app.
- Tap Don’t Require Face ID.
- Authenticate to confirm.
The app returns to normal visibility. If you do not see it on your Home Screen immediately, check the App Library or search for the app after unlocking it.
Method 3: Use App-Specific Face ID Locks and Smart Workarounds
If you do not have iOS 18, or if you want extra protection inside certain apps, use app-specific Face ID settings. Many popular apps include their own lock feature. This method is often more precise because it protects the app’s content from inside the app itself.
Use Face ID inside supported apps
Apps such as WhatsApp and Messenger include built-in app lock settings. In WhatsApp, for example, you can go to WhatsApp Settings > Privacy > App Lock and turn on Require Face ID. Messenger has a similar app lock setting under its privacy and safety controls.
Banking apps, password managers, crypto wallets, health apps, and private journal apps often include Face ID as well. The exact menu names vary, but you can usually find the option under:
- Settings
- Privacy
- Security
- Passcode
- Face ID
- App Lock
If the app does not show a Face ID option, check Settings > Face ID & Passcode > Other Apps. If the app appears there, make sure its Face ID permission is enabled.
Lock private notes with Face ID
The Notes app can protect individual notes with Face ID, Touch ID, your device passcode, or a separate Notes password. This is perfect for information you want to keep inside Apple’s ecosystem, such as private plans, sensitive lists, personal reminders, or gift ideas that must survive the annual “Can I use your phone?” ambush.
To lock a note, open the note, tap the more options button, choose the lock option, and follow the prompts. Once locked, the note requires authentication before it opens. Keep in mind that unlocking one note may temporarily unlock other locked notes in the same account, so lock them again when you are finished.
Protect private photos with Face ID
The Photos app also includes privacy protection for the Hidden and Recently Deleted albums. On supported iOS versions, these albums can require Face ID, Touch ID, or your passcode before opening. To check this, go to Settings > Photos and look for the Face ID option for hidden albums.
This does not technically put Face ID on the entire Photos app, but it protects the photos and videos most people are trying to keep private. It is a much better idea than creating an album called “Definitely Not Private Stuff,” which is basically a neon sign for nosy people.
Use Screen Time as a passcode-based backup
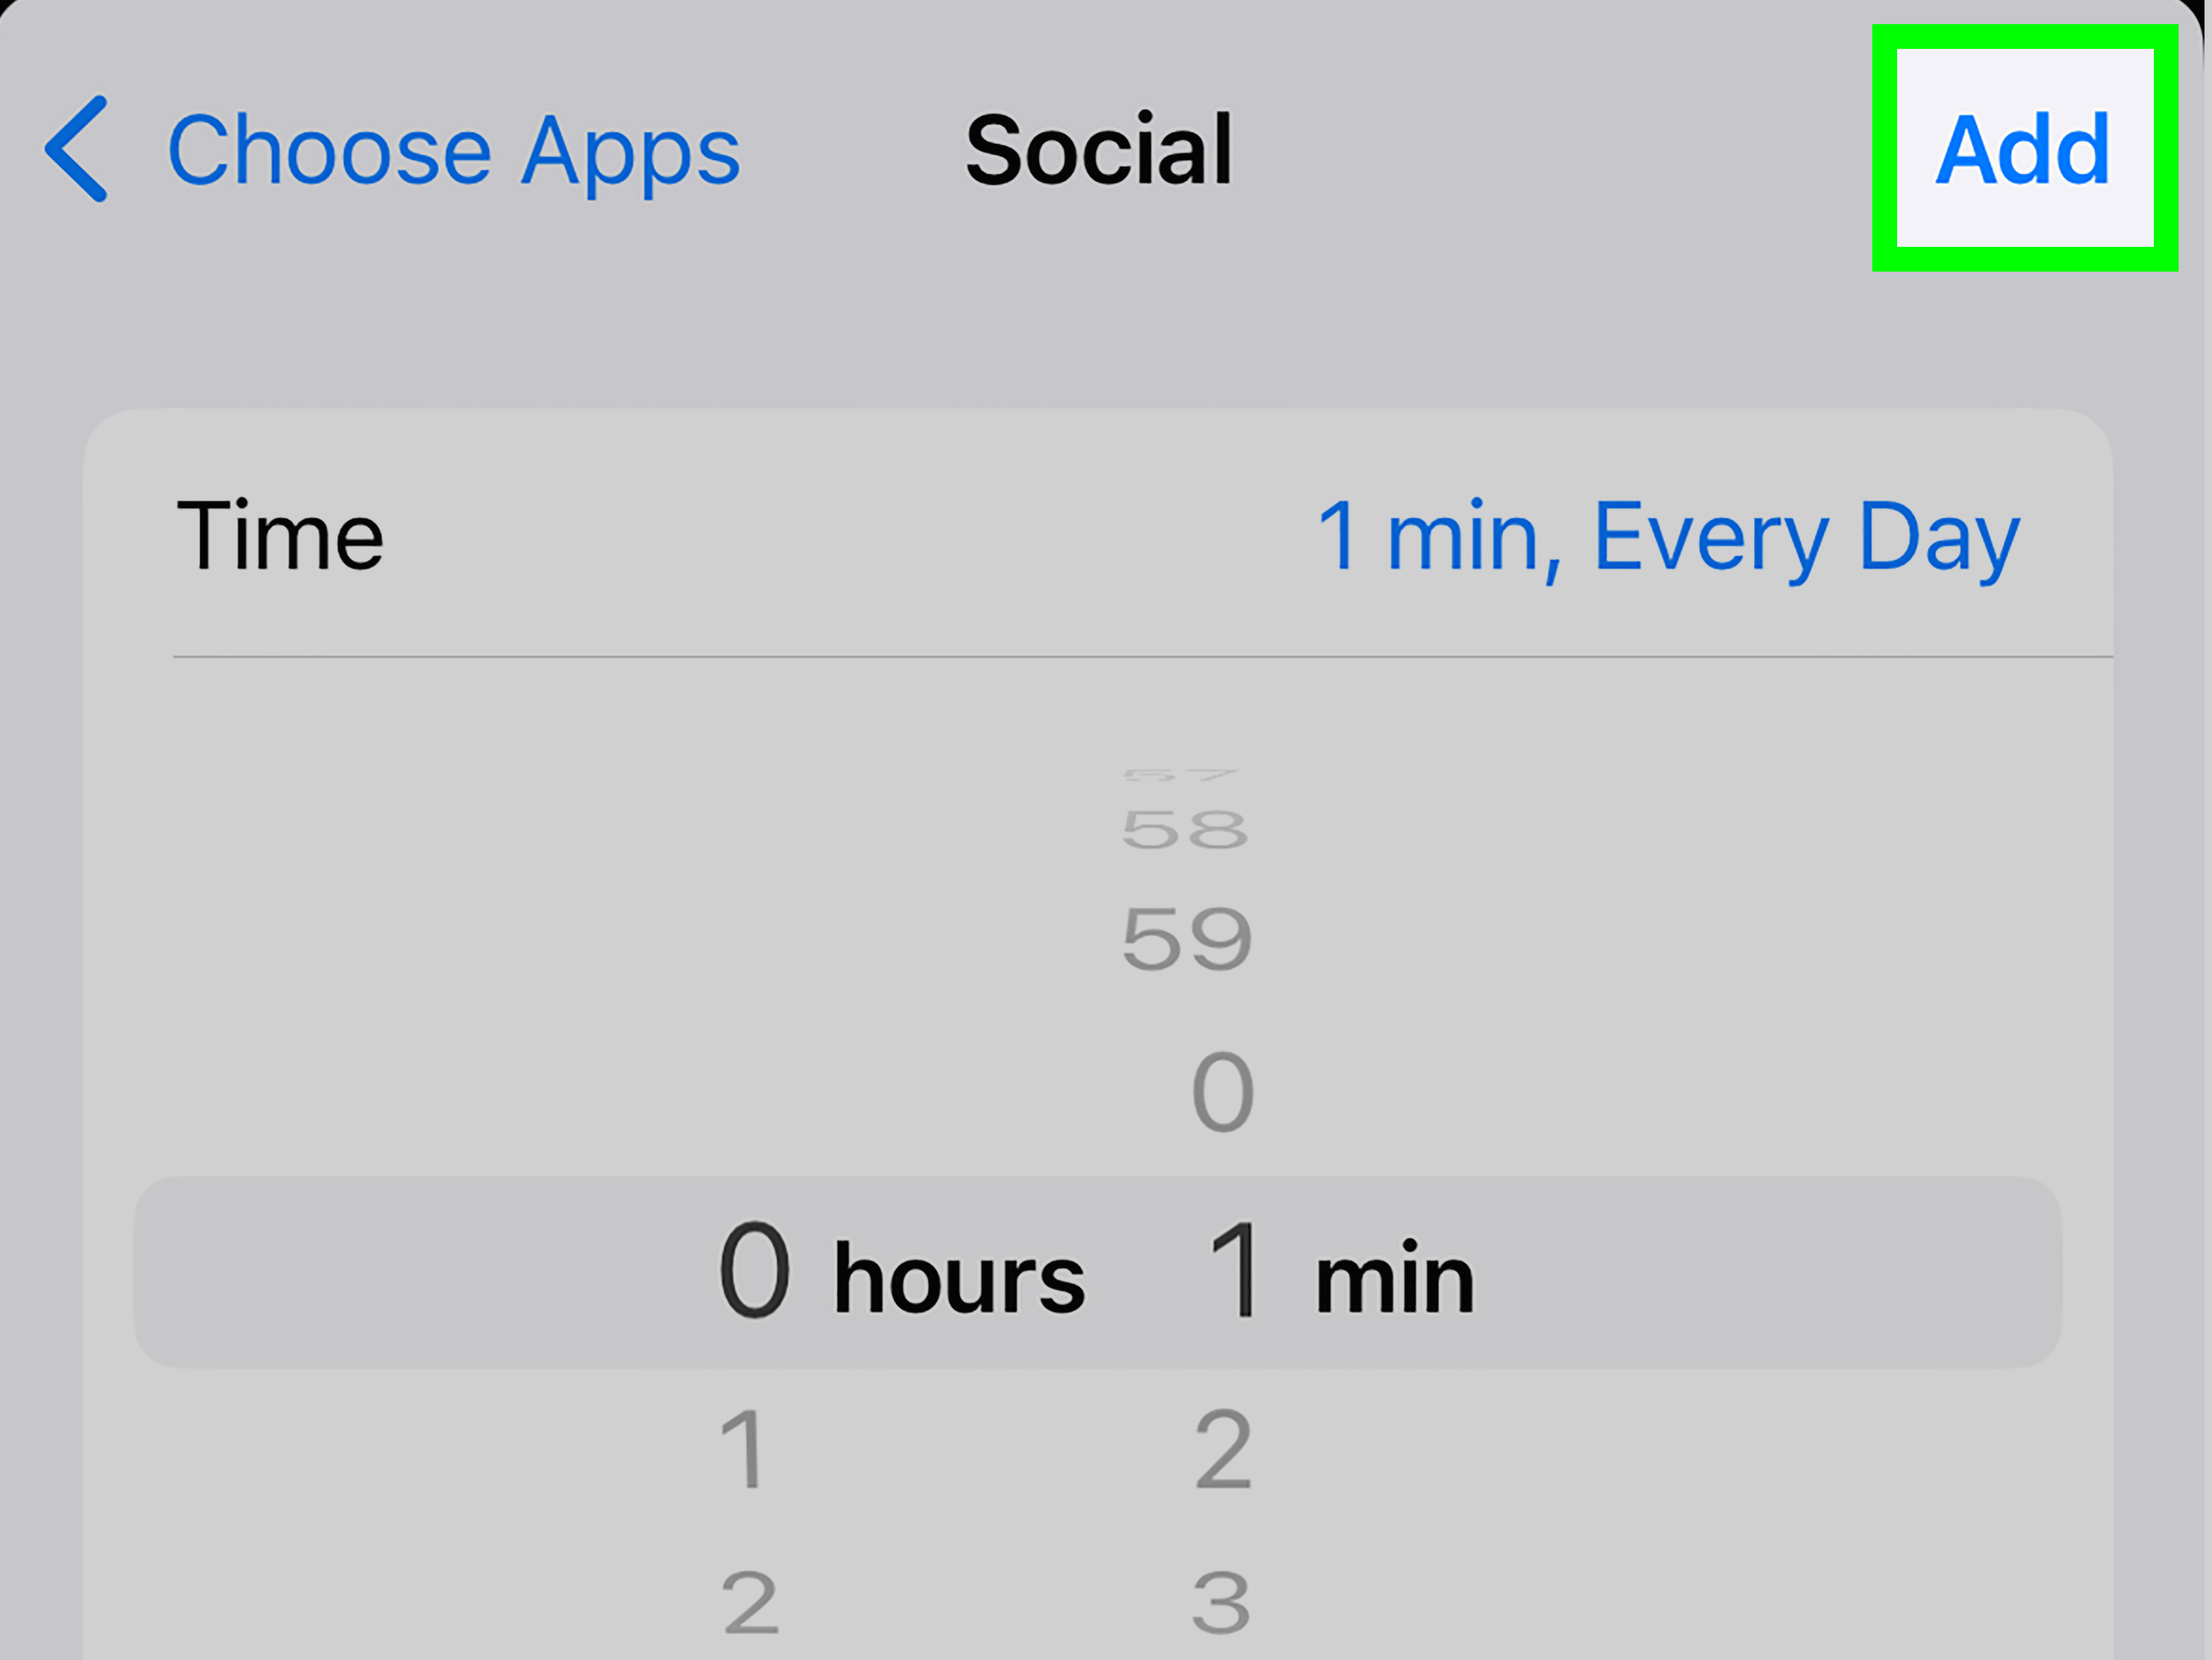
Screen Time is not a true Face ID app lock, but it can limit access to apps with a Screen Time passcode. Go to Settings > Screen Time > App Limits, add a limit for the app or app category, and set a very short daily limit. Once the limit is reached, the app requires the Screen Time passcode for more time.
This is not as smooth as Face ID, and it is better for boundaries than high-security privacy. Still, it can help if you are protecting apps from casual access or reducing your own doom-scrolling. Your future self may thank you, probably while trying to open the app anyway.
Use a Shortcuts automation workaround
For older iOS versions, some users create a Shortcuts automation that locks the iPhone when a selected app opens. The idea is simple: when someone opens the protected app, the iPhone immediately locks, and Face ID is needed to unlock the phone again.
To try it, open Shortcuts, go to Automation, create a personal automation, choose App as the trigger, select the app, choose Is Opened, and add an action such as locking the screen if available on your iOS version. This is more of a workaround than a polished app lock, but it can be surprisingly effective.
The downside is that it may feel clunky. You open the app, the phone locks, then you unlock it again. It is a little like hiring a security guard who slams the door in your face every time you come home. Secure? Yes. Smooth? Not exactly.
Which Method Should You Use?
If your iPhone supports iOS 18 or later, start with the native Require Face ID feature. It is the simplest, fastest, and most Apple-like option. Use Hide and Require Face ID when you also want the app removed from plain sight.
If the app already has its own Face ID lock, turn that on too. App-level locks are especially useful for messaging apps, password managers, finance apps, and apps that contain sensitive files. For example, locking WhatsApp inside WhatsApp and also locking the app through iOS gives you two layers of protection.
If you are on an older iOS version, use app-specific locks wherever possible. For everything else, use Screen Time or Shortcuts as backup tools. They are not perfect replacements for iOS 18’s app lock, but they can still reduce casual snooping.
Best Apps to Lock With Face ID
You do not need to lock every app. Locking the Weather app is probably unnecessary unless you are hiding your emotional attachment to checking the forecast twelve times a day. Focus on apps that contain private, financial, or personal information.
- Messages and chat apps: Protect conversations, attachments, and private notifications.
- Banking and payment apps: Add another layer around financial information.
- Password managers: Keep saved logins behind authentication.
- Photos and notes: Protect personal images, plans, lists, and documents.
- Shopping apps: Hide orders, saved cards, addresses, and surprise gifts.
- Email apps: Protect receipts, account alerts, and personal messages.
- Health and fitness apps: Keep private health-related information private.
Troubleshooting: Face ID App Lock Not Working?
Update your iPhone
If you do not see Require Face ID when pressing an app icon, your iPhone may not be running iOS 18 or later. Go to Settings > General > Software Update and check for updates.
Check whether the app supports locking
Some built-in Apple apps cannot be locked. If the option does not appear for a specific system app, try another app to confirm the feature is working.
Check Face ID permissions
Go to Settings > Face ID & Passcode > Other Apps. Make sure the app is allowed to use Face ID if it appears in the list.
Restart your iPhone
It sounds basic, but restarting your iPhone fixes many small glitches. Technology is advanced, but sometimes it still needs the digital equivalent of a nap.
Reset Face ID if needed
If Face ID fails across multiple apps, go to Settings > Face ID & Passcode and consider resetting Face ID. Set it up again in good lighting, hold the phone naturally, and make sure the TrueDepth camera area is clean.
Privacy Tips After Locking Apps
Locking apps is a strong move, but it is only one part of iPhone privacy. Use a strong passcode instead of a simple four-digit code. Turn on two-factor authentication for important accounts. Review notification previews under Settings > Notifications so private messages do not appear on the Lock Screen like tiny gossip billboards.
Also, be thoughtful about who knows your passcode. Face ID is excellent, but your passcode is still the fallback key. If someone knows it, they may be able to unlock many things. Treat your passcode like your toothbrush: useful, personal, and not something to casually share.
Real-World Experience: What It Feels Like to Use Face ID App Locks
In daily use, Face ID app locking feels most valuable in small, ordinary moments. You may not think about app privacy when you are alone at home, but the second someone borrows your iPhone, every unlocked app suddenly feels like an open window. Maybe a coworker needs to call someone. Maybe a friend wants to AirDrop photos. Maybe a family member wants to check a recipe and somehow ends up three swipes away from your messages. Face ID app locks turn those moments from mildly stressful to comfortably boring.
The best experience comes from locking only the apps that truly matter. If you lock everything, your iPhone starts feeling like a tiny airport security checkpoint. Open email: scan. Open photos: scan. Open notes: scan. Open a calculator app to split pizza: scan. At that point, you are not protecting privacy; you are training for patience. A smarter setup is to lock your messaging apps, financial apps, password manager, private notes, and hidden photos. Leave everyday low-risk apps alone.
Another practical lesson: hidden apps are useful, but they should not become a substitute for honest organization. If you hide too many apps, you may forget where things are and start searching your own phone like it belongs to a mysterious stranger. The Hidden folder is best for apps that are sensitive or rarely used, not for every app you do not want cluttering your Home Screen.
Face ID app locks are also helpful for parents and students. A parent can hand a child the phone to watch a video without worrying as much about banking apps or shopping apps. A student can protect notes, email, or social apps when sharing a device during group work. It is not about paranoia; it is about creating sensible boundaries. Your phone contains more personal data than most people kept in an entire filing cabinet twenty years ago.
One small annoyance is that locked apps can interrupt convenience. For example, if you lock a messaging app, you may need to authenticate more often than expected. If you hide an app, you may miss notifications or forget to check it. That is why the best privacy setup is balanced. Lock what matters. Hide what needs to stay out of sight. Keep your phone usable enough that you do not disable everything after two days.
Overall, putting Face ID on apps makes the iPhone feel more personal and more controlled. It gives you the confidence to lend your phone briefly without mentally replaying every app you left open. It also reduces the chance of accidental taps, curious browsing, and awkward discoveries. In other words, Face ID app locking is not just a security feature. It is peace of mind with a camera notch.
Conclusion
Putting Face ID on apps on your iPhone is now much easier than it used to be. If you have iOS 18 or later, use Apple’s built-in Require Face ID feature to lock apps directly from the Home Screen or App Library. If you want extra privacy, hide supported downloaded apps and store them in the Face ID-protected Hidden folder. For older iOS versions or extra protection, use app-specific Face ID locks, locked Notes, protected Hidden photos, Screen Time limits, and Shortcuts automation.
The smartest approach is layered but not annoying. Lock your most sensitive apps, hide only what truly needs to be hidden, and keep your iPhone passcode strong. Your phone should feel secure, not like a puzzle box designed by someone who hates convenience.