A ladybug costume is one of those rare DIY Halloween projects that looks adorable, costs very little, and does not require you to be the household champion of sewing, engineering, or staying calm around glitter. With a red shirt, black felt, a simple pair of wings, and cheerful antennae, you can create a costume that works for toddlers, kids, teens, adults, school plays, garden parties, bug-themed birthdays, and last-minute Halloween panic at 9:42 p.m.
The beauty of a homemade ladybug costume is flexibility. You can make it cute and cozy with a sweatshirt and leggings, sparkly with a tutu, dramatic with oversized wings, or simple enough to assemble in under an hour. This guide walks you through the materials, steps, comfort tips, safety details, and creative variations so your little bug can flutter around without falling apart before the first handful of candy.
Why a DIY Ladybug Costume Is Such a Smart Choice
Ladybug costumes are popular because they are instantly recognizable. Red body? Black spots? Tiny antennae? Congratulations, you are now a beloved garden beetle with excellent branding. Unlike complicated character costumes, a ladybug outfit does not need exact proportions or expensive accessories. The look is simple, bold, and forgiving.
A DIY ladybug costume is also budget-friendly. Most of the pieces can come from clothing you already own: a red shirt, black leggings, black shoes, and a headband. Craft supplies such as felt, cardboard, pipe cleaners, elastic, ribbon, tulle, and pom-poms are easy to find at craft stores, dollar stores, or in that mysterious drawer where scissors disappear forever.
Another advantage is comfort. Store-bought costumes sometimes look cute on the hanger but feel itchy, stiff, or too thin for chilly October weather. When you make your own, you can build the costume over normal clothes. A red sweatshirt and black leggings can keep a child warm while still looking festive. For adults, a red dress or red hoodie can become the base of the costume with almost no effort.
Materials You Will Need
For a basic DIY ladybug costume, gather the following supplies:
- Red shirt, sweatshirt, dress, or leotard
- Black leggings, pants, tights, or sweatpants
- Black felt or black fabric for spots
- Scissors
- Fabric glue, hot glue, double-sided fabric tape, or safety pins
- Black headband
- Two black pipe cleaners or chenille stems
- Two black pom-poms
- Red felt, red poster board, foam board, or cardboard for wings
- Elastic, ribbon, or Velcro for shoulder straps
- Optional: red and black tulle for a tutu
- Optional: reflective tape for nighttime visibility
If you are making the costume for a younger child, choose soft materials, avoid tiny detachable pieces, and keep the wings lightweight. If you are making it for an adult, you can go bigger with dramatic wings, a red skirt, red dress, or even a red hoodie with oversized felt dots.
Step 1: Choose the Costume Base
Start with the base outfit. The easiest option is a red top with black bottoms. A red sweatshirt works especially well because it is warm and gives the costume a rounded, cozy ladybug shape. A red dress is cute for a party version. A red leotard with a tutu works well for dance recitals, school events, or kids who believe every costume should include a little spin test.
For colder weather, layer smartly. A black long-sleeve shirt under a red T-shirt can look intentional, not like a parent desperately negotiating with the weather. Black leggings, sweatpants, or tights make the legs look bug-like while keeping the outfit comfortable.
The most important rule is movement. Have the wearer walk, sit, raise their arms, and do a tiny dramatic twirl before you attach everything permanently. If the base outfit pulls, sags, scratches, or causes complaints within 30 seconds, it will not survive an evening of trick-or-treating.
Step 2: Make the Ladybug Spots
Black spots are the magic ingredient. Without them, you have a red outfit. With them, you have a ladybug. Cut circles from black felt or fabric. For a child’s shirt, circles between 2 and 4 inches wide usually look best. For an adult costume or oversized wings, you can go larger.
To make neat circles, trace around a cup, jar lid, roll of tape, or small bowl. Do not worry if every spot is not mathematically perfect. Real ladybugs are not checking your geometry homework.
Attach the spots to the red shirt using fabric glue if you want a stronger hold. If you want to reuse the clothing after Halloween, use safety pins, removable fabric tape, or Velcro dots. Place the spots randomly but evenly. A few on the front, a few on the back, and maybe one on each sleeve will create a balanced look.
Step 3: Create Easy Ladybug Wings
Wings make the costume feel complete, and there are several ways to make them. The easiest method is to use red felt or red poster board. Fold the material in half and draw half of a heart shape, with the fold forming the center line. Cut it out, open it, and you will have a symmetrical wing shape that resembles two ladybug wing covers.
Add a black line down the center with felt, ribbon, marker, or paint. Then glue or tape black felt circles onto the wings. For extra structure, attach the felt to cardboard or foam board. If you want a softer wing cape, use felt only and let it drape from the shoulders.
To make wearable wings, attach two loops of elastic or ribbon to the back so they can slide over the shoulders like backpack straps. Measure the wearer first. Straps that are too loose will slide around; straps that are too tight will turn your cheerful ladybug into a grumpy beetle with opinions.
No-Sew Wing Option
If sewing is not your thing, use hot glue or strong fabric glue to attach the straps. Reinforce the glued areas with small felt squares on top. This helps prevent the straps from peeling off when the wearer runs, jumps, or suddenly decides to become an aerodynamic insect.
Cardboard Wing Option
Cardboard is excellent for structured wings. Cut the wing shape from a flattened box, paint it red, let it dry, and add black spots. Cardboard wings hold their shape well and are great for photos. The downside is that cardboard does not love rain, so add clear tape to the edges or use foam board if the weather looks dramatic.
Tulle Wing Option
For a softer, fairy-like ladybug costume, use red tulle. Gather several layers together, tie them at the center, and attach them to the back of the outfit or to elastic shoulder straps. Add black felt spots with fabric glue. This version is lightweight, whimsical, and perfect for younger kids who want something less stiff.
Step 4: Make the Antennae
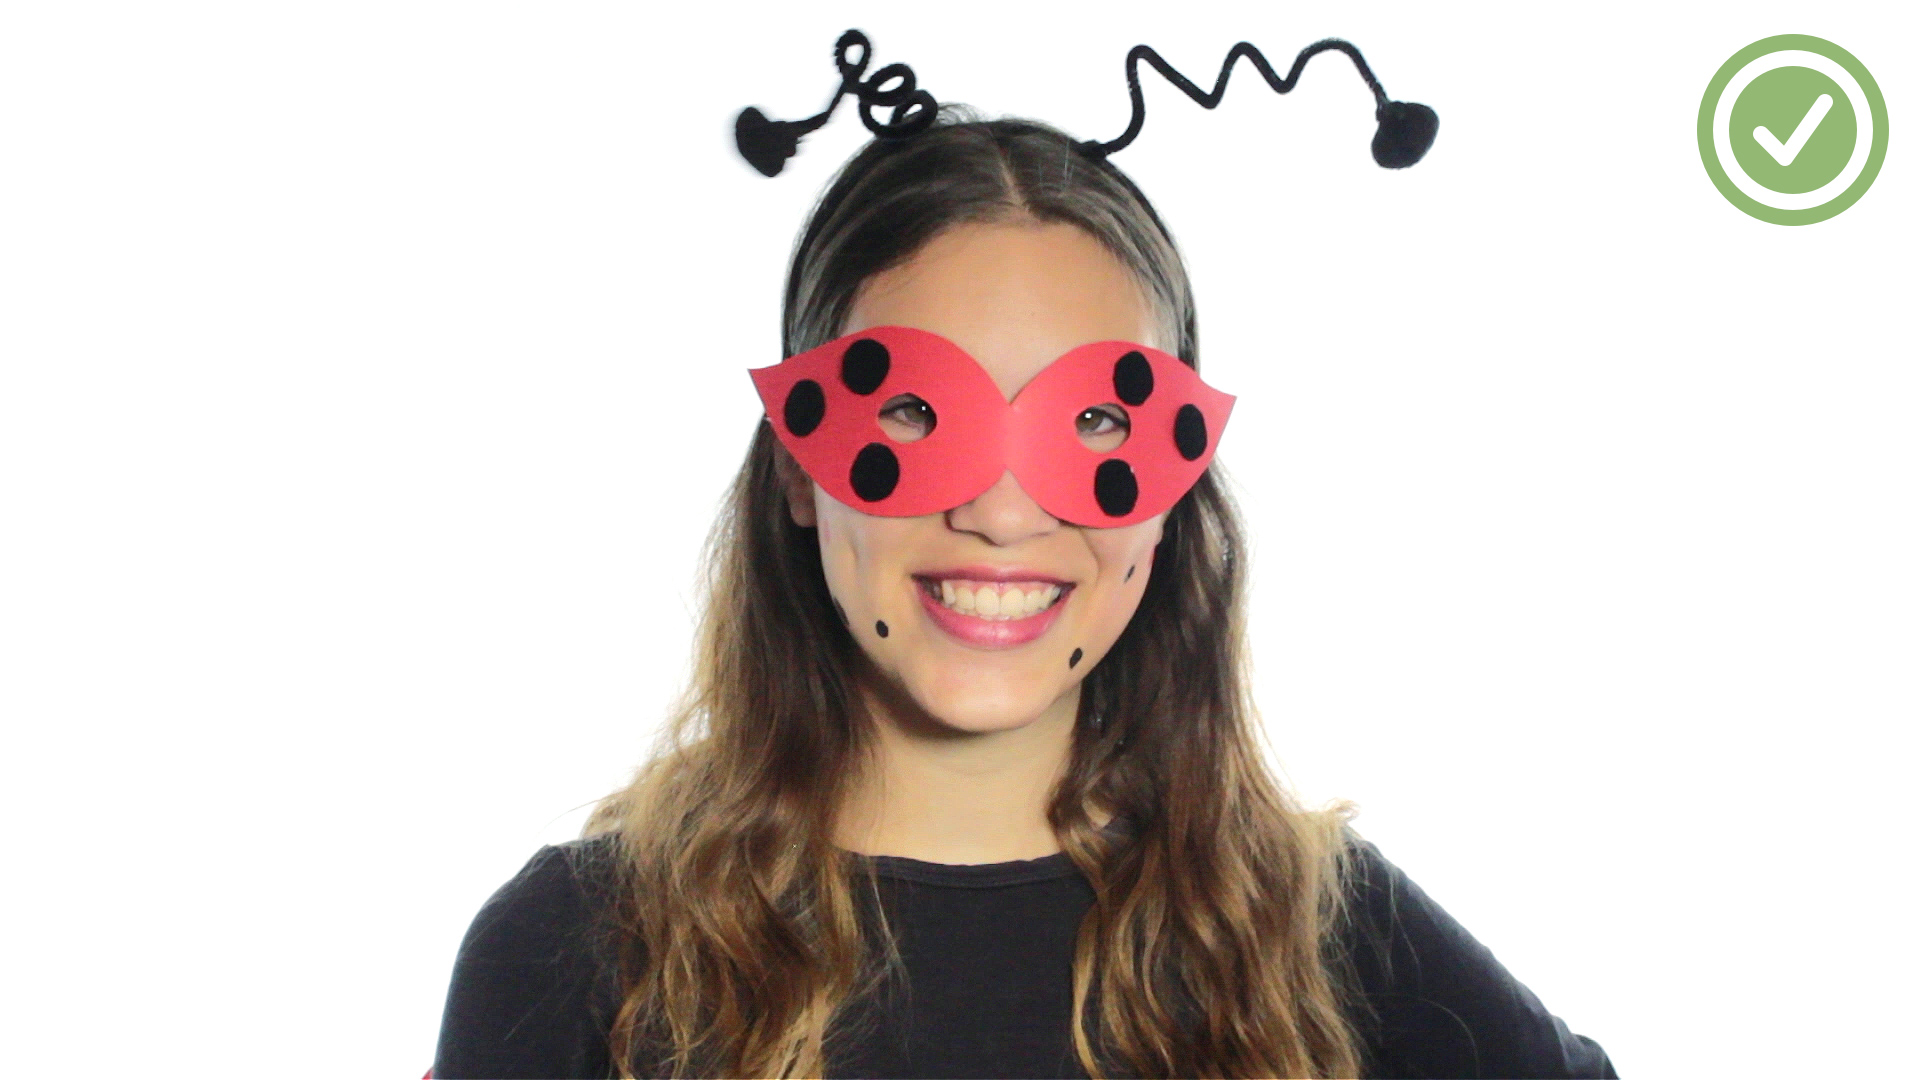
Antennae are quick, funny, and absolutely necessary. Take a black headband and wrap one black pipe cleaner around each side. Twist tightly so they stand upright. Curl the tops slightly or bend them outward. Glue a black pom-pom to the end of each pipe cleaner.
For a more playful look, use red pom-poms or glitter pom-poms. For toddlers, keep the antennae short and soft. Long antennae may look cute in photos but can become a doorway hazard, a sibling-poking device, or a snack-table disaster waiting to happen.
If the wearer does not like headbands, attach the pipe cleaners to a black beanie instead. A beanie is warmer, more secure, and harder to lose in a candy-fueled sprint.
Step 5: Add a Tutu or Skirt
A tutu is optional, but it gives the costume extra volume and charm. To make a no-sew tutu, cut strips of red and black tulle about twice the desired skirt length. Tie the strips around an elastic waistband using simple loop knots. Alternate red and black tulle for a fuller, more textured effect.
If you prefer a cleaner ladybug look, use mostly red tulle and add black felt dots around the skirt. Pair it with a red top and black leggings. The result is cute, comfortable, and dramatic enough for a child who enters every room like it is a Broadway stage.
For adults, a red skirt or black skirt with red accents can replace the tutu. A red dress with felt dots is the fastest version of all: add antennae and wings, and you are done.
Step 6: Finish with Shoes, Makeup, and Accessories
Black shoes are the easiest choice. Sneakers are best for trick-or-treating because they are sturdy and comfortable. Black boots work well for adults or older kids. Avoid slippery dress shoes if the wearer will be walking outdoors.
For makeup, keep it simple. A little red blush, black eyeliner dots on the cheeks, or a small painted ladybug on one cheek can add personality. Use non-toxic face paint, and test it on a small patch of skin first if the wearer has sensitive skin. Face paint is usually better than a mask because it does not block vision.
Accessories can include a red treat bag with black spots, a leaf-shaped candy tote, or a small flower prop. If the costume will be worn after dark, add reflective tape to the wings, shoes, or treat bag. Safety can still be cute. Think of it as ladybug glow-up technology.
Ladybug Costume Variations
Classic Kid Ladybug Costume
Use a red sweatshirt, black leggings, felt spots, red cardboard wings, and a pipe-cleaner headband. This version is warm, easy, and ideal for Halloween night.
Baby Ladybug Costume
Use a soft red onesie or red footed pajamas with felt spots attached carefully. Skip large wings if the baby will be carried or placed in a stroller. Instead, attach soft felt wings to the back or use a red blanket with black spots for photos.
Glam Ladybug Costume
Use a red dress, black tights, shiny black shoes, dramatic eyeliner, oversized wings, and sparkly antennae. Add a red lip for adults, and you have a costume that says, “Yes, I pollinate the party.”
Last-Minute Ladybug Costume
Wear a red shirt and black pants. Cut black circles from construction paper or felt and tape them to the shirt. Twist pipe cleaners onto a headband. Done. Is it couture? No. Will people know you are a ladybug? Absolutely.
School-Friendly Ladybug Costume
Use soft felt spots, small wings, and comfortable layers. Avoid glitter that sheds everywhere, large props, or anything that makes sitting at a desk impossible. Teachers already have enough surprises.
Safety and Comfort Tips
Before the costume makes its grand debut, check the fit. Wings should not drag on the ground. The tutu or skirt should not be so long that it causes tripping. Shoes should be comfortable enough for walking. Antennae should stay secure without poking the wearer or innocent bystanders.
If the costume is for Halloween night, visibility matters. Add reflective tape to the back of the wings or the treat bag. A flashlight, glow stick, or light-up bracelet can help drivers see children more easily. Choose layers that keep the wearer warm without hiding the costume completely.
Be careful with hot glue. Adults should handle glue guns, sharp scissors, and craft knives. Let glued pieces cool completely before trying on the costume. If using cardboard, smooth any rough edges with tape so they do not scratch clothing or skin.
Finally, avoid loose cords around the neck, tiny pieces that could detach for young children, and stiff props that could jab someone during play. A good costume should survive walking, sitting, laughing, candy sorting, and at least one dramatic pose for photos.
How Much Does a DIY Ladybug Costume Cost?
The cost depends on what you already have. If you own a red shirt and black leggings, you may only need felt, pipe cleaners, pom-poms, and elastic. That can keep the project very affordable. A more elaborate version with tulle, foam board, glitter, and accessories will cost more, but it is still usually cheaper than many store-bought costumes.
The biggest money-saving trick is to build the costume around regular clothes. A red hoodie can be worn again. Black leggings are useful beyond Halloween. Even a tutu can become dress-up clothing later. The wings and antennae are the only truly costume-specific parts, and they are easy to store for future bug emergencies.
Common Mistakes to Avoid
One common mistake is making the wings too large. Giant wings are fun until the wearer tries to get into a car, sit at a school desk, or walk through a doorway without taking out a lamp. Keep wings proportional and lightweight.
Another mistake is using weak tape on fabric. Regular tape may fall off quickly, especially if the costume is worn outdoors. Use fabric tape, safety pins, Velcro, or fabric glue when possible.
Do not place spots only on the front. Costumes are seen from every angle, especially in photos and while trick-or-treating. Add spots to the back of the shirt or wings for a complete look.
Also, remember comfort. Glittery, stiff, scratchy, or heavy materials may look great for five minutes but become a problem fast. A happy ladybug is better than a fancy ladybug who wants to go home before sunset.
Personal Experience: What Making a Ladybug Costume Teaches You
Making a ladybug costume is one of those projects that starts with confidence and quickly becomes a small comedy show at the kitchen table. At first, it seems almost too easy: red shirt, black dots, wings, antennae. Then you discover that cutting twelve identical circles is apparently a skill the universe only gives to kindergarten teachers and professional pastry chefs. The good news is that the costume still looks adorable even when the spots are slightly different sizes. In fact, the uneven spots often make it look more handmade in the best possible way.
One of the biggest lessons from making this costume is that simple ideas usually work best. The first instinct may be to add glitter, extra layers, huge wings, a fancy skirt, painted shoes, dramatic makeup, and perhaps a tiny bug crown because why not? But the most successful ladybug costumes are usually the ones that let the wearer move comfortably. Kids want to run. Adults want to sit down without making crunching sounds. Babies want nothing to do with your artistic vision. Keeping the costume soft, light, and flexible makes everyone happier.
The wing straps are usually the part that deserves the most patience. If they are too loose, the wings slide around like a backpack full of soup. If they are too tight, the wearer feels trapped. The best approach is to measure the straps while the person is wearing the base outfit, then test the wings before gluing everything permanently. A few extra minutes here can save a lot of adjusting later.
Another helpful experience is to make the costume in stages. Cut the spots one day, make the wings the next, and assemble the antennae last. This keeps the project relaxed instead of turning it into a late-night craft marathon fueled by candy corn and regret. If children are helping, give them safe tasks like placing spots, choosing pom-pom colors, or deciding where the biggest dot should go. Kids love being part of the process, and they are surprisingly serious creative directors.
Photos are also easier when the costume has one bold feature. Oversized wings, a fluffy tutu, or big antennae can make the whole outfit pop. Choose one star detail and let the rest support it. This keeps the costume from looking cluttered while still giving it personality.
In the end, a DIY ladybug costume is not just about making something cute. It is about creating a memory. There is something special about seeing ordinary craft supplies turn into a costume with character. The felt circles, the slightly wobbly antennae, the proud smile, the “Look, I’m a ladybug!” momentthat is the real payoff. And if a spot falls off halfway through the evening? That is not failure. That is just your ladybug molting dramatically.
Conclusion
Learning how to make a ladybug costume is easy, affordable, and genuinely fun. Start with a comfortable red-and-black outfit, add felt spots, create lightweight wings, and finish the look with antennae. From no-sew toddler costumes to sparkly adult versions, the ladybug theme works because it is simple, cheerful, and instantly recognizable.
The best DIY costumes do not need to be perfect. They need to be wearable, safe, and full of personality. Whether you are crafting for Halloween, a school event, a garden party, or a themed photo shoot, a homemade ladybug costume gives you plenty of room to be creative without needing advanced sewing skills. Keep it comfortable, add a few smart safety touches, and your little red-and-black bug will be ready to flymetaphorically, of course. Please do not test the wings from the couch.
Note: This article was written from a synthesis of real DIY costume methods, craft best practices, parenting costume tips, and Halloween safety guidance, then rewritten in original, publication-ready language.