Covering a book with contact paper is one of those oddly satisfying home projects that makes you feel responsible, crafty, and just a tiny bit like a school librarian with superpowers. A clear protective layer can help a paperback survive backpack chaos, coffee-table life, sticky fingers, and the mysterious crumbs that appear even when nobody remembers eating crackers.
Contact paper, also called self-adhesive covering film, is a thin plastic sheet with a peel-away backing. When applied carefully, it creates a wipeable surface that protects a book cover from scratches, smudges, light moisture, and everyday wear. The keyword here is carefully. Contact paper is sticky, and sticky things have opinions. Rush the job and you may trap air bubbles, wrinkle the corners, or accidentally laminate your own sleeve. Nobody needs that level of commitment.
This guide walks you through 15 practical steps for covering a book with contact paper, from choosing the right book to smoothing the final corner. It also includes troubleshooting tips, examples, and real-world experience so your book comes out neat, flexible, and ready for daily use.
Important note: Do not use contact paper on rare books, antique books, signed editions, collectible dust jackets, library books you do not own, leather covers, fragile cloth covers, or books with high sentimental or resale value. Adhesive film can permanently alter the cover and may be difficult or impossible to remove cleanly later.
Why Cover a Book with Contact Paper?
A contact paper book cover is useful when you want extra protection without buying a specialty book jacket. It works especially well for school textbooks, workbooks, cookbooks, frequently handled paperbacks, planners, notebooks, and kids’ books that seem to attract fingerprints like magnets attract paper clips.
The main benefit is durability. A covered book is easier to wipe clean and less likely to suffer curled corners or scuffed edges. For a cookbook, contact paper can protect against flour dust and small kitchen splashes. For a school book, it can defend against backpack friction, desk grime, and the dramatic daily journey between classes. For a paperback novel you plan to reread, it can keep the cover from looking like it completed military training.
Still, contact paper is not magic armor. It will not repair a broken spine, stop pages from falling out, or make a badly damaged book new again. Think of it as a raincoat, not a time machine.
Supplies You’ll Need
Before beginning, gather everything in one place. This prevents the classic crafting disaster where the sticky film is halfway attached and your scissors are somehow in another room.
- Clear contact paper or self-adhesive book covering film
- The book you want to cover
- Scissors or a craft knife
- Ruler or measuring tape
- Pencil
- Plastic card, ruler, or bone folder for smoothing
- Clean cloth for dusting the cover
- Flat work surface
Choose clear contact paper if you want the original cover art to remain visible. Matte film reduces glare and fingerprints, while glossy film makes colors pop but may show smudges more easily. If you are new to this project, removable or repositionable adhesive film is more forgiving than permanent film.
How to Cover a Book with Contact Paper: 15 Steps
Step 1: Choose the Right Book
Start with a book that is useful, replaceable, and meant for daily handling. School books, paperbacks, notebooks, and recipe books are good candidates. Avoid rare, old, fragile, leather-bound, cloth-bound, or collectible books. Once adhesive film touches a cover, removal can damage artwork, paper fibers, or surface coatings.
Step 2: Pick the Right Contact Paper
Use clear, smooth contact paper for most books. If the book will be handled heavily, choose a thicker book-covering film rather than thin decorative shelf liner. A grid on the backing paper is helpful because it makes measuring and cutting straighter. For beginners, repositionable contact paper is the friendliest option because it gives you a small chance to correct mistakes before the adhesive fully grips.
Step 3: Clean the Book Cover
Wipe the front cover, back cover, and spine with a dry, clean cloth. Dust, lint, and tiny crumbs can create bumps under the contact paper. If the cover is glossy and has a small smudge, use a barely damp cloth, then let the book dry completely. Never apply contact paper over moisture. That is how bubbles are born, and bubbles love drama.
Step 4: Prepare a Flat Workspace
Work on a clean table with plenty of space. Avoid carpet, beds, or uneven surfaces. Contact paper behaves better when it has a flat place to lie down and think about its choices. Good lighting also matters because you need to see the edges, corners, and any air pockets as you smooth.
Step 5: Measure the Book
Open the book and lay it cover-side down on the backing side of the contact paper. Include the front cover, spine, and back cover in your measurement. Add about 1.5 to 2 inches of extra contact paper around all outer edges. This extra border will fold inside the covers and hold the film in place neatly.
Step 6: Mark the Cutting Lines
Use a pencil and ruler to mark a rectangle on the backing paper. If your contact paper has grid lines, follow them for a cleaner cut. Do not cut too close to the book’s actual size. A little extra material is helpful; too little material turns the project into a tiny tragedy with scissors.
Step 7: Cut the Contact Paper
Cut along your marked lines with scissors or a craft knife. Keep the edges as straight as possible. A slightly uneven outer edge is not the end of the world because it will fold inside the book, but cleaner cuts make the finished cover look more professional.
Step 8: Position the Book Before Peeling
Place the book on the backing paper again to confirm the fit. Check that there is enough extra film on the top, bottom, front edge, and back edge. Make sure the spine area is centered. This dry run helps you avoid peeling the adhesive too soon, which is important because contact paper becomes very confident once exposed.
Step 9: Peel a Small Section of Backing
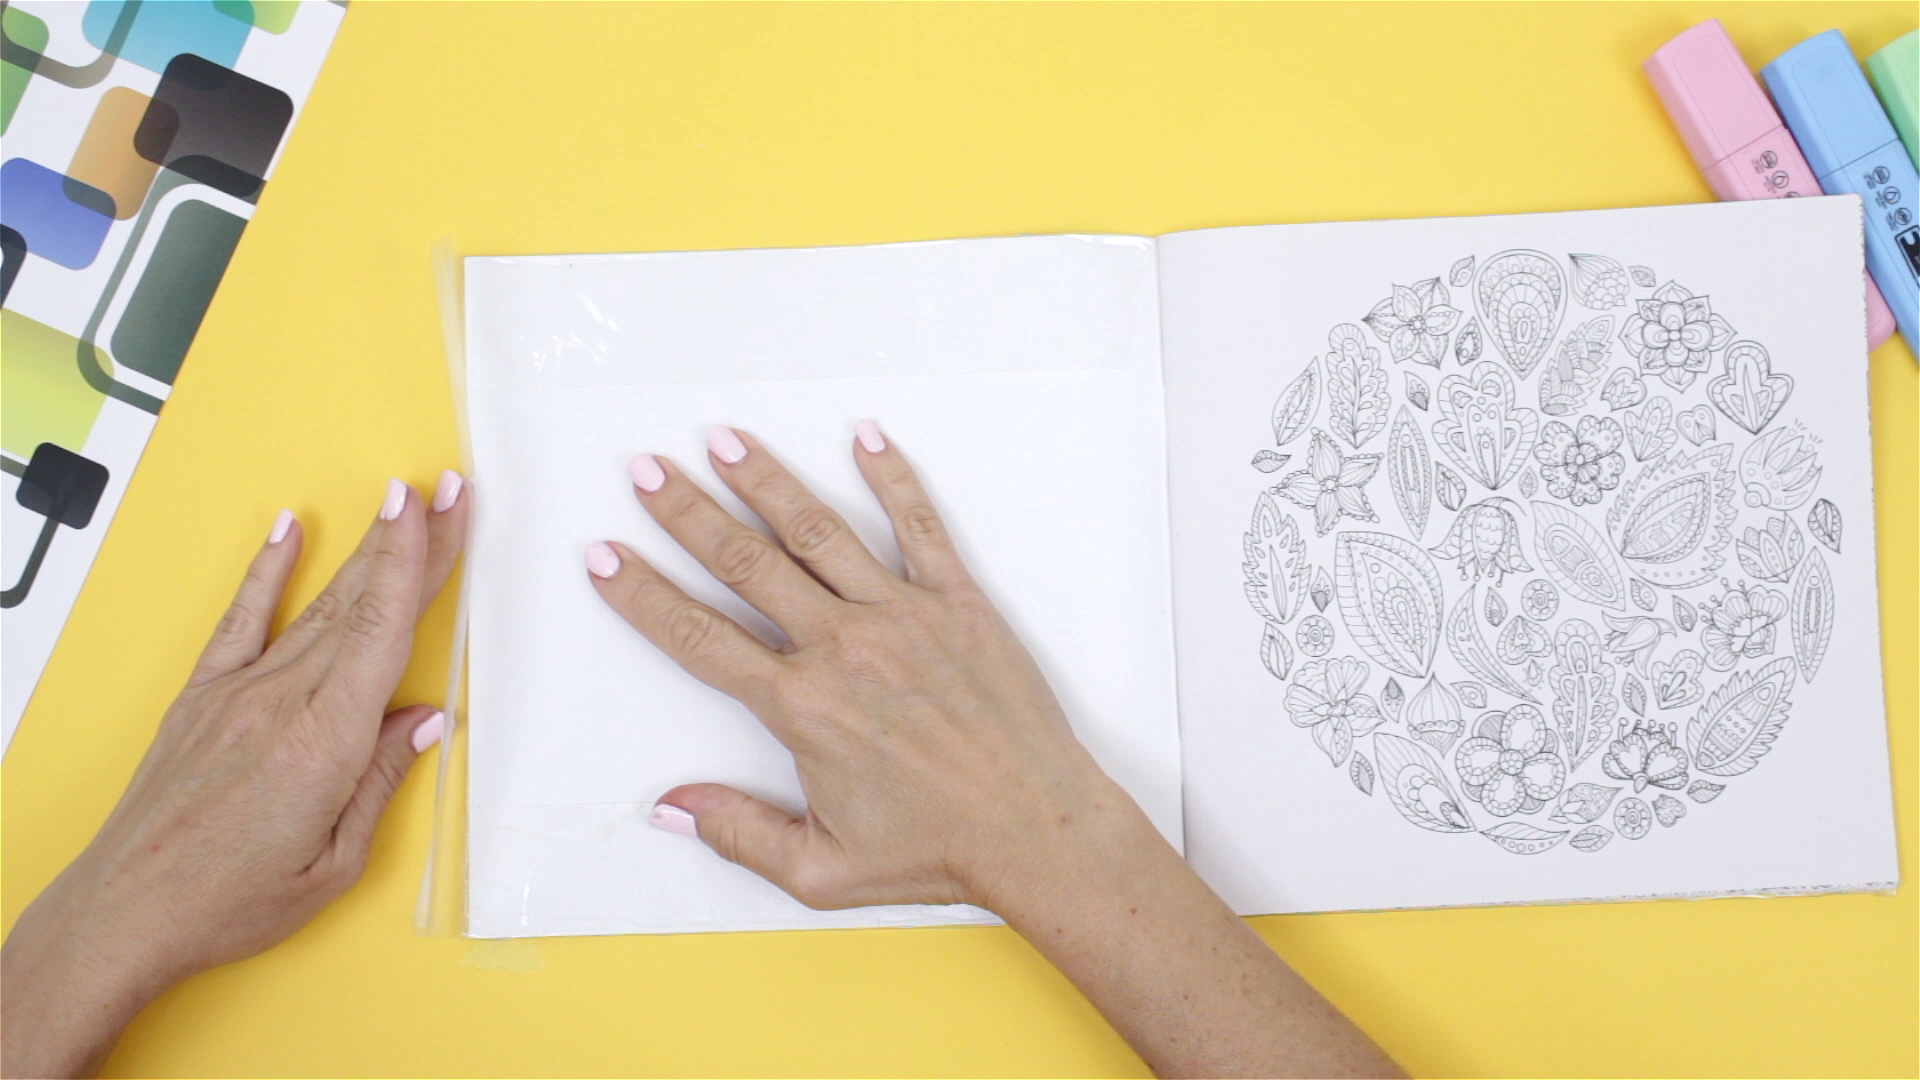
Do not peel the entire backing at once. Instead, peel back only 2 to 3 inches from one side. Place the front cover onto the exposed adhesive, starting near the spine and working outward. Keep the book aligned with your guide marks. This slow method reduces wrinkles and gives you better control.
Step 10: Smooth from the Center Outward
Use a plastic card, ruler, or your fingers to smooth the contact paper from the center of the cover toward the edges. Move slowly and press gently. If you push too hard, you may stretch the film. If you move too quickly, you may trap air. The goal is calm, steady pressure, not a wrestling match.
Step 11: Continue Across the Spine
Peel more backing as you move across the spine. Let the film settle naturally into the hinge area without pulling it too tight. This is important because a book needs to open and close comfortably. If the contact paper is stretched tightly over the spine, the cover may feel stiff or may pull when opened.
Step 12: Cover the Back Cover
Continue peeling and smoothing until the back cover is covered. Again, work from the spine outward. Use your smoothing tool to push air pockets toward the closest edge. If you see a small bubble, lift the film gently if possible and re-smooth. With permanent adhesive, lifting may damage the cover, so go slowly from the beginning.
Step 13: Trim the Corners
At each outside corner, cut the contact paper diagonally, leaving a small gap between the cut and the book corner. Do not cut right up against the book. Leaving a tiny bit of extra material helps cover the corner neatly when you fold the flaps inside. If the book has rounded corners, make smaller curved cuts or several tiny snips.
Step 14: Fold the Edges Inside
Fold the top, bottom, and side flaps of contact paper over the inside of the front and back covers. Press firmly with your smoothing tool. At the spine, cut small V-shaped notches where the cover bends so the film does not bunch up. Fold these small sections carefully and check that the book still opens naturally.
Step 15: Inspect and Smooth the Final Cover
Close the book and run your hand over the front cover, spine, and back cover. Open and close it a few times to make sure the hinges move freely. Press down any lifted edges. If you spot tiny bubbles, smooth them toward the edge. For stubborn bubbles, a very small pinprick can release trapped air, but use this only as a last resort and keep it subtle.
Common Mistakes to Avoid
Peeling All the Backing at Once
This is the fastest route to wrinkles, bubbles, and regret. Peel slowly in sections. Contact paper is much easier to control when only a small adhesive area is exposed.
Pulling the Film Too Tight
A tight cover may look smooth at first, but it can restrict the spine and make the book harder to open. Let the contact paper lie naturally, especially near the hinges.
Cutting Corners Too Close
If you trim right against the book corner, the original cover may peek through after folding. Leave a small margin so the corner stays protected.
Using Contact Paper on Valuable Books
This is the big one. Adhesive film can permanently change a book. For collectibles, use non-adhesive archival covers, dust jacket protectors, or consult a professional conservator.
Best Books to Cover with Contact Paper
Contact paper is best for books that need everyday protection rather than preservation-level care. A student planner, spiral notebook, paperback textbook, or frequently used workbook can benefit from a clear cover. Children’s books are also good candidates when they are not valuable editions, because the wipeable surface can handle normal household messes.
Cookbooks are another strong example. If you have ever tried to follow a recipe while flour is airborne and tomato sauce is plotting a landing, you understand the appeal of a protective cover. Contact paper will not make a cookbook waterproof, but it can make the cover easier to clean after ordinary kitchen use.
Contact Paper vs. Book Tape vs. Non-Adhesive Covers
Contact paper covers a large surface area and works well for full-cover protection. Book tape is better for reinforcing spines, edges, or small worn areas. Non-adhesive covers are best when you want protection without sticking anything directly to the book.
If the book is replaceable and used daily, contact paper is practical. If the book is collectible, old, or special, avoid adhesive products. For hardcovers with dust jackets, a non-adhesive jacket cover is usually a safer choice because it protects the jacket without bonding to it.
How to Remove Bubbles from Contact Paper
Small bubbles are common, especially on glossy covers. Start by pushing the bubble toward the nearest edge with a plastic card. Use slow, even pressure. If the bubble is near the center and will not move, you can prick it with a very fine pin and press the air out. Keep the hole tiny. The goal is invisible rescue, not a new design feature.
Wrinkles are harder to fix than bubbles. If the adhesive is still fresh and the cover surface is sturdy, you may be able to lift the film and reapply it. If the book cover is paper-based or matte, lifting may tear the surface. In that case, it is usually better to smooth what you can and call it “character.”
How Long Does a Contact Paper Book Cover Last?
A well-applied contact paper cover can last months or years, depending on the quality of the film and how often the book is handled. Books tossed into backpacks every day will wear faster than books that sit politely on a shelf. Edges and corners usually show wear first. If the film starts peeling, press it down early before dust gets under the adhesive.
Storage also matters. Keep covered books away from direct sunlight, excessive heat, and damp areas. Heat can soften adhesives, while humidity can encourage warping or mildew. A covered book still needs normal book care: dry hands, reasonable shelves, and no heroic balancing acts beside a bathtub.
Extra Tips for a Cleaner Finish
- Use a ruler or card wrapped in a soft cloth to smooth without scratching the film.
- Work slowly around the spine and hinges.
- Cut small relief notches where the cover bends.
- Let the book rest closed under light weight for a few hours after covering.
- Practice first on a notebook before covering an important book.
Experience Notes: What Actually Helps When Covering Books with Contact Paper
After covering a few books, you quickly learn that the job is less about strength and more about patience. The first mistake many people make is treating contact paper like wrapping paper. It is not wrapping paper. Wrapping paper is polite. Contact paper is clingy. Once the adhesive side touches the wrong spot, it wants to stay there and build a life together.
The best experience-based tip is to peel less backing than you think you need. Even a large textbook becomes manageable when you expose the adhesive in small sections. Start with a narrow strip, anchor the cover, smooth carefully, and then continue. This method feels slower, but it usually saves time because you are not battling wrinkles later.
Another lesson: the spine needs breathing room. Beginners often stretch the film tightly across the spine because it looks sleek when the book is closed. Then they open the book and discover the cover pulls awkwardly, like jeans after Thanksgiving dinner. Let the book sit in a natural, slightly open position while smoothing the spine area. The finished result may not look vacuum-sealed, but it will function better.
Corner trimming also improves with practice. Cutting too much from the corner leaves tiny exposed spots. Cutting too little creates bulky folds. The sweet spot is a diagonal cut that stops just short of the book corner. When folded, the flaps overlap neatly and protect the edge without creating a lump. If the corner looks bulky, make a tiny extra snip rather than forcing the fold.
For paperbacks, a single sheet across the front, spine, and back usually works well. For hardcovers, you need to be more careful around the hinge because the boards move differently. Some people prefer covering only the front and back boards separately, leaving the spine less restricted. This is especially useful when the book already has a stiff binding.
One surprisingly helpful trick is to use the backing paper as a shield. As you peel, keep the loose backing between your hand and the adhesive. This prevents fingerprints and keeps the sticky surface from grabbing dust. If a pet walks across the table during the project, pause immediately. Cat hair under contact paper is forever, and it will stare at you every time you read chapter three.
For cookbooks, matte contact paper is often more practical than glossy film because it hides fingerprints and small scuffs better. For colorful notebooks or children’s books, glossy film can make the artwork look brighter. The choice depends on how the book will be used. A desk planner may benefit from matte film, while a bright classroom workbook may look better with gloss.
The biggest experience lesson is knowing when not to cover a book. A cheap workbook? Go ahead. A favorite paperback you read on the bus? Reasonable. A first edition, signed copy, inherited family book, or vintage dust jacket? Step away from the adhesive. Use a non-adhesive cover instead. Good book care sometimes means doing less, which is wonderful news for anyone who enjoys responsible laziness.
Finally, accept that the first attempt may not be perfect. A tiny bubble or slightly uneven inside flap does not ruin the project. The outside is what people see, and the protection is what matters. By the second or third book, your hands understand the process better. By the fifth book, you may start looking around the house for more things to cover. This is normal. Contact paper confidence arrives quickly.
Conclusion
Learning how to cover a book with contact paper is a simple skill that can extend the everyday life of school books, notebooks, cookbooks, and frequently used paperbacks. The key is to choose the right book, measure generously, peel the backing slowly, smooth from the center outward, and give the spine enough flexibility to move. With a little patience, your book can gain a clean, protective cover without looking like it survived a craft-room thunderstorm.
For ordinary books, contact paper is affordable and effective. For valuable books, skip the adhesive and choose a safer preservation method. In other words: protect the books that need daily armor, but let the treasures age gracefully without sticky surprises.