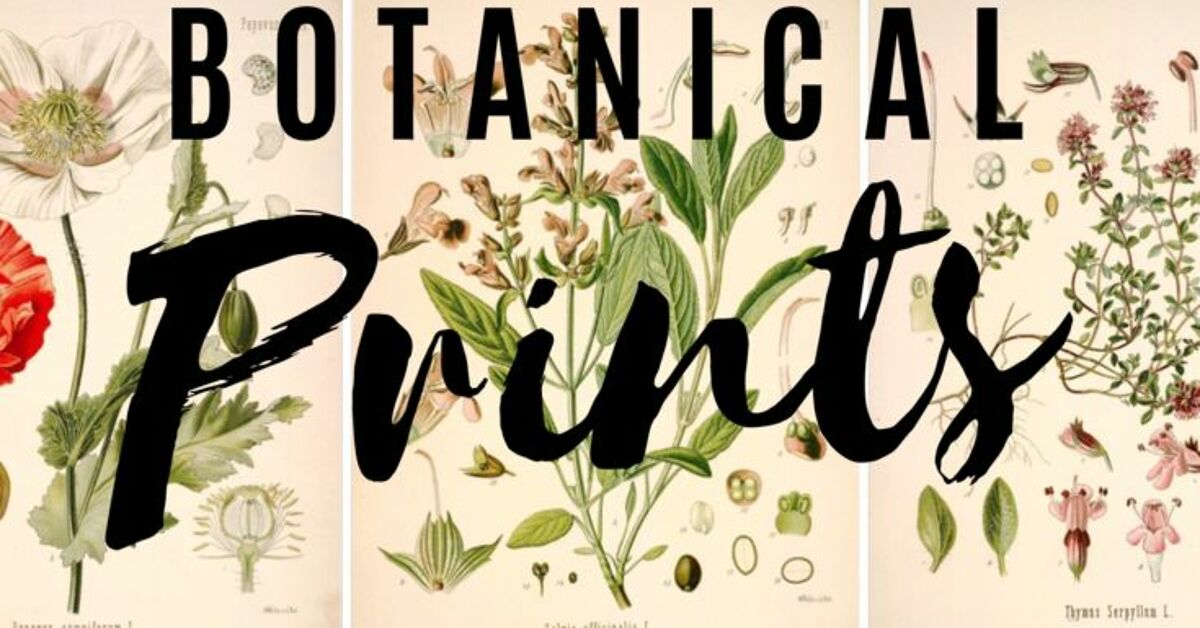
A botanical print gallery wall is one of those home projects that looks expensive, feels personal, and quietly whispers, “Yes, I know what a fern is.” Even better, you can make one without hiring a designer, buying museum-priced artwork, or drilling so many holes into your wall that it starts resembling Swiss cheese.
Botanical prints have a timeless charm because they bring nature indoors in a calm, elegant way. Whether you love vintage flower illustrations, moody green leaves, pressed herbs, scientific plant drawings, or soft watercolor florals, a botanical gallery wall can work in almost any room: living room, hallway, dining nook, bedroom, home office, kitchen, or even a powder room with decent ventilation.
This DIY guide walks you through how to choose botanical artwork, plan your layout, frame your prints, hang everything neatly, and avoid the classic gallery wall mistakes that make frames look like they got into an argument with gravity. By the end, you will have a wall that feels collected, intentional, and refreshingly leafy.
What Is a Botanical Print Gallery Wall?
A botanical print gallery wall is a curated arrangement of framed plant-themed artwork. The prints may feature flowers, leaves, herbs, fruit, trees, mushrooms, seed diagrams, antique scientific illustrations, or modern botanical photography. Unlike a single large piece of wall art, a gallery wall combines multiple pieces to create a stronger visual statement.
The beauty of botanical prints is their flexibility. You can create a polished grid with matching black frames and white mats, a vintage-inspired collection with brass and wood frames, or a relaxed cottage-style wall with mixed sizes and soft colors. Botanical art can feel traditional, modern, farmhouse, coastal, academic, bohemian, or minimalist depending on how you frame and arrange it.
Why Botanical Prints Work So Well in Home Decor
Botanical prints have staying power because they are calm but not boring. They add texture, color, history, and a sense of nature without demanding all the attention in the room. A gallery wall of roses, ferns, citrus branches, or wildflowers can soften hard edges, warm up blank walls, and make a room feel more finished.
Another major advantage is affordability. Many vintage botanical illustrations are available through public-domain archives, museum collections, library databases, and open-access image collections. You can also make your own botanical art using pressed flowers, leaf silhouettes, watercolor washes, or high-resolution photos from your garden. In other words, your wall can look custom even if your budget is currently saying, “Let’s be reasonable.”
Best Places to Use a Botanical Gallery Wall
Living Room
A botanical gallery wall can anchor the space above a sofa, console table, fireplace, or reading chair. For a living room, choose a layout that is wide enough to balance the furniture beneath it. A horizontal arrangement usually works well above a couch, while a taller grid can fill a narrow wall beside a window or bookcase.
Dining Room
Botanical art is a natural fit for dining spaces, especially prints featuring herbs, fruit, citrus trees, olives, grapevines, or edible plants. A set of six or nine matching prints in a grid can make a dining room feel formal without becoming stiff.
Bedroom
In a bedroom, softer botanical prints create a restful atmosphere. Look for muted greens, dusty pinks, cream backgrounds, lavender, eucalyptus, or delicate line drawings. Hang the collection above the headboard or on a side wall where it can be enjoyed without overwhelming the room.
Kitchen
Small botanical prints can bring character to a kitchen wall, breakfast nook, or pantry area. Herb prints, vegetable illustrations, and fruit studies are especially charming here. Use frames with glass or acrylic protection because kitchens are hardworking spaces with steam, splatters, and the occasional sauce incident.
Hallway or Staircase
Hallways and staircases are ideal for gallery walls because they often have long blank stretches. A botanical collection can turn a pass-through area into a mini art moment. For staircases, follow the angle of the stairs and keep spacing consistent.
Choose a Botanical Theme Before You Start
The easiest way to make a DIY botanical print gallery wall look intentional is to choose a theme. Without a theme, your wall can quickly look like a plant encyclopedia exploded. That might be educational, but not exactly relaxing.
Popular Botanical Gallery Wall Themes
- Vintage florals: roses, peonies, poppies, irises, tulips, and wildflowers
- Greenhouse style: ferns, palms, monstera leaves, ivy, and tropical plants
- Kitchen garden: herbs, citrus, tomatoes, artichokes, apples, pears, and figs
- Scientific illustration: labeled plant diagrams, seed studies, roots, and cross-sections
- Pressed flower look: delicate stems, transparent backgrounds, and shadow-box frames
- Minimalist botanical art: black line drawings, neutral backgrounds, and simple frames
For a polished look, choose prints that share at least one common element: color palette, paper tone, subject matter, frame style, or illustration style. They do not have to match perfectly. In fact, a little variation makes the wall feel collected rather than copied from a catalog.
Where to Find Botanical Prints
You have several options for sourcing botanical artwork. Public-domain collections are wonderful for vintage illustrations. Many museums, libraries, and archive projects provide high-resolution images that can be downloaded and printed. Search terms like “public domain botanical illustrations,” “vintage flower plates,” “fern botanical print,” “fruit illustration,” or “herbarium specimen art” can help you find beautiful options.
You can also buy printable botanical art from independent artists, thrift old garden books, scan pages from damaged books that are no longer usable, or create your own art. If you use any online image, check the usage rights before printing it for display, especially if you plan to publish photos of your finished wall on a website or use it in a commercial setting.
Supplies You Will Need
Before you start, gather everything in one place. Gallery wall projects become much more enjoyable when you are not wandering around the house asking where the tape measure went. Spoiler: it is probably in the garage, under something mysterious.
- Botanical prints or digital files
- Printer or professional print service
- Picture frames
- Mats, if desired
- Tape measure
- Pencil
- Painter’s tape
- Level or laser level
- Craft paper or newspaper for templates
- Scissors
- Picture hangers, nails, screws, anchors, or adhesive strips
- Stud finder for heavier frames
- Soft cloth for cleaning glass
Step 1: Decide on the Size of Your Gallery Wall
Start by measuring the wall space. If you are hanging the botanical gallery wall above furniture, use the furniture as your visual anchor. A common decorating mistake is making the arrangement too small. The gallery wall should usually be about two-thirds the width of the furniture below it. For example, if your console table is 60 inches wide, aim for an art arrangement around 40 inches wide.
Leave breathing room around the artwork. If you are hanging prints above a sofa or headboard, keep the bottom of the arrangement roughly 6 to 10 inches above the furniture. If the art floats too high, it can feel disconnected. If it sits too low, someone may eventually lean back and introduce their head to your fern print. Not ideal.
Step 2: Choose a Layout Style
The layout determines the entire mood of your botanical print gallery wall. A grid feels clean and classic. A salon-style arrangement feels collected and artistic. A linear row feels simple and modern. Pick the layout that fits both your room and your personality.
Grid Layout
A grid layout uses identical or similar frames arranged in rows and columns. This is the best choice if you want a formal, balanced look. It works beautifully for sets of six, nine, or twelve botanical prints. Use matching frames and consistent spacing for the most polished result.
Organic Gallery Layout
An organic layout uses different frame sizes and a looser arrangement. This style feels relaxed, vintage, and collected over time. It works especially well if your botanical prints vary in scale or if you want to mix flowers, leaves, landscapes, and small decorative objects.
Horizontal Layout
A horizontal layout is ideal above a sofa, bed, bench, or dining banquette. Use three to seven frames in a row, or create two staggered rows for more movement.
Vertical Layout
A vertical botanical gallery wall works well in narrow spaces such as entryways, powder rooms, reading corners, or the wall beside a cabinet. Tall plant illustrations, fern prints, and stem drawings are perfect for this format.
Step 3: Pick Frames and Mats
Frames can completely change the look of botanical prints. Black frames feel crisp and modern. Gold or brass frames add vintage charm. Natural wood frames create warmth and a relaxed organic feel. White frames keep things airy and coastal. Dark walnut frames can make botanical art feel like it belongs in a historic library, preferably one with a rolling ladder and someone saying “splendid.”
Mats are optional, but they often make prints look more expensive. A white or cream mat gives the artwork breathing room and creates a gallery-style finish. For vintage botanical prints with aged paper backgrounds, try warm white, ivory, linen, or pale beige mats rather than bright white.
If your prints are small, larger mats can help them command more presence. For example, an 8-by-10 botanical print in an 11-by-14 frame with a mat can look much more refined than the same print squeezed into a small frame.
Step 4: Print Your Botanical Art Correctly
For best results, use high-resolution images. A low-quality image may look fine on your laptop but print like it has just returned from a foggy vacation. Aim for files large enough for your frame size, especially if printing 11-by-14 inches or larger.
Choose paper based on the look you want. Matte paper works well for vintage botanical illustrations because it reduces glare and gives the print a soft, archival feel. Textured fine-art paper adds depth and looks more luxurious. Satin paper can work for botanical photography, while glossy paper is usually less ideal for vintage-style prints because it can reflect too much light.
You can print at home for small sizes, but a professional print shop is often worth it for larger pieces. Ask for matte or fine-art paper, and bring one test print home before ordering the entire set. Colors can shift from screen to paper, and your wall deserves better than accidental neon parsley.
Step 5: Plan the Arrangement on the Floor
Before making holes in the wall, lay your frames on the floor. Start with the largest or most important print, then build around it. Keep spacing consistent. For most gallery walls, 2 to 4 inches between frames works well. Smaller walls usually look better with tighter spacing, while large walls can handle slightly wider gaps.
Take a photo of your floor layout before moving anything. This gives you a reference when you start hanging. If you are working with a grid, measure carefully from frame edge to frame edge. If you are creating an organic arrangement, balance dark frames, bold prints, and larger pieces across the layout so one side does not feel visually heavier.
Step 6: Make Paper Templates
Paper templates are the secret weapon of gallery wall sanity. Trace each frame onto craft paper, newspaper, or leftover wrapping paper, then cut out the shapes. Mark the hanging point on each template so you know exactly where the nail or hook should go.
Tape the templates to the wall with painter’s tape. Step back and look at the arrangement from different angles. View it while standing, sitting, and walking into the room. Adjust until the layout feels right. This extra step can save you from patching holes later, which is less fun than almost anything else on the DIY menu.
Step 7: Hang the Frames
Once the templates look good, start hanging from the center or from the largest frame. Use a level as you go. If your frames are heavy, use proper wall anchors or hangers rated for the weight. For lighter frames, picture hanging strips may work, especially for renters, but follow the package directions carefully and check the weight limits.
After each frame is hung, remove the paper template and place the artwork on the hook. Continue outward, checking spacing and level lines as you go. When everything is up, clean the glass or acrylic with a soft cloth. The final dusting matters more than you think; fingerprints are tiny little joy thieves.
Step 8: Style the Area Around the Wall
A botanical print gallery wall looks best when it relates to the rest of the room. Add a plant nearby, but do not overdo it unless you want your living room to look like it is auditioning for a jungle documentary. A ceramic vase, woven basket, wood console, linen lamp shade, or stack of garden books can echo the natural theme without feeling too literal.
Repeat colors from the prints elsewhere in the room. If your botanical wall includes sage green, ivory, soft pink, and warm brown, bring those tones into pillows, throws, rugs, or tabletop decor. This makes the gallery wall feel connected to the room instead of pasted on as an afterthought.
DIY Botanical Art Ideas If You Want to Make Your Own Prints
Pressed Flower Frames
Press flowers or leaves between heavy books for one to three weeks, then arrange them on acid-free paper or between glass panels. This creates delicate, personal artwork that feels romantic and handmade. Use flowers from your garden, a meaningful bouquet, or herbs from the kitchen.
Leaf Silhouette Prints
Place leaves or faux stems on thick paper, lightly secure them with removable tape, and spray paint over them. When you remove the leaves, you will have a crisp botanical silhouette. This method works well with ferns, eucalyptus, palm leaves, and simple flower stems.
Botanical Book Page Art
Print botanical images onto old book pages for a layered vintage effect. Make sure the pages are not from rare or valuable books. Damaged thrift-store books, outdated dictionaries, or old garden manuals can work beautifully.
Watercolor Botanical Backgrounds
Create soft washes of green, blush, ochre, or blue watercolor, then print simple botanical line drawings over them. The result feels custom and modern, even if your painting skills peaked somewhere around elementary school art class.
Common Mistakes to Avoid
Hanging the Art Too High
Art should usually sit around eye level, but the right height depends on the room. In dining rooms or sitting areas, hang art slightly lower so it feels connected to seated eye level. Above furniture, keep the gallery wall visually tied to the piece below it.
Using Random Prints With No Connection
Botanical does not automatically mean cohesive. A tropical palm photo, a Victorian rose diagram, a neon cactus print, and a mushroom sketch can work together only if something unifies them. Use color, frame style, scale, or paper tone to create harmony.
Ignoring Frame Weight
Heavy frames need secure hardware. Do not rely on tiny nails for large frames, especially above beds, sofas, or benches. Gravity has no respect for your weekend project.
Skipping the Template Step
Templates may feel unnecessary until you hang nine frames and realize the whole arrangement is sliding downhill like a sad botanical parade. Tape templates first. Your future self will applaud politely.
Budget-Friendly Tips for a Botanical Gallery Wall
You do not need a luxury budget to create a beautiful botanical print gallery wall. Start by looking for free public-domain art from reputable museum and library collections. Print smaller sizes at home or through an affordable print shop. Buy frames in sets for a grid layout, or thrift frames and paint them the same color for a collected but cohesive look.
If custom mats are too expensive, look for ready-made frames that already include mats. You can also use oversized frames with smaller prints to create a high-end look. For a charming cottage feel, use clips, narrow wood rails, or picture ledges instead of traditional frames.
Experience Notes: What Actually Matters When Making a Botanical Print Gallery Wall DIY
After working through this kind of DIY project, one lesson becomes clear very quickly: the wall is not the hard part. The decision-making is. Choosing prints, frames, spacing, paper, and layout can take longer than the actual hanging. That is normal. A botanical print gallery wall is simple in theory, but the best results come from slowing down before the hammer comes out.
One practical experience is that matching frames are the easiest path for beginners. If you are nervous about making the wall look polished, choose six or nine identical frames and create a grid. It is almost impossible for a grid of botanical prints to look messy when the spacing is even and the frames match. This approach is perfect for dining rooms, kitchens, and home offices where structure feels appropriate.
However, mixed frames can look more personal. The trick is to repeat materials. For example, use a mix of antique brass, black, and warm wood, but repeat each finish at least twice. A single random gold frame can look accidental. Three gold frames look like a decision. Design often works that way: one odd choice is suspicious; repeated odd choices are style.
Another useful lesson is to test print colors before committing. Botanical art often has subtle tones, and screens can be misleading. A soft sage leaf on your monitor may print darker, bluer, or flatter than expected. Print one sample first and hold it in the actual room during the day and at night. Natural light, warm bulbs, and wall color can all change how the art reads.
Spacing also matters more than most people expect. If frames are too far apart, the gallery wall looks scattered. If they are too close, the arrangement feels cramped. For most botanical print walls, 2 to 3 inches between frames is a safe starting point. In a large hallway or above a sofa, 3 to 4 inches can work. For small prints, tighter spacing usually looks better.
One of the best DIY tricks is to photograph every layout option. Arrange the frames on the floor, take a photo, change the arrangement, and take another photo. Comparing photos makes it easier to spot balance problems. Sometimes the eye misses what the camera catches, especially when you have been staring at twelve fern prints for forty minutes and they all start looking like distant cousins.
It is also wise to think about moisture and sunlight. Botanical prints can fade if placed in strong direct sun, especially inexpensive home prints. Bathrooms and kitchens can be tricky because humidity may ripple paper or trap moisture under glass. If you want botanical art in those spaces, use inexpensive prints, sealed frames, good ventilation, and avoid placing valuable originals there.
Finally, do not rush to fill every inch. A gallery wall should have breathing room. Negative space is not empty; it is what lets the artwork feel calm. Botanical prints are naturally detailed, so a little restraint helps them shine. When done well, the finished wall feels like a quiet garden inside your home: organized, fresh, personal, and thankfully free of actual watering duties.
Conclusion
Making a botanical print gallery wall DIY is one of the most rewarding ways to refresh a room without a major renovation. You can use vintage illustrations, public-domain artwork, pressed flowers, handmade silhouettes, or modern plant photography to create a wall that feels meaningful and stylish. The key is to choose a clear theme, print your artwork well, use frames that support your room’s style, plan the layout before hanging, and keep spacing consistent.
Whether you prefer a neat grid of herb prints in the kitchen or a romantic mix of floral illustrations in the bedroom, botanical art brings warmth, nature, and personality into your home. Best of all, it is a DIY project that looks far more expensive than it has to be. Your wall gets a glow-up, your budget survives, and your plants do not even need sunlight.
SEO Tags
Note: This article is written in original, publish-ready HTML body format and is based on practical DIY decorating guidance, gallery wall layout principles, and real botanical art sourcing methods.