A polished ballet bun is more than a pretty swirl of hair. It keeps hair away from the face and neck, helps teachers see alignment, survives turns without becoming a tiny helicopter, and gives dancers that clean, classical look associated with the studio and the stage. The good news? You do not need a professional stylist, a magic wand, or the patience of a saint. You need the right tools, a few smart tricks, and about ten minutes of practice.
This guide explains how to make a ballet bun in 12 clear steps, including tips for thick hair, fine hair, curly hair, short layers, textured hair, recital days, and those “we have class in five minutes” mornings. Let’s build a bun that stays put from plié to grand allegro.
Why a Ballet Bun Matters
A ballet bun is designed for function first. In class, loose hair can cover the eyes, hide the neckline, distract the dancer, or interfere with spotting during turns. A neat bun keeps the head and neck visible, which helps with posture, balance, and teacher corrections. On stage, it also creates a smooth silhouette under lights, headpieces, tiaras, flowers, or costume accessories.
The classic ballet bun usually sits at the center back of the head, not too high and not too low, unless a teacher or performance style asks for a specific placement. A low bun may suit certain romantic ballet looks, while a higher bun may be requested for some contemporary or competition styles. When in doubt, check your studio dress code first. The bun may be small, but apparently it has rules. Very dramatic rules.
What You Need to Make a Ballet Bun
Gather your supplies before starting. A ballet bun is much easier when you are not searching for a hairnet while holding a half-twisted ponytail with one hand and questioning your life choices with the other.
- Hairbrush or detangling brush
- Fine-tooth comb
- Strong hair elastic
- Hair gel, styling cream, or water spray bottle
- Hairpins or U-shaped bun pins
- Bobby pins for flyaways and short pieces
- Hairnet close to the dancer’s hair color
- Hairspray for finishing hold
- Optional: edge brush, soft bristle brush, small elastics, headband, or bun cover
Hairpins and bobby pins are not the same. Hairpins are usually better for anchoring the bun because they grab more hair and hold the coil against the head. Bobby pins are great for securing bangs, wisps, and rebellious little pieces that think they are soloists.
How to Make a Ballet Bun: 12 Steps
Step 1: Start with brushed, detangled hair
Brush through the hair from ends to roots to remove tangles. Smooth hair is easier to gather, twist, and pin. If the hair is curly, coily, or textured, use a detangling product, water, or a small amount of styling cream to make the hair more manageable without forcing it flat or dry. The goal is neat and secure, not uncomfortable.
Step 2: Decide where the bun should sit
For a traditional ballet bun, place it at the center back of the head, roughly in line with the ears. This placement keeps the bun balanced and usually prevents it from showing from the front. A recital, audition, or exam may require a specific position, so follow any instructions from the teacher or costume director.
Step 3: Smooth the hair toward the bun placement
Use a brush or comb to direct all hair toward the chosen spot. Apply a light mist of water, a pea-sized amount of gel, or a smoothing cream to control frizz and flyaways. For a sleek ballet bun, brush the top, sides, and nape until the surface looks even. Avoid using too much product at once; you can always add more, but removing crunchy helmet hair is a different Olympic event.
Step 4: Create a firm ponytail
Gather the hair into a tight ponytail and secure it with a strong elastic. The ponytail is the foundation of the ballet bun, so make sure it feels stable before moving on. If the ponytail is loose, the finished bun will wobble, sag, or slowly migrate during class. For thick hair, two elastics may give better support. For fine hair, use a smaller elastic that grips without slipping.
Step 5: Check for bumps before twisting
Look at the hairline, crown, sides, and nape. Smooth any bumps with a comb, brush, or damp fingers. If short layers are escaping, pin them now with bobby pins. It is easier to fix bumps before the bun is built than after it has become a tiny architectural project.
Step 6: Twist the ponytail into a rope
Hold the ponytail straight out from the head and twist it firmly from the base to the ends. The twist should be snug but not painful. If the hair is very long, keep tension even so the bun does not become bulky on one side. If the hair is very thick, split the ponytail into two sections, twist each section, and wrap them one at a time for a flatter, more secure shape.
Step 7: Wrap the twist around the elastic
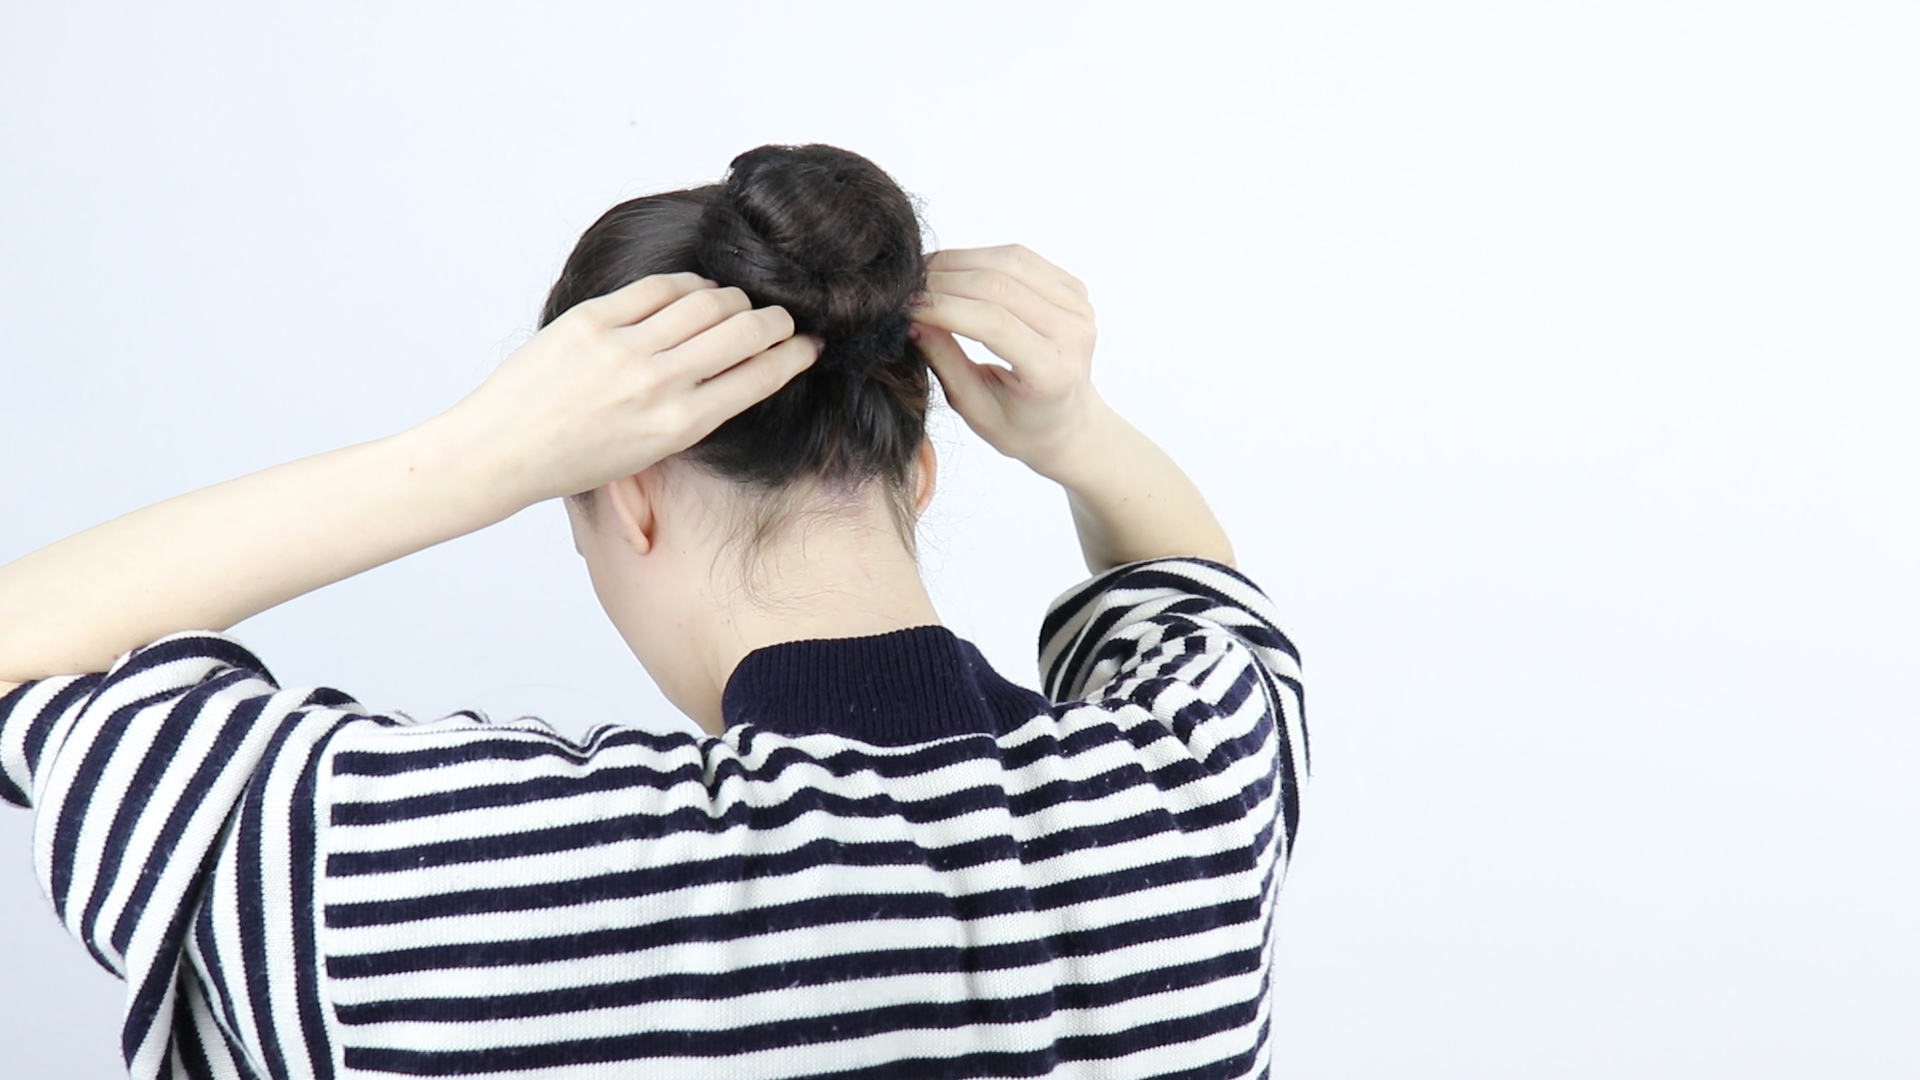
Coil the twisted ponytail around the base of the ponytail in the same direction as the twist. Keep the bun flat against the head rather than stacking it into a tall knob. A good ballet bun should look round, balanced, and close to the scalp. Tuck the ends underneath the coil so they do not stick out like a tiny hair antenna.
Step 8: Pin the bun as you wrap
Do not wait until the whole bun is wrapped before pinning, especially if the hair is thick or long. Insert hairpins around the bun as you coil. Slide each pin into the edge of the bun, catch a small amount of hair from the scalp, then push the pin inward toward the center. Think of placing pins around a clock: 12, 3, 6, and 9 first, then fill in the gaps.
Step 9: Add a hairnet
Place a hairnet over the bun, twist the extra netting, and wrap it around the bun again until it fits snugly. A hairnet is the secret weapon of a clean ballet bun. It holds layers, flyaways, and loose ends in place while making the bun look smoother. Choose a hairnet that matches the hair color as closely as possible so it blends naturally.
Step 10: Pin the hairnet and secure the shape
Use more hairpins to anchor the hairnet and refine the bun shape. Press the bun gently so it lies flat and even. Add pins wherever the bun feels loose. The finished bun should feel secure when the dancer shakes their head lightly, but it should not pull painfully at the scalp. Secure does not mean “instant headache.”
Step 11: Control flyaways, bangs, and short layers
Use a small amount of gel, hairspray, or styling cream to smooth flyaways around the hairline and nape. Bobby pins can hold bangs or shorter front pieces away from the face. For textured hair, braids, twists, or locs, secure loose ends off the neck and keep the style comfortable and stable. The clean line matters, but so does respecting the hair’s natural texture and avoiding unnecessary tension.
Step 12: Finish with hairspray and a final check
Lightly mist the bun and hairline with hairspray. Check the bun from the front, sides, and back. Make sure no pins are poking, the hairnet is hidden, and the bun is centered. The dancer should be able to turn, jump, and bow without the bun launching into the audience. If it passes the gentle head-shake test, it is ready for class, rehearsal, or performance.
Ballet Bun Tips for Different Hair Types
For thick hair
Thick hair often needs stronger elastics, larger hairpins, and more pinning points. Try dividing the ponytail into two sections and wrapping them separately around the base. This creates a flatter bun and avoids the “cinnamon roll skyscraper” effect.
For fine or slippery hair
Fine hair may need texture before styling. A little hairspray, dry shampoo, or styling spray can help pins grip. Use smaller pins and a smaller hairnet so the bun does not look oversized or loose.
For curly or textured hair
Moisture and gentle handling are key. Detangle carefully, use a smoothing product that works with the hair texture, and avoid pulling too tightly at the edges. A soft brush or edge brush can help polish the hairline. For braids, twists, or locs, gather the hair securely and pin loose ends away from the face and nape.
For short hair or layers
Short hair may need extra bobby pins, small elastics, a headband, or a French twist alternative. If the hair cannot form a full bun yet, secure it away from the face and neck as neatly as possible. Many studios accept practical solutions for growing-out stages because hair, like ballet turnout, does not improve overnight.
Common Ballet Bun Mistakes to Avoid
The most common mistake is starting with a loose ponytail. If the ponytail is not secure, the bun cannot be secure. Another mistake is relying only on bobby pins instead of hairpins. Bobby pins are useful, but U-shaped hairpins usually hold the bun more effectively.
Skipping the hairnet is another classic problem. Without a net, the bun may look tidy at home and then slowly unravel during class. Too much product can also be an issue. The bun should look polished, not like it has been shellacked for display in a museum. Use enough gel or hairspray to control hair, but keep the style comfortable and natural-looking.
Finally, avoid painful tension. A ballet bun should be snug, not punishing. If the dancer has a headache, scalp soreness, or pulling around the edges, loosen and redo the style with more pins and less elastic tension.
Performance-Day Ballet Bun Checklist
For recitals, auditions, competitions, and exams, prepare the bun a little more carefully than you would for an ordinary class. Pack extra hairnets, elastics, pins, and hairspray in the dance bag. Label supplies if several dancers are sharing a dressing room, because bobby pins disappear faster than snacks backstage.
Before leaving home, check that the bun is centered, smooth, and compatible with any headpiece. If a tiara, ribbon, flower, or costume accessory is required, pin it securely to the hair and not just to the hairnet. A beautiful accessory is less charming when it makes a dramatic escape in the middle of a pirouette.
Real-Life Experience: What Actually Helps a Ballet Bun Last
After making enough ballet buns, you learn that the perfect bun is not always the one that looks flawless in the bathroom mirror. It is the one that survives warm-up, barre, center work, jumps, costume changes, and the mysterious chaos of backstage hallways. A ballet bun has a job, and that job is staying calm while everyone else is looking for their left shoe.
One of the most useful experiences is learning that preparation matters more than panic. A dancer with clean, brushed, slightly damp hair is much easier to style than a dancer who arrives with dry tangles and three minutes before class. Keeping a small “bun kit” in the dance bag saves the day again and again. The kit does not need to be fancy. A zip pouch with elastics, pins, hairnets, a travel brush, a mini hairspray, and a few emergency bobby pins can prevent a lot of pre-class drama.
Another practical lesson is that every head of hair behaves differently. Some dancers need gel before the ponytail. Others need hairspray after the bun. Some thick hair needs two elastics. Fine hair may need a little texture so pins do not slide out. Curly and coily hair often holds beautifully when it is moisturized and handled gently, but it should never be forced into a painful style just to look “sleek.” A good ballet bun respects the dancer’s hair while still meeting class or performance needs.
Parents and beginners often worry because their first bun looks lumpy. That is normal. Ballet buns improve with repetition. The first attempt may look like a sleepy bagel. The fifth attempt looks better. By the twentieth, you may become the unofficial dressing-room bun expert, which is a powerful title and should come with snacks.
The best trick is to pin with intention. Randomly stabbing pins into the bun rarely works. Instead, anchor the bun at four main points first, then add more pins where the bun feels loose. A hairnet also makes a huge difference. Many beginners skip it because the bun already looks finished, but the net keeps the style neat after movement begins. It is the quiet hero of ballet hair.
Finally, comfort matters. A bun that hurts will distract the dancer, especially during a long rehearsal or performance day. The dancer should be able to move freely, turn the head, and focus on dancing. The bun should support the performance, not become the main character. When the hair is secure, the dancer can stop thinking about flyaways and start thinking about musicality, posture, and maybe remembering the combination after the teacher only showed it once.
Conclusion
Learning how to make a ballet bun is a small skill with a big payoff. A neat bun keeps hair controlled, supports a clean ballet line, and helps dancers feel prepared for class, rehearsal, auditions, and performances. The key steps are simple: smooth the hair, make a firm ponytail, twist and wrap the bun flat, secure it with hairpins, cover it with a matching hairnet, and finish with light hairspray.
Do not worry if the first few attempts are not perfect. Like pliés, pirouettes, and remembering which side is stage left, ballet buns improve with practice. With the right tools and a little patience, you can create a polished, comfortable, stage-ready bun that stays put from the first tendu to the final bow.
Note: Always follow your dance school, audition, or performance dress code when it gives specific hair requirements.