A broken PopSocket can turn one-handed texting into an unexpected juggling audition. One moment your phone grip is doing its job; the next, the top is rolling under the couch while the base remains attached to your case like nothing happened.
Fortunately, many apparently broken PopSockets are not truly ruined. The top may have twisted out of its locking mechanism, the flexible accordion may have popped loose, or the reusable gel base may simply be dirty. Even a worn adhesive pad or a small crack can sometimes be repaired without replacing the entire accessory.
This guide explains how to fix or reattach a broken PopSocket using four practical methods. You will also learn how to identify the damaged part, choose a safe adhesive, avoid harming your phone, and decide when replacement makes more sense than repair.
First, Identify What Actually Broke
Before reaching for glue, examine the PopSocket carefully. Adding adhesive to the wrong area can turn a five-minute repair into a tiny plastic monument to regret.
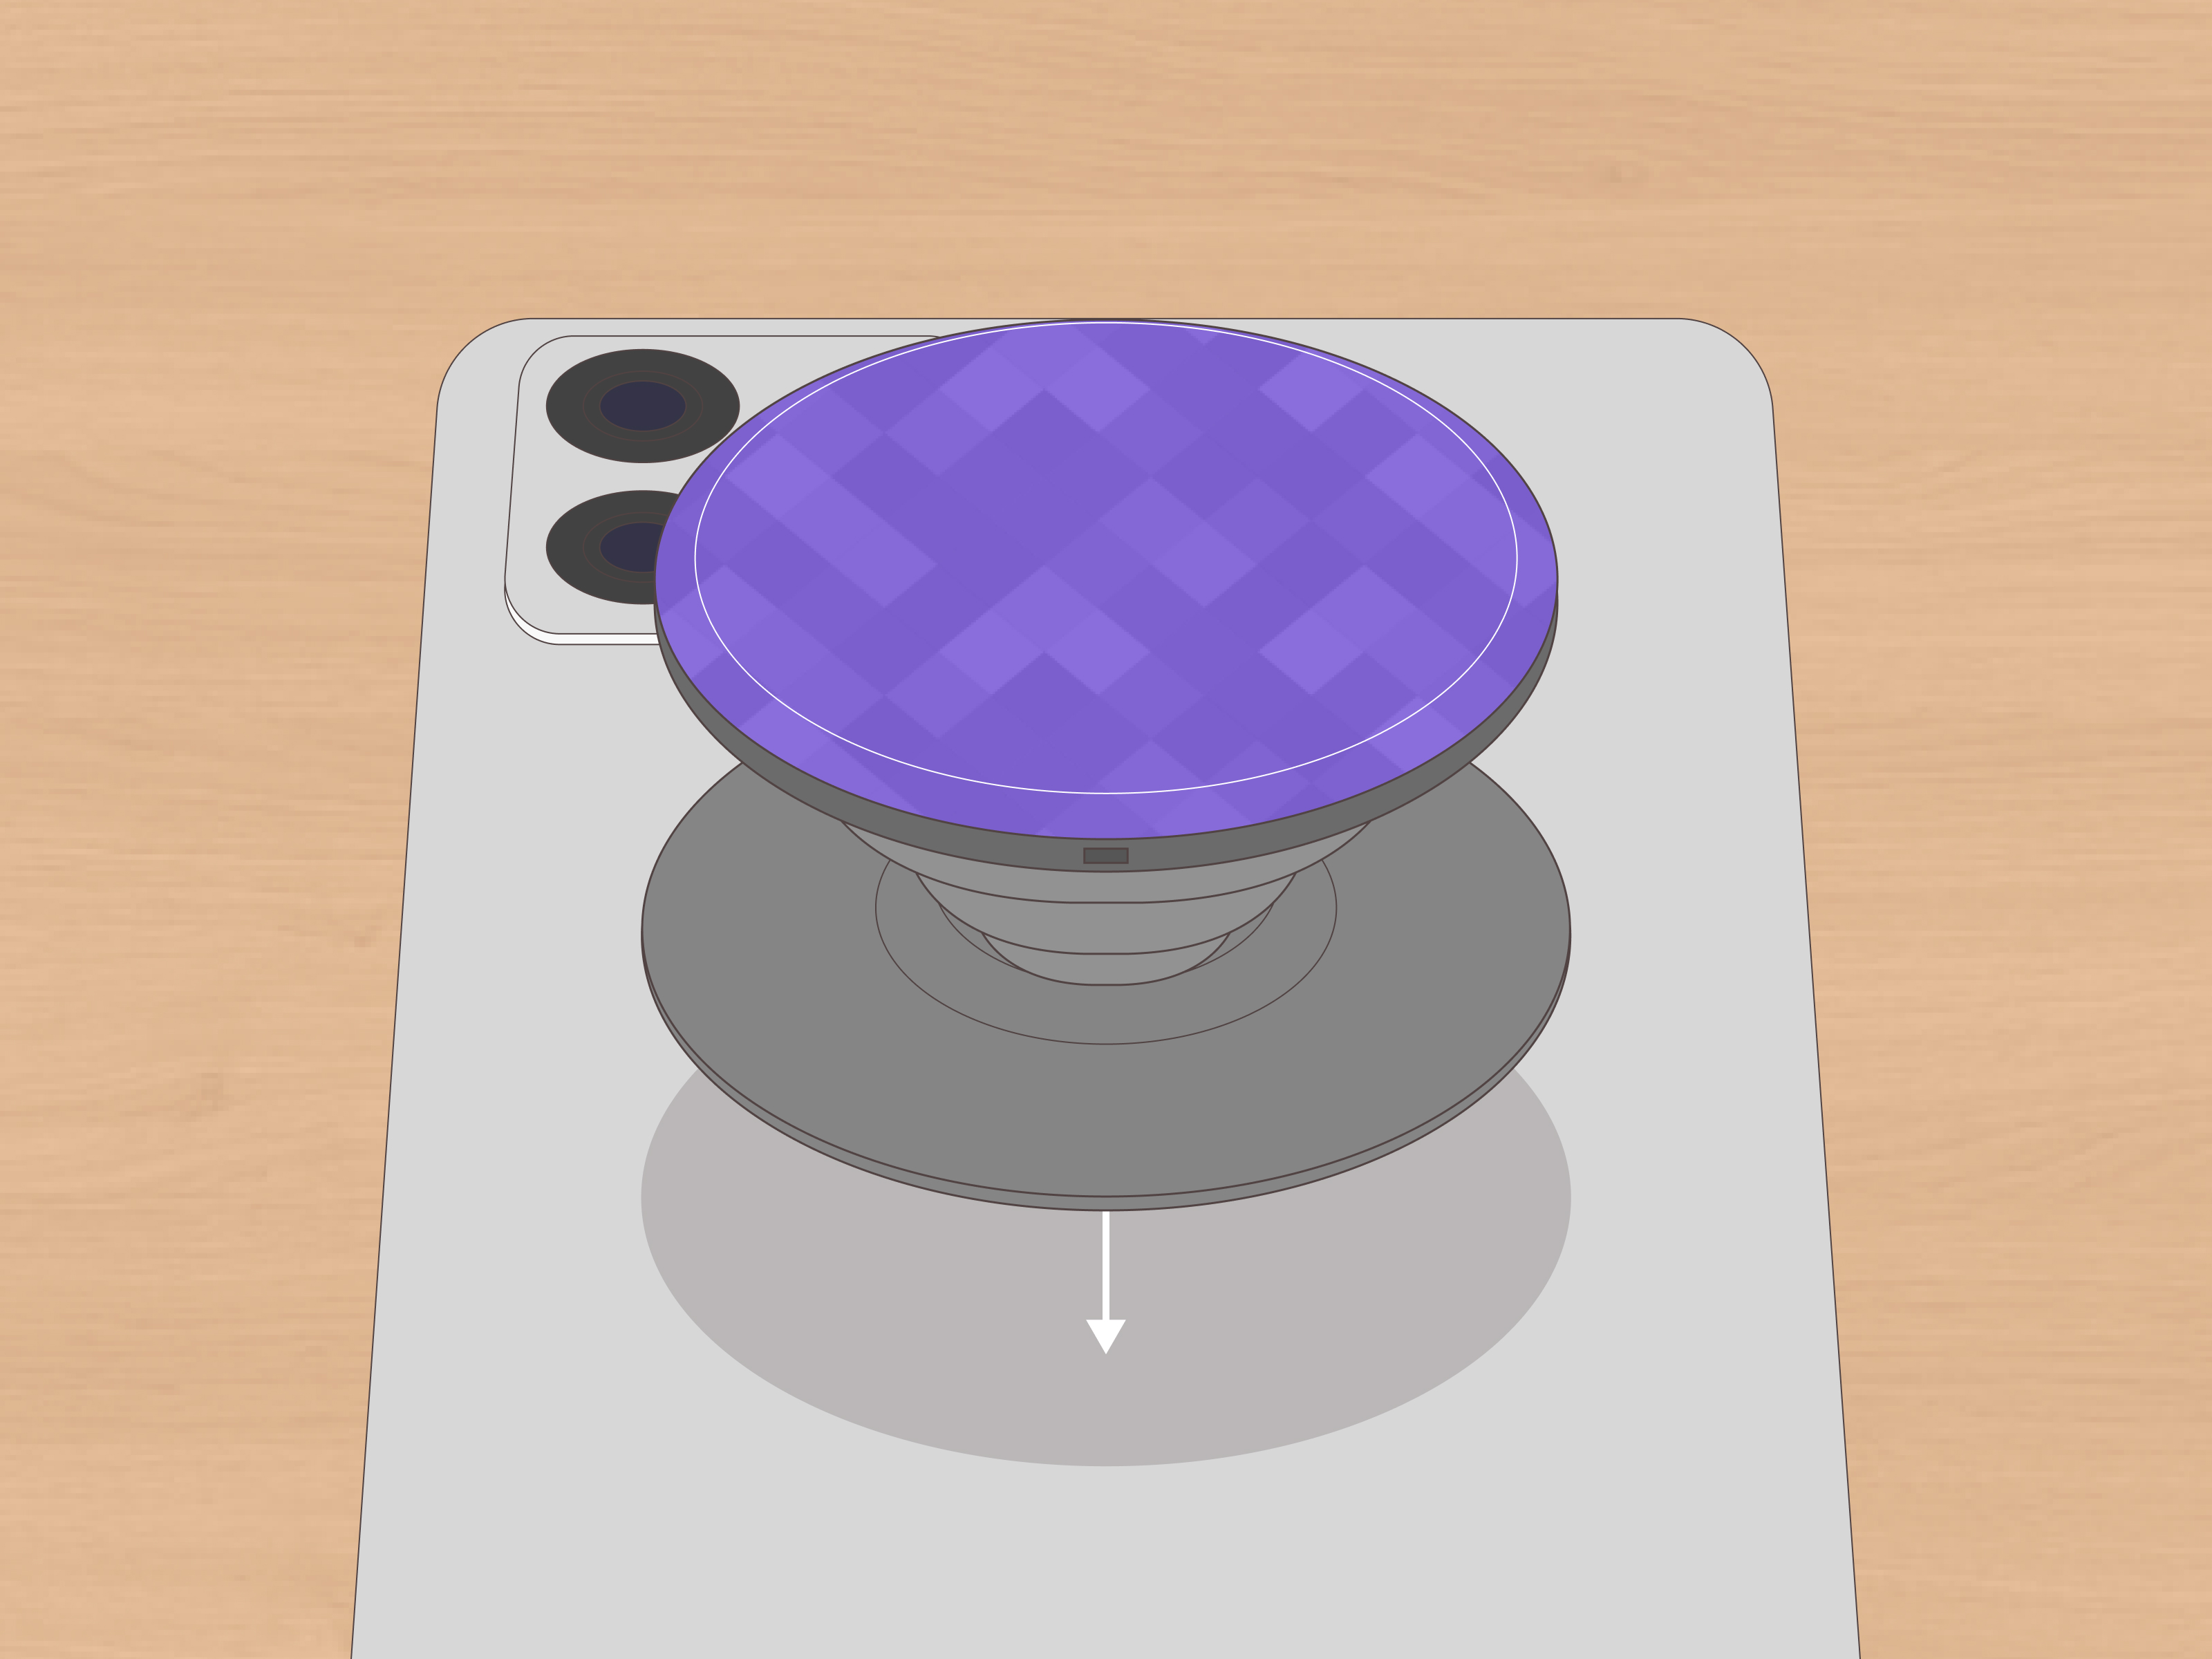
A standard adhesive phone grip generally has several parts:
- The PopTop: The decorative round piece your fingers touch.
- The accordion or flexible cone: The collapsible section that expands and contracts.
- The locking platform: The plastic section connecting the top to the base.
- The adhesive base: The flat disk that attaches to the phone or case.
Magnetic PopSockets are slightly different because they attach through a magnetic platform rather than a permanent adhesive disk. If a magnetic grip keeps falling off, the issue may be weak magnetic alignment, an incompatible case, or a missing magnetic adapter ringnot failed glue.
Common PopSocket Problems
Your repair method depends on the symptom:
- The decorative top came off, but nothing appears cracked.
- The accordion pulled out of the base or locking ring.
- The entire PopSocket fell off the phone because the base stopped sticking.
- A plastic tab, stem, or edge cracked.
If the central stem is shattered, the accordion is torn, or several locking tabs are missing, replacement is usually safer. A phone grip supports the weight of an expensive device, so this is not the ideal place for heroic optimism.
Tools and Supplies You May Need
Most PopSocket repairs require only a few household items:
- A clean microfiber cloth
- Warm water
- Mild dish soap
- Cotton swabs
- Tweezers or a plastic opening tool
- Replacement phone-grip adhesive disk
- Plastic-compatible flexible glue or gel super glue
- Wax paper or a disposable work surface
Remove your phone from its case before using water, alcohol, or glue. Never apply liquid adhesive while the case is still installed. Glue can run into buttons, speaker openings, camera rings, charging ports, or seams around the back panel.
Method 1: Reattach a PopTop That Twisted Off
Many newer PopSocket models use a swappable top. That means the decorative PopTop is designed to come off. If it separated without cracking, it may not be broken at allit may simply have escaped.
How to Reinstall the PopTop
- Press the accordion section down until the grip is fully collapsed.
- Inspect the top and locking platform for dirt, bent tabs, or broken plastic.
- Align the grooves or tabs on the underside of the PopTop with the matching slots in the platform.
- Press the top downward gently.
- Rotate it approximately 90 degrees until it locks into place.
- Pull the grip open slowly and test it several times.
PopSockets describes a similar process for swappable tops: collapse the grip, press and twist the top about 90 degrees, remove or reinstall it, and twist it into the locked position.
Do not force the top if it refuses to rotate. Remove it, check the alignment, and try again. Forcing misaligned tabs can shave down the plastic and prevent the mechanism from locking securely.
How to Test the Repair
Open and collapse the grip 10 to 15 times. Then hold the casenot the phoneover a soft surface such as a bed. Apply light pulling pressure to the top. If it remains locked and does not wobble, reinstall the phone and continue using it cautiously.
If the top repeatedly twists off during normal use, one or more locking tabs may be worn. A replacement PopTop may solve the problem if the lower platform is still intact.
Method 2: Reseat a Popped-Out Accordion
The flexible accordion can sometimes pull away from its retaining groove when the grip is yanked sideways, caught on a pocket, or used as an improvised handle for a phone that weighs roughly as much as a small paving stone.
If the accordion is flexible, untorn, and still connected on at least one side, it may be possible to press it back into position.
Steps for Reseating the Accordion
- Remove the phone from its case.
- Collapse the PopSocket as far as possible.
- Examine the edge of the accordion and locate the retaining lip or groove.
- Start with the section that is still attached correctly.
- Use your thumbnail or a blunt plastic tool to press the loose edge into the groove.
- Work around the circumference a little at a time.
- Expand and collapse the grip slowly to check that the fold moves evenly.
Avoid metal screwdrivers or sharp blades. These can puncture the flexible material, scratch the case, or slip directly into your fingeran impressively dramatic conclusion to a phone-accessory repair.
Use Warmth Carefully
If the flexible material feels stiff, hold the detached case and grip in your hands for a few minutes to warm it slightly. You can also place the case in a comfortably warm room. Do not use boiling water, a heat gun, an open flame, or prolonged hair-dryer heat. Excessive heat may warp the grip, soften case coatings, or weaken adhesive elsewhere.
When This Repair Will Not Work
Replace the grip if the accordion has a visible tear, permanent crease, missing edge, or stretched section that will not stay inside the retaining channel. Glue is rarely a good solution for a torn accordion because the area must flex every time the PopSocket opens.
Method 3: Restore the Sticky Base or Install New Adhesive
If the entire PopSocket fell off your phone or case, inspect the adhesive base. A reusable gel pad often loses grip because it has collected pocket lint, skin oil, dust, and mysterious crumbs that apparently live everywhere.
Option A: Clean a Reusable Gel Base
- Remove any loose dust with clean fingers.
- Rinse the sticky gel surface briefly with cool or lukewarm water.
- Do not scrub it with a rough cloth or paper towel.
- Place it sticky-side up and allow it to air-dry.
- Reattach it while the gel is clean and tacky.
Do not use a hair dryer to speed up the process. Direct heat can deform the plastic or dry the gel unevenly. Also avoid touching the clean adhesive with your fingertips, since skin oils immediately begin reducing adhesion again.
Prepare the Phone Case
The mounting surface must be smooth, clean, and completely dry. Remove grease with a lint-free cloth lightly dampened with an appropriate cleaner for the case material. Adhesive manufacturers commonly recommend cleaning suitable bonding surfaces with an isopropyl alcohol and water mixture before applying pressure-sensitive tape.
However, case materials vary. Alcohol can discolor printed finishes, leather, soft-touch coatings, or certain painted surfaces. Test an inconspicuous area first and follow the case manufacturer’s cleaning instructions. Apple and Samsung also advise applying cleaning liquid to a cloth rather than pouring or spraying it directly onto a device.
Reattach the Base
- Choose the final position before exposing the adhesive.
- Center the base on a flat area of the case.
- Press down firmly and evenly for 30 to 60 seconds.
- Leave the grip collapsed while the bond strengthens.
- Avoid pulling or twisting it for several hours.
Pressure matters. Adhesive tape bonds best when it makes full contact with the surface rather than merely touching it like an awkward first date.
Option B: Replace a Worn Adhesive Disk
If washing does not restore tackiness, the original adhesive may be worn out. Replacement adhesive disks made for phone grips are inexpensive and usually cleaner than trying to spread liquid glue across the entire base.
- Peel the old adhesive away with your fingers or tweezers.
- Remove every loose fragment from the plastic disk.
- Clean the base and allow it to dry.
- Apply the replacement disk without touching the sticky surfaces.
- Press the disk firmly onto the PopSocket base.
- Remove the remaining liner and mount the grip to the case.
iFixit’s replacement procedure similarly recommends removing all worn adhesive before installing a new adhesive layer.
Surfaces That May Not Hold Well
Adhesive grips perform best on smooth, hard, nonporous cases. They may bond poorly to:
- Soft or heavily textured silicone
- Leather or fabric
- Rough, glittery, or rubberized coatings
- Anti-fingerprint finishes
- Curved case surfaces
- Cases with loose paint or printed graphics
For difficult cases, use a case designed with an integrated phone-grip mount, a compatible adhesive adapter disk, or a magnetic grip system.
Method 4: Repair a Small Plastic Crack
A minor crack in a rigid decorative top or outer plastic edge may be repairable. A broken load-bearing stem, severely damaged locking tab, or cracked base is a different story. Those parts carry the phone’s weight and should generally be replaced.
Choose the Right Glue
Look for an adhesive labeled for the type of plastic being repaired. A flexible plastic adhesive or impact-resistant gel super glue is often more suitable than a brittle general-purpose formula. Some plastics, including polyethylene and polypropylene, are difficult to bond and may require a specialized plastic bonding system or primer.
Loctite notes that adhesive selection depends on the plastic and that flexible plastics need an adhesive formulated to remain flexible. It also emphasizes following the product’s stated curing time, which may range from minutes to a full day.
Steps for Gluing a Minor Crack
- Remove the damaged component from the phone and case.
- Clean both sides of the crack and let them dry completely.
- Place the part on wax paper or another protected surface.
- Apply the smallest possible amount of adhesive with a toothpick.
- Align the pieces precisely.
- Hold or lightly clamp them according to the adhesive instructions.
- Remove excess glue before it hardens, using the cleanup method specified on the label.
- Allow the full recommended cure time before testing the grip.
More glue does not automatically create a stronger repair. Excess adhesive can seep into the locking mechanism, stiffen the accordion, leave white residue, or permanently glue the grip shut.
Never Glue the PopSocket Directly to the Phone
Liquid glue should not be applied to a phone’s glass, painted back panel, camera area, or charging components. It may damage coatings, complicate future repairs, and reduce resale value. Perform any permanent adhesive repair only on a removable case or detached PopSocket component.
What Not to Do When Fixing a PopSocket
Do Not Use Hot Glue
Hot glue is bulky, uneven, and vulnerable to heat. It may peel from smooth cases and create a raised surface that lets the grip wobble.
Do Not Use Household Tape as a Permanent Fix
Regular transparent tape, masking tape, and duct tape are poor long-term choices. Their adhesives are not designed for repeated twisting and pulling, and the result may leave residue on the case.
Do Not Reattach It to a Dirty Surface
Even strong adhesive will struggle against sunscreen, lotion, grease, dust, or silicone residue. Surface preparation is one of the most important parts of a durable repair.
Do Not Test It Over a Hard Floor
After repairing the grip, test it with the phone removed or while holding the case over a bed. Your repair deserves a trial period; your phone does not deserve an immediate gravity-based performance review.
How Long Should You Wait Before Using a Reattached PopSocket?
A cleaned reusable gel base may be usable shortly after firm reattachment, but giving it several hours without pulling can improve the result. Replacement adhesive disks and liquid glues require different curing periods.
Some products develop an initial bond within seconds or minutes but do not reach full strength for 24 hours. Follow the exact directions supplied with the adhesive rather than assuming “dry to the touch” means “ready to support a phone.”
How to Keep a PopSocket From Breaking Again
- Collapse the grip before putting the phone into a tight pocket.
- Do not carry the phone by the extended PopSocket alone.
- Avoid twisting the top unless it is a swappable model.
- Keep the adhesive base away from dust while moving it.
- Mount it on a flat, compatible case surface.
- Remove the grip before cleaning the case with strong chemicals.
- Replace worn components before they fail completely.
A PopSocket is designed to improve grip, but it is not a climbing harness for your smartphone. Supporting the phone with your fingersespecially while walking, taking photos over water, or leaning over a balconyreduces stress on the mechanism.
When Should You Replace the PopSocket?
Repair is worthwhile when the parts are intact, the top simply came unlocked, the accordion popped out, or the adhesive pad needs replacement. Buy a new grip when:
- The central stem is cracked or missing.
- The accordion is torn.
- The base is warped.
- Multiple locking tabs have broken.
- The grip still feels loose after correct reassembly.
- Glue would be supporting the full weight of the phone.
A replacement is far less expensive than a cracked screen. When the repair inspires more hope than confidence, retire the old PopSocket with dignity.
Practical Repair Experiences and Lessons Learned
PopSocket repairs tend to fall into a few recognizable real-world scenarios. The first is the “it broke in my pocket” situation. The user pulls out the phone, finds the decorative top missing, and assumes the grip has snapped. In many cases, the top was accidentally pressed and rotated while rubbing against the pocket lining. Once the locking grooves are cleaned and aligned, the top twists back into place within seconds. The useful lesson is to inspect before gluing. A perfectly functional swappable top can be ruined by pouring super glue into a mechanism that was designed to rotate.
The second common experience involves a grip that keeps sliding off a silicone case. Cleaning the adhesive, buying stronger tape, and pressing harder may produce temporary success, but the grip often fails again. The problem is not necessarily the adhesive. Some soft-touch, textured, or silicone surfaces have low surface energy or flex too much for reliable bonding. Switching to a smooth hard-shell case or using a compatible adapter disk usually works better than repeating the same repair every weekend.
Another familiar scenario starts after the PopSocket has been transferred between several phones. The reusable gel initially works well, but each move introduces more lint, oil, and dust. Rinsing can restore a dirty gel pad, but it cannot reverse permanent wear. When the surface remains smooth and non-tacky after cleaning, a properly sized replacement adhesive disk is generally the most practical solution. The important detail is removing every bit of the original adhesive. Applying a new disk over old residue creates uneven contact and allows the base to rock under pressure.
Small plastic cracks produce mixed results. A hairline split in a decorative, non-load-bearing edge can sometimes be repaired neatly with a tiny amount of plastic-compatible adhesive. Repairs fail when too much glue is used or when the part is tested before the adhesive has fully cured. A bond that feels solid after ten minutes may still be developing strength. Waiting the full period listed on the package is less exciting, but it prevents the classic experience of watching the crack reopen during the first enthusiastic pop.
Perhaps the most valuable lesson is to test every repair without risking the phone. Install the repaired grip on an empty case, expand and collapse it repeatedly, and apply light pressure over a bed or couch. Listen for clicking, inspect the locking tabs, and look for movement around the adhesive disk. A secure PopSocket should feel stable without rotating unexpectedly or lifting at the edges.
These experiences show that successful repair depends less on brute strength and more on diagnosis, cleanliness, alignment, and patience. Most failed attempts skip one of those steps. People force misaligned tabs, glue dirty surfaces, choose an adhesive that cannot flex, or test the repair before it cures. Slow down, use the least aggressive method first, and remember that replacing one inexpensive phone grip is preferable to launching a thousand-dollar phone toward the sidewalk.
Conclusion
Learning how to fix or reattach a broken PopSocket is usually straightforward once you know which part failed. A detached PopTop may only need to be aligned and twisted back into place. A popped-out accordion can sometimes be reseated by carefully pressing its edge into the retaining groove. A dirty gel base may recover after rinsing and air-drying, while a worn base can be renewed with a replacement adhesive disk. Small, non-structural plastic cracks may also be repaired with a compatible adhesive and sufficient curing time.
Always remove the phone before cleaning or gluing, prepare surfaces carefully, and test the repaired grip over something soft. If the central support, accordion, base, or locking tabs are badly damaged, replace the accessory rather than trusting a questionable repair with your phone.