A broken cane chair can look dramatic, as if it has survived a family argument, a curious cat, and one overconfident dinner guest all in the same week. The good news? Most broken cane chairs are not doomed. If the wood frame is solid, the seat or back can usually be repaired with new cane webbing, reed spline, patience, and a few tools that do not require you to own a professional furniture shop.
This guide explains how to fix broken cane chairs, especially the common pressed-cane style found on vintage dining chairs, Cesca-style chairs, accent chairs, and thrift-store treasures. You will learn how to identify the type of cane, remove damaged cane, measure the groove, install new cane webbing, prevent sagging, and avoid rookie mistakes. By the end, your chair should look less like “garage-sale tragedy” and more like “heirloom with a comeback story.”
What Kind of Cane Chair Do You Have?
Before grabbing a utility knife and declaring war on the seat, identify the caning style. Cane chairs generally fall into two main repair categories: pressed cane and hand-woven cane.
Pressed Cane Chairs
Pressed cane, also called sheet cane or cane webbing, is the easiest type for most DIY repairs. It uses a pre-woven sheet of rattan cane that is pressed into a groove around the seat or back. A reed spline holds the cane in place. If your chair has a visible groove around the opening and no individual holes drilled around the frame, you probably have pressed cane.
This is the style many homeowners can repair themselves. It is faster than hand weaving, supplies are widely available, and the process is mostly about careful removal, accurate sizing, soaking, pressing, gluing, and trimming.
Hand-Woven Cane Chairs
Hand-woven cane is different. These chairs have small holes drilled around the seat frame. Long strands of cane are woven through the holes in several steps to create the classic octagonal pattern. This repair is beautiful but more time-consuming. It is absolutely learnable, but it requires more patience than pressed cane. Think of it as furniture yoga: calm breathing helps.
If your chair has holes around the perimeter, you need strand cane and a weaving pattern. If it has a groove, you need cane webbing and spline. Choosing the wrong method is like bringing a snow shovel to a beach picnic: technically a tool, but not the right one.
Tools and Materials You Need
For a pressed-cane chair repair, gather the following supplies before you start:
- Pre-woven cane webbing
- Reed spline that fits the chair groove
- Wood glue or cane-seat glue
- Caning wedges or small wooden wedges
- Utility knife with sharp blades
- Caning chisel, small chisel, or flat screwdriver
- Hammer or rubber mallet
- Spray bottle, sponge, or small steamer
- Bucket or tray for soaking cane
- Measuring tape or ruler
- Clamps or weights, if needed
- Fine sandpaper
- Towel or drop cloth
A proper caning chisel makes the removal stage easier and reduces the chance of chewing up the wooden groove. A screwdriver can work in a pinch, but it is also very good at slipping, scratching, and making you invent new vocabulary.
Step 1: Inspect the Chair Frame
Do not install new cane on a weak chair frame. Cane webbing is flexible, but it is not magic. Check the joints, legs, rails, and back frame. Wiggle the chair gently. If the wood creaks, shifts, or separates, fix the frame first with proper wood glue, clamps, and any needed structural repair.
Also inspect the groove. If it is cracked, shallow, or badly damaged, the new spline may not hold securely. Small dents and old glue are normal. Major breaks may require wood filler, careful reshaping, or professional restoration.
Step 2: Remove the Old Cane
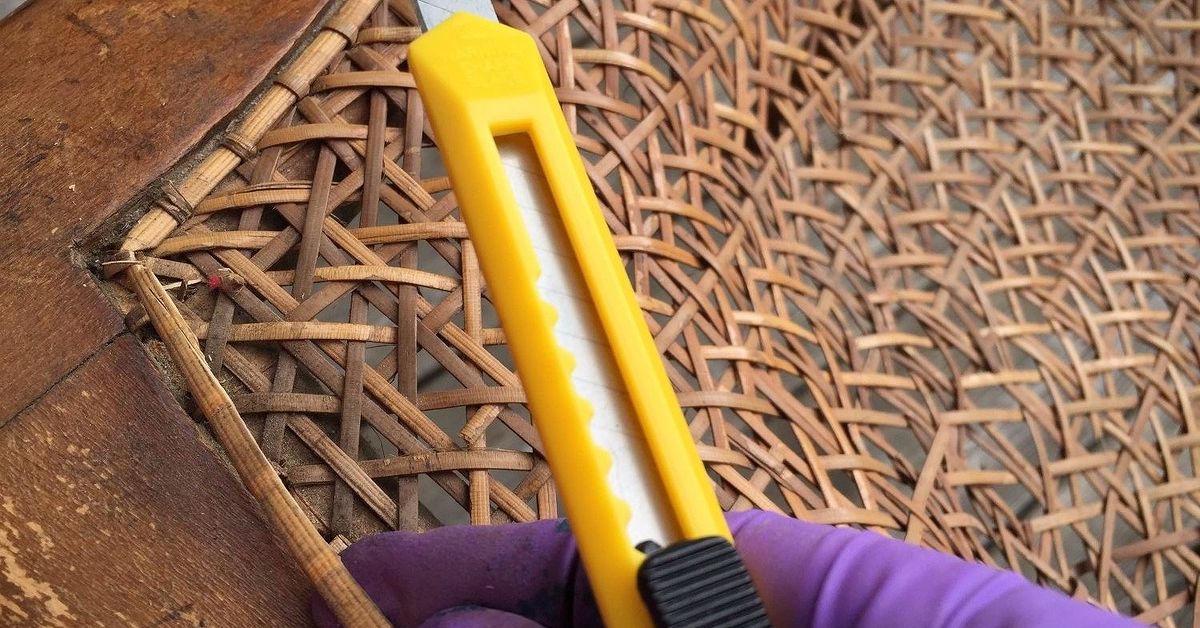
Use a utility knife to cut out the broken cane from the center of the seat or back. Leave the edges and spline in place for now. This opens the work area and gives you access to the groove.
Next, remove the old spline. Score along both sides of the spline with a sharp blade to break old glue lines. Then use a caning chisel or narrow flat tool to lift the spline from the groove. Work slowly. If the spline is stubborn, soften it with warm water, a damp towel, or gentle steam. Let moisture sit for several minutes so the old glue relaxes. The goal is to remove the spline without gouging the chair frame.
Old spline often comes out in pieces. That is normal. Do not panic if it behaves like a stale breadstick. Keep working around the groove until all old cane, spline, and glue are removed.
Step 3: Clean the Groove Thoroughly
This step separates a neat repair from a chair that pops apart later. Scrape the groove clean using a caning chisel, awl, or small screwdriver. Remove old glue, cane fibers, wood splinters, dust, and stubborn crumbs from 1987.
The new cane and spline must sit fully inside the groove. If debris remains, the spline may ride too high or fail to grip the cane properly. Lightly sand rough spots, but do not widen the groove unless you know what you are doing. The groove size determines the spline size, and changing it can create fit problems.
Step 4: Measure for Cane Webbing and Spline
Measure the chair opening, then add about two inches beyond the groove on all sides when cutting or ordering cane webbing. Extra material gives you room to center the pattern and press the cane into the groove without wrestling it like a wet noodle.
For spline, measure the width of the groove. The spline should fit snugly without requiring brutal force. If it is too small, it will not hold. If it is too large, it can split the frame or refuse to seat properly. When possible, compare with a sample of the old spline or use a supplier’s spline sizing guide.
Also pay attention to the cane pattern. Traditional open cane has a familiar hexagonal design, but cane webbing comes in different sizes and styles. For chair seats, choose a strong pattern appropriate for seating, not a delicate decorative webbing intended only for cabinet doors.
Step 5: Soak the Cane Webbing and Spline
Cane is brittle when dry and flexible when damp. Soaking helps it bend into the groove without cracking. Place the cane webbing in warm water until it becomes pliable. Depending on the cane and supplier instructions, soaking can range from about 30 minutes to a few hours. Reed spline usually needs less soaking, often around 15 to 30 minutes.
Avoid soaking cane overnight. Oversoaking can discolor the fibers and weaken the material. You want flexible cane, not swamp furniture.
After soaking, blot excess water with a towel. The cane should be damp during installation. As it dries, it tightens naturally, which helps create a smooth, firm seat.
Step 6: Position the New Cane Webbing
Lay the damp cane webbing over the opening. Center the pattern so the lines run straight from front to back and side to side. This is more important than it seems. Crooked cane will still function, but every time you walk past the chair, it may whisper, “You rushed me.”
Make sure you have enough overhang around the groove, but not so much that the excess bunches and fights you. About one to two inches beyond the groove is usually workable. If needed, trim the sheet slightly, but leave enough material for adjustment.
Step 7: Press the Cane Into the Groove
Start pressing the damp cane into the groove using caning wedges or small wooden wedges. Work gradually around the chair. Do not hammer straight down aggressively. Instead, guide the cane into the groove little by little, keeping the pattern straight and tension even.
Use temporary pieces of spline or wedges to hold sections in place as you work. At corners or curves, you may need to remove a few cane strands that run directly into the groove. This helps the webbing tuck cleanly without bunching or breaking.
Do not pull the cane too tight while wet. It will shrink as it dries. If you stretch it like a trampoline during installation, it may crack, distort, or pull loose later. Aim for smooth and centered, not drumhead-tight.
Step 8: Glue and Install the Reed Spline
Once the cane is seated in the groove, apply a modest bead of glue inside the groove over the cane. Do not drown the chair in glue. Too much glue creates mess, squeeze-out, and regret.
Place the damp reed spline over the groove and press it into place. Tap gently with a hammer and wooden wedge or use a rubber mallet. Work around the chair in small sections. The spline should push the cane firmly into the groove and lock it in place.
When the spline ends meet, cut them cleanly so they butt together neatly. Many people place the joint at the back of the chair where it is less visible. A diagonal cut can help the ends meet smoothly, especially on curved seats.
Step 9: Trim Excess Cane
After the spline is installed, trim the excess cane webbing with a sharp utility knife. Hold the blade at a safe angle and cut carefully along the outside of the spline. Take your time. One slip can scratch the wood or slice into the fresh cane.
Wipe away glue squeeze-out with a damp cloth before it dries. Check the pattern one last time. If anything has shifted badly, correct it before the glue sets. Once the glue dries, the chair becomes much less interested in your opinions.
Step 10: Let the Chair Dry Completely
Let the repaired cane chair dry for at least 24 to 48 hours before sitting on it. Keep it in a room with normal airflow. Avoid direct sun, high heat, or damp basements during drying. As the cane dries, it tightens across the opening.
Do not test the seat every ten minutes. Cane repair rewards patience. Sitting too soon can stretch the fibers, loosen the spline, or create sagging before the repair has fully set.
How to Fix Small Breaks Without Replacing the Whole Seat
If only one or two strands are broken, you may wonder whether a full replacement is necessary. For decorative backs, small breaks can sometimes be stabilized with careful strand replacement or a discreet patch. For seats, replacement is usually better. A cane seat carries weight, and one broken area often means the surrounding fibers are dry, brittle, or weakened.
A tiny broken strand on a chair back may be tolerable. A broken seat that supports people should be treated seriously. Nobody wants dessert interrupted by a surprise meeting with the floor.
Common Mistakes to Avoid
Using the Wrong Spline Size
Spline that is too thin will not secure the cane. Spline that is too thick can damage the frame. Measure carefully and order the right size.
Skipping Groove Cleaning
Old glue and cane fibers prevent the new spline from seating properly. Clean the groove until the new materials fit smoothly.
Installing Dry Cane
Dry cane can crack while being pressed into the groove. Soak it until flexible, then install it damp.
Overtightening the Webbing
Cane tightens as it dries. Pulling it too tight while wet can lead to cracks or distortion.
Sitting Too Soon
Give the glue and cane time to dry. A repaired cane chair needs a short vacation before returning to dinner duty.
How to Care for Cane Chairs After Repair
Once your cane chair is repaired, maintenance is simple. Keep it away from extreme dryness and direct heat, which can make cane brittle. Avoid leaving cane furniture in harsh sun for long periods. Clean it gently with a soft brush or vacuum attachment. If needed, wipe with a slightly damp cloth, then dry the area.
For chairs used daily, rotate them if possible so one chair does not take all the wear. Cane is strong, but it appreciates fairness. Also avoid standing on cane seats. They are chairs, not step ladders with vintage charm.
When to Call a Professional
DIY cane chair repair is very doable for pressed-cane seats, but some situations deserve professional help. Call a furniture restorer or seat-weaving specialist if the chair is valuable, antique, structurally damaged, or hand-caned with a complex pattern. Professional restoration may also be worth it if the chair has sentimental value and you would rather not learn by making mistakes on Grandma’s favorite rocker.
For ordinary dining chairs, thrift finds, and modern cane-backed chairs, replacing pressed cane yourself can be satisfying and cost-effective. It also gives you the small but mighty joy of saying, “I fixed that,” every time someone compliments the chair.
Real-World Experience: What Fixing Broken Cane Chairs Teaches You
Repairing a cane chair is one of those projects that looks intimidating until you begin. The first lesson is that removal is often harder than installation. Many beginners imagine the new cane will be the tricky part, but the old spline is usually the true villain. It may be glued firmly, wedged tightly, painted over, or fossilized by decades of household life. Warm water, steam, patience, and a proper chisel make the job far less frustrating.
The second lesson is that measuring matters more than enthusiasm. A beautiful sheet of cane webbing will not save you if the spline does not fit the groove. Before ordering supplies, measure twice. If the old spline comes out in usable pieces, keep a sample. That small brittle strip can help you choose the correct replacement size.
The third lesson is to respect the pattern. Cane webbing has straight lines that reveal every shortcut. If the sheet is slightly crooked when you begin pressing it into the groove, it will look more crooked after the spline is installed. Step back several times during installation. Look from the front, side, and back. Adjust while the cane is damp and movable.
Another useful experience is learning how cane behaves as it dries. Damp cane may look slightly relaxed during installation, but it tightens later. This is why you should not yank it tight like upholstery fabric. Smooth, centered, and gently tensioned is better than stretched to its limit. The drying process does part of the work for you.
Glue control is another practical lesson. Beginners often use too much glue because they want the repair to be extra strong. Unfortunately, excess glue squeezes out, stains the cane, and creates cleanup headaches. A moderate bead in the groove is usually enough. The spline provides the mechanical hold; the glue supports that hold.
Finally, cane chair repair teaches patience. Let the chair dry fully before use. It is tempting to test the seat because the project looks finished, but early pressure can create sagging. Give the repair at least a full day, preferably longer, before putting it back into service.
The best part of fixing broken cane chairs is the transformation. A chair that looked ready for the curb can become stylish, useful, and full of character again. The repair is hands-on, slightly messy, and deeply satisfying. You save money, reduce waste, preserve a piece of furniture, and gain a new skill. Not bad for a project that starts with a broken seat and a quiet suspicion that the chair has been judging you from the corner.
Conclusion
Fixing broken cane chairs is a practical DIY project when you understand the difference between pressed cane and hand-woven cane. For most grooved chairs, the process involves removing the old cane and spline, cleaning the groove, measuring carefully, soaking the new webbing, pressing it into place, installing new spline with glue, trimming the excess, and letting everything dry completely.
The secret is not brute force. It is preparation, patience, and careful alignment. Treat the chair gently, use the right materials, and give the cane time to tighten naturally. Whether you are restoring a vintage dining set, repairing a thrift-store find, or rescuing a family chair, a good cane repair can bring beauty and function back into your home without sending the chair to furniture retirement.