There are two kinds of people in this world: people who can cut out a paper star on the first try, and people who accidentally create a five-legged potato with confidence. The good news? You do not need to be a geometry teacher, craft influencer, or mysterious holiday elf to learn how to cut out a paper star. You only need paper, scissors, a few smart folds, and the willingness to forgive your first attempt for looking “abstract.”
Paper stars are simple, affordable, and surprisingly useful. They can become classroom decorations, patriotic garlands, Christmas ornaments, birthday party accents, scrapbook embellishments, gift tags, wall art, or a last-minute “I definitely planned this” centerpiece. Whether you want a classic five-pointed star, a quick template-cut star, or a dimensional paper star that pops off the page, this guide walks you through the process in plain American English with practical tips along the way.
Below, you will learn the easiest way to cut a paper star, how to make a cleaner five-point star with folds, how to choose the right paper, how to avoid lopsided points, and how to turn your cutouts into something worth hanging instead of quietly sliding into the recycling bin.
Why Learning How to Cut Out a Paper Star Is So Useful
A paper star is one of those tiny skills that looks more impressive than it is. Once you understand the folds and cuts, you can make stars in almost any size. Small stars work well for cards, confetti, gift wrap, and scrapbooks. Medium stars are great for bulletin boards, kids’ crafts, and party banners. Large stars can become wall decorations, window displays, tree toppers, or hanging ornaments.
The best part is that paper stars are budget-friendly. You can use printer paper, construction paper, scrapbook paper, wrapping paper, cardstock, magazine pages, old book pages, paper bags, or leftover craft scraps. In other words, before you buy more decorations, look around your desk. That slightly wrinkled sheet of paper might be one good fold away from stardom.
Supplies You Need to Cut Out a Paper Star
For the basic paper star cutout, gather these simple materials:
- Paper, cardstock, construction paper, origami paper, or scrapbook paper
- Sharp scissors
- Pencil
- Ruler, optional but helpful
- Star template, optional for beginners
- Glue, tape, string, ribbon, or hole punch if you plan to decorate or hang the stars
Scissors matter more than people think. Dull scissors chew the paper instead of cutting it, which gives your star fuzzy edges. That may be charming if you are going for “rustic raccoon craft night,” but for crisp stars, use clean, sharp scissors. For children, choose age-appropriate safety scissors and supervise the cutting step.
The Easiest Method: Cut a Paper Star With a Template
If you want a reliable star without doing paper-folding gymnastics, use a template. This is the best method for young kids, classroom crafts, party prep, or anyone who wants matching stars quickly.
Step 1: Choose or Draw a Star Shape
You can print a star template or draw one by hand. A five-point star is the classic choice, but you can also make six-point stars, rounded stars, skinny stars, chunky stars, or cartoon-style stars. If you are drawing your own, sketch lightly with a pencil so you can erase any lines later.
Step 2: Place the Template on Your Paper
Set the template on your chosen paper. If you are using patterned paper, place the template on the back side so pencil marks do not show on the finished star. For multiple stars, trace the shape several times before cutting. This saves time and keeps your stars consistent.
Step 3: Cut Slowly Around the Outline
Turn the paper as you cut instead of twisting your wrist into a pretzel. Long, smooth scissor movements create cleaner lines. When you reach an inside corner between two points, stop, reposition the scissors, and cut out from the corner carefully. Rushing this part is how stars become suspicious sea creatures.
Step 4: Clean Up the Edges
After cutting, check each point. Trim any bumps, pencil marks, or uneven edges. If you want a polished look, lightly erase leftover pencil lines and flatten the star under a book for a few minutes.
How to Cut a Five-Point Paper Star With Folding
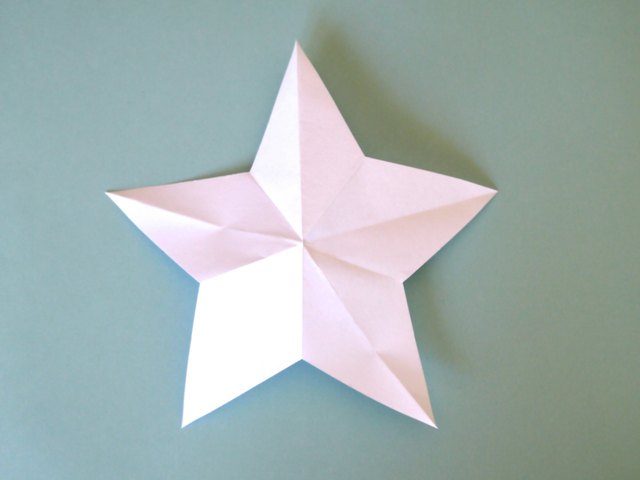
The fold-and-cut method is the classic “ta-da” version of paper star making. With the right folds, one angled cut opens into a symmetrical five-pointed star. It feels a little like a magic trick, except the rabbit is paper and the hat is your patience.
For the traditional one-snip star, use a piece of paper trimmed to 8.5 inches by 10 inches. This proportion helps create a balanced five-point star. You can practice with regular printer paper before moving on to colored or decorative paper.
Step 1: Trim and Fold the Paper in Half
Start with an 8.5-by-10-inch rectangle. Fold it in half horizontally so the short edges meet. Crease firmly. A crisp crease is important because every later fold depends on this first fold behaving itself.
Step 2: Mark the Center With Light Creases
Fold and unfold the paper gently to create center guide creases. You do not need to draw heavy pencil lines. The goal is to give yourself reference points so the corners can meet accurately.
Step 3: Fold One Corner Toward the Center
Bring one corner of the folded paper toward the center guide point. Press the fold firmly. This is where beginners often go off course, so line up the edges carefully before creasing.
Step 4: Fold Back to Create a Narrow Triangle
Fold that same section back on itself so the edge lines up neatly. The paper will start to look like a layered wedge. If it resembles a paper airplane that changed careers, you are probably close.
Step 5: Fold the Opposite Side Over
Bring the remaining side across the folded wedge, keeping all layers aligned. Crease firmly. The cleaner your folds, the more even your final star will be.
Step 6: Make One Angled Cut
Cut diagonally across the folded wedge. The angle of this cut determines the personality of your star. A shallow angle creates wider, softer points. A steeper angle creates sharper, longer points. If you want a dramatic star, cut boldly. If you want a friendly classroom star, keep the angle moderate.
Step 7: Unfold and Adjust
Open the paper slowly. You should see a five-point star. If some creases bend the wrong way, gently refold them so the long creases form raised points and the shorter creases dip inward. This gives the star a more dimensional look even if it is technically still flat.
How to Make Your Paper Star Look More Professional
Cutting the star is only half the fun. The finishing details can make your paper star look intentional instead of like it survived a craft-room weather event.
Use Better Paper for Better Results
Printer paper is excellent for practice, but cardstock holds its shape better. Scrapbook paper adds instant color and pattern. Metallic paper looks festive, but it can show creases more strongly, so fold carefully. Wrapping paper works for large stars, though thin wrapping paper may need backing if you want the star to stay flat.
Sharpen the Points
After unfolding your star, run your fingernail, ruler edge, or bone folder gently along each crease. This sharpens the structure. For a flat cutout, place the star under a heavy book for ten minutes. For a 3D look, pinch each point outward and press the inner valleys inward.
Layer Different Sizes
Cut three stars in different sizes and glue them together from largest to smallest. This creates a layered paper star that works beautifully on greeting cards, gift tags, classroom posters, and party backdrops.
Add Texture
Try dots of glue and glitter, marker outlines, watercolor washes, washi tape, stickers, stamped patterns, or tiny punched holes. You can also fold the star points slightly upward to create shadows. Suddenly your humble paper star has main-character energy.
Common Mistakes When Cutting Out a Paper Star
Even simple crafts have traps. Here are the most common paper star mistakes and how to fix them.
The Star Looks Uneven
Uneven stars usually come from loose folds or mismatched edges. Crease every fold firmly and keep the layers aligned. If you are using a template, make sure the template does not shift while tracing.
The Points Are Too Short
If your star looks squat, your angled cut may have been too wide or too flat. Try a steeper diagonal cut next time. Practice on scrap paper until you find the shape you like.
The Paper Tears While Folding
Very thick cardstock can crack when folded sharply. Score the fold lines lightly with a blunt tool before folding. Do not press so hard that you cut the paper; the goal is to guide the fold, not start a paper surgery.
The Star Curls Up
Thin paper may curl after cutting or decorating. Flatten it under a book, use a glue stick instead of wet glue, or switch to heavier paper. Too much liquid glue can warp paper faster than a toddler with a juice box near homework.
Creative Ways to Use Paper Stars
Once you know how to cut out a paper star, you may accidentally become the person who puts stars on everything. This is not a medical condition. It is simply crafting momentum.
Paper Star Garland
Cut several stars in matching colors. Punch a small hole in one point of each star, then thread them onto string or ribbon. Use the garland for birthdays, Fourth of July parties, Christmas trees, baby showers, classrooms, or bedroom decor.
Gift Wrap Decorations
Glue a paper star to a wrapped gift instead of using a bow. Add the recipient’s name in the center and you have a handmade gift tag. Brown kraft paper with white or gold stars looks especially clean and modern.
Window and Wall Displays
Make stars in different sizes and tape them to windows, doors, or walls. For a night-sky effect, use blue, silver, white, and gold paper. For a kid’s room, use bright construction paper and let the stars be a little imperfect. Children’s crafts are supposed to have personality.
3D Paper Star Ornaments
To make a dimensional star, cut two identical stars from cardstock. Score a line from each point to the opposite inner corner. Fold the long lines outward and the short lines inward. Glue the two stars back-to-back, add a loop of string, and hang it. This creates a simple paper ornament with depth and structure.
Upcycled Paper Bag Stars
Paper bags can become large hanging stars. Stack several flat paper bags, glue them together with a T-shaped line of glue, cut the open end into a point, and fan the bags into a starburst. This is a great project for parties because the result looks big and festive, but the materials are inexpensive.
Best Paper Types for Cutting Stars
Different paper creates different results. Printer paper is flexible and forgiving, making it ideal for learning the fold-and-cut technique. Construction paper is colorful and kid-friendly, though it can be slightly fuzzy at the edges. Cardstock gives crisp stars that hold up well for decorations. Scrapbook paper adds instant design, especially for holidays or themed parties. Origami paper folds beautifully and is excellent for small, precise stars.
If you plan to make hanging decorations, choose paper that is not too flimsy. Lightweight paper may flutter nicely, but it can tear around the hole punch. If you want stars for a card or scrapbook, thinner paper layers better and does not make the page bulky.
Safety Tips for Kids and Group Crafting
Paper star crafts are great for children, but scissors still deserve respect. Use safety scissors for young kids and pre-cut tricky templates for preschoolers. Older children can trace and cut their own stars, but show them how to turn the paper instead of forcing the scissors around tight corners.
For classrooms, prepare stations: tracing, cutting, decorating, and hanging. This keeps glue away from scissors and glitter away from everything except, somehow, the entire building. If you use hot glue for 3D stars, keep that step for adults or older supervised crafters.
Quick Troubleshooting Guide
If your folded star does not open correctly, do not panic. Fold-and-cut stars often take a few practice rounds. Use scrap paper and label your folds with light pencil marks until the sequence feels natural. If your template star looks jagged, cut more slowly and use smaller scissor movements around corners. If your star looks plain, outline it with a marker, layer it with a smaller star, or add a small button, sticker, or paper circle in the center.
Remember: the first star teaches your hands what the instructions mean. The second star looks better. By the fifth star, you will be looking around the room for more paper like a craft goblin with a mission.
Extra Experience: What I Learned From Cutting Paper Stars Again and Again
The first time you cut out a paper star, you may assume the hardest part is the cutting. Surprisingly, it is usually the folding. The scissors only follow the plan that the folds create. If the folds are crooked, the scissors will faithfully produce a crooked star. Very loyal, very unhelpful. After making enough stars for garlands, gift toppers, and classroom-style decorations, the biggest lesson is simple: slow folding beats fast cutting every time.
One useful habit is to practice with plain white printer paper before using your “good” paper. Decorative paper has a way of making people nervous. You suddenly treat every fold like a life decision. With scrap paper, you can experiment freely. Try one cut at a sharp angle, another at a wide angle, and another somewhere in the middle. Open each star and compare the points. This teaches you more in five minutes than staring at instructions for half an hour.
Another experience-based tip is to make more stars than you think you need. Paper stars look best in groups. One star on a wall can feel lonely, like it arrived too early to the party. Ten stars in different sizes look intentional. Twenty stars become decor. Thirty stars mean you are either very festive or avoiding emails, and honestly, both are valid.
For clean results, keep a small “test fold” nearby. Whenever you switch paper types, make one practice star first. Thin paper, cardstock, wrapping paper, and metallic paper all behave differently. Cardstock needs firmer creases and sometimes scoring. Wrapping paper needs a lighter touch because it tears easily. Metallic paper looks beautiful but can show every crease, including the one you made while arguing with the cat for sitting on your project.
When crafting with kids, perfection should not be the goal. Let them choose colors, draw patterns, and make stars that are wide, wiggly, tiny, giant, or accidentally hilarious. A child’s uneven paper star often has more charm than a perfect store-bought decoration. The best projects are the ones people remember making.
If you are using paper stars for home decor, choose a limited color palette. For example, white, gold, and kraft paper looks warm and natural. Red, white, and blue works for patriotic holidays. Silver, navy, and pale yellow creates a night-sky theme. Pink, lavender, and cream feels soft for birthdays or baby showers. A color palette helps even simple cutouts look designed.
Finally, do not throw away the scraps too quickly. The leftover triangles and strips can become mini stars, confetti, card corners, mosaic pieces, or practice cuts. Paper crafting rewards the person who sees possibilities in the leftovers. That oddly shaped scrap beside your scissors? It might be tomorrow’s tiny shooting star.
Conclusion
Learning how to cut out a paper star is a small skill with big creative payoff. You can use a template for easy, consistent shapes, try the fold-and-cut method for a classic five-point star, or build dimensional stars for ornaments and party decorations. The secret is not complicated: choose the right paper, make crisp folds, cut slowly, and practice until your stars stop looking like they have been through a tiny windstorm.
Paper stars are inexpensive, customizable, and fun for all ages. They work for holidays, classrooms, home decor, gift wrapping, scrapbooking, and rainy afternoons when everyone needs something better to do than stare at a screen. Start with one sheet of paper and one pair of scissors. Before long, you will have a table full of starsand probably a few scraps stuck to your sleeve. That is how you know the craft is working.