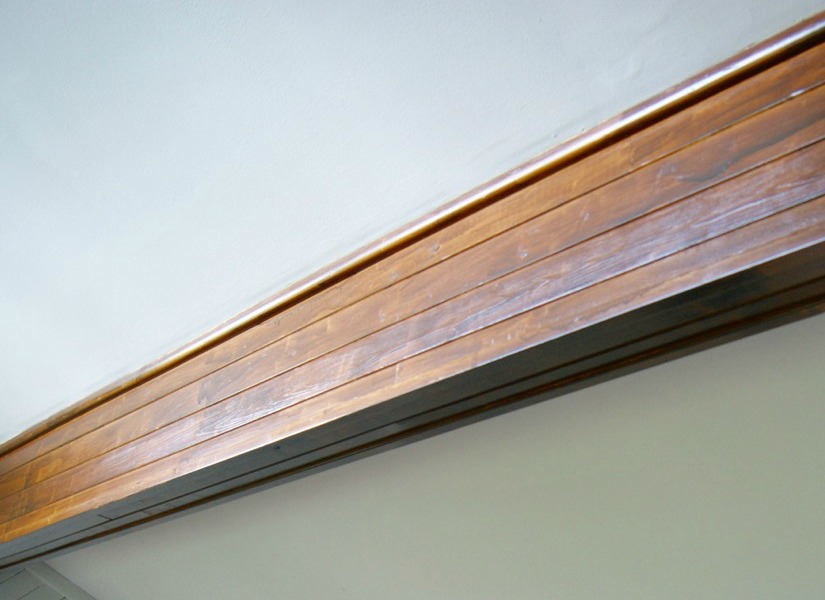
Note: “Without sanding” does not mean “without preparation.” This method is designed for wood beams with a sound existing finish, such as varnish, polyurethane, lacquer, or an older stain-and-sealer combination. It refreshes or darkens the visible color by applying gel stain over the surface. If your beams are bare, raw wood and you want a traditional penetrating stain, sanding is still the right move. Wood finishing has rules, and it enjoys enforcing them with blotches.
Wood ceiling beams can make a room feel warm, architectural, and pleasantly expensive. They can also make a room feel like a ski lodge from 1997 that has not updated its wardrobe since the first season of Friends. When beams are too orange, too pale, overly glossy, or simply out of step with the rest of the room, staining them can dramatically change the look.
The problem is that traditional staining usually involves sanding. Lots of sanding. Ceiling sanding. Overhead sanding. Sanding while your shoulders question every decision that brought you here. Fortunately, there is a practical alternative for many finished wood beams: clean the surface thoroughly, chemically degloss it when appropriate, apply gel stain in thin controlled layers, and protect it with a compatible clear topcoat.
This guide explains how to stain wood beams without sanding, what products work best, which beams are good candidates, and how to avoid turning a beautiful ceiling feature into a very tall regret.
Can You Really Stain Wood Beams Without Sanding?
Yes, but there is an important technical distinction. A conventional liquid stain is designed to soak into open, unfinished wood fibers. If a beam is sealed with polyurethane, varnish, shellac, lacquer, paint, wax, or another finish, the stain cannot penetrate evenly. Applying ordinary stain over a sealed beam usually produces streaks, weak color, or an effect best described as “wet cardboard.”
Gel stain behaves differently. It has a thicker consistency and carries more pigment near the surface instead of relying entirely on deep absorption. That makes it useful for vertical projects such as doors, trim, moldings, paneling, and decorative beams. A gel stain can tint a stable existing finish, deepen the color, reduce an orange tone, or create a more weathered or espresso-like appearance.
The catch is that gel stain is not magic pudding. It needs a clean, stable, compatible surface. It cannot fix peeling polyurethane, wax buildup, loose paint, deep gouges, water damage, or a beam that is actively flaking like a croissant in a wind tunnel.
When the No-Sanding Method Works Best
This method is most successful when your beams meet the following conditions:
- The existing finish is intact and firmly attached.
- The beams are indoors and not exposed to heavy weathering.
- The surface is free of wax, silicone polish, cooking grease, smoke residue, or heavy grime.
- You want to darken, enrich, mute, or slightly alter the existing color.
- You are willing to test the process in a hidden area before committing to the entire ceiling.
It is less suitable for beams that are unfinished, badly scratched, painted with loose paint, coated in wax, covered in years of kitchen grease, or showing signs of moisture damage. In those cases, stripping, sanding, repair, or professional refinishing may be necessary.
Why Gel Stain Is the Best Choice for Ceiling Beams
For staining wood beams without sanding, gel stain is usually the star of the show. Traditional liquid stain runs easily on vertical surfaces, especially when gravity sees an opportunity to become involved. Gel stain is thicker, slower to drip, and easier to manipulate with a brush, foam applicator, or lint-free cloth.
Because it sits closer to the surface, gel stain can create color over a sealed beam without requiring the wood pores to be fully exposed. You can apply one thin coat for a modest change or add a second coat for deeper color. Dark walnut, espresso, antique walnut, provincial brown, and weathered gray-brown blends are popular choices for exposed ceiling beams because they add visual weight without making the ceiling feel like a cave.
A medium brown gel stain can soften orange pine. A dark walnut tone can make a lightweight decorative beam look more substantial. A warm brown can make a grayish wood finish feel more inviting. The goal is not always to make every beam look brand-new. Often, the best result is a finish that looks naturally aged, slightly varied, and intentional.
Supplies You Will Need
Before climbing a ladder with a can of stain, gather everything you need. Ceiling work becomes much easier when you are not repeatedly climbing down because the rag, tape, or snack has vanished into another room.
- Gel stain in your chosen color
- A small sample board or hidden test area
- Painter’s tape and plastic sheeting
- Drop cloths for floors and furniture
- Lint-free cotton cloths or staining pads
- A high-quality natural-bristle brush or foam brush
- Degreasing cleaner suitable for finished wood
- Liquid sandpaper or deglosser, if compatible with your existing finish
- Disposable gloves and safety glasses
- A step ladder or platform ladder rated for your weight and the job
- A compatible clear topcoat, usually polyurethane or a durable water-based clear finish
- A clean metal container with a lid for used oil-based stain rags
Step 1: Identify What Your Beams Are Made Of
Before choosing a stain color, determine whether the beams are real wood, wood veneer, engineered wood, MDF wrapped in veneer, foam, polyurethane, or another decorative material. Many modern “wood beams” are hollow faux beams designed to look rustic while weighing about as much as a confident housecat.
Real wood and wood veneer can often accept gel stain well. Faux polyurethane beams may also be tinted with certain gel stains, but they require extra attention to adhesion and compatibility. Never assume that a stain suitable for oak is automatically suitable for foam, fiberglass, molded polyurethane, or painted composite materials.
Look at the underside, ends, joints, and mounting points. Real beams typically show end grain, natural imperfections, and variation. Faux beams may have molded seams, uniform texture, hollow interiors, or repeating grain patterns that seem suspiciously committed to being identical.
Step 2: Test Before You Touch the Visible Beam
Testing is not optional. It is the inexpensive little chore that prevents the expensive big chore.
Choose a hidden area above a cabinet, near a ceiling corner, behind a mounted fixture, or on the back side of a beam. Clean a small section, apply the planned stain method, allow it to dry, and examine it in daylight and evening lighting. A color that looks like rich walnut at noon can look nearly black under warm recessed lights.
Check for three things: adhesion, color, and streaking. Gently rub the dry test patch with a clean white cloth. If color transfers heavily, feels sticky, or scratches off too easily, stop and reassess before continuing. You may need a different prep cleaner, a compatible bonding product, a longer dry time, or a different finishing system.
Step 3: Protect the Room Like You Mean It
Staining overhead is not difficult, but it is messy in a uniquely theatrical way. Tiny drops can travel farther than expected, especially when you are stretching, reaching, and pretending you are not afraid of ladders.
Move furniture away from the work area whenever possible. Cover remaining furniture with plastic sheeting, then lay drop cloths over the floor. Tape off nearby walls, ceilings, light fixtures, trim, and hardware. Remove or cover pendant lights and ceiling fans if they are near the beams.
Use stable ladders and reposition them often rather than leaning too far sideways. The most attractive beam finish in the world is not worth attempting a one-person circus act six feet above a hardwood floor.
Step 4: Clean the Existing Finish Thoroughly
Cleaning is the heart of a successful no-sanding wood beam stain project. Dirt, wax, polish, cooking residue, and body oils can interfere with adhesion. A beautiful stain layer over invisible grime is still a failure waiting politely in the wings.
Use a cleaner formulated for finished wood or a mild degreasing solution that does not leave residue. Avoid heavy wax-based furniture polish before staining. Wipe the beams with a clean cloth, changing cloths frequently so you are removing dirt rather than simply relocating it from one beam to another.
Allow the beams to dry completely. This is particularly important around kitchens, fireplaces, bathrooms, and entryways, where airborne grease, smoke, humidity, and dust tend to collect. A beam can look clean while still carrying enough residue to make a stain misbehave.
Step 5: Use Liquid Deglosser Carefully
Liquid sandpaper, also called deglosser, is a chemical preparation product that dulls a glossy existing finish without mechanical sanding. Think of it as the polite cousin of sandpaper: less dusty, more chemical, still capable of causing drama if ignored.
Choose a deglosser labeled for the type of surface you have, and follow its instructions exactly. Some formulas are intended for painted or varnished surfaces, while others should not be used over certain stains, plastics, fresh finishes, or delicate coatings. Apply it with a lint-free cloth, work in manageable sections, and wear gloves and eye protection.
The goal is not to strip the beam. You only want to remove surface contamination and reduce the slick shine that can prevent stain from gripping. Once the surface has dried according to the product instructions, inspect it. It should look clean and slightly duller, not sticky, gummy, or damaged.
Step 6: Stir the Gel Stain and Work in Small Sections
Stir gel stain thoroughly before use and occasionally during the project. Do not shake it. Shaking introduces bubbles, and bubbles are rarely invited to an elegant beam makeover.
Work on a section that is easy to control, usually 3 to 5 feet long. Apply a thin, even coat with a brush, foam applicator, or lint-free cloth. Brush in the direction of the wood grain whenever possible, even if the existing grain is partly hidden by an old finish.
Let the stain sit briefly according to the product directions, then wipe away excess with a clean cloth. Use long strokes in the grain direction. The amount of stain left behind controls the depth of color, so keep your wiping pressure and timing consistent from one section to the next.
On high beams, it helps to have one person apply and another person wipe. The application partner becomes the “stain captain,” while the wiping partner becomes the “please do not let this dry in a stripe” department. A two-person system is not required, but it can make large rooms much easier.
Step 7: Blend Edges Before They Dry
Lap marks happen when one stained section dries before the next section overlaps it. They are especially noticeable on long beams, dark colors, and strong overhead lighting.
To avoid them, maintain a wet edge. Finish one manageable section, then feather the next application into it before the previous edge dries. Use a nearly dry brush or cloth to soften transitions. Do not keep rubbing an area after it begins to tack up; that is how smooth stain becomes patchy stain.
For beams with knots, cracks, rough-sawn texture, or pronounced grain, allow slight variation. Perfectly uniform color can make rustic beams look suspiciously plastic. A little natural variation creates depth and makes the result feel more believable.
Step 8: Add a Second Coat Only After Full Drying
If the first coat looks too light, resist the urge to immediately add more stain. Let the first coat dry for the full time listed on the label. Gel stains can feel dry on the surface before they are ready for another coat, especially in humid rooms or areas with limited airflow.
Once dry, apply a second thin coat using the same technique. Two light coats are usually safer than one heavy coat. Thick gel stain can become tacky, uneven, or slow to cure if applied too heavily. More product does not always mean more elegance. Sometimes it means more muttering.
Step 9: Protect the Finish With a Clear Topcoat
After the stain has dried fully, apply a compatible clear protective finish. This step is important because gel stain remains closer to the surface than a penetrating stain. A clear topcoat helps protect against dust, light cleaning, fingerprints, and the occasional airborne kitchen mystery.
For interior beams, a low-sheen satin or matte clear finish often looks most natural. Gloss can make beams look shiny and artificial, especially under recessed lighting. Satin preserves richness without turning the ceiling into a reflective event venue.
Choose a clear finish compatible with the stain system you used. Follow the manufacturer’s dry-time and recoating instructions. Apply thin, even coats and avoid overworking the finish. Let each coat cure before judging the final appearance.
Common Problems When Staining Beams Without Sanding
The Stain Looks Streaky
Streaks usually come from uneven cleaning, inconsistent wiping, working over too large an area, or allowing one section to dry before blending the next. Correct minor streaks by applying a thin fresh coat of gel stain over the area and blending it while wet.
The Stain Will Not Stick
Poor adhesion usually means the surface has wax, silicone, grease, a failing finish, or a coating incompatible with the stain. Stop before adding more layers. Clean and test again in a hidden area. If the original finish is unstable, full refinishing may be the better answer.
The Beams Became Too Dark
Dark stain can be dramatic, but a ceiling can quickly become visually heavy. If the stain is still wet, wipe aggressively with a clean cloth to remove more pigment. If it has dried, try gently blending with a compatible solvent only if the product instructions allow it. Always test first.
The Finish Feels Sticky Days Later
Sticky stain often means the coat was too thick, the room was too humid, the surface had contamination, or the product was recoated before it cured. Improve ventilation, allow additional drying time, and avoid applying a topcoat until the surface is fully dry and no longer cool or tacky to the touch.
Safety Tips for Staining Ceiling Beams
Ventilate the room well, especially when using oil-based gel stains, mineral spirits, or solvent-based clear coats. Open windows when weather allows, use fans to move air out of the work area, and keep flames, smoking materials, and heat sources away from finishing products.
Wear gloves, safety glasses, and clothing you do not mind permanently decorating. Store staining rags safely. Oil-based stain rags can create a fire risk if left crumpled together. Place used rags in a covered metal container or handle disposal according to the product label and local waste rules.
Finally, do not rush on ladders. Move the ladder instead of leaning too far. Ceiling beam projects reward patience, steady hands, and a healthy respect for gravity.
Experience Notes: What Actually Makes No-Sanding Beam Staining Work
The biggest lesson from no-sanding beam projects is that preparation matters more than enthusiasm. Most people begin by choosing a stain color, imagining a gorgeous cabin-inspired ceiling, and mentally spending the money they will save by not hiring a professional. Then they discover that the beams have years of dust, greasy fingerprints, furniture polish residue, or a glossy finish slick enough to repel nearly anything.
The projects that turn out best are usually the ones where the testing phase is taken seriously. A small hidden spot tells you whether the gel stain will cling, whether the color reads warm or muddy, and whether the original finish has surprises waiting underneath. Some older oak beams become beautifully rich with one thin walnut-toned coat. Some pine beams turn dramatically darker than expected. Some “wood” beams reveal themselves to be foam or molded polyurethane, which is a useful discovery before you stain the entire living room.
Another common experience is underestimating how much lighting changes the color. Natural daylight often makes a stain look softer and more dimensional. Warm bulbs can make brown stain appear redder or more orange. Cool LED lighting can make the same stain look gray, charcoal, or slightly lifeless. It is worth viewing your test area at several times of day before committing. The beam color needs to cooperate with the room, not just with the label on the can.
Working overhead also changes the pace of the project. On a tabletop, it is easy to see every wet edge. On a ceiling beam, your neck gets tired, your arms get tired, and suddenly you are making finishing decisions while standing on the second step of a ladder and questioning whether “espresso” was perhaps too ambitious. Breaking the work into short sections prevents fatigue from becoming streaks. It also keeps the stain from drying before you have a chance to wipe it evenly.
People often expect a single heavy coat to create instant drama. In practice, thin coats win. A light first coat gives you a map of where the color is going. A second coat adds depth only where it is needed. This layered approach is especially helpful with rustic beams, reclaimed wood, knotty pine, or beams that have natural color variation. Instead of fighting every irregularity, use the stain to make the irregularities look intentional.
One more practical lesson: do not chase perfection at the expense of believable wood. Real wood has knots, darker grain lines, lighter patches, old nail marks, and personality. A beam that is slightly varied often looks more expensive than one that appears uniformly coated. The goal is a finish that makes visitors look up and say, “Those beams are beautiful,” not “Wow, somebody worked very hard to make that ceiling look suspiciously identical.”
When the surface is stable, the color is tested, and the stain is applied patiently, staining wood beams without sanding can create a dramatic transformation with far less dust and disruption than full refinishing. It is not a shortcut around every wood-finishing rule. It is simply a smarter method for the right kind of beam.
Final Thoughts
Staining wood beams without sanding is one of those home upgrades that can make a room feel completely different without changing the architecture. The secret is using gel stain as a controlled surface color, not expecting it to behave like a penetrating stain on bare lumber.
Clean deeply, test in a hidden spot, work in small sections, wipe consistently, respect dry times, and choose a low-sheen clear coat for protection. With patience and the right prep, you can transform dated beams into a richer, more intentional design featurewithout filling your house, hair, and lunch with sanding dust.