Every home has at least one drawer that behaves like a tiny indoor tornado. You open it looking for a measuring spoon and somehow find birthday candles, a screwdriver, a mystery key, three rubber bands, and a pen that has not worked since the Obama administration. The good news? You do not need a luxury custom cabinet system or a professional organizer with a clipboard to fix it. With a few simple materials, a tape measure, and a plan that does not involve pretending the drawer no longer exists, you can build DIY drawer organizers that actually make daily life easier.
DIY drawer organizers are practical, affordable, and wonderfully customizable. Unlike store-bought trays that almost fit but leave that useless half-inch gap where crumbs go to retire, handmade drawer dividers can be sized for your exact drawer and your exact stuff. Whether you want to organize kitchen utensils, office supplies, socks, makeup, craft tools, bathroom products, or the legendary junk drawer, the same basic principle applies: give every item a home, and the drawer stops acting like a junkyard with handles.
Why DIY Drawer Organizers Work So Well
The magic of a drawer organizer is not complicated. It creates boundaries. Loose items slide, pile up, hide under each other, and slowly transform into clutter soup. Dividers, bins, trays, and inserts separate categories so you can see what you own and grab what you need quickly. In kitchens, this keeps spatulas from wrestling with peelers. In bathrooms, it prevents lip balm from disappearing behind cotton swabs. In dressers, it keeps socks from forming a secret society in the back corner.
Another major advantage is flexibility. Your drawers are not the same size as everyone else’s, and your habits are not either. A person who cooks daily needs a different utensil setup than someone whose most-used kitchen tool is the takeout menu. DIY drawer dividers let you design around real life instead of forcing real life into a plastic tray that was apparently designed for five forks and one very optimistic ladle.
Before You Build: Empty, Sort, and Measure
Step 1: Empty the Drawer Completely
Start by removing everything from the drawer. Yes, everything. This is the part where the drawer reveals its secrets. You may find expired coupons, duplicate chargers, batteries of unknown emotional status, or a tiny packet of soy sauce that has been aging like fine wine. Put all items on a clear surface so you can see what you are dealing with.
Step 2: Declutter Before You Organize
Do not build a beautiful organizer for things you do not need. Toss trash, relocate items that belong elsewhere, and donate or recycle duplicates. If you own twelve pens and only two write, congratulations: you now own two pens. For clothing drawers, remove items that no longer fit, are worn out, or never get used. For bathroom drawers, check expiration dates on makeup, skincare, sunscreen, and medications.
Step 3: Group Items by Category
Once you know what is staying, sort items into groups. Kitchen drawers might include flatware, cooking tools, measuring spoons, clips, and towels. A desk drawer might have pens, sticky notes, cables, stamps, scissors, and paper clips. A vanity drawer could hold skincare, hair accessories, dental care, makeup, and daily essentials. Grouping similar items is the foundation of every successful drawer organizer.
Step 4: Measure the Drawer and the Items
Measure the inside width, depth, and height of the drawer. Then measure the items you plan to store. This prevents the classic DIY mistake of building a divider that looks amazing on the table but refuses to fit inside the drawer, which is humbling in a way no human needs before lunch. Remember to account for drawer slides, rounded corners, and any interior lips or hardware.
Best Materials for DIY Drawer Organizers
Wood Craft Boards
Thin wood boards are one of the most popular materials for DIY drawer dividers. They are sturdy, easy to paint or stain, and suitable for kitchen, office, dresser, and bathroom drawers. Craft boards around 1/4 inch to 1/2 inch thick usually work well, depending on the drawer size and how heavy the stored items are.
Cardboard or Foam Board
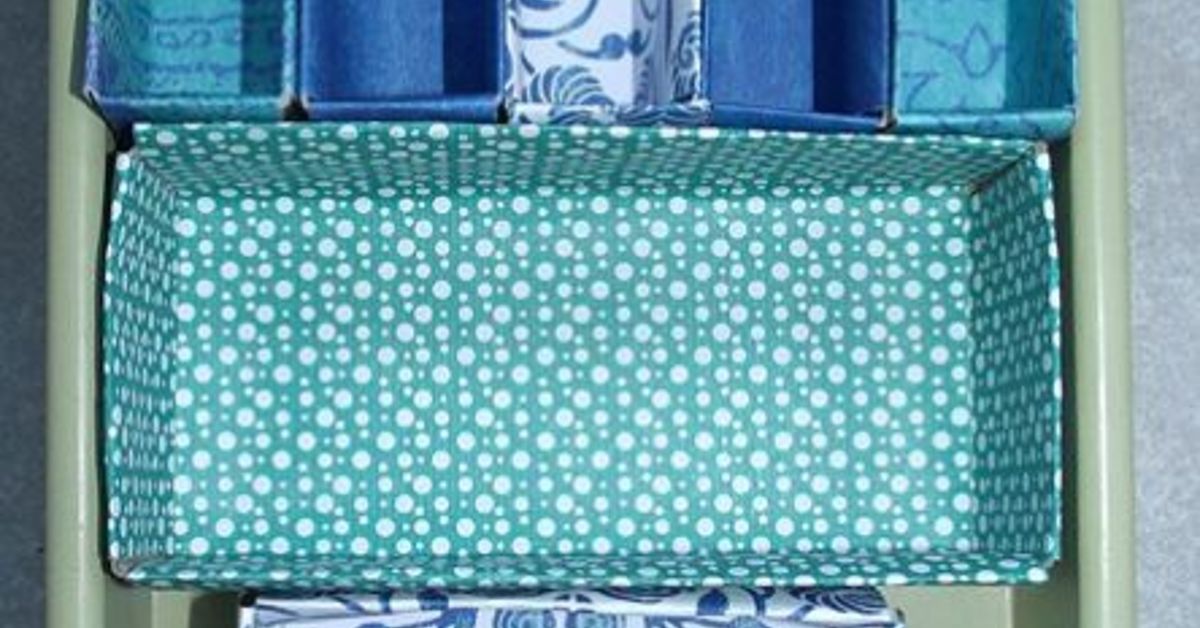
Cardboard is the budget champion. It is perfect for renters, temporary setups, kids’ rooms, craft drawers, and anyone who wants to test a layout before committing to wood. Foam board is slightly cleaner-looking and easier to cut straight. Cover either material with adhesive paper or fabric for a more polished finish.
Acrylic or Plastic Containers
Clear acrylic and plastic bins are excellent for bathroom drawers, makeup drawers, craft supplies, and office drawers. They make contents visible, which helps prevent overbuying. If you already have small containers, repurpose them before buying new ones. Empty mint tins, shallow boxes, and clean food containers can become surprisingly useful organizers.
Bamboo Dividers
Bamboo has become popular because it looks warm, clean, and more natural than plastic. Adjustable bamboo drawer dividers are widely used in kitchens and dressers, but you can also create a DIY version with thin bamboo strips or wood boards. Bamboo works especially well in spaces where the drawer is opened often and visible to guests.
Fabric Bins
Fabric organizers are ideal for clothing drawers. They are soft, lightweight, and less likely to snag delicate fabrics. Use them for socks, underwear, scarves, workout clothes, baby clothes, or accessories. They are not the best choice for wet bathroom products or messy craft supplies, unless you enjoy laundering your organizer, which sounds like a hobby invented by chaos.
How to Make Simple DIY Drawer Dividers
Supplies You May Need
For a basic wood drawer organizer, gather a measuring tape, pencil, craft boards, a small saw or utility-safe cutting tool, sandpaper, wood glue, clamps, and optional paint or stain. For cardboard or foam board, use a ruler, pencil, craft knife, cutting mat, hot glue or strong tape, and decorative paper if desired. If power tools are involved, use eye protection and adult supervision when appropriate.
Build the Layout First
Sketch your drawer on paper. Draw compartments based on the categories you created earlier. Place frequently used items toward the front or in the easiest-to-reach section. Keep long items in long channels, small items in small boxes, and bulky items in wider spaces. A good layout feels boringly logical, which is exactly what you want. Drawers are not the place for suspense.
Cut the Divider Pieces
Cut your material to match the inside dimensions of the drawer. For a simple grid, you will need long pieces that run front to back and shorter pieces that run side to side. Sand wood edges smooth so they do not scratch the drawer or your hands. If using cardboard, make clean straight cuts and test-fit each piece before gluing.
Use Interlocking Slots or Glue
There are two common approaches. The first is to glue the pieces together into a fixed frame. This is sturdy and simple. The second is to cut halfway slots into intersecting pieces so they slide together like a puzzle. Interlocking dividers are easier to adjust or remove later. If you are not sure your layout will last forever, choose the adjustable method. Future you may develop a new hobby, buy new utensils, or finally admit that the garlic press deserves its own compartment.
Test Before Final Assembly
Place the pieces in the drawer before gluing everything permanently. Add the actual items to see whether the compartments make sense. Can the drawer close? Can you remove the largest item easily? Are tiny items contained? Does the layout match how you actually use the drawer? A five-minute test can save you from a very professional-looking mistake.
DIY Drawer Organizer Ideas by Room
Kitchen Drawer Organizers
Kitchen drawers benefit from strong dividers because they hold oddly shaped tools. Create long sections for spatulas, tongs, whisks, and wooden spoons. Add small compartments for measuring spoons, corn holders, bag clips, and bottle openers. For flatware, build a custom tray with separate lanes for forks, spoons, knives, and serving pieces. Deep kitchen drawers can use pegboard-style inserts for plates, bowls, and food containers.
Junk Drawer Organizers
The best junk drawer is not truly junk. Think of it as a utility drawer with boundaries and better manners. Use small compartments for tape, scissors, pens, batteries, charging cables, rubber bands, matches, small tools, and spare keys. Keep only one junk drawer in the home if possible. Once every drawer becomes a junk drawer, the house has officially filed a complaint.
Bathroom Drawer Organizers
Bathroom drawers need categories that match routines. Create sections for morning skincare, nighttime products, hair tools, dental care, makeup, shaving supplies, and backup items. Clear containers work especially well because you can see when you are running low. Keep daily essentials in the top drawer or front section, and store extras in a lower drawer or separate bin.
Desk Drawer Organizers
A desk drawer should help you work, not invite you into a 20-minute search for a paper clip. Use narrow trays for pens and pencils, small boxes for clips and pushpins, a cable section for chargers, and a flat area for sticky notes. Keep duplicates under control. One stapler is useful. Four staplers suggest your desk is preparing for office warfare.
Dresser Drawer Organizers
For clothing drawers, the goal is visibility. Use dividers to separate socks, underwear, belts, scarves, activewear, and folded T-shirts. File folding works well because you can see each item from above instead of digging through stacks. Store everyday items in upper drawers and seasonal or less-used pieces lower down. Keep the system simple enough that laundry day does not require architectural training.
Craft and Hobby Drawer Organizers
Craft drawers are where tiny items multiply. Beads, thread, markers, glue sticks, stickers, washi tape, and paintbrushes all need their own zones. Use shallow compartments so supplies do not bury each other. Labeling is especially helpful here because craft drawers are often shared by multiple people, including children who believe “put it away” means “place it near the general area and hope for applause.”
Smart Design Tips for Better Drawer Organization
Design for Habits, Not Perfection
A drawer organizer should match how you live. If you always toss keys into the same drawer, make a key compartment there instead of pretending you will suddenly become the kind of person who hangs keys on a decorative hook. Successful organization reduces friction. It should be easier to put something away than to leave it loose.
Use Labels Where They Help
Labels are useful in shared drawers, kids’ drawers, craft areas, and utility drawers. They remind everyone where things belong. You do not need fancy labels. Painter’s tape, small paper tags, or a simple label maker all work. For a cleaner look, label the bottom of each compartment so the guide is visible only when the space is empty.
Leave Room to Grow
Do not pack every compartment to maximum capacity. A drawer that is full on day one has nowhere to go except downhill. Leave a little breathing room so new items can be added without destroying the system. This is especially important in kitchens, craft areas, and children’s rooms, where new objects appear as if delivered by invisible clutter elves.
Use Non-Slip Liner
A drawer liner helps keep organizers from sliding. It also protects the drawer bottom from scratches, crumbs, makeup dust, and small spills. Choose washable liner for kitchens and bathrooms. For dresser drawers, fabric or paper liner can add a decorative touch, but avoid anything that may snag clothing.
Think Vertically
Many people use only the bottom surface of a drawer, but drawer height matters too. Deep drawers can hold stacked bins, upright file-folded clothing, peg inserts, or taller dividers. In shallow drawers, keep organizers low so the drawer closes smoothly. Always test height before committing to a design.
Common DIY Drawer Organizer Mistakes
Making Compartments Too Small
Tiny compartments look satisfying until you realize nothing fits except two paper clips and a cough drop. Measure the actual items first. Add a little extra space so items can be removed easily.
Ignoring Drawer Function
A pretty organizer that blocks access is not a win. Put frequently used items where your hand naturally reaches. Store rarely used items toward the back or sides.
Using the Wrong Material
Cardboard is great for dry, light items but not ideal near moisture. Fabric bins are wonderful for clothes but less useful for leaky pens or cosmetics. Wood is sturdy but should be sanded and sealed if used in humid areas.
Skipping Maintenance
No organizer is magic. It needs a quick reset now and then. Spend two minutes once a week returning items to their compartments. Do a bigger cleanout every few months. This is much easier than waiting until the drawer starts making crunchy sounds when it opens.
Budget-Friendly DIY Drawer Organizer Ideas
You can organize drawers without spending much money. Use cereal boxes cut into shallow trays. Cover them with contact paper for a cleaner look. Repurpose phone boxes, jewelry boxes, tea tins, or small shipping boxes. Cut foam board into dividers for lightweight storage. Use cardboard strips with notches to create an adjustable grid. For a more finished look, paint wood dividers the same color as the drawer interior or stain them to match nearby cabinetry.
Another smart budget trick is to prototype with cardboard before building in wood. Live with the layout for a week. If it works, copy the same dimensions in a stronger material. If it does not, adjust the design without feeling guilty. Cardboard is forgiving. Wood is less forgiving and has a way of reminding you about math.
How to Keep Drawer Organizers Working Long-Term
The best drawer system is one you can maintain when life gets busy. Follow a simple rule: like goes with like, daily items stay easy to reach, and anything that does not belong gets removed quickly. Avoid turning organized compartments into permission slips for more clutter. A battery section should not become a museum of dead batteries. A pen section should not become a retirement home for dry markers.
When your needs change, update the organizer. That is the beauty of DIY. You can remove a divider, resize a section, add a container, or relabel compartments. Organization is not a one-time event; it is a living system. Fortunately, it is a system that can be fixed with a scrap of wood, a small box, or ten minutes of honest decluttering.
Real-Life Experiences With DIY Drawer Organizers
The first time I made a DIY drawer organizer, I dramatically underestimated how strange my drawer contents were. I thought I was building a simple kitchen utensil divider. Then I emptied the drawer and discovered three peelers, two pizza cutters, a lemon zester, chopsticks, a meat thermometer, a garlic press, birthday candles, and a tiny screwdriver that had no business living near the spatulas. The lesson was immediate: do not design from memory. Empty the drawer first, because drawers lie by omission.
My first layout looked neat on paper but failed in practice. I made equal-size compartments because symmetry felt responsible and adult. Unfortunately, kitchen tools are not equal-size creatures. The whisk needed more room, the measuring spoons needed less, and the tongs behaved like a metal alligator. After a few days, I rebuilt the organizer with one long section, two medium sections, and several small spaces. It was not perfectly symmetrical, but it worked beautifully. Function beat beauty, though the finished drawer still looked much better than the original utensil jungle.
Another experience came from organizing a bathroom vanity drawer. I used clear plastic containers instead of wood because the drawer held skincare, toothpaste, floss, lip balm, tweezers, and travel-size products. Visibility changed everything. Before the organizer, I would buy new lip balm because I thought I had lost it. After organizing, I learned I owned five. Apparently, my bathroom drawer had been running a small lip balm warehouse. Clear containers helped me use what I already had before buying more.
For a dresser drawer, I tried fabric dividers and file folding. This was surprisingly satisfying. Socks stayed in one section, workout clothes in another, and T-shirts stood upright instead of collapsing into a cotton landslide. The key was not folding everything perfectly; it was making the system easy to repeat. If a drawer requires too much precision, it will eventually fail on a tired laundry day. A good organizer should forgive normal human behavior.
The biggest lesson from multiple DIY drawer organizer projects is that maintenance matters more than the material. A wood divider can fail if the drawer is overstuffed. A cardboard organizer can succeed if the categories are clear. The best system is the one that fits the drawer, fits the items, and fits the person using it. Start simple, test the layout, and adjust without shame. The drawer does not need to look like a magazine photo. It needs to open smoothly, close without resistance, and stop hiding the scissors when you need them most.
Conclusion
DIY drawer organizers are one of the easiest home projects with one of the biggest daily payoffs. They turn cluttered drawers into useful storage, make routines faster, and help you stop buying duplicates of things you already own. Whether you build wood dividers, cut cardboard inserts, repurpose small boxes, or mix bins and trays, the goal is the same: create clear homes for the things you use. Start with one drawer, keep the design practical, and do not chase perfection. A drawer that works is better than a drawer that merely poses for photos.
Note: This article is written in original American English and synthesized from practical home-improvement, DIY, and professional organizing guidance. Source links are intentionally omitted per publishing requirements.