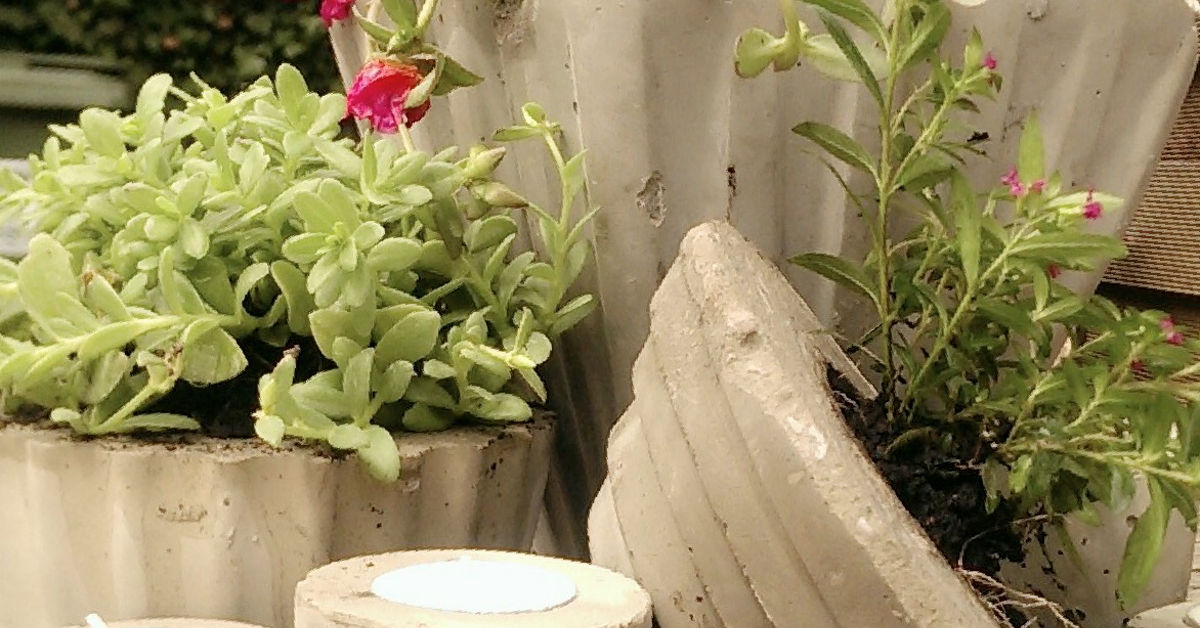
Concrete décor has a special talent: it looks expensive, modern, and p bag of cement-based mix, a few recycled containers, and a willingness to make a controlled mess, you can create sturdy planters and candle holders that fit industrial, minimalist, rustic, or contemporary interiors.
This guide explains how to choose a suitable mix, build simple molds, reduce air bubbles, cure each piece properly, add drainage, and finish the surface without accidentally producing a lumpy gray object that resembles an archaeological discovery.
Cement vs. Concrete: What Are You Actually Using?
Although people often search for “DIY cement planters,” cement and concrete are not technically the same material. Cement is the powdered binder. Concrete combines cement with water and aggregates such as sand, gravel, or crushed stone. Mortar generally combines cement with finer sand and does not contain the larger aggregate found in standard concrete.
For small candle holders and compact succulent pots, a fine-grained cement-based casting, repair, mortar, or sand mix is usually easier to push into corners than a chunky general-purpose concrete mix. Larger outdoor planters can handle a mix containing small aggregate, provided the finished walls are thick enough. Always check the bag for minimum application thickness, water requirements, working time, and recommended curing procedure.
Why Make DIY Concrete Planters and Candle Holders?
Concrete works well for decorative casting because it can take the shape and texture of almost any mold. Smooth plastic produces a relatively sleek surface, silicone captures fine details, cardboard creates subtle texture, and deliberately wrinkled liners can create an organic stone-like finish.
Making your own pieces also lets you control their proportions. You can create a shallow bowl for succulents, a deep herb pot, a geometric tealight holder, or a coordinated collection for a dining table. Reusable silicone molds provide consistent results, while recycled plastic containers offer an inexpensive way to experiment before investing in specialty supplies. Beginner Projects
- Small succulent or cactus pots
- Round planters made from nested plastic bowls
- Square planters cast in food-storage containers
- Tealight holders with removable metal cups
- Votive holders designed around glass inserts
- Miniature trays for candles, jewelry, or keys
- Concrete paver planter boxes assembled with masonry adhesive
A planter can even be assembled from concrete pavers rather than cast. This approach is useful when you want a rectangular outdoor container without constructing a complicated mold. Small gaps in the base should remain open so excess water has somewhere to go besides holding a pool party around the roots.
Tools and Materials
Gather everything before mixing. Cement-based products do not pause politely while you search the garage for a missing spoon.
Basic Materials
- Fine-grained cement-based mix suitable for the project thickness
- Clean water
- Large outer mold
- Smaller inner mold
- Mixing bucket or disposable container
- Sturdy stirring stick or small trowel
- Mold-release spray or a light coating approved for the mold material
- Tape, weights, stones, or sand for holding the inner mold in place
- Nitrile or waterproof gloves
- Safety glasses
- Dust mask or suitable particulate protection
- Plastic sheet or bag for moisture-controlled curing
- Sandpaper or a masonry sanding block
- Concrete-compatible sealer, if desired
For Planters
- Wooden dowel, straw, cork, or removable plug for forming a drainage hole
- Potting mix appropriate for the selected plants
- Felt pads or a saucer to protect furniture
For Candle Holders
- Metal tealight cup or heat-resistant glass votive insert
- A candle-sized cylinder for shaping the cavity
- Cork or felt pads for the bottom
Safety Before Style
Dry cement powder can irritate the eyes and respiratory system, while wet Portland cement is alkaline and may cause skin irritation, dermatitis, or chemical burns after prolonged contact. Work in a ventilated area, avoid creating dust, wear eye protection, and keep wet mix off your skin. Waterproof gloves are much better than bare hands followed by several minutes of increasingly worried rinsing. wash leftover concrete slurry into household drains. Let unwanted material harden in a disposable container, then dispose of it according to local waste requirements. Clean tools in a designated utility area before the residue sets.
How to Make a DIY Concrete Planter
Step 1: Select Two Compatible Molds
The outer mold determines the exterior shape. The inner mold creates the planting cavity. Plastic bowls, nursery pots, takeout containers, and silicone forms are practical options. The inner container should leave a consistent gap around the sides and bottom.
For a small planter, aim for walls thick enough to resist cracking when the mold is removed. Thin edges may look elegant, but they can snap during demolding, especially when the mix contains large aggregate.
Step 2: Prepare the Drainage Hole
Secure a removable plug through the bottom area before pouring. A short dowel, piece of tubing, tightly rolled straw, or cork can form the hole. Make sure it cannot float or shift.
Drainage is not an optional decorative feature for most plants. A hole allows excess water to escape and helps air remain available to the roots. When direct drainage is impossible, keep the plant in a separate nursery pot and use the concrete piece as a decorative cachepot. Remove the inner pot for watering and return it only after excess water has drained. 3: Apply Mold Release
Apply a thin, even layer of release agent to surfaces that will contact the mix. Too much oil can create discoloration or soft-looking patches. Silicone molds may require little preparation, while rigid recycled containers generally benefit from a light release coating.
Cover unwanted holes with strong tape. Check the bottom and seams carefully; wet cement mix has a remarkable ability to locate the one opening you forgot.
Step 4: Mix Carefully
Measure the mix and water according to the manufacturer’s directions. Add water gradually and stir until no dry pockets remain. The ideal consistency depends on the selected product, but it should generally be workable enough to settle into the mold without becoming watery.
Excess water can weaken cement-based materials and encourage shrinkage, cracking, and a dusty surface. The American Cement Association notes that, with other variables held equal, lower water content generally produces stronger concrete. Use only enough water to achieve the consistency required by the product instructions. 5: Fill the Outer Mold
Spoon or pour some mix into the bottom. Tap the mold against the work surface to help trapped air rise. Continue adding material in layers, pressing it gently into corners with a stick or narrow tool.
Insert the smaller mold and center it. Add stones, sand, or another weight so it does not float upward. Fill the sidewalls evenly, stopping slightly below the rim if you plan to sand the top flat.
Step 6: Remove Air Bubbles
Tap the sides repeatedly or vibrate the mold gently. Commercial casting tables are convenient, but a small DIY project usually responds well to patient tapping. Quikrete’s decorative casting instructions similarly recommend vibrating or tapping molds to release trapped air. pinholes create attractive character. A crater large enough to rent as a studio apartment means more tapping was needed.
Step 7: Cure Without Rushing
Cover the mold with plastic to reduce rapid moisture loss. Keep it level and protected from direct sun, freezing temperatures, wind, children, pets, and curious people who insist on poking the surface “just to see.”
Demolding time varies by mix, object size, temperature, and wall thickness. Manufacturer project examples range from about 18 hours for small decorative castings to 48 hours for compact lamps and at least four days for larger planters. These examples are not universal rules, so follow the directions for your exact product. Concrete continues developing strength after it becomes firm enough to demold. ining moisture during early curing supports better results. Accepted curing methods include covering the surface, retaining moisture, or using a compatible curing product. 8: Demold Gently
Remove weights and loosen the inner mold first. Flexible plastic can often be twisted carefully. Disposable rigid containers may need to be cut away. Avoid prying directly against a thin rim.
Let the piece rest longer if the surface feels soft, dark, or easily scratched. “Technically out of the mold” is not the same as “ready to be thrown into a tote bag with three gardening tools.”
Step 9: Sand and Finish
Once the piece is sufficiently hard, smooth sharp edges with suitable sandpaper or a masonry sanding block. Wear respiratory protection and sand outdoors or use a wet-sanding method compatible with the material.
Leave the planter natural, apply concrete stain, add painted geometric shapes, or seal it with a product intended for concrete and the planned indoor or outdoor environment. Follow the sealer’s drying and recoating instructions before adding soil or plants.
How to Make a Concrete Candle Holder
The casting process is similar to making a planter, but the cavity must fit the intended candle securely. The safest beginner design uses a removable metal tealight cup or heat-resistant glass votive insert. This keeps wax contained and makes cleaning easier.
Step 1: Choose a Stable Shape
Use a mold with a wide, level base. Tall, narrow candle holders can become top-heavy. A low geometric block, round puck, or shallow cylinder is easier to cast and less likely to tip.
Step 2: Form the Candle Cavity
Coat the exterior of a candle-sized insert or temporary cylinder with release agent. Place it in the center of the filled mold and weigh or tape it in position. The cavity should be deep enough to hold the metal or glass insert without hiding the flame or trapping excessive heat.
Step 3: Cure, Demold, and Test
After curing and demolding, check that the holder sits flat. Sand the base if necessary and add cork or felt pads. Place the insert inside and test the fit before lighting anything.
Keep candles on a stable, heat-resistant surface and away from curtains, furniture, decorations, children, and pets. Never leave a burning candle unattended. Candle and accessory designs can create burn or fire hazards when heat is trapped, flames become excessive, or containers fail, so decorative experiments should always remain secondary to safe use.
Creative Design Ideas
Add Integral Color
Use a pigment specifically formulated for cement-based materials. Mix it thoroughly for consistent color, or stir it only partially for a marbled effect. Record the amount used so matching a second batch does not become an abstract guessing exercise.
Create a Terrazzo-Inspired Finish
Add small decorative stone chips or compatible colored aggregate to the mix. After curing, sand the surface carefully to reveal the pieces. Test the technique on a small object first because aggressive sanding can expose air pockets or weaken delicate edges.
Use Textured Molds
Line the mold with corrugated cardboard, textured plastic, lace, leaves, or flexible shelf liner. The material must release cleanly and should not absorb so much water that it interferes with the surface.
Try Hypertufa
Hypertufa is a lighter, more porous cement-based material commonly made with Portland cement and lightweight ingredients such as perlite and peat moss. It creates an aged stone appearance and is especially popular for garden containers. Recipes and curing methods vary, so use a tested formula rather than improvising random proportions from whatever is hiding behind the shed. te a Coordinated Collection
Repeat one mold in several heights, or use the same pigment in different shapes. A group of three often looks more intentional than a single object. Odd-numbered arrangements also make it easier to vary heights without producing a display that looks like concrete soldiers standing at attention.
Preparing Concrete Planters for Plants
Allow the planter to complete the manufacturer-recommended curing period before planting. Rinse away dust, confirm that the drainage hole is open, and add a suitable commercial potting mix rather than compacted garden soil.
Match the container depth to the plant. Small succulents and compact herbs can work in modest pots, while vegetables and larger ornamentals need substantially more root space. Water until moisture exits through the drainage hole, then empty any saucer that remains filled. Containers without functioning drainage have a higher risk of waterlogged soil and root problems. te planters can be heavy. Position large pieces before filling them with damp soil, unless moving a small monument across the patio happens to be your preferred workout.
Common Problems and Practical Fixes
The Planter Cracked During Demolding
The piece may have been removed too early, the walls may be too thin, or the inner mold may have been forced out. Allow the next casting to cure longer, increase wall thickness, and use a more flexible mold.
The Surface Is Full of Large Holes
Air became trapped against the mold. Fill in smaller layers, press the mix into detailed areas, and tap or vibrate the container more thoroughly.
The Top Edge Is Uneven
The mold may not have been level, or the mix may have shifted when the inner container was inserted. Level the work surface before pouring and mark a fill line around the mold.
The Inner Mold Floated Up
Concrete exerts upward pressure on lightweight inserts. Add enough stones, sand, or another removable weight to keep the inner mold at the intended depth.
The Finished Piece Looks Chalky
Possible causes include excess mixing water, premature drying, or sanding before the material developed enough strength. Measure carefully, cover the mold during early curing, and wait longer before finishing.
The Planter Leaves Marks on Furniture
Moisture can migrate through porous material or escape from the drainage hole. Use a waterproof saucer, sealed base, pot feet, cork pads, or a removable plastic liner with its own drainage system.
Experience Notes: Lessons Learned From Making Concrete Décor
The first lesson is that mold selection matters almost as much as the mix. Containers with straight sides may grip a cured casting like they have entered into a legally binding relationship. Slightly tapered plastic cups are much easier to remove. Flexible silicone molds are even friendlier, especially for candle holders with geometric details.
The second lesson is to make test pieces. A tiny planter uses little material and quickly reveals whether the mixture is too stiff, the pigment is too strong, or the mold has an inconvenient seam. It is far less painful to dislike a three-inch sample than a planter heavy enough to qualify for its own ZIP code.
Another useful habit is measuring water instead of pouring it directly from a hose or bottle. Small batches are extremely sensitive to small changes. An extra splash may not look important, but it can turn a firm casting mix into gray soup. A marked measuring cup makes repeat batches more predictable.
Air bubbles are not automatically failures. Tiny pinholes create an honest concrete appearance and can make handmade pieces more interesting. The goal is not necessarily a flawless factory finish. The goal is to prevent major voids near rims, drainage holes, and narrow structural sections. Tapping the mold for a full minute feels excessive until the first smooth piece comes out.
Centering the inner mold is another deceptively difficult step. It may look centered from above while sitting much closer to one wall below the surface. Spacers cut from foam or wood can keep the gap even. Tape stretched across the top of the outer mold also helps hold a lightweight insert in position.
Patience during curing produces a larger improvement than most decorative tricks. Early demolding is tempting because the visible surface may look completely hard. The interior, however, can still be fragile. Waiting an additional day is usually easier than repairing a broken rim and pretending the missing corner was part of the original artistic vision.
When making planters, form the drainage hole during casting whenever possible. Drilling hardened concrete works, but it requires the correct masonry bit, careful positioning, eye protection, and a gentle pace. A removable plug is simpler and reduces the risk of cracking a small pot after almost all the work is finished.
For candle holders, removable inserts are worth the effort. Wax residue can be difficult to remove from an unsealed porous surface. Metal cups or glass votives allow the candle to be replaced without scraping wax from the concrete. They also create a clear boundary between the flame and the handmade casting.
Finishing deserves restraint. A raw concrete surface already has visual character. Sand only the sharp areas, uneven base, and rough rim unless a highly polished result is intentional. Over-sanding can erase texture and round off crisp geometric details.
Finally, keep notes. Record the product, batch size, water quantity, pigment amount, mold type, temperature, demolding time, and final result. Concrete crafting becomes dramatically easier when successful projects can be repeated instead of reconstructed from a vague memory involving “about half a cup” and “some blue powder.”
Conclusion
DIY concrete and cement planters and candle holders combine practical casting skills with nearly unlimited design possibilities. The basic process is straightforward: select an appropriate fine-grained mix, prepare compatible molds, measure the water, remove trapped air, control moisture during curing, and resist the urge to demold too early.
Planters need dependable drainage and enough space for healthy roots. Candle holders need stable proportions, removable heat-resistant inserts, and responsible placement whenever a flame is used. Once those functional details are handled, color, texture, shape, and finish can be customized to suit almost any room, patio, shelf, or gift basket.
Your first casting may not look like boutique décor. It may have bubbles, a slightly crooked rim, or one side with considerably more personality than the other. That is normal. Concrete rewards repetition, and even imperfect pieces can become excellent homes for succulentsor very sturdy containers for paper clips.