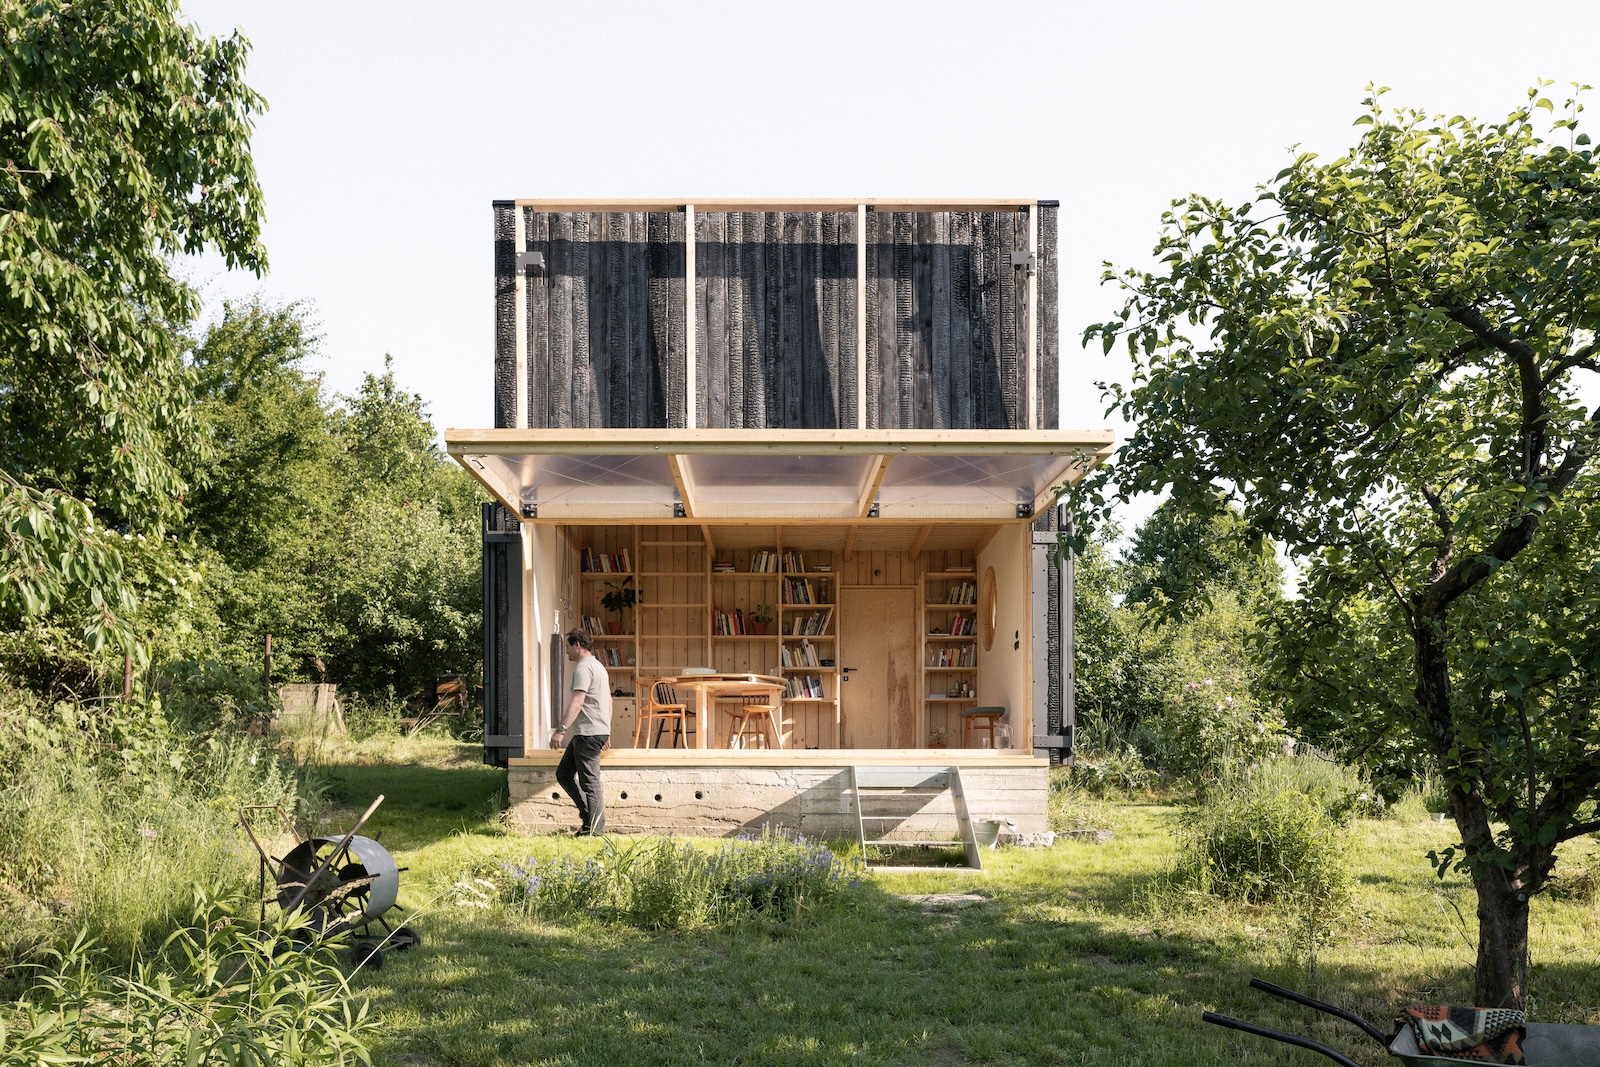
A garden shed should be more than a wooden box where rakes go to disappear and half-empty bags of potting mix quietly turn into geology. The ultimate garden shed is a hardworking backyard headquarters: part storage room, part workshop, part potting station, and part escape hatch from household noise.
Creating one does not require a mansion-sized yard or a budget that makes your lawn mower nervous. It requires thoughtful planning. The right location, foundation, material, doors, lighting, ventilation, and storage layout matter far more than decorative gadgets. Get those essentials right, and even a modest shed can feel spacious, organized, and surprisingly enjoyable to use.
This guide explains how to design, build, buy, equip, and maintain a garden shed that works beautifully in real lifenot merely in photographs where nobody seems to own a muddy shovel.
What Makes a Garden Shed “Ultimate”?
The ultimate garden shed is not necessarily the largest or most expensive model. It is the shed that matches its owner’s actual gardening habits. A vegetable gardener may need seed storage, a washable work surface, and room for harvesting baskets. A lawn enthusiast may prioritize double doors, equipment parking, and fuel-safe storage. A flower gardener might want shelves for pots, a sink, and generous natural light.
Before selecting a size, list everything the shed must hold. Include obvious items such as shovels, hoses, pruners, soil, and a mower, but also remember seasonal objects: row covers, patio cushions, stakes, sprinklers, holiday planters, and that wheelbarrow that occupies approximately the same amount of space as a small canoe.
When estimating capacity, leave room for movement and future purchases. Lowe’s recommends planning roughly 25 percent more space than your current storage needs. This extra capacity prevents the doorway from becoming an archaeological dig every time you need the hedge trimmer. Door dimensions should also accommodate the largest piece of equipment you plan to store.
Research basis: shed sizing, access, future capacity, and local restrictions.
Choose the Right Location Before Choosing the Shed
Check Local Rules First
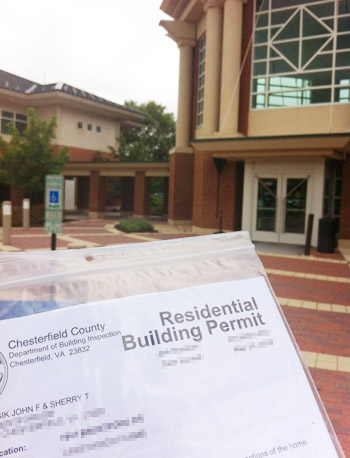
Before ordering lumber or clicking “buy now,” contact your local building or zoning department. Shed requirements vary by city, county, climate, lot size, and intended use. Rules may address permits, maximum square footage, overall height, property-line setbacks, utility easements, foundations, electrical work, and whether the structure can be used as an office or living space.
Homeowners’ association rules may add another layer of requirements covering paint colors, roof materials, visibility from the street, or placement. Checking first is much cheaper than relocating a completed shed because it is six inches too close to a fence.
Study Sun, Water, and Access
Select a spot that stays reasonably dry and offers a practical route from the garden. Avoid low areas where stormwater collects. Water trapped under or around a shed can contribute to uneven floors, moisture damage, mold, rust, and premature deterioration.
Think about daily convenience. A beautiful shed hidden at the farthest edge of the property may become annoying when every forgotten tool requires a miniature expedition. At the same time, placing it directly against a fence or dense hedge can make painting, repairs, pest inspection, and gutter cleaning difficult.
Consider sunlight as well. Morning light can make a potting shed pleasant without producing brutal afternoon heat. If the shed will contain many windows or a glazed roof, provide ventilation and shade to control heat buildup.
Research basis: zoning checks, site access, drainage, solar orientation, and maintenance clearance.
Build the Shed on a Foundation That Will Last
A shed is only as reliable as the surface supporting it. An unstable foundation can cause floors to sag, doors to bind, walls to shift, and roof joints to separate. Unfortunately, a fancy cupola cannot distract from a door that requires shoulder-checking every spring.
The correct foundation depends on shed size, soil, frost depth, local regulations, equipment weight, and manufacturer instructions. Common options include:
- Compacted gravel pads: Useful for many small and medium sheds because they provide drainage and can be carefully leveled.
- Concrete blocks or piers: Suitable for certain framed floors when correctly spaced and installed on stable ground.
- Pressure-treated timber platforms: A practical solution for some prefabricated or wood-framed buildings.
- Concrete slabs: Strong, durable, and helpful for heavy equipment, workshops, and sheds that require an easy-to-clean floor.
- Frost-protected footings: Often necessary in cold regions or for larger structures, depending on local codes.
Whichever system you use, the base should be level, adequately drained, and strong enough for both the structure and its contents. A riding mower, shelving full of soil amendments, and a collection of power tools create a very different load than a few hand tools and watering cans.
Never assume a prefabricated shed includes a floor or foundation. Read the specifications and installation manual before delivery. Some models include a floor frame but still require a prepared base underneath it.
Research basis: gravel, slab, block, pier, frost-line, drainage, and load considerations.
Select the Best Shed Material
Wood: Flexible and Good-Looking
Wood sheds are highly customizable. Shelves, cabinets, windows, electrical boxes, hooks, insulation, and decorative trim can be attached with ordinary construction methods. Wood also blends naturally into many landscapes and can be painted to coordinate with the house.
The trade-off is maintenance. Siding, trim, door bottoms, and roof edges should be inspected for peeling paint, insect activity, rot, and moisture damage. Keeping the wood above wet soil and maintaining the exterior finish greatly improves longevity.
Resin or Vinyl: Low-Maintenance Convenience
Resin and vinyl sheds resist rot, insects, and rust. Many models are relatively straightforward to assemble and include molded floors, skylights, vents, or integrated accessory systems. They are attractive choices for homeowners who want storage without an annual relationship with a paintbrush.
Customization may be more limited than with wood. Wall-mounted shelves and hooks often require manufacturer-approved hardware, and lightweight structures must be anchored according to instructions.
Metal: Practical and Budget-Conscious
Metal sheds can offer substantial storage for a reasonable price. Galvanized or coated panels require little exterior maintenance and are not vulnerable to termites or wood rot.
However, thin metal panels can dent, condensation may develop on interior surfaces, and assembly can be fiddly. Anyone who has tried to align sheet-metal holes in a breeze knows that the wind has a mischievous personality. A solid base, proper anchoring, ventilation, and careful installation are essential.
Research basis: wood, resin, vinyl, and metal characteristics and foundation needs.
Design an Interior That Works Like a Tiny Workshop
Create Storage Zones
Divide the shed into zones based on activity. Keep everyday hand tools close to the entrance. Place long-handled tools together on a wall rack. Store potting supplies near the workbench. Reserve lower shelves for heavy bags and containers, while lightweight seasonal items can occupy higher shelves.
A logical layout saves time because every object has a home. It also prevents the classic shed domino effect, in which removing one rake causes three shovels, a tomato cage, and an unidentified piece of irrigation equipment to fall over.
Use the Walls Before Sacrificing the Floor
Vertical storage is the secret to making a small shed feel generous. Pegboard, adjustable rails, hooks, magnetic strips, wall-mounted baskets, and French-cleat systems keep tools visible and accessible. Door-mounted organizers can hold gloves, hand tools, kneeling pads, or lightweight supplies.
Install shelves that can handle the expected weight, and fasten them to structural framing rather than thin wall panels. Clear containers make small parts easy to identify, while labels eliminate the need to open seven boxes in search of sprinkler fittings.
Add a Serious Potting Bench
A useful potting bench should have a comfortable working height, a durable surface, and enough depth for repotting plants without creating a soil avalanche. A raised edge can prevent loose mix from spilling onto the floor. Add a shelf for frequently used pots and a drawer or lidded container for labels, twine, markers, and seed packets.
If plumbing is practical and permitted, a small utility sink is a luxurious upgrade. Without plumbing, a removable tub or bucket system can still simplify cleanup.
Protect the Main Aisle
Keep a direct path between the entrance and the back of the shed. Large equipment should roll in and out without requiring five smaller objects to be moved first. Double doors and a properly supported ramp are especially valuable for lawn mowers, wheelbarrows, carts, and snow blowers.
Research basis: vertical storage, zoning, hooks, shelves, movable systems, and potting stations.
Improve Lighting, Ventilation, and Weather Protection
Let in Useful Daylight
Windows, glazed doors, skylights, and translucent roof panels can reduce the need for electric lighting during daytime tasks. Position work surfaces where daylight reaches them without creating uncomfortable glare.
Windows also make the building feel less like a storage locker and more like an inviting garden room. For security, consider smaller windows, locks, curtains, frosted glazing, or strategic placement that does not advertise every tool inside.
Give Moisture a Way Out
Airflow helps control heat and moisture. Ridge vents, soffit vents, wall vents, operable windows, or a cupola can allow warm, damp air to escape. Ventilation is particularly important in sheds containing wet tools, soil, garden chemicals, or gasoline-powered equipment.
Hang tools rather than leaving metal heads against a damp floor. Allow muddy equipment to dry before packing it tightly into a corner. Gutters and downspouts can direct roof runoff away from the foundation, provided the discharge does not create a new puddle elsewhere.
Insulate Only When the Use Justifies It
A basic tool shed may not need insulation. A workshop, office, propagation room, or four-season hobby space is different. Insulation can improve comfort and reduce condensation, but it must be installed with appropriate air sealing, ventilation, interior protection, and moisture control.
Converting a shed into occupied workspace may also trigger additional requirements for electrical service, emergency access, structural capacity, heating, and permits. A garden shed with a desk is still a structure, not a loophole wearing curtains.
Research basis: shed ventilation, daylight, condensation control, and insulation.
Make Safety and Security Part of the Design
Install a dependable latch and lock, especially when the shed contains sharp tools, chemicals, or expensive equipment. Hinges should be resistant to easy tampering, and windows should close securely. Motion-activated exterior lighting can improve nighttime visibility and discourage casual theft.
Pesticides deserve particular care. The U.S. Environmental Protection Agency recommends following label instructions, keeping pesticides in their original labeled containers, and storing them away from children, pets, food, feed, medical supplies, flooding, and ignition sources. A locked, ventilated cabinet provides an additional layer of protection.
Do not casually store gasoline, propane cylinders, oily rags, paint, lithium-ion batteries, or flammable products in a hot, poorly ventilated shed. Follow product labels, fire-safety recommendations, and local regulations. Remove rechargeable tool batteries when temperature extremes or manufacturer guidance make indoor storage safer.
Electrical work should be designed and installed according to local code. Use outdoor-rated fixtures and components where required, and avoid relying on a household extension cord as permanent wiring. It may appear convenient, but so does using a flowerpot as a ladder until gravity submits its review.
Research basis: pesticide containers, locked ventilation, flood avoidance, child safety, and original labels.
Blend the Shed Into the Garden
A shed can be practical without looking like a shipping crate that lost its paperwork. Repeat design details from the house, such as siding color, roof pitch, trim, door style, or hardware. This visual connection helps the outbuilding feel intentional.
Use a path to connect the shed with the patio, driveway, or primary garden beds. Gravel, brick, flagstone, or stepping stones can provide all-weather access while adding character. Make the path wide and stable enough for a wheelbarrow or mower.
Foundation plantings soften the structure, but leave enough clearance for airflow and maintenance. Trellises, window boxes, rain barrels, and compact planting beds can turn the shed into a garden focal point. Avoid directing irrigation against siding or planting vigorous vines where they can invade roofing, gutters, or vents.
Paint can do much of the decorative work. Soft green, charcoal, navy, barn red, warm white, or a color borrowed from the home’s trim can make an ordinary shed feel custom. A contrasting door provides personality without requiring the entire building to shout across the yard.
Research basis: matching structures to landscapes, repeating architectural details, planting beds, and decorative integration.
Should You Build, Buy, or Hire an Installer?
Building from scratch offers maximum control over dimensions, framing, windows, doors, roof style, and interior layout. It may also be rewarding for experienced DIYers. However, the project requires tools, time, accurate measurements, safe lifting, and familiarity with structural construction.
A prefabricated kit simplifies design decisions and material purchasing, but “kit” does not always mean “effortless.” Large components may require several people, and the foundation must usually be completed before assembly. Read reviews, manuals, warranty terms, snow-load information, wind requirements, and included-component lists before purchasing.
Professional installation costs more but can be worthwhile for large sheds, difficult sites, concrete work, electrical upgrades, or tight schedules. Clarify who handles permits, site preparation, material delivery, debris removal, anchoring, painting, and final inspection.
The least expensive quote is not necessarily the least expensive finished shed. A bargain structure placed on a poor base can become a premium-priced repair project with free frustration included.
Research basis: DIY construction, prefabricated assembly, equipment loads, and installation considerations.
Spend Money Where It Matters Most
Prioritize the foundation, roof, weather-resistant exterior, doors, anchoring, and structural framing. These features protect everything else. Decorative handles and vintage signs can be added later; correcting a sinking foundation is less charming.
Good upgrades usually improve daily use. Examples include wider doors, a ramp, adjustable shelving, additional wall framing for tool racks, a durable workbench, gutters, vents, and basic lighting. Choose accessories that solve a real problem rather than filling the shed with products designed to organize products.
Leave some open wall and floor space. Gardens evolve, equipment changes, and hobbies expand. A flexible shed can adapt without requiring a total renovation every time you acquire another long-handled implement.
Maintain the Shed Season by Season
Inspect the roof, flashing, siding, doors, vents, foundation, and surrounding drainage at least once or twice a year. Look for leaks, peeling finishes, loose fasteners, insect activity, warped boards, corrosion, and vegetation touching the structure.
Clean soil from tools before storage, disinfect equipment when plant disease is a concern, allow tools to dry, sharpen cutting edges, and lightly oil suitable metal surfaces. Keep fertilizer and seed bags on shelves rather than directly on a floor where moisture may reach them.
At the end of the main growing season, remove trash, damaged containers, expired products, and mysterious scraps saved for projects that have not materialized since the previous decade. Reorganize by frequency of use so spring begins with a functional workspace instead of a cluttered apology.
Research basis: cleaning tools, dry storage, disease prevention, oiling metal, and elevating bags.
Real-World Experience: What Shed Owners Learn After the First Season
Experience 1: Extra Floor Space Disappears Quickly
One of the most common lessons is that an empty shed looks enormous until real equipment arrives. A mower extends farther than expected. A wheelbarrow refuses to park politely. Tomato cages occupy a comical amount of volume while contributing almost no structural discipline.
The practical solution is not simply buying the largest shed the yard can hold. It is planning the largest objects first. Mark their footprints on the proposed floor with tape or stakes. Simulate the door swing and walking path. Then decide where smaller items will live. This simple exercise often reveals that a slightly wider door or deeper equipment bay is more valuable than an extra decorative window.
Experience 2: Accessibility Beats Maximum Capacity
A tightly packed shed may hold more, but it does not necessarily work better. When frequently used tools are trapped behind seasonal furniture, the shed becomes an obstacle rather than a solution.
Successful layouts place everyday tools between the entrance and workbench. Rarely used supplies go higher or farther back. Heavy items remain low. Seasonal gear can be stored in labeled containers that move as a unit. The goal is not to fill every cubic inch. The goal is to retrieve pruning shears without reenacting an escape-room challenge.
Experience 3: Mud Management Deserves Its Own Plan
Garden sheds collect soil, grass, leaves, and water because that is what garden equipment carries. A floor that looks pristine on installation day may become gritty after the first rainy weekend.
Durable flooring, an exterior boot scraper, a broom near the door, washable mats, and a defined place for wet tools make cleanup easier. Some gardeners create a small covered landing beside the shed where muddy equipment can drip and dry before entering. Others keep a bucket of sand or suitable tool-cleaning supplies near the workbench. The best system is the one simple enough to use when you are tired.
Experience 4: Lighting Changes How the Shed Feels
A dark shed encourages fast visits and careless storage. A bright shed invites people to clean tools, read labels, organize seeds, and complete small projects properly. Natural light is particularly valuable, but even modest electric or solar lighting can improve usability.
Task lighting over a bench is more useful than a single dim fixture in the center of the ceiling. Exterior lighting near the doors also makes evening access safer. Owners often think of lighting as a luxury and later discover that it is one of the upgrades they appreciate most.
Experience 5: Adjustable Storage Outperforms Perfect Storage
A custom rack built for today’s tools may become awkward after equipment changes. Adjustable shelves, movable hooks, pegboard, and modular rails tolerate new hobbies and different garden seasons. They also make cleaning easier because objects can be removed or rearranged without dismantling half the interior.
The smartest sheds include a combination of fixed and flexible elements. The workbench, mower bay, and heavy-duty lower shelves can remain permanent. Smaller bins, hooks, baskets, and upper shelves can move as needed.
Experience 6: Small Comforts Encourage Better Habits
A stool, radio shelf, fan, clock, towel hook, beverage spot, or attractive view may sound unrelated to storage, yet these details make the shed pleasant to use. When a workspace feels welcoming, people are more likely to return tools, sweep the floor, and maintain equipment.
Comfort should never compromise safety. Keep seating away from chemicals, fuel, sharp tools, and unstable stacks. Still, there is no rule saying a hardworking shed must feel grim. A cheerful paint color and a decent place to sit can transform ten minutes of garden cleanup into a satisfying end-of-day ritual.
Experience 7: The Ultimate Shed Is Never Completely Finished
A productive garden changes every year, and its shed should be allowed to change with it. You may add a propagation shelf, install a rain barrel, replace open shelving with cabinets, or discover that one wall should be dedicated entirely to hand tools.
Rather than treating these changes as design failures, consider them evidence that the shed is doing its job. The ultimate garden shed is not a museum display. It is an evolving workspace shaped by muddy boots, successful harvests, broken handles, new ideas, and the occasional purchase made because a garden center offered an irresistible discount.
Conclusion
The ultimate garden shed begins with practical decisions: a legal location, stable foundation, durable structure, weather protection, safe storage, and an interior planned around real equipment. Once those essentials are established, windows, paint, landscaping, and personal details can turn a utilitarian building into a backyard destination.
Design for access rather than maximum clutter. Use walls efficiently, preserve a clear aisle, control moisture, secure hazardous products, and leave room for future changes. A well-planned shed will not perform the weeding for you, unfortunately, but it can make nearly every garden task faster, safer, and far more enjoyable.