Note: This guide is written for general educational use and should be paired with your vehicle’s service manual. Clutch hydraulic systems vary by make, model, year, and whether the slave cylinder is external or concentric inside the transmission bellhousing.
If your manual-transmission car suddenly feels like it is auditioning for a drama series every time you shift, air in the clutch hydraulic system may be the villain. A soft clutch pedal, grinding when selecting gears, trouble getting into first or reverse, or a pedal that sinks without much resistance can all point toward hydraulic trouble. One common fix is to bleed the slave cylinder, which removes trapped air from the clutch fluid circuit and restores firm, predictable clutch operation.
The good news? Bleeding a slave cylinder is not automotive sorcery. The bad news? It can be messy, awkward, and occasionally more stubborn than a lug nut installed by Thor. With the right tools, patience, and a safety-first mindset, many DIYers can handle the job at home. This guide explains how to bleed a clutch slave cylinder in 14 clear steps, including preparation, safety tips, troubleshooting, and real-world lessons that can save you from turning a simple job into a garage opera.
What Does the Slave Cylinder Do?
In a hydraulic clutch system, your clutch pedal pushes a master cylinder. The master cylinder sends pressurized brake fluid through a hydraulic line to the slave cylinder. The slave cylinder then moves the clutch fork or release mechanism, helping disengage the clutch so you can shift gears smoothly.
Brake fluid is used because it transfers force well under pressure. Air, however, compresses. When air bubbles enter the system, the pedal may feel spongy or weak because pedal force gets wasted squishing bubbles instead of moving the clutch release mechanism. Bleeding the slave cylinder removes those bubbles and replaces old or aerated fluid with clean fluid.
Signs You May Need to Bleed the Slave Cylinder
You may need to bleed the clutch slave cylinder if you notice a clutch pedal that feels soft, springy, or unusually low. Other warning signs include difficulty shifting, grinding gears, a clutch that will not fully disengage, or a pedal that sticks near the floor. These symptoms can appear after replacing a clutch master cylinder, slave cylinder, hydraulic line, clutch kit, or after the reservoir has run low.
However, bleeding is not a magic wand. If the system has a leak, a failed master cylinder, a bad slave cylinder seal, or contaminated fluid, bleeding may only give temporary relief. If the pedal improves and then quickly gets soft again, inspect for leaks before blaming your bleeding technique.
Tools and Supplies You Will Need
- Correct brake fluid listed in your owner’s manual, often DOT 3 or DOT 4
- Line wrench or box-end wrench that fits the bleeder screw
- Clear vinyl hose that fits snugly over the bleeder nipple
- Catch bottle or drain container
- Jack stands or ramps if access under the vehicle is needed
- Wheel chocks
- Shop towels and brake cleaner
- Safety glasses and nitrile gloves
- A helper, unless using a vacuum bleeder or pressure bleeder
Safety First: Do Not Skip This Part
Brake fluid can damage paint, irritate skin, and make a floor slick. Keep water and shop towels nearby for accidental spills, and wipe painted surfaces immediately. Never crawl under a vehicle supported only by a jack. Use jack stands on solid, level ground, chock the wheels, set the parking brake, and keep the engine off during the bleeding process.
Also, do not reuse old fluid that comes out of the bleeder. It may contain air, moisture, dirt, or tiny bits of rubber from aging seals. Fresh fluid is cheaper than doing the job twice, and your clutch system will not send you a thank-you card for recycling dirty fluid.
How to Bleed a Slave Cylinder: 14 Steps
Step 1: Park on Level Ground
Park the vehicle on a flat surface. Turn off the engine, set the parking brake, and place wheel chocks behind the wheels. If you need to lift the car for access, use proper jack points and support it securely with jack stands. A level vehicle helps prevent trapped air from hiding in high spots.
Step 2: Locate the Clutch Fluid Reservoir
Open the hood and find the clutch master cylinder reservoir. Some vehicles have a dedicated clutch reservoir, while others share fluid with the brake master cylinder. Check your owner’s manual if you are unsure. Clean the cap and surrounding area before opening it so dirt does not fall inside.
Step 3: Check the Correct Fluid Type
Read the cap or service manual to confirm the fluid type. Most hydraulic clutch systems use DOT 3 or DOT 4 brake fluid, but you should never guess. Mixing the wrong fluid can damage seals and create a bigger problem than the one you started with.
Step 4: Fill the Reservoir
Top off the reservoir with fresh fluid. During bleeding, the fluid level will drop, so keep checking it. This is one of the most important rules in the entire job: never let the reservoir run dry. If it does, air enters the system again, and congratulations, you have just unlocked extra work.
Step 5: Locate the Slave Cylinder Bleeder Screw
The slave cylinder is usually mounted near the transmission. On external slave cylinders, the bleeder screw is often easy to spot. On concentric internal slave cylinders, the bleeder may be routed outside the bellhousing. Clean the bleeder area before loosening anything to prevent contamination.
Step 6: Inspect for Leaks Before Bleeding
Look for wetness around the master cylinder, hydraulic line, slave cylinder, and inside the bellhousing area if visible. If fluid is leaking, bleeding alone will not solve the issue. A leak allows air back in and may eventually leave you with no clutch pedal when you need it most.
Step 7: Attach the Clear Hose
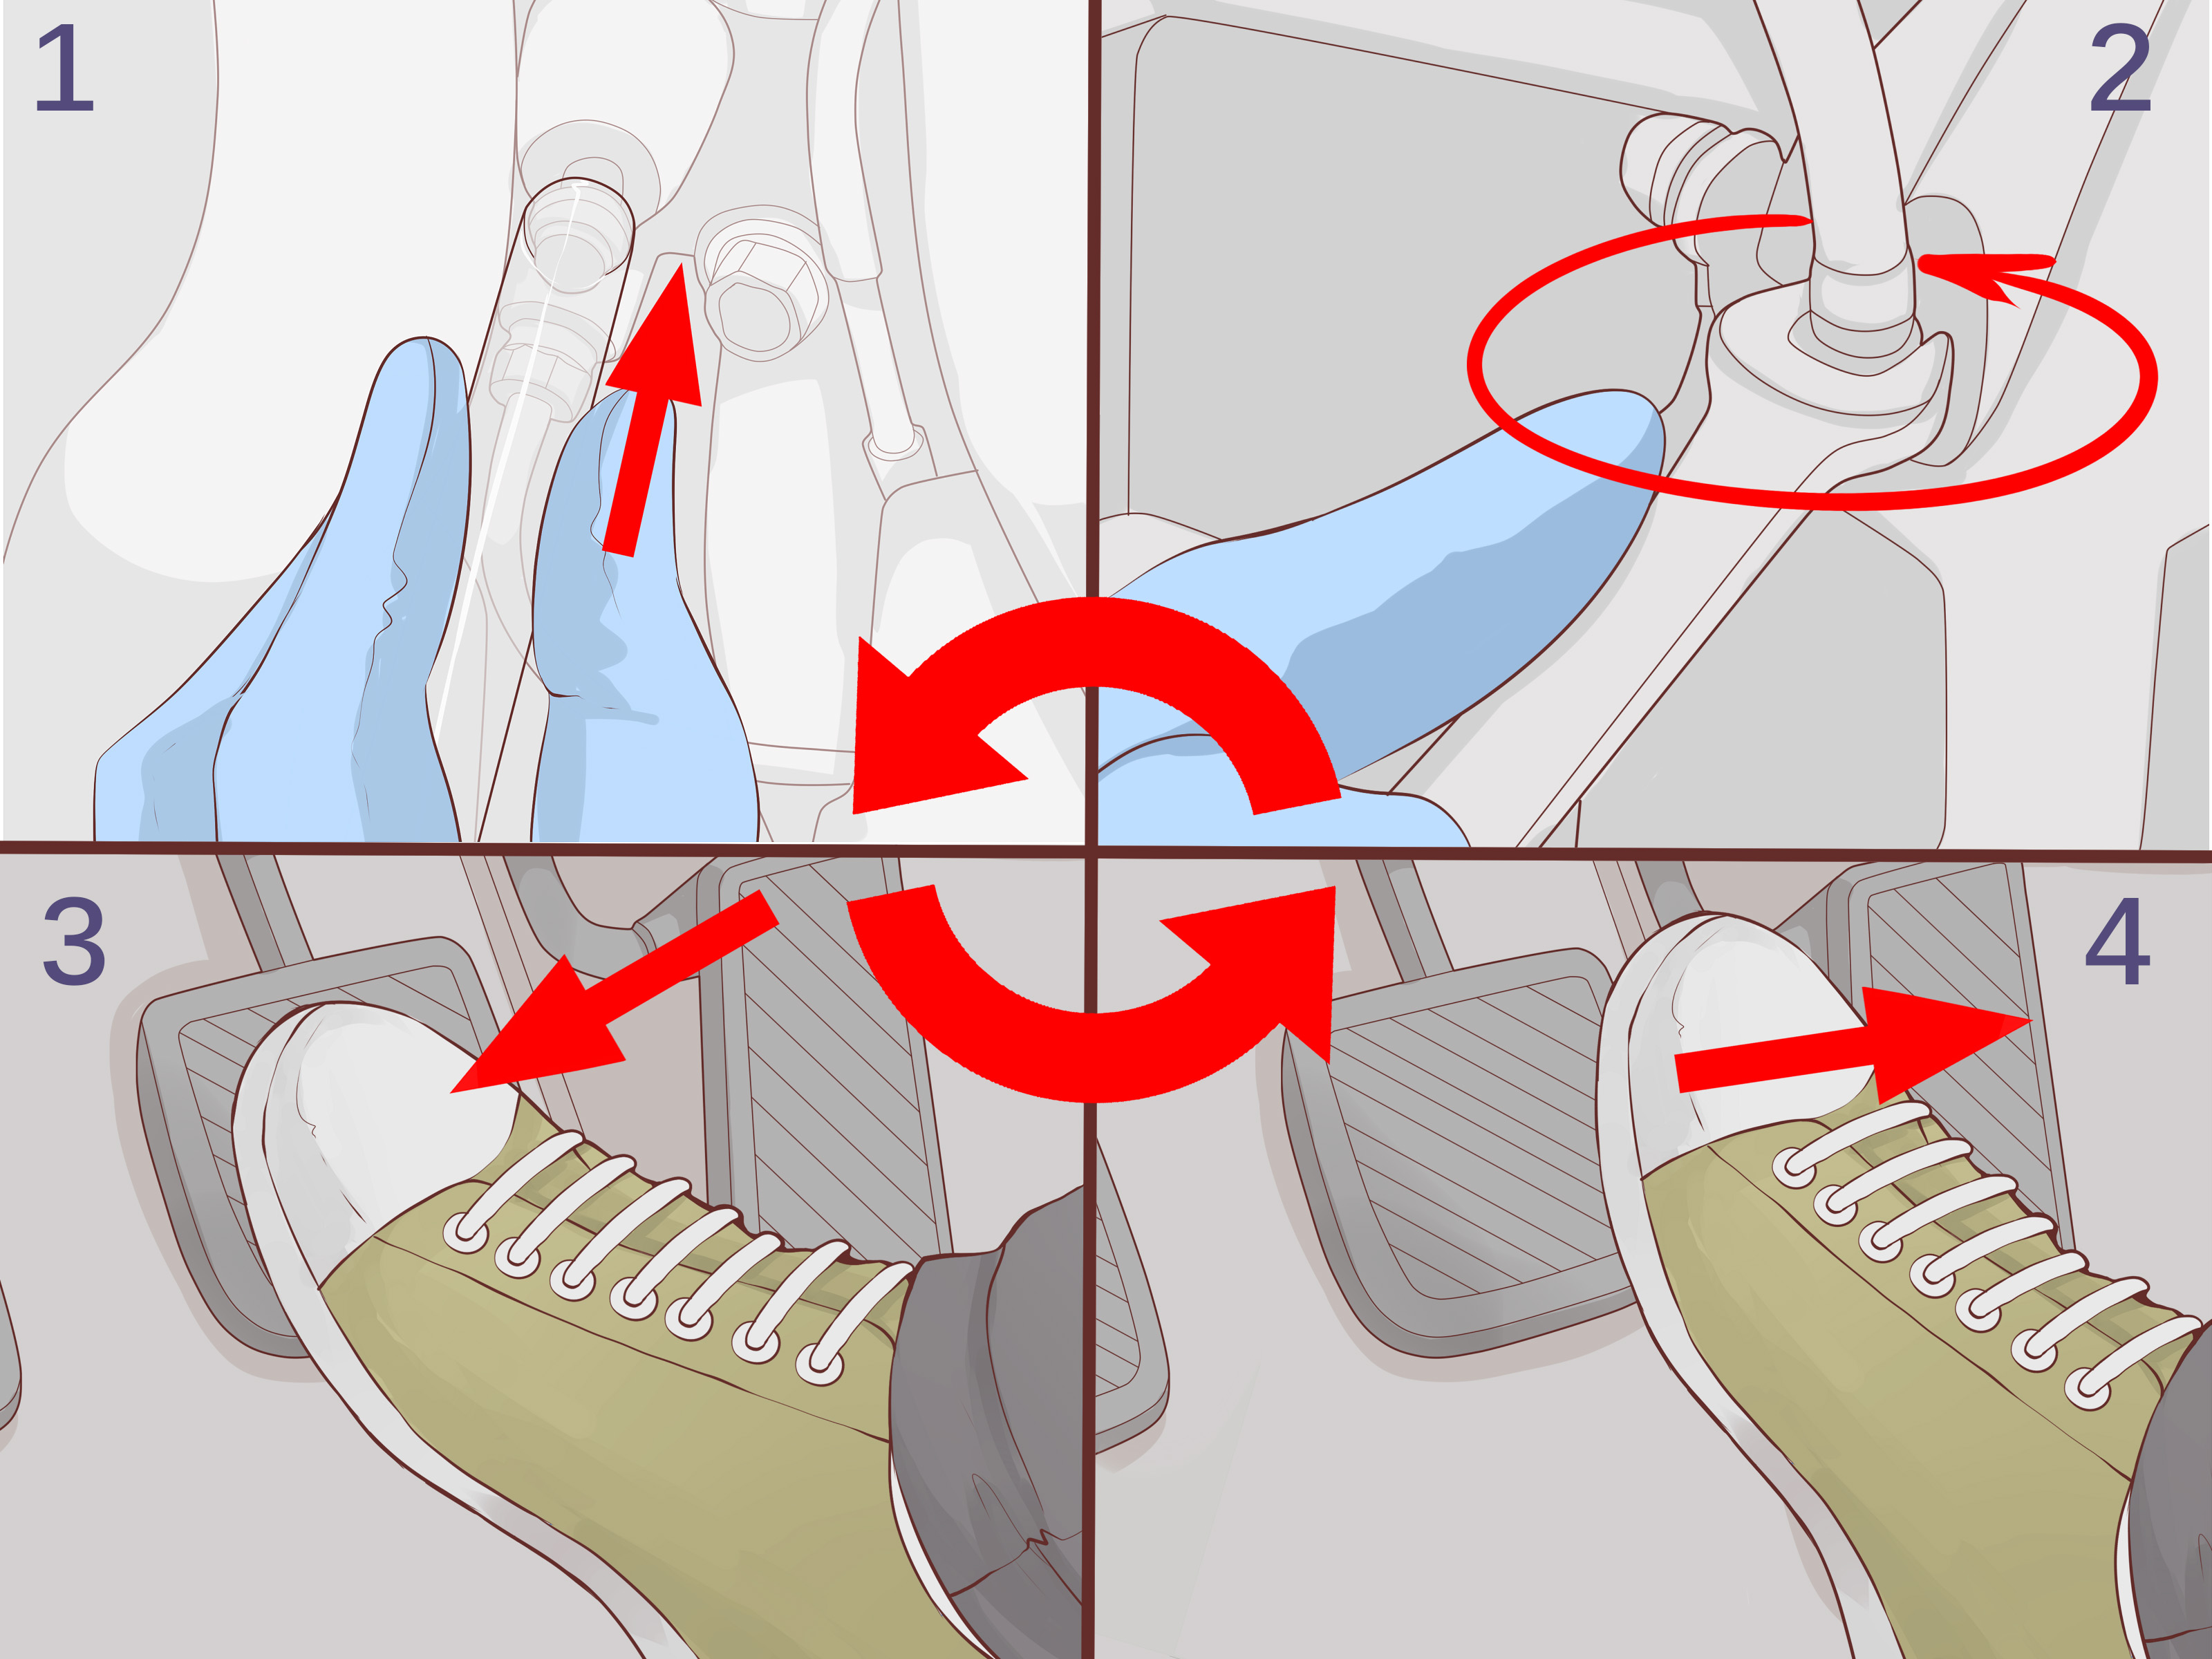
Push one end of the clear hose over the bleeder nipple. Place the other end into a catch bottle with a small amount of clean brake fluid at the bottom. Submerging the hose end helps reduce the chance of air being pulled backward into the system.
Step 8: Loosen the Bleeder Carefully
Use the correct wrench and crack the bleeder screw loose slightly. A line wrench is ideal because it grips more sides of the fitting and reduces the chance of rounding it. If the bleeder is rusty, use patience. Rushing here can snap the bleeder and turn a simple bleed into a parts-ordering adventure.
Step 9: Have a Helper Pump the Clutch Pedal
Ask your helper to press the clutch pedal slowly several times, then hold it down. Avoid rapid pumping at first because it can break large bubbles into tiny bubbles, making the system harder to bleed. Smooth and slow is the name of the game.
Step 10: Open the Bleeder With the Pedal Held Down
With the pedal held to the floor, open the bleeder slightly. Fluid and air bubbles should flow through the clear hose into the bottle. Once the flow slows, close the bleeder before your helper releases the pedal. This sequence matters: pedal down, bleeder open, bleeder closed, pedal up.
Step 11: Repeat Until Bubbles Disappear
Repeat the process until you see clean fluid with no air bubbles in the clear hose. Check and refill the reservoir frequently. Depending on how much air is trapped, this may take a few cycles or many. If the system was completely dry, expect the job to take longer.
Step 12: Try Gravity Bleeding if Needed
If the pedal remains soft, gravity bleeding may help. Open the bleeder and allow fluid to slowly run through the system while keeping the reservoir full. This can help move stubborn air out without whipping the fluid into foam. Close the bleeder once the flow is bubble-free.
Step 13: Consider Vacuum or Pressure Bleeding
A vacuum bleeder attaches at the slave cylinder bleeder and pulls fluid through the system. A pressure bleeder pressurizes the reservoir and pushes fluid through. These tools can be helpful when working alone or when a clutch system is difficult to bleed manually. Follow the tool instructions carefully and use low, controlled pressure.
Step 14: Tighten, Clean, Test, and Recheck
Tighten the bleeder screw snugly, but do not overtighten it. Remove the hose, clean spilled fluid, reinstall the reservoir cap, and check pedal feel. Start the engine only after everything is secure. Test clutch engagement while parked before driving. If the pedal feels firm and gears engage smoothly, take a short, cautious test drive and recheck for leaks afterward.
Common Mistakes to Avoid
The biggest mistake is letting the reservoir run dry. The second biggest is opening the bleeder and allowing the pedal to return before closing it. That can pull air back into the system. Other common mistakes include using the wrong fluid, rounding off the bleeder screw, ignoring leaks, pumping the pedal too aggressively, and assuming every vehicle uses the exact same bleeding method.
Some vehicles require special procedures, especially systems with concentric slave cylinders, quick-connect fittings, dampers, or pre-filled hydraulic assemblies. When in doubt, check the factory service information. The service manual is not trying to ruin your weekend; it is trying to keep you from inventing new swear words.
Manual Bleeding vs. Gravity Bleeding vs. Vacuum Bleeding
Manual bleeding is the classic two-person method. It works well when the bleeder is accessible and the system has moderate air. Gravity bleeding is slower but gentle, making it useful when air is stubborn or the pedal has little pressure. Vacuum bleeding is convenient for one-person work, but air can sometimes sneak around bleeder threads and look like system air, so do not panic if you see tiny bubbles at the hose connection.
Pressure bleeding is often efficient, especially on systems that resist manual bleeding. The key is to avoid excessive pressure and to make sure the reservoir adapter seals properly. No matter which method you choose, the goal is the same: clean fluid, no bubbles, firm pedal, smooth gear engagement.
What If the Clutch Still Feels Spongy?
If the clutch pedal still feels soft after repeated bleeding, inspect the system more carefully. Check the master cylinder for internal bypassing, the slave cylinder for leaks, and the hydraulic line for cracks, swelling, or loose connections. Air can also hide in high points of the line. Sometimes gently tapping the slave cylinder or line while bleeding can help bubbles move toward the bleeder.
If the clutch will not disengage even with a firm pedal, the problem may be mechanical rather than hydraulic. Worn clutch components, a damaged clutch fork, a bad release bearing, incorrect installation, or internal transmission issues can mimic hydraulic problems. At that point, diagnosis matters more than more bleeding.
When Should You Call a Mechanic?
Call a professional if the bleeder screw is seized, the slave cylinder is inside the transmission, fluid keeps disappearing, the pedal drops to the floor repeatedly, or you cannot safely access the part. A shop can use pressure bleeding equipment, inspect for leaks, and confirm whether the master or slave cylinder needs replacement.
There is no shame in getting help. The only shame is pretending a clutch pedal with the texture of warm pudding is “probably fine” and then discovering it is not fine in traffic.
Real-World Experience: What Bleeding a Slave Cylinder Teaches You
Anyone who has bled a slave cylinder more than once learns that this job is less about brute force and more about rhythm. The first time, many DIYers treat the clutch pedal like a gym machine: pump, pump, pump, faster, harder, louder. That usually makes things worse. Hydraulic systems prefer calm behavior. Slow pedal movement, a full reservoir, and a clear sequence usually beat frantic effort.
One practical lesson is to prepare more than you think you need. Have extra fluid ready. Have more towels than seems reasonable. Put the catch bottle somewhere it cannot tip over. Make sure the hose fits tightly before the first pedal press. Brake fluid has a way of finding the one painted surface, clean shoe, or important cardboard box in the garage. It is basically a liquid with comic timing.
Another experience-based tip is to pay attention to the pedal’s story. At first, the pedal may drop with almost no resistance. After several cycles, it may begin returning more consistently. Then it may suddenly firm up. That progression tells you air is leaving the system. If nothing changes after many attempts, stop and reassess. You may have a leak, a blocked bleeder, a bad master cylinder, or an air pocket trapped in a high section of line.
Working with a helper also matters. The helper should understand the exact commands: “press,” “hold,” “release.” The person at the bleeder controls when the pedal comes back up. If the helper releases too early, air can re-enter. A calm helper is worth more than an expensive tool. A distracted helper who keeps asking, “Can I let go now?” is how garage friendships are tested.
On older vehicles, the bleeder screw can be the hardest part of the job. A rusty bleeder should be treated gently. Use the correct wrench, clean the area, and avoid forcing it. If it feels like it may snap, it is better to pause than to break it. A broken bleeder can require slave cylinder replacement, and if the slave cylinder is internal, that may mean transmission removal. That is not a plot twist anyone wants.
Finally, the best experience lesson is to test before celebrating. A firm pedal in the driveway is good, but smooth gear engagement is the real proof. Start with the vehicle stationary. Try reverse and first gear. Listen for grinding. Feel whether the clutch disengages cleanly. After a short test drive, recheck the reservoir and look underneath for leaks. The job is not finished when the tools are put away; it is finished when the clutch works consistently and nothing is dripping.
Bleeding a slave cylinder may not be glamorous, but it is satisfying. You take a vague, mushy problem and solve it with simple tools, careful steps, and a little patience. That is the heart of good DIY automotive work: not magic, not panic, just method.
Conclusion
Learning how to bleed a slave cylinder is one of the most useful skills for manual-transmission maintenance. The process removes air from the hydraulic clutch system, restores pedal feel, and can solve shifting problems after repairs or fluid loss. The key is to work safely, use the correct brake fluid, keep the reservoir full, follow the open-close pedal sequence, and inspect for leaks before and after the job.
If the system refuses to bleed or the pedal keeps going soft, do not keep repeating the same steps forever. Troubleshoot the master cylinder, slave cylinder, hydraulic line, and vehicle-specific bleeding procedure. A clean, firm clutch pedal is great. A correctly diagnosed clutch system is even better.