A beach-style round epoxy coffee table is part furniture, part ocean art, and part conversation starter. With layered turquoise resin, a sandy shoreline, and delicate white waves, an ordinary wooden circle can become a glossy coastal centerpiece that looks as though someone captured a tiny piece of vacation and gave it legs.
The actual pouring is not especially difficult. The challenge is controlling dozens of small details before the epoxy begins curing. Your tabletop must be flat, the workspace must be level, the wood must be sealed, and every pigment cup must be ready before Part A meets Part B. Epoxy appreciates preparation. It has considerably less patience for improvisation.
Epoxy safety guidance synthesized from OSHA and CDC/NIOSH resources.
What Creates the Beach Effect?
A convincing beach-style epoxy table normally contains four visual zones:
- A warm sand-colored shoreline
- Transparent pale-blue shallow water
- Richer turquoise or teal water
- A darker blue area that suggests depth
The colors should overlap instead of forming perfect stripes. A narrow line of opaque white resin is pushed across the lighter water with moving air, producing feathery cells that resemble breaking waves and sea foam.
A round tabletop works especially well because the curved perimeter complements the organic shoreline. For a living-room coffee table, a diameter of 30 to 36 inches is practical, while a finished height of approximately 16 to 18 inches usually pairs comfortably with a standard sofa.
Materials and Tools
Materials
- A round hardwood panel or 3/4-inch cabinet-grade plywood
- An optional second wood circle for a thicker tabletop
- Tabletop coating epoxy intended for shallow flood coats
- Compatible transparent aqua, turquoise, teal, and blue pigments
- Compatible opaque white pigment
- Sand-colored and blue acrylic paints
- Clean, completely dry decorative sand
- Small dried shells or pebbles, if desired
- Painter’s tape or resin-resistant sheathing tape
- Mixing containers, color cups, stir sticks, and spreaders
- Wood glue, screws, and table legs or a pedestal base
- Sandpaper ranging from 80 to 220 grit or finer
- An optional compatible clear finish or polishing system
Tools
- Router with a circle-cuttingli>
Tools
- Router with a circle-cutting jig or a jigsaw
- Drill and countersink bit
- Random-orbit sander
- Level
- Heat gun or controllable hair dryer
- Shop vacuum
- Digital scale or graduated measuring containers
- Plastic drop cloth
- Painter’s pyramids or sturdy support blocks
Tool and material recommendations synthesized from Rockler, earch14turn877264search15turn877264search31turn352501search3
How to Make a Beach-Style Round Epoxy Coffee Table
1. Select a Stable Wood Base
A pre-cut hardwood or butcher-block circle is convenient, but cabinet-grade birch plywood is stable, affordable, and easy to finish. Avoid wet lumber, badly warped panels, loose bark, oily wood, and unstable knots.
For a more substantial appearance, glue two 3/4-inch plywood circles together. Spread the glue evenly, align the pieces, clamp them on a flat surface, and allow the assembly to dry completely. The resulting 1-1/2-inch edge looks more like finished furniture and provides additional material for mounting the legs.
2. Cut the Round Tabletop
Mark the exact center of the wood panel. For the cleanest circle, attach a circle-cutting jig to a router and set the pivot distance to half the desired tabletop diameter. Make several shallow passes instead of trying to cut through the entire panel at once.
A jigsaw is a good alternative. Draw the circle with a homemade compass, cut slightly outside the line, and sand back to the final shape. Use a fine-cut blade and move slowly to reduce splintering.
Round over the upper edge lightly with a router bit or sandpaper. A softened edge feels comfortable and allows a flood coat to flow more smoothly.
3. Sand and Clean the Wood
Sand the top and edges until they are flat and smooth. Begin with 80 or 120 grit, depending on the condition of the panel, and progress through 180 or 220 grit. Vacuum the surface carefully and inspect it under angled light.
The wood must be dry and free from dust, wax, oil, silicone, lint, and cleaning residue. Do not touch the prepared surface with bare fingers because skin oils can interfere with adhesion and contribute to fisheyes.
Surface preparation methodsearch0turn352501search8turn877264search20turn537943search26
4. Seal the Porous Surface
Bare wood contains small pockets of air. As the wood warms, that air can escape into the uncured resin and create bubbles or pinholes. Apply a thin seal coat of compatible epoxy over the top, edges, end grain, cracks, sand, and other porous materials.
Allow the seal coat to reach the stage specified by the manufacturer. If it cures completely before the decorative layer is poured, lightly sand it to provide mechanical adhesion and remove all sanding dust.
Keep the coat thin. A thick seal coat can trap bubbles rather than prevent them.
5. Design the Shoreline
Sketch the coastline lightly with a pencil. A balanced layout usually dedicates one-quarter to one-third of the tabletop to the beach, leaving the remaining area for water.
Avoid drawing a perfectly straight shoreline. Create a gentle curve with a small cove or projection. Natural asymmetry makes the finished ocean resin table feel more realistic.
Paint the beach area tan or warm beige. Paint the water zone pale aqua near the shore, turquoise through the center, and deep blue near the opposite edge. This painted foundation ensures that no bare wood appears if the resin layer becomes thin.
6. Add Sand and Coastal Details
For a textured shore, mix a modest quantity of completely dry decorative sand with clear epoxy or adhere it in a thin layer. Do not build a deep mound. Thick sand consumes resin, traps air, and can leave an uneven surface.
Shells and pebbles should be washed, dried, arranged, and sealed before the main pour. Use only a few focal pieces. One small shell cluster can look elegant; an entire souvenir shop may be slightly less subtle.
7. Prepare and Level the Workspace
Cover the floor and workbench with plastic. Raise the tabletop on painter’s pyramids or support blocks so resin can drip freely from the edges.
Check the table with a level from side to side and front to back. Recheck it after every adjustment. A small tilt can cause the dark-blue resin to migrate across the table and occupy territory originally assigned to the beach.
Keep the resin, wood, and room within the temperature range recommended for the specific product. Many tabletop epoxies perform well in stable conditions around 70°F to 80°F. Cold resin can become thick and retain bubbles, while excessive heat can shorten working time and increase the risk of overheating.
Temperature, seal-coat, bubble, and resin-selection guidance synthesisearch2turn352501search1turn352501search17turn352501search29
8. Estimate How Much Epoxy You Need
Use the manufacturer’s coverage calculator whenever possible. For a rough estimate, multiply the surface area by the desired coating thickness.
A 30-inch-diameter circle has an area of approximately 707 square inches. At an average depth of 1/8 inch, the theoretical resin volume is about 88 cubic inches, or roughly 49 U.S. fluid ounces. Add extra material for mixing cups, drips, textured sand, and minor surface variations.
Use tabletop coating epoxy for a thin decorative flood coat. Deep-pour casting resin is formulated to cure slowly in thick sections and should not be substituted unless its instructions specifically support your intended application.
9. Organize Before Mixing
Place every pigment, cup, stir stick, spreader, and heating tool within reach. Prepare a clean dust cover large enough to protect the entire tabletop.
Once the resin and hardener are combined, the working clock begins. That is not the ideal moment to search the garage for the missing white pigment or discover that your heat gun is upstairs.
10. Measure and Mix the Epoxy
Measure Part A and Part B precisely according to the manufacturer’s ratio. Some products are mixed 1:1 by volume, while others use entirely different ratios. Do not guess, and do not add extra hardener in an attempt to accelerate curing.
Mix slowly while scraping the sides and bottom of the container. Transfer the mixture into a second clean cup and mix again. This double-cup technique helps prevent unmixed resin from creating sticky areas on the table.
Prepare only as much material as you can spread during the listed working time. A large mass of mixed epoxy can generate considerable heat and cure rapidly inside the container.
11. Divide and Color the Resin
Reserve some clear resin, then divide the remainder into smaller cups. Create pale aqua, turquoise, medium blue, deep blue, and opaque white mixtures.
Keep the water colors translucent. The ability to see through several layers creates the impression of depth. Make the wave mixture more opaque, but stay within the pigment limits specified by the resin manufacturer. Excessive pigment can interfere with curing.
12. Pour the Ocean Layers
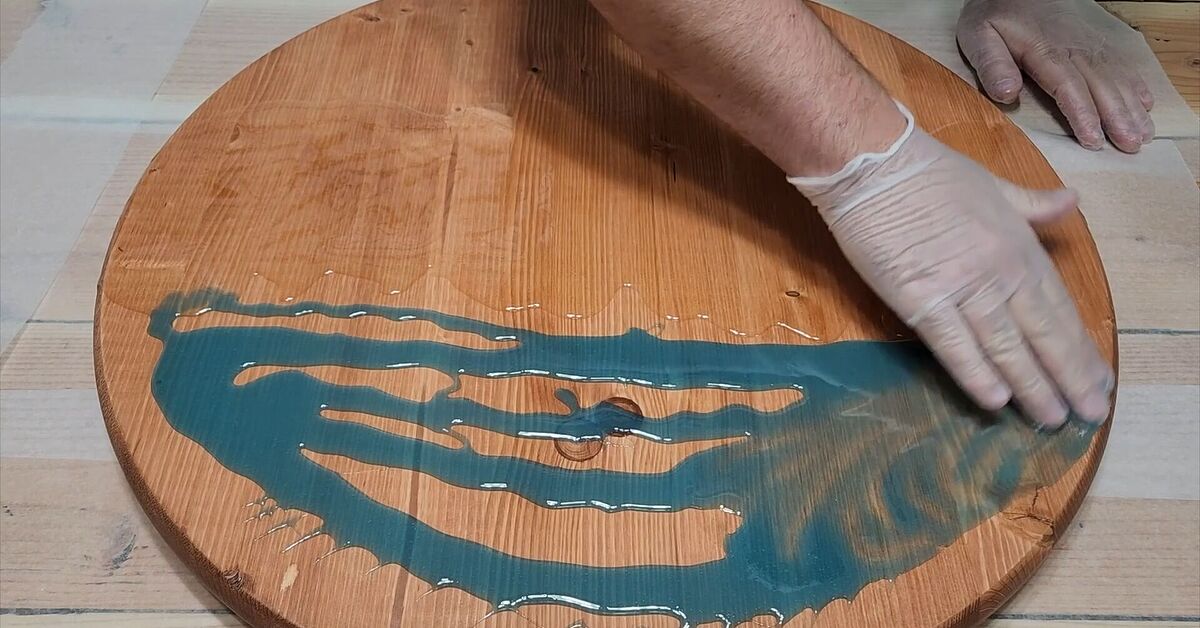
Apply a thin clear layer over the beach to lock down the sand. Pour pale aqua along the shoreline, followed by turquoise, medium blue, and deep blue toward the far edge.
Allow neighboring colors to overlap. Use a spreader or stir stick to guide them, but avoid blending everything into a single uniform shade. Pull narrow ribbons of clear resin through the shallow water and add small streaks of neighboring colors for natural variation.
A realistic ocean contains gradients and irregular movement. A flat block of blue tends to look less like the Caribbean and more like a melted recycling container.
13. Create White Epoxy Waves
Pour a narrow line of white-tinted resin where the pale water meets the beach. Hold the heat gun or hair dryer at a low angle and push the white resin over the clear or aqua layer.
Use short, controlled passes and keep the tool moving. The white resin should stretch into fine lace, cells, and uneven foam rather than forming a thick solid stripe.
Add a second, smaller wave behind the first when space permits. Change its width and direction so the waves do not appear stamped from the same mold. Stop as soon as the pattern looks convincing. Continued blowing can turn crisp foam into cloudy soup.
Ocean layering and wave-19search0turn147319search3turn147319search6turn147319search9
14. Remove Bubbles
Inspect the resin during its working window. Pass gentle heat briefly over visible bubbles while keeping the tool in motion. Use a toothpick to release bubbles trapped beside shells or textured sand.
Avoid repeatedly heating the entire surface. Too much heat can disturb the pigments, accelerate curing, create ripples, damage the wood beneath the coating, or cause yellowing and cracking.
15. Cover and Cure the Tabletop
Cover the table with a clean box or temporary dust tent that does not touch the resin. This prevents dust, insects, hair, and mysterious floating garage particles from becoming permanent residents of the beach scene.
Follow the manufacturer’s cure schedule. “Dry to the touch,” “ready to handle,” and “fully cured” are different stages. Avoid sanding, flipping, attaching legs, or placing objects on the surface prematurely.
16. Add a Clear Flood Coat
After the decorative layer has cured as directed, inspect the table from several angles. If the sand, shells, or wave ridges rise above the surrounding resin, apply a clear tabletop flood coat to create a flat, glasslike surface.
Sand first when required for adhesion, remove all residue, and mix the new coat accurately. Respect the product’s recoat window. A fully cured layer generally needs sanding before another coat is applied.
17. Finish the Edges
Remove the tape and trim cured drips with a scraper, chisel, or sander. Begin with a suitable coarse grit and progress gradually through finer grits. Skipping several grit levels can leave deep scratches visible beneath the polish.
For a glossy edge, continue wet-sanding and polishing with products approved for cured epoxy. Seal exposed wood on the underside so moisture does not affect one face of the tabletop more than the other.
18. Attach the Table Base
Use three or four hairpin legs, a tripod base, or a central pedestal rated for the tabletop’s diameter and weight. Center the base, mark the mounting holes, and predrill carefully.
Select screws shorter than the tabletop’s total thickness. A screw emerging through your newly finished ocean would certainly be memorable, although probably not in the way you intended.
Install adjustable feet or floor protectors if necessary, then check the finished table for wobbling before placing it into service.
Common Epoxy Table Problems
Sticky or Soft Spots
Incorrect measurement and incomplete mixing are common causes. Follow the exact ratio, scrape the mixing container thoroughly, and use the double-cup method.
Excessive Bubbles
Seal porous wood and sand, mix slowly, pour close to the surface, and maintain a stable or slightly falling temperature. Rising temperatures can cause air inside the wood to expand into the coating.
Cloudy Water
Moisture, overheating, incompatible pigment, or excessive colorant can reduce clarity. Use completely dry materials and colorants specifically approved for epoxy.
Waves That Disappear
The white mixture may be too transparent, or the airflow may be too strong. Use an opaque white pigment, allow the underlying colors to settle briefly, and push the wave with short passes.
Fisheyes and Bare Spots
Round depressions often indicate oil, wax, silicone, or other contamination. Clean the surface carefully and avoid furniture polish, oily cloths, and unapproved additives.
Troubleshooting guidance synthesized from arch17turn147319search11turn352501search12turn352501search13
Beach Table Design Variations
For a tropical appearance, combine warm sand, pale aqua, bright turquoise, and a small amount of deep blue. For a moodier Pacific-coast design, use gray-brown sand, sea green, slate blue, and restrained white foam.
You can also create a small tide pool, add a metallic mica line beneath the shallow water, or place a few flat shells near the shoreline. Keep the decorative objects sparse so the color gradients and waves remain the main attraction.
Care and Maintenance
Clean the finished epoxy coffee table with mild soap, water, and a soft cloth. Use coasters and trivets, wipe spills promptly, and avoid abrasive cleaners or harsh solvents.
Do not drag rough ceramic decorations across the surface. Although cured tabletop epoxy is durable, it can still scratch. Prolonged direct sunlight may also affect the appearance of some clear resin systems, so avoid placing the table in intense window exposure unless it has a compatible UV-resistant finish.
Practical Building Experience: Lessons That Make the Project Easier
The most valuable workshop lesson is that the dramatic pour is not the hardest part. The preparation that happens before the pour determines whether the finished table looks professional. Builders may spend hours selecting the perfect turquoise pigment and only two minutes leveling the bench. They then watch the deep-blue resin slowly migrate to one side. Level the support structure, place the tabletop on it, and check the level again before mixing anything.
Making a small sample board is equally valuable. Use the same wood, paint, sand, pigments, and resin planned for the table. A test piece reveals whether the turquoise is too opaque, whether the sand releases bubbles, how strongly the white pigment forms cells, and how much the colors change after curing. It may feel like an unnecessary delay, but it is much cheaper than transforming a full tabletop into an expensive study of swamp green.
Wave-making improves when the builder practices restraint. The first pass with a heat gun can produce a beautiful foam edge, creating an understandable desire to continue blowing. That is usually when the pattern begins to blur. Make one controlled pass, pause, and inspect the wave from above. Add movement only where the composition needs it. Uneven foam looks more realistic than a continuous white border with identical thickness.
Organization becomes essential once the curing clock starts. Label the pigment cups before mixing the main batch. Position the deep blue nearest the far edge, the pale aqua beside the shoreline, and the white resin near the heat gun. Keep clean gloves within reach. Replacing a sticky glove is easier than discovering blue fingerprints on the drill, doorknob, light switch, and possibly the family dog.
Experienced makers also plan for the underside. Resin drips can cure into sharp knobs that are tedious to remove. Tape the underside perimeter, elevate the tabletop, and inspect the edge during the gel stage when the product instructions permit trimming. When drips do harden, sand or scrape them gradually instead of applying excessive force near the decorative edge.
The decision to add a clear topcoat should be based on usability. Textured sand can look realistic, but a coffee table must support glasses, books, and snack bowls. If the shoreline, shells, or waves sit above the surrounding surface, a clear flood coat creates a more functional tabletop. When the decorative pour is already smooth and level, an unnecessary additional coat only increases material cost and introduces another opportunity for dust.
Finally, allow more curing time than impatience considers reasonable. A resin surface can feel hard while remaining vulnerable to pressure marks. Installing the legs, flipping the table, or placing a heavy decoration on it too early may leave dents. Follow the full-cure schedule and allow the chemistry to finish its work. The reward is a durable round epoxy coffee table with enough depth and movement to make an ordinary cup of coffee feel as though it came with an ocean view.
Conclusion
Making a beach-style round epoxy coffee table is a sequence of controlled steps: create a flat circular base, seal every porous surface, select the correct tabletop resin, layer translucent ocean colors, shape restrained white waves, and allow the epoxy to cure fully before assembly.
The project does not require mysterious artistic powers. It requires accurate measurements, a level workbench, careful preparation, and the wisdom to stop moving the resin when the wave already looks good. Follow those principles and your finished table will deliver the best kind of coastal décor: useful, durable, and completely free of sand inside your shoes.