If you have ever pulled a 3D print off the bed and found it wearing a tiny spiderweb cape, congratulations: you have met stringing. It is one of the most common 3D printing problems, especially with PETG, flexible filaments, hotter print settings, wet filament, or a nozzle that behaves like it has separation anxiety. Those little hairs between towers, letters, supports, or decorative details may look harmless, but they can turn a clean model into something that appears to have been stored in a dusty attic with a family of very artistic spiders.
The good news is that stringing is not magic. It is usually molten plastic escaping from the nozzle during travel moves, when the printer head moves from one area to another without intentionally extruding. Retraction settings, nozzle temperature, travel speed, filament dryness, extrusion flow, and slicer path planning all matter. But one overlooked fix is wonderfully simple: wipe your nozzle. A clean nozzle, a smart wipe movement, or a physical nozzle brush can reduce blobs, dragged plastic, and those wispy strings that make your print look like it lost a fight with cotton candy.
This guide explains why nozzle wiping helps, how it fits into the larger stringing puzzle, and how to use it without accidentally creating new problems. Because in 3D printing, every solution has a tiny gremlin attached.
What Is Stringing in 3D Printing?
Stringing happens when melted filament leaks from the nozzle while the print head travels across open space. Instead of stopping cleanly at the end of a printed section, the nozzle leaves behind a thin strand of plastic. These strands can appear between separate parts of a model, inside openings, across towers, around supports, or between fine details.
The classic stringing test uses two or more small vertical towers. If your printer is tuned well, the towers stand cleanly apart. If not, they look like they have been connected by a tiny suspension bridge built by a nervous silkworm.
Stringing is especially common with materials that flow easily or absorb moisture. PETG is famous for it. TPU can do it. PLA can string when printed too hot or when the filament has picked up moisture. Even a well-tuned printer can create wisps if the nozzle is dirty, the filament is over-extruding, or the slicer is sending the toolhead across open air too slowly.
Why Wiping the Nozzle Helps
A nozzle wipe is exactly what it sounds like: the printer moves the nozzle in a way that removes, smears, or deposits leftover molten filament before it can stretch into a string. This can happen in several ways. Some slicers use a software-based wipe movement, where the nozzle travels slightly over the already-printed path while retracting. Some printers use a purge line at the start of a print. Others use a silicone pad, brass brush, wiper, or dedicated cleaning area where the nozzle physically rubs off excess plastic.
Think of the nozzle like the tip of a hot glue gun. If you lift it straight away while glue is still flowing, you get a string. If you drag the tip slightly across the surface first, the leftover glue is more likely to stay on the surface instead of stretching into the air. Nozzle wiping works on a similar idea. It gives extra plastic somewhere to go before the printer makes a travel move.
Wiping is not a replacement for retraction, temperature tuning, or dry filament. It is more like the final napkin after dinner. It does not cook the meal, but it prevents sauce from ending up on your shirt.
The Main Causes of Stringing
1. Nozzle Temperature Is Too High
When filament gets too hot, it becomes more fluid. More fluid plastic oozes more easily from the nozzle. If your PLA is stringing at 215°C, try lowering the temperature in small steps, such as 5°C at a time, while watching for weak layer adhesion or under-extrusion. PETG often needs more heat than PLA, but it can still become too runny if printed at the high end of its range.
A temperature tower is one of the fastest ways to find the sweet spot. Print one tower with sections at different temperatures, then compare stringing, layer bonding, surface finish, and bridging. The best temperature is not always the prettiest one; it is the one that balances clean movement with strong parts.
2. Retraction Is Not Tuned
Retraction pulls filament back slightly before a travel move. This reduces pressure in the hot end and helps prevent oozing. Too little retraction leaves pressure in the nozzle, which causes strings. Too much retraction can cause grinding, clogs, heat creep, or gaps after travel moves.
Direct-drive extruders usually need shorter retraction distances than Bowden setups. A direct-drive machine may work well around 0.5 to 2 mm, while Bowden systems often need more because the filament path is longer and springier. Retraction speed also matters. Too slow, and filament leaks before the move finishes. Too fast, and the drive gear may chew the filament like a tiny angry beaver.
3. Travel Moves Are Too Slow
When the nozzle travels slowly between print areas, molten plastic has more time to leak. Faster travel moves reduce the time available for oozing. This does not mean every printer should be pushed recklessly fast. If travel speed is too high for the machine, you can introduce ringing, skipped steps, or layer shifts. But within your printer’s limits, increasing travel speed can reduce stringing noticeably.
4. Filament Has Absorbed Moisture
Many filaments absorb water from the air. When wet filament enters the hot nozzle, moisture can turn into steam, causing popping, bubbles, rough surfaces, inconsistent extrusion, and stringing. PETG, nylon, TPU, and some specialty materials are especially sensitive, but PLA can also suffer.
If your filament suddenly starts stringing even though your settings did not change, moisture is a prime suspect. Dry the filament according to the manufacturer’s recommendation and store it in a sealed container with desiccant. Your printer may not thank you verbally, but your print surface will stop looking like a haunted sweater.
5. The Nozzle Is Dirty or Carrying Plastic
A dirty nozzle can drag semi-molten plastic across the print. This is not always true stringing from internal ooze; sometimes it is external buildup stuck to the nozzle tip. PETG is particularly talented at collecting on the nozzle, forming little blobs, then depositing them at the worst possible moment. Usually that moment is five hours into a print, because the printer has a flair for drama.
Cleaning or wiping the nozzle helps remove that buildup before it becomes a blob, a scar, or a string dragged across the model.
Software Wiping vs. Physical Nozzle Wiping
Software Wiping
Software wiping is controlled by your slicer. Settings such as “wipe while retracting,” “wipe distance,” “outer wall wipe distance,” or similar options tell the nozzle to keep moving slightly along the printed path while retraction happens. Instead of retracting while standing still, the nozzle wipes the last bit of molten plastic onto the existing extrusion line.
This is often useful for reducing tiny hairs and blobs at the end of extrusion paths. It can also improve seam quality when used carefully. However, too much wiping may leave marks on top surfaces, thin walls, or glossy materials. It can also create under-extrusion if paired with aggressive coasting or excessive retraction.
Physical Wiping
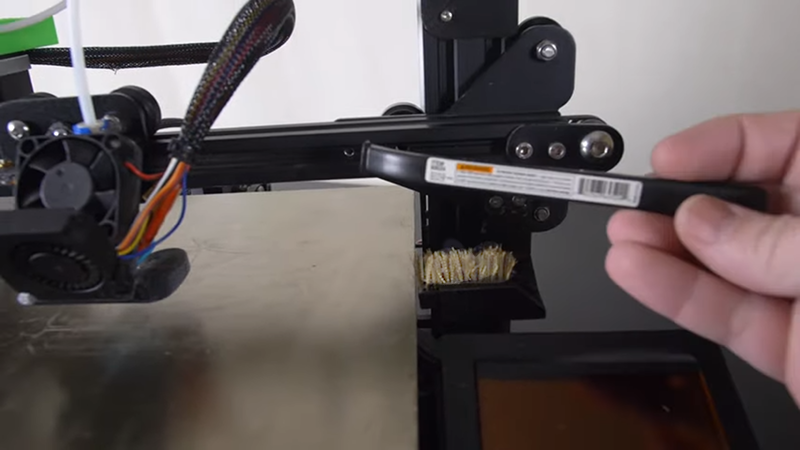
Physical wiping uses an actual surface to clean the nozzle. Some printers include built-in nozzle wipers, silicone brushes, purge buckets, or cleaning pads. Many hobbyists add a small brass brush or silicone wiper near the bed edge and use start G-code or layer-change G-code to move the nozzle across it.
This method is especially helpful for filaments that love to cling to the nozzle, such as PETG. A physical wipe can remove plastic stuck outside the nozzle, while slicer wipe settings mostly manage the filament still inside the extrusion path.
However, physical wiping needs to be set up carefully. The wiper must be located where the nozzle can reach safely. It must not crash into the bed, clips, probe, or printed part. The material must tolerate heat. A brass brush can work, but it should not be placed where loose bristles can fall onto electronics or the print bed. A silicone wiper is gentler, but it still needs secure mounting.
How to Wipe Your Nozzle Properly
Start with a Clean Nozzle
Before tuning slicer settings, inspect the nozzle. Heat it to printing temperature, then carefully remove loose plastic from the outside using a suitable brush, cloth, or cleaning method. Never grab a hot nozzle with your fingers unless you enjoy learning through regret. Use proper tools and avoid damaging thermistor wires, heater cartridges, silicone socks, or the nozzle surface.
If the nozzle is badly clogged, wiping alone will not fix it. You may need a cold pull, nozzle cleaning needle, fresh nozzle, or hot-end maintenance. Stringing caused by internal blockage often appears alongside under-extrusion, clicking extruder sounds, weak layers, or inconsistent lines.
Use a Purge Line at the Start
A purge line primes the nozzle before the actual print begins. It pushes out old filament, stabilizes flow, and wipes the nozzle along the bed edge. This is why many printer start routines draw a line or skirt before printing the model. It is not decorative; it is the printer stretching before exercise.
If your first few moves often leave blobs or thin lines, check your start G-code and purge routine. A clean purge line can prevent leftover ooze from hitchhiking onto the first layer.
Enable Wipe While Retracting
In slicers that support it, enable “wipe while retracting” or an equivalent setting. Start conservatively. A small wipe distance can reduce end-of-line ooze without dragging the nozzle too far over the model. If your slicer allows “retract amount before wipe,” tune it carefully. The goal is to relieve pressure and clean the nozzle tip, not to starve the next extrusion line.
After changing wipe settings, print a small test model. Do not test on a 14-hour dragon unless you enjoy suspense, heartbreak, and explaining to your family why dinner is delayed because “the nozzle has a personality issue.”
Add a Physical Wiper for Sticky Materials
If PETG keeps collecting on the nozzle, a physical wiper can be useful. Mount it securely in a safe area, then add controlled movements to your start G-code or custom routine. Some users wipe at the start of every print; others wipe after filament changes or before critical first-layer work.
A layer-by-layer wipe can help in stubborn cases, but it adds time and motion. It also increases the chance of something going wrong if the wiper position is inaccurate. Use it only when necessary and test carefully with the bed clear.
Do Not Overdo It: Wiping Has Limits
Nozzle wiping is helpful, but it is not a magic wand. If your print temperature is too high, your filament is wet, your retraction is disabled, and your flow rate is over-extruding, wiping the nozzle is like mopping the floor while the bathtub is still overflowing. Admirable effort, wrong order.
Too much wiping can create surface scars. Too much coasting can leave gaps. Too much retraction can cause jams. Too much physical brushing can wear parts or knock loose filament where it does not belong. The best 3D printing setup is balanced. Each setting should solve a specific problem without creating two new ones wearing fake mustaches.
A Practical Anti-Stringing Checklist
Use this simple workflow when your print starts producing strings:
- Clean the outside of the nozzle and inspect for stuck plastic.
- Dry the filament, especially PETG, TPU, nylon, or older PLA.
- Print a temperature tower and reduce heat in small steps if possible.
- Tune retraction distance and retraction speed using a small test model.
- Increase travel speed within your printer’s safe mechanical limits.
- Enable wipe while retracting or a similar slicer wipe setting.
- Use coasting carefully if your slicer supports it and your seams are blobby.
- Add a purge line, skirt, or physical wiper if the nozzle carries buildup.
- Check flow calibration if strings appear with blobs or swollen walls.
- Avoid unnecessary Z-hop if it worsens stringing on your machine.
Best Settings to Try First
There is no universal setting that fixes every printer, because 3D printers are basically tiny factories assembled from physics, firmware, belts, optimism, and mild chaos. Still, the following starting points are useful for many hobby printers.
For PLA
Try reducing nozzle temperature in 5°C steps if stringing appears. Use modest retraction for direct-drive printers and longer retraction for Bowden machines. Enable wipe while retracting, use a purge line, and keep travel moves reasonably fast. PLA usually behaves well once temperature and retraction are tuned, unless the filament is old or damp.
For PETG
PETG is strong, glossy, and charming until it decides to decorate your nozzle like melted caramel. Print it hot enough for layer adhesion, but not so hot that it oozes constantly. Dry it well. Use wipe while retracting, avoid excessive squish on the first layer, and consider a silicone sock or physical nozzle wiper to reduce buildup.
For TPU
Flexible filament often needs slower printing, careful retraction, and a clean filament path. Too much retraction can cause feeding issues. Wiping can help, but moisture control and conservative speeds are often more important. TPU is not difficult because it hates you; it is difficult because it is basically cooked spaghetti with ambition.
Common Mistakes When Fighting Stringing
Changing Too Many Settings at Once
If you lower temperature, increase retraction, enable wipe, change speed, dry filament, adjust flow, and switch slicers all at the same time, you may improve the print, but you will not know why. Change one or two related settings at a time. Save profiles. Name them clearly. “PETG_Final_FINAL_REALLYFINAL_v7” is funny until you need to troubleshoot at midnight.
Assuming More Retraction Is Always Better
More retraction can reduce strings, but only up to a point. Past that point, it can cause clogs, delayed extrusion, weak starts, or grinding. If wiping and temperature tuning reduce stringing without extreme retraction, that is usually a healthier solution.
Ignoring the Outside of the Nozzle
Many users tune retraction for hours while the real problem is a blob stuck to the nozzle. If the nozzle tip has burnt plastic, dust, or PETG buildup, it can drag material around even when internal extrusion is well controlled. Cleaning the nozzle is basic maintenance, but basic maintenance is where many heroic troubleshooting journeys should have started.
Experience Notes: Real-World Lessons from Nozzle Wiping
The most useful thing I have learned about nozzle wiping is that it works best as part of a routine, not as a panic button. When I first started fighting stringing, I treated it like a slicer mystery. I opened every advanced setting with the confidence of someone defusing a movie bomb. Retraction distance went up. Retraction speed went down. Temperature dropped. Travel speed changed. Z-hop came on, then went off, then came back on like a guest star nobody requested. The print improved a little, then got worse in a different way. That is when I finally looked at the nozzle and noticed a tiny curl of old filament stuck to the side. The printer had been dragging its own snack across the model.
After cleaning the nozzle and adding a better purge-and-wipe routine, the same filament behaved far better. The lesson was painfully simple: not every string comes from bad retraction. Some strings begin as residue. If plastic is already hanging from the nozzle before the travel move starts, the slicer is trying to win a race it did not know had begun.
On PETG prints, wiping became even more important. PETG likes to stick to the nozzle, especially when the first layer is too close or the flow is slightly high. A small amount of buildup can ride along for several layers, slowly growing into a blob. Then the blob drops onto the print like a tiny meteor. A physical wipe before printing, plus a good silicone sock, reduced those surprise deposits. I still had to tune temperature and dry the filament, but wiping helped keep the nozzle from becoming a rolling snowball of molten plastic.
One mistake I made early was wiping too aggressively. I thought, “If a little wipe is good, a heroic wipe must be better.” Naturally, the printer disagreed. Long wipe moves across visible top surfaces left faint marks, especially on shiny filament. The fix was to reduce wipe distance, avoid unnecessary travel over clean outer surfaces, and test with small models. A wipe should be a tidy handoff, not a windshield wiper during a thunderstorm.
I also learned that start-of-print wiping matters more than many people expect. A nozzle that oozes while heating can carry a little tail into the first layer. A purge line gives that tail somewhere to go. A skirt can also help stabilize flow before the model begins. When the first layer starts clean, the entire print has a better chance. It is like beginning a road trip with a full tank and no potato chip crumbs on the steering wheel.
The best results came from a boring routine: dry filament, clean nozzle, correct temperature, reasonable retraction, fast safe travel moves, wipe while retracting, and a purge line. Boring is good. Boring means the printer is not inventing modern art when you asked for a bracket. Nozzle wiping will not solve every stringing problem, but it is one of those small habits that makes the entire printing process more predictable. In 3D printing, predictable is beautiful. Beautiful is when your model comes off the bed clean, your nozzle is not wearing a plastic beard, and the only strings in the room are attached to an actual guitar.
Conclusion
Wiping your nozzle is one of the simplest ways to reduce stringing, blobs, and dragged filament in 3D printing. It works because it removes or redirects leftover molten plastic before the nozzle travels across open space. Software wipe settings, purge lines, skirts, silicone pads, and physical brushes can all help, depending on your printer and filament.
Still, wiping is only one part of the solution. For the cleanest prints, combine nozzle wiping with tuned retraction, proper temperature, dry filament, calibrated flow, and smart travel paths. Start small, test often, and resist the urge to attack every slicer setting like it personally insulted your Benchy.
Note: This article is written for web publishing and is based on synthesized, real-world 3D printing practices from manufacturer documentation, slicer guidance, troubleshooting resources, and common maker experience. External source links are intentionally not included in the body.