Your entryway is the first thing people see when they walk in. Unfortunately, it’s also the first place
chaos moves inshoes breeding overnight, backpacks multiplying, and keys disappearing like they’re auditioning
for a magic show. The good news? You don’t need a fancy “hall tree” that costs as much as a small used car.
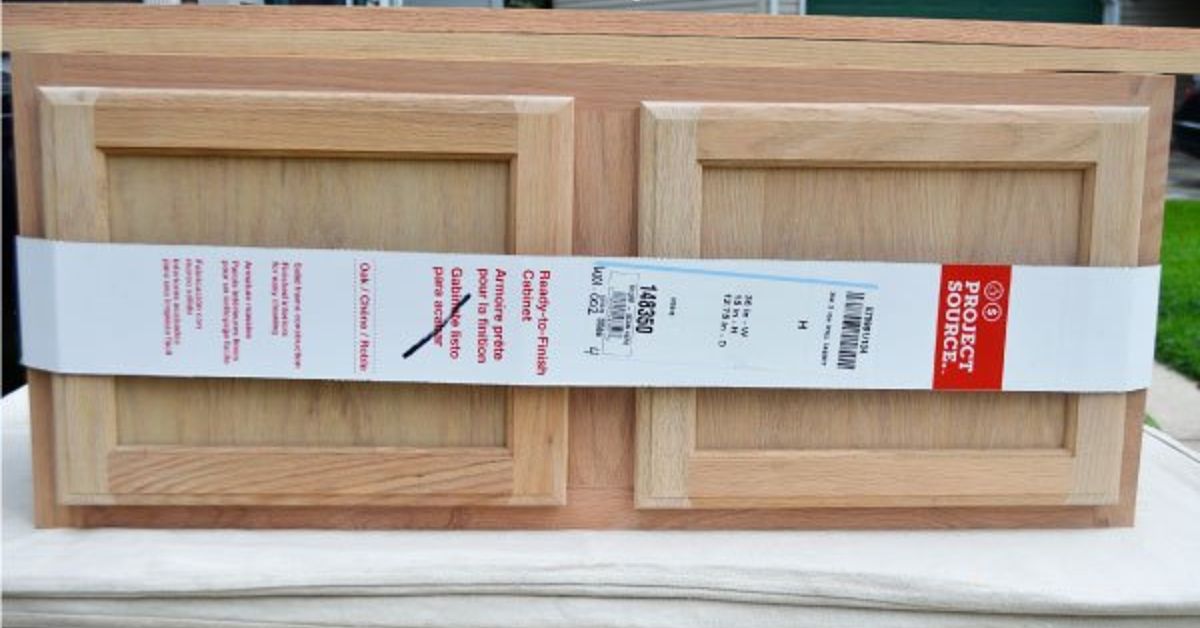
You may already own the secret weapon: an old kitchen cabinet.
Kitchen cabinets are built for daily abuseheat, humidity, slamming doors, and that one drawer you always
yank too hard. That makes them surprisingly perfect for an entryway upgrade: sturdy storage, a clean-lined
silhouette, and endless options to customize. With a little planning (and a tiny bit of sawdust), you can
turn “old cabinet destined for the garage” into “best accessory in the house.”
Why an old kitchen cabinet is entryway gold
It’s already the right kind of furniture
Cabinets are basically “storage furniture” in disguise. They have doors, shelves, sometimes drawers, and
they’re designed to hold weight. Instead of buying a bench + shoe rack + console table + coat organizer,
you can combine multiple jobs into one compact piece.
It solves the three biggest entryway problems
- The shoe pile: closed doors hide visual clutter while still keeping shoes accessible.
- The drop zone: the top becomes a landing strip for keys, mail, sunglasses, and life’s tiny emergencies.
- The “where do I put this?” dilemma: shelves and baskets create a home for bags, gloves, dog leashes, and sports gear.
It’s a sustainability win that also looks expensive
Reusing a cabinet keeps usable materials out of landfills and cuts down on the cost (and hassle) of sourcing
new furniture. Done right, a cabinet makeover can look built-inlike it came with the houseespecially if you
match trim and paint to your walls or baseboards.
Pick the right cabinet and plan your entryway “traffic flow”
Cabinet types that work best
- Wall cabinets (upper cabinets): often close to bench height when combined with a thicker top or a small base.
- Base cabinets: deeper and heaviergreat for console-style storage, less ideal for narrow foyers.
- Sink base cabinets: awkward cutouts can still work if you’re converting it into open cubbies or a pet station.
Measure before you fall in love
A comfortable “sit to tie your shoes” height is usually in the neighborhood of 17–19 inches, but your best
guide is your space and your household. In a tight entry, depth matters more than widthtoo deep and you’ll
turn your hallway into an obstacle course.
Pro tip: if your cabinet has doors that swing wide, check that they won’t smack into walls, stairs, or the
front door when it opens. A soft-close hinge is nice, but so is not bruising your shin at 7:45 a.m.
Decide what your cabinet needs to “do”
Make a short wish list. For example:
- Closed shoe storage for a family of four
- A bench top for sitting
- Hooks above for coats and backpacks
- A small tray area for keys and mail
- A charging spot (because phones are basically organs now)
Tools and materials checklist
Basic tools
- Measuring tape, pencil, level
- Screwdriver/drill
- Stud finder (strongly recommended)
- Orbital sander or sanding block (plus sandpaper)
- Utility knife, putty knife
- Clamps (helpful, not mandatory)
Materials you’ll likely use
- Cleaner/degreaser and rags
- Wood filler and caulk
- Primer + durable cabinet/trim paint (or stain + protective topcoat)
- Top material: butcher block, finished plywood, reclaimed wood, or a countertop offcut
- Reinforcement lumber (like 2x4s or 1x4s) if the cabinet needs a stronger base
- New hardware (optional, but it’s the fastest “upgrade” per dollar)
- Anti-tip wall anchors (highly recommended for safety)
Step-by-step: convert a kitchen cabinet into an entryway bench with hidden storage
Step 1: Safety firstespecially dust and old paint
If the cabinet is older or you don’t know its history, treat sanding dust like the villain in a superhero
movie: it looks harmless until it isn’t. Work in a ventilated space, protect floors, and wear proper
respiratory protection for dust. If there’s any chance of old lead-based paint (especially if the cabinet
comes from an older home), test before sanding or stripping.
Step 2: De-kitchen the cabinet (clean, strip, and inspect)
Kitchens leave “souvenirs”: grease, cooking residue, and mystery splatters. Clean thoroughly so primer and
paint can actually stick. Remove doors, drawers, and all hardware. Label parts with painter’s tape so
reassembly isn’t a puzzle later.
Inspect the structure. Look for water damage, swollen particle board, wobbly corners, or broken hinges.
Tighten screws, add wood glue where joints are loose, and replace anything that’s beyond saving.
Step 3: Reinforce for sitting (because entryway benches are not decorative suggestions)
A cabinet that held cereal boxes may not automatically be thrilled about holding an adult tying boots.
Reinforcement is the difference between “solid bench” and “unexpected modern art collapse.”
- Add a base frame: a simple rectangular frame under the cabinet (often made from 2x4s) adds stability and gives you a place to attach trim or feet.
- Support the top: if the cabinet is particle board, add internal cleats (wood strips) along the inside edges to give screws something stronger to bite into.
- Level it: entryways are rarely perfectly flat. Use shims or adjustable feet so the cabinet doesn’t rock.
Step 4: Add a “bench-worthy” top
The top is the hero momentvisually and functionally. You want something smooth, durable, and comfortable
at seat height.
- Butcher block: warm, durable, and looks custom (especially with a matte protective finish).
- Plywood with edge banding: budget-friendly and paintable. Choose thicker plywood for stiffness.
- Reclaimed wood planks: rustic charm, but seal well to handle wet gloves and rainy-day drips.
- Cushion option: add a thin foam cushion with a removable covergreat for comfort, less great for muddy pets unless washable.
Slightly overhang the top (even 1/2–1 inch) for a finished furniture look. If kids live in your house (or
adults who behave like kids around corners), consider rounding the edges.
Step 5: Make it look built-in (trim, panels, and “intentional” details)
This is where “old cabinet” becomes “entryway accessory.” Add trim to match your home’s style:
- Baseboard-style trim along the bottom to blend into the room
- Shaker-style paneling on the sides if the cabinet ends are raw
- Beadboard backing if you’re building a mini mudroom wall section
- A toe-kick or tapered legs depending on whether you want built-in or furniture vibes
Step 6: Paint or stain for durability (the part that separates “cute” from “lasting”)
Most cabinet makeover heartbreak comes from skipping prep. The glam part is picking a color. The important
part is making it stick and survive.
- Scuff sand: you’re not trying to erase the cabinet’s pastjust give primer something to grip.
- Remove dust: vacuum, then wipe with a tack cloth or microfiber cloth.
- Prime: use a bonding primer if the surface is slick, glossy, or laminate.
- Light sand again: once primer dries, smooth it lightly for a cleaner topcoat finish.
- Paint in thin coats: durable enamel or cabinet/trim paint holds up better in high-traffic areas.
- Let it cure: “dry” and “cured” are not the same. Give it time before reinstalling hardware or loading it with daily use.
Brush/roller application is totally doable, but a foam roller can help reduce texture on flat surfaces.
If you want a more “factory” finish, spraying is an optionbut it requires more prep, more masking,
and more patience than most of us have before coffee.
Step 7: Organize the inside like a tiny mudroom
Storage is only magical when it’s usable. The goal is to make it easy to put stuff away, not just easy
to hide it when guests arrive.
- Add a shelf: split tall storage into two levelseveryday shoes below, seasonal items above.
- Use bins: soft bins for gloves and hats, wipeable bins for dog gear or sports equipment.
- Ventilation matters: shoes get funky when air can’t circulate. Consider leaving a small gap at the back, adding a few discreet vent holes, or using slatted inserts.
- Boot management: keep a removable tray inside for wet boots to protect the cabinet interior.
Step 8: Install it safely (and make it feel permanent)
Entryways are high-traffic. People lean, kids climb, and someone always tries to sit down while also
holding three bags, a coffee, and a questionable decision. Secure your piece.
- Anchor it: anti-tip straps or brackets into wall studs are a smart safety step.
- Protect floors: use felt pads or a thin rubber layer under the base if you’re on hardwood.
- Check door swing: reinstall doors/drawers and confirm they open cleanly without binding.
Upgrades that make it the “best accessory” (not just a bench)
1) Add hooks and vertical storage above
The dream entryway uses vertical space. Mount a row of hooks, a rail with hooks, or a small shelf above
your cabinet. Create “zones” for each personone hook per coat, one hook per bag, and one hook reserved
for the item that always ends up on the floor anyway.
2) Build a key-and-mail command center
Add a small tray, a shallow wall-mounted pocket, or a tiny drawer insert. If you’re fancy, label it.
If you’re realistic, label it and accept that the mail will still pile up. Progress, not perfection.
3) Sneak in a charging station
If your cabinet has a drawer, drill a small hole in the back of it (or the cabinet interior) and run a power
strip through to create a charging drawer for phones, earbuds, and portable chargers. Keep cords tidy with
simple clips or adhesive cord organizers.
4) Add a mirror for function and “space magic”
A mirror above the cabinet helps you do a quick last-second check before leaving, and it can make smaller
entryways feel larger. It’s like a cheat code, but socially acceptable.
Style ideas: make it look like it belongs in your home
Modern and minimal
- Flat-front doors (or simple Shaker fronts)
- Matte paint in warm white, greige, charcoal, or muted green
- Sleek pulls or even touch-latch hardware
- Thin bench top with a subtle overhang
Cozy farmhouse
- Beadboard backing above the bench
- Chunkier top in stained wood
- Black or antique brass hardware
- Woven baskets under hooks for gloves and scarves
Vintage charm
- Play up the cabinet’s age with a softer color and classic knobs
- Swap doors for cane webbing or glass panels (if you want to show off neat storage)
- Add a small runner rug to tie it all together
Common mistakes (and how to dodge them like a pro)
- Skipping degreasing: paint hates grease. Clean first, always.
- Rushing cure time: if the finish feels “dry” but dents easily, it’s not ready for daily punishment.
- Painting too thick: thick coats lead to drips, stickiness, and doors that glue themselves shut at the worst possible time.
- Ignoring ventilation for shoes: sealed cabinets + damp shoes = a scent you will never emotionally recover from.
- Not anchoring: especially important in homes with kids, pets, or enthusiastic leaners.
- Forgetting the entryway flow: if the cabinet blocks the door, it’s less “accessory” and more “boss level obstacle.”
Maintenance: keep it looking great through real life
Wipe the top weekly (entryways collect dust and grit fast). If your finish is painted, treat it like trim:
gentle cleaner, soft cloth, no harsh abrasives. Keep a small jar of leftover paint for quick touch-ups,
because scuffs are inevitable when your entryway is the busiest 20 square feet in the house.
Real-life experiences: what it’s actually like to live with a cabinet-turned-entryway hero (extra)
Here’s the part most tutorials skip: the “after” isn’t just a pretty reveal photo. It’s daily lifemud, keys,
backpacks, guests, and that one person who refuses to take their shoes off until they’ve walked across
half the house (you know who you are).
In the first week, the biggest surprise is how quickly an entryway bench changes your habits. When you have
a place to sit, you sit. That sounds obvious, but it’s the difference between shoes being kicked off in
the living room and shoes being removed at the door like a functional adult who definitely has their life
together. The cabinet becomes the “pause point” between outside and inside. You walk in, you set down your
bag, you take off your shoes, you hang your coatlike a tiny ritual that makes the whole house feel calmer.
The second surprise is that storage doesn’t automatically equal organization. If the inside is one big empty
cave, you’ll still end up with a shoe pilejust hidden behind doors like a secret. The fix is easy: give the
cabinet a system. A shelf for everyday sneakers, a tray for wet boots, and a bin for “random small stuff”
(gloves, dog leashes, hair ties, the single mitten that survived the winter). People are far more likely to
keep things tidy when the “right place” is obvious and effortless.
Then there’s the “family behavior” factor. If you have kids, they will treat hooks like a game. Too high,
and coats will land on the bench (or the floor). Too few hooks, and you’ll get coat layering like geological
sediment. The sweet spot is one hook per person, mounted at a reachable height for the smallest household
members, plus a second row or a shelf for adult coats. If you’re feeling extra smart, label the hooks with
names or iconsbecause you can’t argue with a dinosaur sticker that clearly indicates where your backpack
belongs.
One more very real experience: paint durability becomes personal. Entryways are a high-contact areashoes
scuff, bags scrape corners, and metal zippers have no respect for your hard work. That’s why prep and cure
time matter so much. A well-prepped, properly cured finish turns daily abuse into “eh, wipe it down.” A rushed
finish turns daily abuse into “why is it peeling already and why am I emotionally attached to primer now?”
Thin coats, patience, and letting the paint fully harden pay off every single day you don’t have to redo it.
Finally, the best part: the cabinet stops being just storage and becomes a “set the tone” piece. Add a small
tray for keys, a candle (if your household won’t immediately knock it over), a tiny plant, or a framed photo.
Suddenly your entryway looks intentionallike you planned it, not like you’re bravely coping. And when guests
come in, they instinctively know what to do: shoes go here, coats go there, keys land on the tray. You didn’t
just upcycle a cabinetyou created a welcome routine.
Conclusion
Turning an old kitchen cabinet into an entryway accessory is one of those rare DIY wins that checks every box:
practical, stylish, budget-friendly, and weirdly satisfying. With the right prep, reinforcement, and a smart
organization plan, your “old cabinet” becomes a hardworking bench, shoe stash, and daily-life command center
that makes coming home feel easierand leaving the house a little less frantic.