A broom leaning against the whopping bags, and a vacuum attachment nobody remembers buying. Before long, your laundry room becomes less of a workspace and more of a household-item reunion.
A dedicated broom closet solves that problem by giving tall cleaning tools, laundry products, and awkward accessories a permanent home. Better yet, you do not need a giant room or a luxury remodeling budget. With careful measurements, basic lumber, a few storage accessories, and a free weekend, you can build a slim utility closet that makes the entire laundry area feel calmer and easier to use.
This guide explains how to plan, build, organize, and maintain a laundry room broom closet without sacrificing access to your appliances. It also covers budget-friendly alternatives for renters and homeowners who would rather not introduce their walls to a circular saw.
Why Build a Broom Closet in the Laundry Room?
The laundry room is a natural storage zone for cleaning equipment. It already contains products used for washing, stain removal, drying, and household maintenance, so grouping related supplies there reduces the number of places you must search before cleaning.
A well-designed utility closet can hold:
- Brooms, mops, dusters, and floor squeegees
- A stick vacuum or compact canister vacuum
- Dustpans, brushes, and vacuum attachments
- Cleaning cloths, sponges, gloves, and scrubbers
- Laundry detergent, stain treatments, and dryer products
- A folding step stool, ironing board, or drying rack
- Paper towels, trash bags, and household backstock
Storage specialists commonly recommend using vertical space, grouping similar products, labeling containers, and keeping frequently used items within easy reach. A broom closet combines all four ideas while hiding the visual clutter behind a door. tion>
Plan the Closet Before Buying Materials
The fastest way to waste lumber is to begin cutting before deciding what the closet must hold. Start with a short planning session. It may feel less exciting than using power tools, but it is considerably more exciting than discovering your vacuum is one inch wider than the finished opening.
Inventory Your Cleaning Equipment
Remove every cleaning item currently stored in the laundry room, kitchen, hallway, garage, and wherever else rogue spray bottles have established colonies. Discard empty containers and products you no longer use. Group the remaining items into categories such as floor care, laundry care, surface cleaning, paper goods, and specialty supplies.
Measure the tallest, widest, and deepest objects. Pay particular attention to vacuum handles, folding step stools, ironing boards, and buckets. Design the closet around the objects you actually own rather than an imaginary collection of perfectly matching bottles.
Choose the Best Location
Look for a narrow section of unused wall beside the washer, dryer, utility sink, or laundry room entrance. A corner often works well because one existing wall can serve as part of the enclosure.
Before committing to the location, confirm that the closet will not:
- Block the washer or dryer door
- Interfere with the lid of a top-loading washer
- Restrict access to water shutoff valves
- Cover an electrical panel, outlet, drain, or cleanout
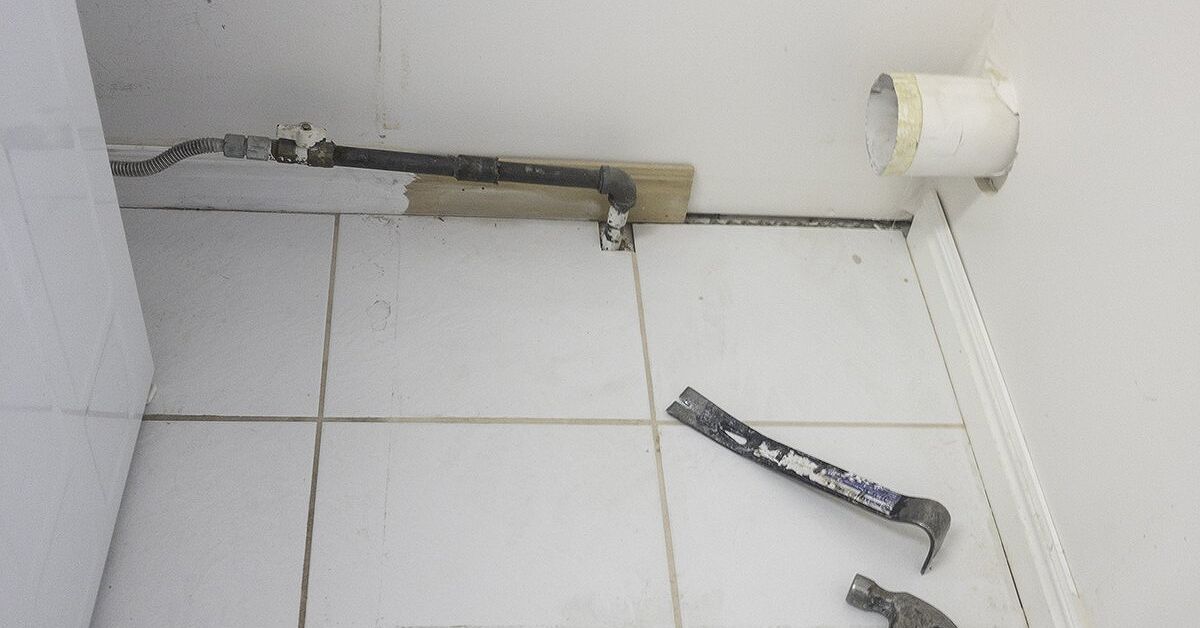
- Crush or obstruct the dryer exhaust duct
- Prevent an appliance from being pulled forward for service
- Create an awkward collision between room and closet doors
Determine the Dimensions
There is no universal broom closet size. A practical narrow closet is often approximately 18 to 30 inches wide and 18 to 24 inches deep, but your measurements should follow your tools and available floor space. Allow extra room around bulky handles rather than designing a closet that works only when every item stands at military attention.
For the interior height, measure the tallest broom, mop, or vacuum and add several inches of clearance. Many homeowners take the enclosure to the ceiling, using the upper portion for lightweight backstock that is needed only occasionally.
Mark the proposed footprint on the floor with painter’s tape. Open appliance doors, carry a laundry basket through the room, and pretend to remove the vacuum. This simple rehearsal often reveals traffic problems before they become permanent carpentry.
Choose a Broom Closet Style
Built-In Framed Closet
A framed closet looks like part of the house. It uses wall studs, drywall or finished panels, trim, and a hinged or sliding door. This option provides the most polished appearance but requires more construction skill.
Tall Utility Cabinet
A freestanding or wall-secured utility cabinet is the easiest solution. Choose a tall cabinet with an open vertical compartment and adjustable shelves. It can often be assembled in a day and painted to match the laundry room.
Shallow Wall Cabinet
When floor space is limited, build a shallow cabinet around wall-mounted broom grippers. A depth of only several inches may be sufficient for flat mops, dusters, and lightweight tools. This design will not accommodate a large vacuum, but it can clear an impressive amount of clutter from the floor.
Curtained Utility Nook
Renters can install a tension rod and washable curtain in front of a recessed nook or narrow shelving unit. It lacks the tailored appearance of cabinetry, but it hides cleaning tools without drilling a hinge collection into someone else’s property.
Materials and Tools
Materials vary according to the design, but a basic built-in broom closet may require:
- Two-by-four lumber for framing
- Plywood, cabinet-grade panels, or drywall
- One-by-two or one-by-three boards for shelf supports
- Wood screws and appropriate wall anchors
- A prehung door, slab door, bifold door, or curtain
- Door hinges, knob, pull, or magnetic catch
- Adjustable shelf standards or fixed shelving
- Broom grippers, utility hooks, and small bins
- Primer, washable paint, caulk, and trim
- A floor tray, scrap vinyl, or washable shelf liner
Useful tools include a tape measure, pencil, level, stud finder, drill-driver, saw, square, safety glasses, hearing protection, sanding block, and caulk gun. A finish nailer is convenient but not essential.
How to Make a Broom Closet in the Laundry Room
Step 1: Empty and Clean the Work Area
Remove baskets, detergent bottles, cleaning tools, and anything else that might trip you while you work. Vacuum the floor and wipe down the wall. Building a closet around existing dust is technically possible, but it feels like giving the dust a mortgage.
Step 2: Locate Studs, Pipes, and Wiring
Use a stud finder to mark wall studs. Check both sides of the wall for plumbing fixtures, outlets, switches, or appliances that suggest hidden utilities. Do not drill or cut until you are reasonably certain the area is clear.
Turn off power to nearby circuits when working close to electrical components. Contact a qualified professional when the planned enclosure requires moving plumbing, outlets, dryer connections, or ventilation.
Step 3: Mark the Closet Footprint
Transfer your taped layout to the wall and floor using a level and square. Mark the front edge, side wall, door opening, and shelf locations. Measure the diagonals of a rectangular footprint; matching diagonal measurements help confirm that the layout is square.
Step 4: Build the Frame
For a framed closet, cut the bottom and top plates, then position vertical studs between them. Anchor the framing to structural wall studs and suitable floor and ceiling framing. Do not rely on drywall alone to support a tall enclosure.
If you are installing a prefabricated cabinet, assemble it according to the manufacturer’s directions and secure it to wall studs. Tall, narrow cabinets can tip forward, especially when a heavy door swings open, so anti-tip attachment is essential.
Step 5: Add the Exterior Panels
Cover the frame with drywall, plywood, beadboard, or cabinet panels. Drywall provides a seamless built-in appearance, while plywood is tougher and easier to use as a mounting surface for interior hooks.
In a damp basement or laundry area, choose finishes suitable for the room’s conditions. Seal exposed wood edges and avoid leaving raw particleboard where occasional splashes can cause swelling.
Step 6: Install Shelves
Reserve one side or the central area for long-handled tools. Install shelves above or beside that vertical zone. Adjustable shelves offer flexibility when products change size, while fixed shelves are simple and sturdy.
Attach shelf supports to studs or to the cabinet structure, not merely to a thin finish panel. A common DIY shelf method uses a wall-mounted support frame secured to studs with a plywood surface fastened on top. </y products around shoulder to waist level. Store lighter, less frequently used supplies on upper shelves. Keep very heavy bottles low enough that retrieving them does not become an overhead strength test.
Step 7: Add Broom Holders and Hooks
Mount spring-loaded broom grippers or rubber-lined tool clamps along the back or side wall. Stagger the mounting heights so broom heads and mop heads do not pile on top of one another.
Use hooks for dustpans, brushes, reusable cleaning pads, extension cords, and vacuum attachments. Pegboard or slatwall can make the layout adjustable. Wall-mounted holders free the floor and allow damp mop heads to dry more effectively than tools stacked in a corner. tect the Floor
Install a removable plastic tray, scrap sheet vinyl, rubber mat, or washable liner at the bottom. It will catch drips from damp mops and small leaks from bottles. A raised lip is especially helpful if the closet contains liquid cleaning products.
Do not place soaked mop heads into a tightly closed cabinet. Let them dry first or provide ventilation openings so moisture does not linger.
Step 9: Install the Door
A standard hinged door offers full access but needs swing clearance. Bifold doors use less floor space, while sliding or barn-style doors avoid an inward swing. A curtain is the simplest low-cost option.
The inside of a solid door can hold a lightweight organizer, paper towel holder, small hooks, or a cleaning schedule. Keep door-mounted items shallow enough that they do not collide with shelves when the door closes. Behind-the-door storage and labeled containers are widely recommended for compact utility spaces. ulk, Prime, and Paint
Fill visible holes, sand rough surfaces, caulk small trim gaps, and apply primer. Finish with durable, washable interior paint. A light color can improve visibility inside a narrow closet, while a contrasting door can make the project feel intentional rather than apologetic.
Step 11: Create Storage Zones
Divide the finished closet into simple zones:
- Floor-care zone: Brooms, mops, vacuum, dustpan, and bucket
- Daily-cleaning zone: Frequently used sprays, cloths, and gloves
- Laundry zone: Detergent, stain remover, dryer balls, and mesh bags
- Specialty zone: Carpet cleaner, furniture polish, and seasonal products
- Backstock zone: Refill bottles, paper products, and extra trash bags
Clear bins make contents easy to identify. Opaque baskets create a calmer appearance but should be labeled. Avoid overfilling every shelf on opening day; leaving some empty space makes the closet easier to use and gives future supplies somewhere to go.
Important Laundry Room Safety Considerations
Keep Products Away From Children and Pets
Store detergent packets, bleach, concentrated cleaners, and other hazardous products high, out of sight, or behind a child-resistant latch. Keep them in their original labeled containers rather than transferring them into beverage bottles or decorative jars. Household Chemicals
Never mix bleach with ammonia, acids, or other household cleaners. Store incompatible products separately and follow the use, storage, and disposal directions printed on each label. yer Area Accessible
Do not build the closet over the dryer duct, block airflow, or create a storage pile behind the appliance. Clean the lint filter regularly and maintain access to the exhaust connection. The U.S. Fire Administration identifies failure to clean as a leading factor in home dryer fires. oading Shelves
Use fasteners rated for the wall type and expected load. Secure shelf supports and tall cabinets to structural framing. Place heavy containers on lower shelves, where they are easier to retrieve and less dangerous if shifted.
Budget-Friendly Broom Closet Ideas
Under $100: The Open Utility Station
Install a wall-mounted broom rack, two sturdy shelves, a few labeled bins, and a curtain. This option works well in rentals or very small laundry rooms. Use removable accessories only where their load ratings suit the items being stored.
$100 to $350: The Freestanding Cabinet
Purchase a narrow utility cabinet with adjustable shelves. Modify one side by removing unnecessary shelves and installing broom holders. Secure the cabinet to studs and add shelf liner or a floor tray.
$350 and Up: The Built-In Closet
A custom framed enclosure costs more because it may require lumber, panels, trim, a door, hardware, paint, and possibly electrical or drywall work. The result can blend seamlessly with existing cabinetry and use the full ceiling height.
Costs vary widely by region, material choice, existing conditions, and whether professional labor is required. Prepare a project-specific shopping list instead of treating a broad online estimate as a promise from the carpentry universe.
Common Mistakes to Avoid
- Making the closet too shallow: Measure the vacuum and bucket, not just the broom handle.
- Ignoring door clearance: Test appliance and room doors before framing.
- Blocking utilities: Preserve access to valves, outlets, drains, and dryer components.
- Installing too many permanent shelves: Leave a flexible vertical bay for tall tools.
- Using weak anchors: Secure loaded shelves and cabinets to structural framing.
- Storing wet tools in a sealed space: Dry mop heads first or add ventilation.
- Decanting hazardous cleaners: Original containers preserve labels and safety instructions.
- Filling every inch: A closet without breathing room quickly becomes another clutter problem with hinges.
How to Keep the Broom Closet Organized
A successful broom closet should not require a complicated maintenance ritual. Five minutes of attention each month is usually more effective than one heroic cleanup every two years.
- Return tools to their assigned hooks immediately after use.
- Wipe drips from bottles and the protective floor tray.
- Remove empty containers before adding replacements.
- Combine only identical products when their labels permit it.
- Check for expired, leaking, damaged, or recalled products.
- Wash reusable cloths and allow damp tools to dry.
- Review backstock before buying more supplies.
Keep a small portable caddy for the products used most often. You can carry the caddy from room to room, then return the entire kit to one shelf instead of hunting down five separate bottles. Grouping routine supplies in a portable container is also recommended in household cleaning guidance.
Practical Experience: Lessons From a Typical Weekend Broom Closet Project
The biggest surprise in a broom closet project is usually not the carpentry. It is the amount of unrelated stuff discovered during the cleanout. A laundry room may quietly accumulate lightbulbs, pet shampoo, half-used paint rollers, mystery hardware, and enough reusable bags to open a small grocery store. Sorting before construction frequently creates more usable space than expected.
A typical project begins with an ambitious sketch showing symmetrical shelves and perfectly aligned tools. Reality then introduces a dryer vent, a water valve, a baseboard, and a wall that is not quite square. The smartest adjustment is to treat the first design as a proposal rather than a sacred document. Building around actual room conditions produces a better closet than forcing the space to obey a drawing.
Painter’s tape is one of the most valuable tools during the planning stage. Marking the proposed cabinet width on the floor makes the closet feel real. A design that looks narrow on paper may suddenly seem enormous when someone tries to walk through the room holding a loaded laundry basket. Reducing the depth by a few inches can preserve traffic flow without sacrificing much storage.
Another common lesson involves shelf placement. It is tempting to install evenly spaced shelves because they look tidy. However, cleaning supplies are not evenly sized. A tall spray bottle, short tub of detergent pods, roll of trash bags, and bulky refill container all demand different clearances. Adjustable shelf tracks may not look as handcrafted as fixed wooden supports, but they make the closet more adaptable over time.
The tool-hanging area also benefits from experimentation. When every broom gripper is installed at the same height, the heads collide and waste space. Staggering the holders allows a broom, flat mop, duster, and dustpan to nest together without becoming tangled. Installing the holders temporarily with a few screws before final finishing makes it easier to adjust the arrangement.
Door choice can determine whether the project feels convenient or irritating. A full hinged door provides the best view of the interior, but in a narrow laundry room it may block the washer or trap whoever is carrying a basket. A bifold door, sliding panel, or curtain can be a better match for limited clearance. The most stylish option is not always the one that behaves best on laundry day.
Finishing details take longer than many DIYers expect. Filling holes, sanding, caulking trim, priming raw wood, and applying two coats of paint can consume as much time as assembly. Skipping those steps saves an afternoon but makes the closet look temporary. A smooth, washable finish is particularly worthwhile in a room exposed to detergent drips, dust, and damp cleaning tools.
The most satisfying moment comes when the broom, mop, vacuum, and supplies are loaded into their assigned zones. The floor becomes clear, the appliances are easier to reach, and the room feels larger even though a closet has technically made it smaller. That is the odd magic of effective storage: adding a structure can create the experience of having more space.
The organization system should remain simple. Elaborate labels and matching containers look impressive, but they cannot compensate for an inconvenient layout. Everyday products should be reachable with one hand. Heavy refills should stay low. Hazardous products should remain secured. Rarely used supplies can occupy the upper shelves. When every category has an obvious home, family members are more likely to put things away without requiring a guided tour.
Finally, leave a little unused capacity. A closet packed tightly on the first day has nowhere to absorb future purchases or changes in equipment. Ten to twenty percent of open shelf and hanging space provides flexibility and makes items easier to remove. Empty space is not wasted space; it is the small luxury that keeps an organized closet from returning to its natural state of chaos.
Conclusion
Building a broom closet in the laundry room is a practical way to control cleaning clutter, use vertical space, and make household chores less frustrating. The best design is not necessarily the largest or most expensive. It is the one that fits your tools, preserves appliance access, secures hazardous products, and gives every frequently used item an easy-to-reach home.
Measure carefully, test the footprint with painter’s tape, anchor the structure properly, and design the interior around real cleaning equipment. Add adjustable shelves, staggered broom holders, labeled bins, and a washable floor liner. The result will be a laundry room that works harder without looking as though a janitorial cart exploded inside it.