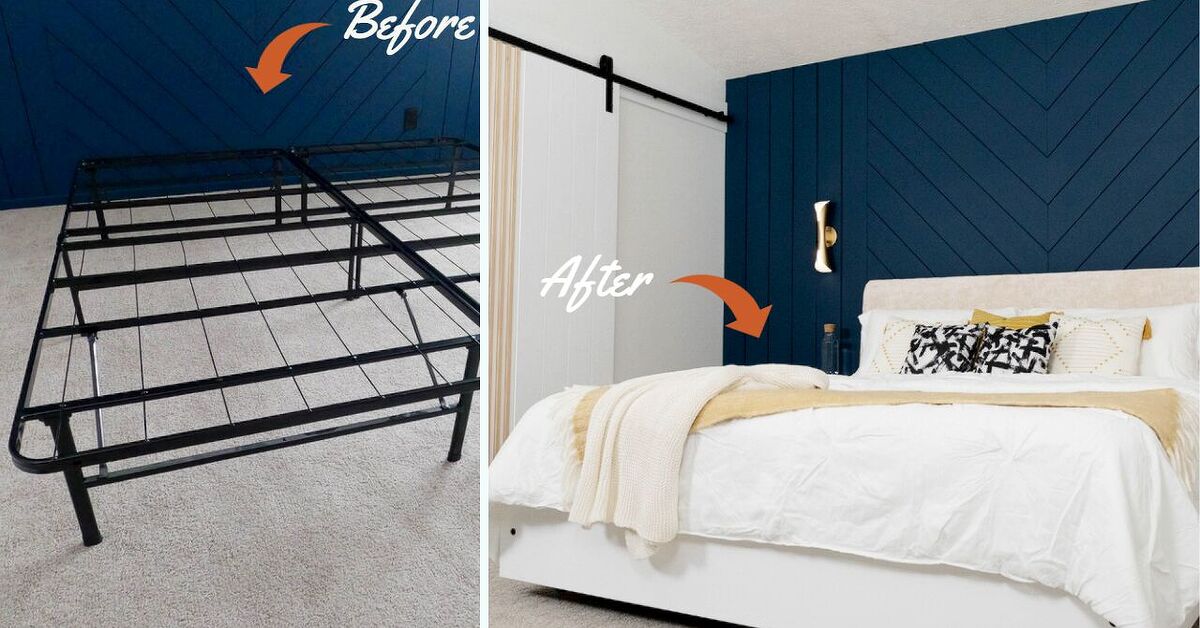
A bedroom without a headboard can feel a little like a tuxedo without shoes: technically complete, but not exactly ready for the party. The bed is usually the largest piece of furniture in the room, which means the wall behind it has one jobmake the whole space look intentional. A luxurious upholstered headboard does that beautifully. It adds softness, height, texture, color, and the quiet confidence of a boutique hotel suite that somehow always smells faintly of lavender and excellent decisions.
The best part? You do not have to buy a designer bed frame or sell a kidney to get the look. With plywood, foam, batting, upholstery fabric, a staple gun, and a little patience, you can create a custom DIY upholstered headboard that looks expensive, feels comfortable, and fits your bedroom better than a store-bought piece ever could. Whether you want velvet drama, linen calm, channel-tufted polish, or a simple padded panel, this guide walks you through the design choices, materials, construction steps, finishing details, and real-life lessons that turn a plain bedroom wall into a plush focal point.
Why an Upholstered Headboard Instantly Makes a Bedroom Feel Luxurious
Luxury in bedroom design is not only about price. It is about comfort, proportion, texture, and the feeling that every piece was chosen on purpose. An upholstered headboard checks all those boxes. Unlike a bare wall or a thin metal frame, a padded headboard gives your bed visual weight. It frames your pillows, softens the room, and makes sitting up in bed more comfortable for reading, scrolling, sipping coffee, or pretending you are the kind of person who journals before sunrise.
Upholstery also introduces texture, which is one of the biggest differences between a flat room and a finished one. Velvet adds depth and glamour. Linen feels relaxed and tailored. Bouclé brings a cozy, high-end look. Performance fabric offers style with practical stain resistance. Even a simple cotton blend can look elegant when stretched smoothly over the right padding and scaled correctly to the bed.
Designers often use upholstered beds and padded wall treatments to create a cocoon-like bedroom, especially in spaces meant for rest and quiet. Fabric and padding help soften harsh surfaces, reduce visual noise, and make the room feel warmer. In other words, a headboard is not just decoration. It is a mood manager with staples.
Choose the Right Headboard Style Before You Touch a Tool
Before buying materials, decide what kind of luxury you want. “Luxury” can mean sleek and minimal, romantic and tufted, bold and architectural, or calm and hotel-inspired. The wrong style can make the room feel awkward, while the right one can make even basic bedding look like it has a personal stylist.
Simple Rectangular Headboard
This is the easiest and most beginner-friendly option. A rectangular plywood panel wrapped in foam, batting, and fabric creates a clean, tailored look. It works well in modern, transitional, farmhouse, and minimalist bedrooms. If you want a timeless upholstered headboard that will not scream “I watched one trend video and made permanent decisions,” start here.
Tall Statement Headboard
A tall headboard creates drama and makes the ceiling feel higher. This style works especially well behind queen, king, and California king beds. For a truly luxurious look, extend the headboard 48 to 60 inches high, or even taller if the room has generous ceilings. Tall upholstered panels can feel grand without being fussy.
Channel-Tufted Headboard
Vertical channel tufting is elegant, modern, and surprisingly forgiving. Instead of classic button tufts, this style uses padded fabric channels that create rhythm and height. It is a smart choice if you want a designer look with less complicated measuring than diamond tufting.
Button-Tufted Headboard
Button tufting feels classic, romantic, and plush. It requires more planning because you need to mark holes, cover buttons, pull them evenly, and keep the fabric tension balanced. The result can be stunning, but it is best for DIYers who are comfortable measuring carefully and redoing a section if the first attempt looks like a lumpy waffle.
Wall-Mounted Upholstered Panels
If you rent, have an unusual bed frame, or want a modern hotel look, consider separate upholstered wall panels. These can be mounted behind the bed in a grid or vertical arrangement. They are easier to move in pieces and can create a custom built-in effect.
Pick a Fabric That Looks Expensive and Lives in the Real World
The fabric determines the personality of your headboard. It also determines how often you will silently regret eating snacks in bed. For a luxurious upholstered headboard, choose fabric with enough weight to stretch smoothly and hold up to daily contact.
Velvet
Velvet is the drama queen of upholstery fabrics, and frankly, she earns the crown. It reflects light beautifully, feels soft, and makes deep colors look rich. Navy, forest green, charcoal, camel, blush, and chocolate velvet can all look sophisticated. The downside is that velvet can show marks, lint, and pressure lines, so gentle maintenance is part of the deal.
Linen and Linen Blends
Linen gives a relaxed, expensive look without feeling flashy. Natural linen wrinkles, which can be charming or annoying depending on your personality and caffeine level. A linen blend is often more practical because it keeps the texture while improving durability.
Bouclé or Nubby Fabric
Bouclé has become popular because it instantly makes a room feel soft and design-forward. It works beautifully in cream, ivory, oatmeal, and warm gray. However, textured fabrics can catch dust and pet hair, so they are best for lower-mess bedrooms.
Performance Fabric
Performance upholstery fabric is a great choice for families, pet owners, and anyone who believes coffee belongs near pillows. Many performance fabrics are designed to resist stains and wear while still looking polished.
Faux Leather or Leather
Leather and faux leather create a tailored, masculine, or modern feel. They are easier to wipe clean than many fabrics, but they can be less forgiving when stapled around corners. Use a sharp blade, strong staples, and careful folds for a crisp finish.
Materials and Tools You Will Need
A simple DIY upholstered headboard does not require a professional workshop. It does require the right materials, a flat workspace, and the emotional maturity to measure twice even when you are absolutely sure.
- 3/4-inch plywood or MDF cut to your desired headboard size
- 2-inch upholstery foam for a plush, high-end feel
- Batting large enough to wrap around the front and back edges
- Upholstery fabric with several inches of extra material on all sides
- Spray adhesive suitable for foam
- Staple gun and upholstery staples
- Scissors or rotary cutter
- Measuring tape and pencil
- Saw, or a hardware store cutting service
- French cleat, wall brackets, or headboard legs for mounting
- Optional: buttons, button-cover kit, upholstery needle, twine, nailhead trim, or decorative welt cord
How to Measure for a Custom Upholstered Headboard
Start with the width of your mattress. A headboard should generally be at least as wide as the mattress, but for a more luxurious look, add 2 to 6 inches on each side. A queen mattress is 60 inches wide, so a finished headboard around 64 to 66 inches wide often looks balanced. A king mattress is 76 inches wide, so 80 to 84 inches can feel substantial.
Height depends on your design style and how many pillows you use. A low modern headboard may rise only 36 to 42 inches from the floor. A taller hotel-style headboard may reach 54 to 60 inches or more. If you love layers of pillows, do not make the headboard so short that it disappears behind them. A hidden headboard is not a headboard; it is an expensive rumor.
Also think about placement. A headboard attached to the bed frame may sit lower than a wall-mounted one. A wall-mounted headboard gives you more control over height and can look more custom. Just make sure it is securely installed into studs or with appropriate heavy-duty anchors.
Step-by-Step: How to Make a Luxurious Upholstered Headboard
Step 1: Cut the Base
Cut your plywood or MDF to the desired size. If you do not own a saw, many home improvement stores can make straight cuts for you. Sand rough edges so they do not snag the batting or fabric. This is not the glamorous part, but it is the part that prevents your beautiful velvet from being attacked by splinters.
Step 2: Attach the Foam
Lay the foam on the plywood and trim it to match the panel. Spray adhesive on the plywood, then carefully press the foam into place. Work slowly so the foam lines up with the edges. For a softer, rounded look, you can let the batting do the edge-softening. For a sharper modern look, keep the foam flush and even.
Step 3: Add Batting
Place the batting on the floor or worktable, then lay the foam-covered board face down on top of it. Pull the batting around the back and staple it in place. Start in the center of each side, then move outward, alternating sides to keep tension even. The batting smooths the foam edges and gives the headboard that plush, professional shape.
Step 4: Wrap the Fabric
Lay your fabric face down, making sure the pattern or nap runs in the right direction. Place the padded board face down on top. Pull the fabric over the back and staple it just as you did with the batting: center first, then corners last. Keep the fabric taut but not distorted. If the material has a visible weave, step back occasionally to check that the lines are straight.
Step 5: Fold the Corners Like a Gift
Corners separate the “custom” look from the “craft night emergency” look. Trim bulky excess fabric, fold neatly, and staple securely on the back. Think of wrapping a present, except the present is large, padded, and judging you. Take your time here. Smooth corners make the entire headboard look more expensive.
Step 6: Add Optional Details
For a designer finish, add nailhead trim along the edges, fabric-covered buttons, vertical seams, or welt cord. Keep details intentional. One strong feature usually looks more luxurious than five competing decorations. A tall velvet panel with clean edges can be just as elegant as a deeply tufted headboard.
Step 7: Mount It Safely
You can attach legs to the back and bolt the headboard to a bed frame, or mount it directly to the wall with a French cleat. Wall mounting often gives the most polished look because the headboard stays steady and can be positioned at the perfect height. For larger headboards, secure hardware into wall studs whenever possible. A luxurious headboard should make your bedroom feel peaceful, not participate in gravity experiments at 2 a.m.
Design Tricks That Make a DIY Headboard Look High-End
Scale is everything. A slightly oversized headboard often looks more expensive than one that barely matches the mattress width. If your bedroom is small, you can still go tall rather than wide. Vertical height draws the eye upward and creates drama without crowding the floor.
Color also matters. Neutrals like ivory, taupe, gray, camel, and oatmeal create a calm hotel look. Jewel tones like emerald, sapphire, rust, and plum bring personality. If the walls are dark, a matching or tonal headboard can create a color-drenched effect. If the walls are light, a deeper fabric can anchor the room.
Texture should coordinate with the rest of the bedroom. Pair velvet with crisp cotton bedding for contrast. Pair linen with layered quilts for casual elegance. Pair bouclé with smooth wood nightstands so the room does not become a festival of fuzz. Good design is often about contrast: soft with structured, matte with shiny, plain with patterned.
Do not forget lighting. Wall sconces or bedside lamps can make the headboard look more intentional. Center the bed, align the nightstands, and keep pillows from hiding the upholstery. A beautiful headboard deserves to be seen, not buried behind seven decorative pillows named “the marriage test.”
Cleaning and Maintenance: Keep the Luxury Alive
An upholstered headboard collects dust, oils, pet hair, and the occasional mysterious mark that no one in the house will admit causing. Regular maintenance keeps it looking fresh. Vacuum the fabric monthly using a soft brush attachment. Spot-clean stains according to the fabric type and manufacturer’s guidance. For velvet, avoid harsh rubbing because it can crush the pile. For linen, blot gently and avoid over-wetting. For performance fabric, follow the care label so you do not accidentally defeat the whole purpose of buying performance fabric.
Keep the headboard away from damp walls and direct, harsh sunlight when possible. Sunlight can fade fabric over time, and moisture is never a friend to plywood, foam, or upholstery. If you use hair products or body oils at night, consider pillow placement that reduces direct contact with the headboard.
Common Mistakes to Avoid
The first mistake is choosing fabric that is too thin. Lightweight fabric can wrinkle, sag, or show the foam underneath. Upholstery-weight fabric gives a smoother result. The second mistake is using foam that is too thin. One-inch foam can work for a basic look, but two-inch foam feels much more luxurious.
Another common problem is uneven tension. If you pull one side too tightly and barely pull the other, the front may ripple or twist. Always staple from the center outward and alternate sides. Also, do not ignore the back. No one may see it daily, but a tidy back usually means a better-built front.
Finally, do not mount a heavy headboard casually. Use appropriate hardware. A large upholstered headboard can be heavier than it looks, especially with thick plywood and foam. Secure installation is part of good design.
Budget Breakdown: Where to Save and Where to Splurge
You can save on the base by using standard plywood and having it cut at the store. You can also save by choosing a simple rectangular shape rather than a complex curved silhouette. Where should you splurge? Fabric and foam. These are the materials you see and feel every day. Cheap foam can flatten, and cheap fabric can pill or stretch. A small increase in material quality can make the finished headboard look far more professional.
If you want a luxury look on a modest budget, choose a classic shape, invest in beautiful fabric, and keep the detailing simple. A clean, tall, well-wrapped headboard in a rich textile will usually look more expensive than an overly complicated design made with flimsy materials.
Real-World Experiences: What Actually Matters When Creating a Luxurious Upholstered Headboard
After seeing many DIY headboard projects succeed, fail, and hover somewhere in the “well, it has personality” category, one lesson stands out: the finished result depends less on advanced skill and more on preparation. The people who get the best results usually do three things before they begin. They measure the wall, choose fabric in person when possible, and test how the fabric behaves when pulled around an edge. That last detail sounds small, but it can save the whole project. Some fabrics look gorgeous flat but become bulky at the corners or reveal stress marks when stretched.
A helpful experience is to create a mini sample before committing. Take a scrap of wood or cardboard, add a small piece of foam and batting, then wrap the fabric around it. This tiny test shows whether the fabric wrinkles, whether staples hold well, and whether the color changes under bedroom lighting. Fabric can look calm and creamy in a store, then turn oddly yellow under warm bulbs. Your headboard should not surprise you like a plot twist.
Another practical lesson: bigger is often better, but only when the room can handle it. A tall headboard can make a bedroom feel luxurious, yet it should not block windows, outlets, artwork, or wall sconces. Before cutting plywood, tape the planned dimensions on the wall with painter’s tape. Live with that outline for a day. Walk into the room several times. If the shape feels balanced, proceed. If it feels like the bed is wearing a crown meant for a medieval parade, adjust the height.
Fabric choice also affects the mood of the entire bedroom. A deep green velvet headboard can make white bedding look crisp and expensive. A beige linen headboard can make a small room feel airy and calm. A warm taupe bouclé panel can bring softness to modern furniture. The most successful projects usually repeat the fabric color somewhere else in the room, even subtly. Try a throw blanket, pillow trim, lampshade, rug detail, or artwork tone. Repetition makes the headboard feel connected instead of randomly dropped into the room by the furniture fairy.
One underrated tip is to upgrade the bedding after finishing the headboard. The headboard may be the star, but wrinkled sheets and tired pillows can dim the performance. You do not need luxury hotel linens, but fresh pillowcases, a textured throw, and two properly scaled shams can make the whole bed look styled. Keep the pillows low enough to reveal the upholstery. If you spent a weekend making a beautiful headboard, do not hide it behind a mountain of cushions that must be excavated every night.
Finally, expect the project to take longer than the cheerful tutorials suggest. Not because it is impossible, but because real homes include interruptions, crooked walls, missing staples, and at least one moment when the fabric is upside down and everyone pretends not to panic. Build in time for careful corners, straight pattern alignment, and safe mounting. The reward is worth it: a custom upholstered headboard that transforms the bedroom every single day. It is comfortable, personal, polished, and deeply satisfying because you made it yourself. That kind of luxury has more character than anything that arrives in a box with an Allen wrench and vague emotional support.
Conclusion
A luxurious upholstered headboard is one of the most effective ways to upgrade a bedroom without remodeling the entire space. It adds softness, style, comfort, and a custom focal point that can completely change how the room feels. By choosing the right shape, scaling it properly, investing in quality foam and fabric, and taking time with the corners and mounting, you can create a DIY headboard that looks designer without the designer invoice.
The secret is intention. Match the headboard to your room’s mood, use fabric that fits your lifestyle, and keep the finishing details clean. Whether your style is velvet and dramatic or linen and serene, the right upholstered headboard can turn a plain bed wall into the kind of bedroom moment that makes you pause at the doorway and think, “Yes, this is where a well-rested, sophisticated person sleeps.” Even if that person still hits snooze three times.
SEO Tags
Note: This article is written as original, publication-ready web content based on real DIY upholstery and bedroom design best practices, with no embedded source links or content reference markers.