A fresh coat of paint can make a tired room look brighter, cleaner, and dramatically more expensive. Unfortunately, it can also produce streaks, drips, fuzzy roller marks, crooked edges, and one permanently speckled houseplant. The difference usually is not artistic talent. It is preparation, tool selection, and a handful of reliable painting tips and tricks.
This guide walks through the complete process, from choosing a color and repairing walls to cutting in, rolling smoothly, fixing mistakes, and storing leftover paint. Whether you are refreshing a bedroom or repainting most of your home, these techniques will help you work more efficiently and achieve a professional-looking finish.
Plan the Painting Project Before Opening a Can
Paint rewards patience and punishes spontaneous enthusiasm. Before removing the lid, decide which surfaces will be painted, how the room will be used, and what order makes sense for the project.
Test Colors in the Actual Room
A paint chip viewed beneath bright store lighting may look completely different in a north-facing bedroom. Permanent features such as flooring, cabinets, tile, countertops, and brick should also influence the color choice. Sherwin-Williams recommends considering these fixed finishes and their undertones before settling on a wall color.
Apply samples to several areas of the wall or paint large removable sample boards. Observe them in morning light, afternoon light, and artificial light. A gray that looks sophisticated at noon may develop a mysterious purple personality after sunset.
Select the Right Paint Sheen
Paint sheen affects appearance, durability, and how easily the surface can be cleaned. Flat and matte finishes help disguise minor wall imperfections, making them useful for ceilings and low-traffic rooms. Eggshell and satin finishes are easier to clean but may reveal bumps, patchwork, and uneven drywall. Semi-gloss is commonly used on trim, doors, cabinets, and other surfaces that need frequent cleaning.
For example, eggshell may be suitable for a living room, while satin can be a practical choice for a busy hallway. In a bathroom or kitchen, choose a coating specifically recommended for moisture-prone or frequently cleaned surfaces.
Buy Enough Paint From the Same Batch
Measure the room before shopping and use the manufacturer’s coverage calculator. Include extra paint for a second coat and future touch-ups. When several cans of the same color are required, combine them in a larger bucket before painting. This technique, often called boxing paint, helps prevent subtle color differences from appearing halfway across a wall.
Gather the Right Painting Tools
You do not need to purchase every gadget in the paint aisle, but dependable tools make the job faster and less frustrating. A basic interior painting kit should include:
- High-quality angled brush
- Roller frame and suitable roller covers
- Extension pole
- Paint tray or five-gallon bucket with a roller grid
- Canvas drop cloths or secured floor-protection paper
- Painter’s tape
- Putty knife and patching compound
- Sanding sponge or fine-grit sandpaper
- Clean rags and a damp sponge
- Paint-can opener and stir sticks
A quality brush holds more paint, distributes it more evenly, and is less likely to leave loose bristles behind. That matters because removing a brush hair from wet paint is an oddly delicate procedure that nobody schedules into the weekend.
Match the Roller Nap to the Surface
Roller-cover thickness is known as the nap. Smooth walls generally need a shorter nap, while textured plaster, masonry, or rough surfaces require a thicker nap to reach into recesses. Consumer Reports recommends a short-nap roller for many smooth interior surfaces because it can provide even coverage with less splatter. The Home Depot similarly advises increasing nap thickness as surface texture becomes rougher.
Before using a new roller cover, remove loose fibers with painter’s tape or wash and dry it according to the manufacturer’s directions. Otherwise, your freshly painted wall may acquire the texture of a wool sweater.
Preparation Is the Most Important Painting Trick
Professional-looking results begin before any color reaches the wall. Paint cannot hide dust, grease, loose material, raised patches, or damaged drywall. In many cases, it makes those problems easier to see.
Clear and Protect the Room
Move small furniture out of the room and place larger pieces near the center. Cover furniture completely and protect the floor with canvas drop cloths, rosin paper, or another material designed for painting projects. Secure the edges so the protection does not slide under your feet.
Remove switch plates, outlet covers, curtain hardware, and easily detachable fixtures. Place screws in labeled bags. Do not simply paint around a switch plate unless your decorating goal is “landlord preparing for a new tenant at record speed.”
Clean the Walls
Dust walls from top to bottom. Clean greasy, smoky, or frequently touched areas with a mild cleaning solution appropriate for the surface, then rinse if required and allow everything to dry. Paint adheres more reliably to a clean surface, while residue can contribute to peeling, poor coverage, and uneven sheen.
Kitchens deserve special attention around stoves, backsplashes, and cabinets. In bathrooms, address soap residue and confirm that any moisture or mildew problem has been corrected before painting.
Patch, Sand, and Remove Dust
Fill nail holes, shallow dents, and small cracks with an appropriate patching compound. Let the repair dry completely, sand it level, and remove the dust. Run your hand over each patch while looking across the wall under strong side lighting. Your fingers often notice ridges that your eyes politely ignore.
Rough or uneven areas should be sanded to create a smoother surface. Benjamin Moore advises wiping away sanding dust with a damp cloth and allowing the wall to dry thoroughly before painting.
Use Painter’s Tape Carefully
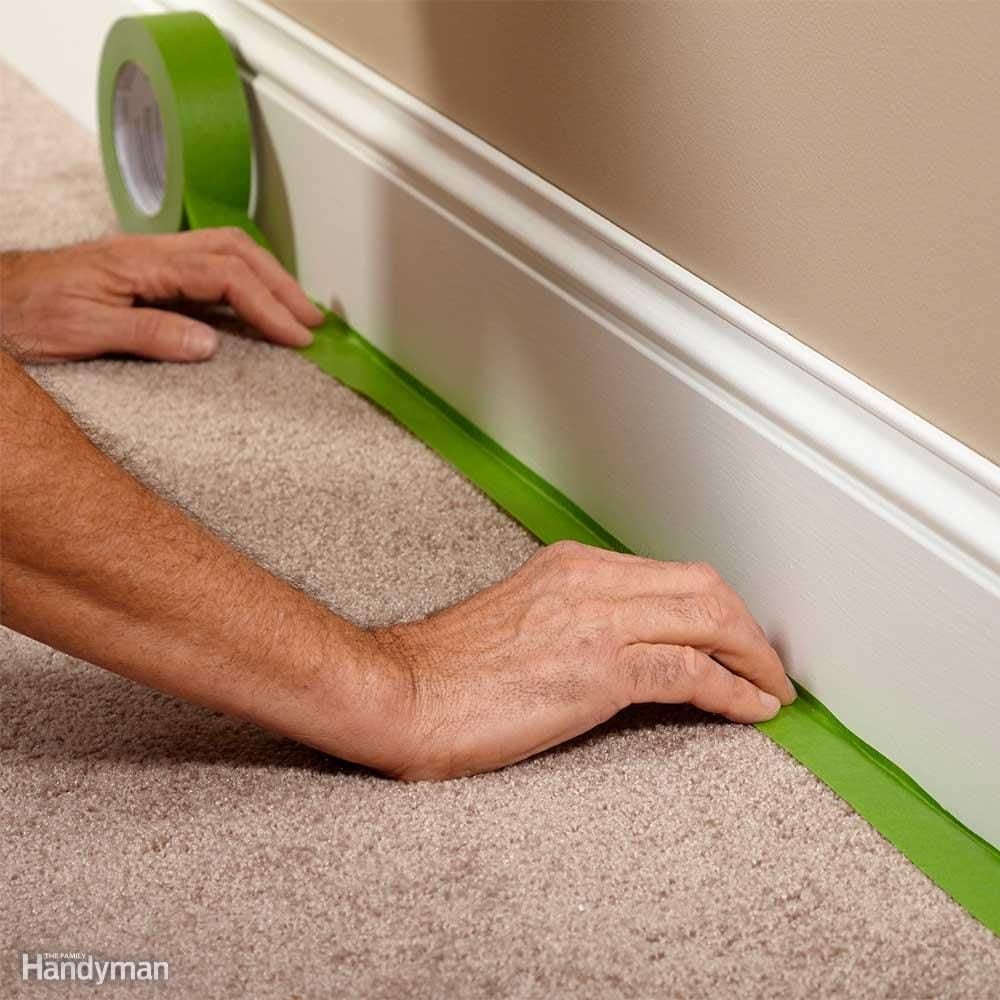
Apply painter’s tape only to clean, dry surfaces. Use short, manageable strips and press the working edge firmly to reduce paint bleed. Choose a tape made for the surface beneath it, especially when masking wallpaper, finished wood, delicate coatings, or recently painted walls.
Tape is helpful, but it is not a force field. Do not flood its edge with paint. Remove it according to the manufacturer’s timing instructions, and score stubborn edges lightly with a sharp utility knife so dried paint does not tear away.
Know When Primer Is Necessary
Primer creates a more uniform surface, improves adhesion, and helps manage stains, porous patches, bare materials, and dramatic color changes. It is particularly valuable on new drywall, bare wood, repaired areas, water stains, glossy coatings, and surfaces with uneven absorption. A tinted primer may improve coverage when switching to a deep or intense color.
A paint-and-primer product may work well on a clean, previously painted wall in sound condition, especially when the new color is similar. However, “paint and primer in one” does not mean “paint and miracle worker in one.” Problem surfaces still need the correct specialized primer.
Use the Best Order for Painting a Room
There is more than one workable sequence, and professional painters sometimes prefer different methods. A practical order for many do-it-yourself projects is:
- Ceiling
- Walls
- Trim, windows, and doors
- Baseboards
Starting with the ceiling allows minor splatter to be covered later. Working from top to bottom also makes it easier to manage drips. When painting trim, Benjamin Moore recommends progressing from crown molding to window frames, door frames, and finally baseboards.
Some experienced painters prefer completing the trim before the walls because a smooth trim surface is easier to tape. Either sequence can work. The real secret is choosing one approach and avoiding a chaotic rotation between ceiling, door, wall, snack break, other wall, and existential regret.
Master Cutting In With a Brush
Cutting in means brushing paint along ceilings, corners, trim, and other edges that a roller cannot reach neatly. Use a quality angled sash brush, a small container of paint, and good lighting.
Load the Brush Without Overloading It
Dip roughly the lower third of the bristles into the paint, then tap the brush gently against the inside of the container. Avoid scraping all the paint off on the rim. The goal is a loaded brush, not a dripping one.
Approach the Edge in Two Passes
Begin slightly away from the edge to release excess paint. On the second pass, guide the brush toward the line with steady pressure. Family Handyman recommends first applying paint about half an inch from the trim and then making another controlled pass along the edge.
Work in sections short enough that the brushed paint remains wet when you begin rolling. Blending the roller into a wet cut-in area reduces visible borders and differences in texture. Benjamin Moore recommends cutting in before rolling the main wall area for easier blending.
Roll Paint Without Streaks or Lap Marks
Load the Roller Evenly
Work paint thoroughly into the roller cover instead of coating only the surface. Roll it over the tray ridges or bucket grid until the cover is saturated but not dripping. A dry roller requires excessive pressure and leaves thin patches; an overloaded roller creates drips and sends decorative freckles across the room.
Work in Manageable Sections
Apply paint to an area several feet wide, distribute it with overlapping passes, and finish with light strokes in the same direction. Do not press hard. Let the roller and paint perform the work.
Maintain a wet edge by overlapping each new section before the previous section dries. This is one of the most important painting tips for preventing lap marks, especially in warm rooms, dry conditions, or large open spaces.
Do Not Keep Reworking Drying Paint
Once paint begins to set, leave it alone. Repeatedly rolling over semi-dry areas can create ridges, dull patches, flashing, and uneven texture. Small imperfections often level as the coating dries. If a problem remains, allow the paint to cure and correct it with the next coat.
Allow Proper Drying Time Between Coats
Follow the recoat time printed on the paint label. Dry-to-the-touch time and safe recoat time are not always the same. Temperature, humidity, ventilation, coating thickness, and surface porosity can all affect drying.
Applying the next coat too soon may pull or soften the first coat, causing drag marks and poor adhesion. A second coat usually improves color consistency, depth, durability, and sheen uniformity, particularly with bold colors or major color changes.
Keep the room ventilated according to the product instructions. Open windows when conditions permit and use fans to move air out of the room rather than simply blowing dust directly onto wet paint.
Common Painting Mistakes and Fast Fixes
Drips and Runs
If the paint is still wet, smooth the drip gently with the brush or roller. If it has dried, sand the raised area, remove the dust, and repaint it with thin coats.
Roller Marks
Roller marks may result from an unsuitable roller cover, excessive pressure, inadequate loading, or rolling over partially dried paint. After the surface dries, sand prominent ridges lightly and apply another coat while maintaining a wet edge.
Paint Bleeding Under Tape
Let the paint dry, use a small artist’s brush or angled sash brush, and touch up the line with the neighboring color. For future sections, clean the surface before taping and press the edge firmly.
Patchy Color or Uneven Sheen
Uneven absorption, insufficient paint, missed areas, poor mixing, or inconsistent roller pressure may create patchiness. Stir the paint, use the same application technique across the wall, and apply another complete coat rather than chasing individual spots.
Visible Touch-Ups
Touch-ups are easiest when the original paint, sheen, application tool, and technique are duplicated. Even then, aged paint can change slightly. When a repair remains obvious under side lighting, repainting the entire wall from corner to corner usually produces the cleanest result.
Painting Safety Tips You Should Never Skip
Wear eye protection when sanding or working overhead. Use a stable ladder on firm, level ground, keep your body centered between its rails, and move the ladder rather than leaning sideways. The U.S. Consumer Product Safety Commission also recommends having another adult nearby when using ladders and keeping ladders away from electrical lines.
Take Lead Paint Seriously
Homes built before 1978 may contain lead-based paint. Sanding, scraping, drilling, or otherwise disturbing painted surfaces can create dangerous lead dust. The Environmental Protection Agency recommends determining whether lead is present and using lead-safe practices or hiring a lead-safe certified contractor.
Do not treat old, peeling paint as an ordinary weekend sanding project until the potential lead hazard has been evaluated. Protect children, pets, furnishings, and ventilation systems from dust generated during surface preparation.
Clean and Store Painting Tools Properly
Clean water-based paint from brushes and rollers with water and mild soap, following the product label and local requirements. Solvent-based coatings require the specified cleaner and additional care. Never pour unwanted paint or solvent into a storm drain.
During a short break, keep brushes and rollers from drying by wrapping them tightly in plastic or placing them in a sealed container. For overnight storage, confirm that the method is suitable for the coating and surrounding temperature.
Label leftover paint with the room, surface, color, sheen, brand, and date. Clean the rim before sealing the lid. Store the container upright in a temperature-controlled location away from freezing conditions, extreme heat, children, and ignition sources.
Usable leftover paint may be donated or recycled. PaintCare operates drop-off programs in participating states and advises transporting accepted products in tightly sealed, labeled original containers.
Real-World Experiences With Painting Tips and Tricks
One of the first lessons many homeowners learn is that the smallest room is not always the easiest room. A compact bathroom may have less wall area, but it also has a mirror, vanity, toilet, towel bars, light fixtures, corners, pipes, and approximately fourteen places where a roller cannot fit. On one such project, the actual painting took less time than masking and cutting in. The experience proved that project difficulty should be judged by obstacles, not square footage.
Another memorable lesson came from repainting a beige bedroom with a deep navy color. The original plan was to skip primer because the paint advertised excellent coverage. After the first coat, the wall looked less like sophisticated navy and more like a cloudy ocean during a weather emergency. The repaired patches absorbed paint differently, the corners appeared darker, and several thin areas allowed the beige to show through. Spot priming the repairs and applying a careful second coat solved the problem. The room looked richer, and the importance of a uniform base became very difficult to forget.
Tool quality also becomes obvious during side-by-side use. A bargain brush may appear acceptable while it is dry, but the difference emerges near trim. Poor bristles can fan unpredictably, hold little paint, and leave visible lines. A better angled brush generally releases paint more smoothly and responds to small changes in pressure. It does not perform the job automatically, but it makes accuracy feel less like trying to sign a birthday card while riding in a moving car.
Painter’s tape offers another useful experience. Applying tape quickly to a dusty baseboard often produces a false sense of security. Paint slips beneath the loose edge, and removing the tape reveals a wavy line. Cleaning the trim first, allowing it to dry, and pressing down the tape’s edge takes longer at the beginning but saves considerable touch-up time later. The broader lesson is simple: fast preparation often creates slow cleanup.
Ceiling projects teach humility. A roller that appears moderately loaded at waist level can become a miniature sprinkler when raised overhead. Loading the roller evenly, removing excess paint, and working with an extension pole reduces splatter and fatigue. It also allows the painter to stand farther from the wet area instead of directly beneath it, staring upward as paint considers landing in an eyebrow.
Maintaining a wet edge may be the most valuable technique learned through experience. On a large living-room wall, stopping halfway for an extended phone call can allow one section to dry before work resumes. Under direct light, the overlap may remain visible even though the color is technically the same. Completing one wall at a time, working from top to bottom, and taking breaks at natural corners prevents this problem.
Finally, every project reinforces the value of patience. Wet paint can look uneven, overly glossy, or slightly different from the sample. Attempting immediate repairs often makes matters worse. Allowing the coating to dry fully before evaluating it prevents unnecessary rolling, brushing, and panic. Most successful painting tricks are not dramatic secrets. They are disciplined habits: clean carefully, repair thoroughly, use the correct tools, apply enough paint, respect drying times, and stop touching the wall when the paint has begun to set.
Conclusion
Great painting results come from controlling the entire process rather than relying on a lucky final coat. Choose colors under real lighting, match the sheen to the room, prepare every surface, use dependable brushes and rollers, maintain a wet edge, and allow each coat to dry properly.
The job may take longer than expected, particularly when repairs or detailed trim are involved. That extra preparation is rarely wasted. It is what separates a smooth, durable finish from a wall that begins revealing every shortcut as soon as the afternoon sun hits it.