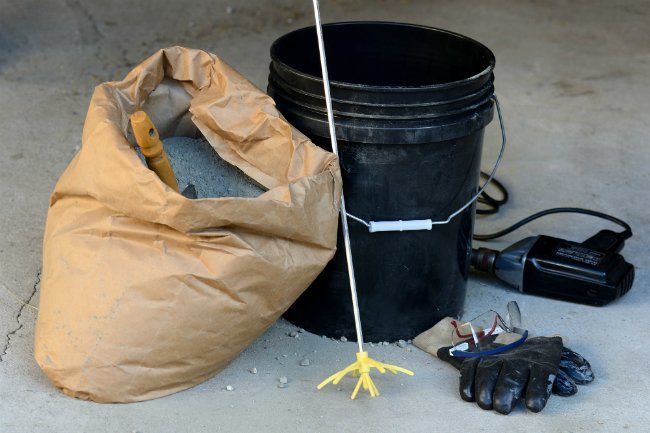
Concrete is wonderfully uncomplicated: Combine dry in optimistic version goes. The less cheerful version involves a wheelbarrow full of gray soup, concrete stuck to every tool you own, and a finished slab that develops more cracks than an old sidewalk in February.
Fortunately, learning how to mix concrete correctly is not difficult. Success comes down to selecting the right product, measuring the water, mixing thoroughly, working efficiently, and allowing the concrete to cure properly. Whether you are setting fence posts, repairing a step, installing a small pad, or making a garden planter, these concrete mixing dos and don’ts will help you produce stronger and more durable results.
Concrete and Cement Are Not the Same Thing
Before opening a bag, it helps to settle one common point of confusion. Cement is not concrete. Portland cement is the powdered binding ingredient used to make concrete. Concrete combines cement, water, sand, and coarse aggregate such as gravel or crushed stone.
When water contacts cement, a chemical reaction called hydration begins. The cement paste gradually hardens and binds the aggregate into a solid mass. Concrete does not become strong simply because its surface dries. It gains strength as hydration continues, which is why water control and proper curing are so important.
Mortar is another related but different material. It typically contains cement, fine sand, and water but lacks the coarse aggregate found in concrete. Mortar is useful for joining brick and block, while concrete is intended for slabs, footings, steps, posts, and other structural or load-bearing projects.
Before Mixing Concrete: Preparation Matters
Do Choose the Correct Concrete Mix
Bagged concrete products are formulated for different jobs. General-purpose concrete works well for small pads, steps, footings, and repairs. High-strength products are useful when greater compressive strength is needed. Fast-setting concrete can save time when setting posts or completing urgent repairs, but it also gives you less time to place and finish the material.
Countertop, crack-resistant, sand-topping, and repair mixes have their own aggregate sizes, additives, working times, and water requirements. Read the label before buying instead of assuming every gray bag contains the same mysterious driveway powder.
Do Calculate the Quantity Before Starting
Measure the length, width, and depth of the placement area, then calculate the required volume. Bagged concrete labels usually state the approximate yield in cubic feet. Buy slightly more than the calculated amount to cover uneven subgrade, spillage, and minor measuring errors.
Running out halfway through a slab can create a cold joint where the first batch begins setting before the next batch arrives. A spare bag is inexpensive insurance compared with a visible seam or weak connection.
Do Prepare the Site and Tools First
Set forms, compact the base, position reinforcement, and confirm drainage before mixing. Gather the wheelbarrow or mortar tub, hoe, shovel, measuring bucket, water supply, screed, float, trowel, and cleanup materials in advance.
Concrete has no sympathy for a person searching the garage for a missing trowel. Once mixed, the clock is running.
Safety Dos and Don’ts
Do Wear Protective Equipment
Wear safety glasses, waterproof gloves, long sleeves, long pants, and waterproof boots. Dry concrete mix can create irritating dust, while wet concrete is alkaline and may cause serious skin irritation or chemical burns during prolonged contact.
A disposable particulate respirator may be appropriate when pouring dusty material or working where ventilation is limited. Avoid creating clouds of powder, and keep your face away from the bag while emptying it.
Don’t Kneel in Wet Concrete
Wet clothing does not provide reliable protection. Concrete can soak through fabric and remain against the skin without causing immediate pain. Remove contaminated clothing and rinse exposed skin promptly with clean water.
Don’t Wash Concrete Slurry Into a Storm Drain
Concrete wash water is highly alkaline and contains suspended cement particles. Never dump it into a street, gutter, storm drain, pond, or garden bed. Collect washout in a lined container, allow the solids to harden, and dispose of them according to local requirements.
How to Mix Concrete by Hand
Step 1: Read the Bag Instructions
Manufacturer instructions outrank generic recipes. Water requirements vary according to bag weight, aggregate moisture, product formulation, temperature, and intended application. Many 80-pound bagged mixes use roughly 3 to 3.5 quarts of water, but the number printed on your bag is the number that matters.
Step 2: Place the Dry Mix in a Suitable Container
For one or two bags, use a sturdy wheelbarrow, mortar pan, or mixing tub. Empty the mix slowly to limit dust. Form a depression in the center, creating a crater that will hold the initial water.
Step 3: Add Most of the Measured Water
Pour approximately two-thirds to three-quarters of the specified water into the crater. Holding back some water gives you control over the final consistency. It is easy to add another cup; removing excess water requires more dry mix and several creative words unsuitable for a family DIY guide.
Step 4: Fold and Chop the Mixture
Pull dry material from the edges into the water using a hoe or shovel. Continue chopping, folding, pushing, and turning the concrete until all dry pockets disappear. Scrape the bottom and corners frequently because unmixed powder likes to hide there.
Step 5: Add the Remaining Water Gradually
Add small amounts of water while mixing until the concrete reaches a uniform, workable consistency. Avoid dumping in all the remaining water at once. A mixture can move from stubbornly dry to excessively wet with surprising speed.
Step 6: Check for Uniformity
Properly mixed concrete should have evenly coated aggregate with no dusty pockets or puddles. It should hold its shape when mounded but remain workable enough to place and consolidate. Depending on the product and method, thorough mixing commonly takes several minutes.
How to Mix Concrete in a Bucket
A heavy-duty bucket and a powerful drill fitted with a concrete or mortar mixing paddle can work well for small repair batches. Choose a drill designed for high-torque mixing rather than asking a lightweight household drill to sacrifice itself for the patio.
When using a bucket, adding the measured water first can help prevent dry material from compacting at the bottom. Add the powder gradually while the paddle turns at low speed. Keep the paddle submerged to reduce splashing and dust.
Do not overfill the bucket. The mixture needs room to circulate, and the drill needs enough power to turn the paddle without overheating. For large aggregate mixes or multiple full bags, a wheelbarrow or drum mixer is usually more practical.
How to Use a Concrete Mixer
A portable drum mixer is useful when a project requires several bags. Position it on stable, level ground close to the placement area. Confirm that extension cords, plugs, and electrical connections are rated for outdoor use and protected from water.
Start the mixer and add a portion of the measured water. Add the dry concrete gradually rather than dropping every bag into the drum at once. Pour in the remaining water as needed and let the drum turn until the batch is evenly blended, often about three to five minutes depending on the product and mixer.
Keep batch sizes and water measurements consistent. Two neighboring batches made with noticeably different amounts of water may cure with different colors, textures, and strengths.
Essential Concrete Mixing Dos
Do Use Clean Water
Use clean, potable water whenever possible. Water contaminated with oil, soil, organic matter, salt, or chemicals may interfere with hydration, setting, appearance, or durability.
Do Measure the Water
Use a marked bucket or measuring container rather than estimating with a garden hose. Consistent measurement produces consistent batches and makes troubleshooting easier.
Do Mix Every Portion Thoroughly
Inspect the bottom, corners, and sides of the container. Dry pockets produce weak, crumbly areas, while poorly distributed water can cause inconsistent setting.
Do Make Manageable Batches
Mix only as much material as you can place, consolidate, screed, and finish within the product’s working time. Fast-setting formulas may allow only a brief window, especially in warm weather.
Do Keep the Method Consistent
Use the same water amount, mixing duration, and sequence for each batch. Consistency helps prevent visible color changes and uneven performance across the project.
Do Clean Tools Immediately
Scrape and rinse tools in a controlled washout area before the residue hardens. Removing fresh concrete takes minutes. Removing cured concrete can turn an ordinary shovel into an archaeological excavation.
Concrete Mixing Don’ts
Don’t Add Excess Water for Easier Pouring
The most common DIY mistake is turning concrete into a thin, flowing mixture because wet concrete seems easier to spread. Excess water increases the water-to-cement ratio, separates the ingredients, encourages shrinkage, and can reduce strength and surface durability.
If the mix feels stiff, first confirm that it has been mixed long enough. Add water only in small measured increments and never exceed the manufacturer’s stated limit.
Don’t Add Water After the Concrete Begins Setting
Adding water to concrete that has started stiffening is called retempering. It may temporarily restore workability, but it disrupts the developing cement structure and can produce weak, dusty, or inconsistent concrete. Discard a batch that has passed its usable working time.
Don’t Confuse Workability With Soupiness
Good concrete can be placed and consolidated without behaving like pancake batter. Aggregate should remain suspended throughout the mixture rather than sinking beneath a watery cement layer.
Don’t Mix Different Products Without Approval
Combining leftover bags of fast-setting mix, standard concrete, mortar, and repair compound creates an unpredictable blend. Different products may contain incompatible additives, aggregate sizes, and curing requirements.
Don’t Mix on Bare Soil
Mixing directly on the ground contaminates the concrete with dirt and absorbs some of the mixing water. Use a wheelbarrow, mortar pan, tub, plywood mixing platform, or mechanical mixer.
Don’t Ignore the Weather
Heat, wind, direct sunlight, low humidity, cold temperatures, and rain can all affect setting and curing. Plan the work around suitable conditions rather than assuming concrete is indifferent to weather because it eventually becomes a rock.
How to Test Concrete Consistency
A simple field check can help determine whether a hand-mixed batch is workable. Pull a hoe or shovel through the concrete to create a groove. The sides should remain defined without collapsing immediately, and the surface should not fill with water.
You can also form a small mound. Correctly proportioned concrete should hold together while slowly settling. A dry, crumbly mound needs additional mixing and possibly a carefully measured amount of water. A puddling mound that immediately flattens is probably too wet.
These informal checks are useful for small DIY projects, but structural work may require specified slump testing, mix designs, inspections, and professional placement.
Mixing Concrete in Hot or Cold Weather
Hot-Weather Concrete
High temperatures, strong sun, low humidity, and wind accelerate moisture loss and shorten working time. Store bags and tools in the shade, use cool mixing water, prepare the site completely, and schedule the pour for a cooler part of the day.
Do not compensate for rapid stiffening by repeatedly adding water. Place and finish smaller batches, then begin curing promptly. Windy conditions can dry the surface even when the air temperature seems comfortable.
Cold-Weather Concrete
Cold temperatures slow hydration and strength development. Fresh concrete must be protected from freezing during its vulnerable early period. Keep materials warm and dry, remove ice and frost from the base, and use insulated curing blankets when appropriate.
For structural work or temperatures near freezing, consult the product manufacturer or a concrete professional. Special mixes, heated water, or non-chloride accelerators may be recommended. Avoid improvised additives, particularly when steel reinforcement is present.
Placing and Finishing the Concrete
Move the mixed concrete into the forms without unnecessary delay. Place it close to its final position instead of pouring one large pile and dragging it across the entire site. Work the material around reinforcement and into corners using a shovel or concrete rake.
Consolidate the concrete by tapping the forms, rodding the mix, or using appropriate vibration. This releases trapped air and helps eliminate hidden voids. Do not over-vibrate, which may cause the aggregate and cement paste to separate.
Screed the surface to the required elevation, then allow bleed water to disappear before final finishing. Troweling while water is still sitting on the surface can trap moisture and create a weak, dusty layer. For outdoor slabs, a lightly textured broom finish usually provides better traction than a glass-smooth surface.
Don’t Forget Concrete Curing
Mixing may end when the wheelbarrow is empty, but the project is not finished. Concrete needs adequate moisture and suitable temperature while hydration continues. Rapid drying can contribute to surface cracking, poor strength, and reduced durability.
Depending on the product and application, curing methods may include gentle misting, wet coverings, plastic sheeting, insulated blankets, or an approved curing compound. Follow the bag instructions before applying sealers or coverings because specialty products may have different requirements.
Concrete may become firm enough for cautious foot traffic within a day or two, but that does not mean it has reached its design strength. Strength is commonly evaluated at 28 days, and hydration can continue beyond that point when moisture remains available.
Troubleshooting Common Mixing Problems
The Mix Is Too Dry
Continue mixing before adding anything. Dry-looking concrete sometimes becomes workable as water spreads through the batch. If necessary, add a small measured amount of water without exceeding the product limit.
The Mix Is Too Wet
Add compatible dry concrete mix in measured amounts and blend thoroughly. Do not add plain cement alone because that changes the designed balance of cement, sand, and aggregate. If the batch is extremely wet, replacing it may be safer than gambling on a weak result.
Dry Powder Remains at the Bottom
Scrape the bottom and fold the material through the wet mixture. With bucket mixing, stop the drill before scraping so the tool does not catch and twist unexpectedly.
The Concrete Is Setting Too Quickly
Move the mixture into place immediately. Do not revive it with water. For the next batch, reduce the batch size, shade the materials, use cooler water, or choose a product with a longer working time.
The Surface Looks Dusty After Curing
Dusting may result from excess water, premature finishing, finishing bleed water into the surface, inadequate curing, or freezing during early strength development. Minor dusting can sometimes be treated, but severe weakness may require removal and replacement.
Experience-Based Lessons From Real-World Concrete Projects
The most valuable concrete lessons often come from ordinary projects rather than dramatic structural failures. A small fence-post job, for example, teaches the importance of checking the product label. Some fast-setting products are designed to be poured dry into a post hole and saturated with water, while standard concrete generally needs thorough premixing. Treating both products the same can leave dry pockets around the post or create a weak, uneven footing.
Small slabs teach a different lesson: preparation usually takes longer than pouring. A first-time DIYer may spend hours building forms and leveling gravel, then discover that six bags of concrete turn into a race against the clock. The best approach is to arrange every tool in working order, assign tasks before opening the first bag, and keep the mixer close to the placement area. One person can measure water and mix while another places and screeds. That simple division of labor prevents the concrete from waiting impatiently in the wheelbarrow.
Another common experience involves the temptation to add water. The first batch feels heavy, so an extra splash goes into the wheelbarrow. The concrete suddenly becomes smooth and cooperative, which feels like success. Weeks later, that section may appear lighter, develop surface dust, or crack earlier than neighboring batches. The lesson is memorable: easier placement does not automatically mean better concrete.
Repair projects show why clean surfaces matter. Fresh concrete or patching material does not bond reliably to dust, loose fragments, grease, paint, or crumbling edges. A repair placed over an unprepared surface may look excellent for a month and then detach as a neat concrete pancake. Removing unsound material, cleaning thoroughly, and using the bonding procedure specified for the product are less exciting than troweling, but they determine whether the repair lasts.
Weather creates some of the most frustrating experiences. On a hot, breezy afternoon, a batch that was workable beside the mixer may stiffen before it reaches the form. A beginner often responds with more water, creating a cycle of rapid drying and repeated retempering. Experienced crews respond by reducing batch size, working in shade when possible, cooling the materials, and beginning early. The weather cannot be negotiated with, but the work plan can.
Cold weather provides the opposite lesson. Concrete may remain soft much longer than expected, tempting someone to remove forms or load the surface too soon. Worse, unprotected concrete can freeze before it develops enough strength. Checking the forecast is therefore part of mixing concrete, even though no weather app appears on the ingredient list.
Cleanup also becomes a lasting lesson after one neglected project. A hoe coated with fresh cement paste can be cleaned quickly. The same hoe left overnight may require hammering, scraping, and an unplanned shopping trip for a replacement. Smart cleanup begins before mixing: establish a lined washout area, keep a stiff brush nearby, and clean tools while the residue is still soft.
Finally, many projects demonstrate that curing is not optional housekeeping. A freshly finished slab can look perfect in the evening and develop fine surface cracks after a hot, dry night. Covering the placement or maintaining moisture may feel anticlimactic after the physical work is done, but curing is where much of the concrete’s long-term performance is decided.
Taken together, these experiences point to one principle: concrete rewards discipline. Measure instead of guessing, prepare instead of improvising, and protect the placement instead of walking away when the troweling is finished. Concrete may be gray, but its feedback is remarkably clear.
Frequently Asked Questions
Can You Mix Concrete With a Shovel?
Yes. A shovel can mix small batches, although a concrete hoe usually makes folding and chopping the material easier. Use a wheelbarrow or mortar tub and scrape the bottom frequently.
How Long Should Concrete Be Mixed?
Mix until the ingredients are completely uniform and no dry pockets or water puddles remain. Many bagged products and mechanical mixing methods call for approximately three to five minutes, but always follow the product instructions.
What Happens When Too Much Water Is Added?
Excess water can increase shrinkage, reduce strength, promote cracking, encourage aggregate separation, and produce a weak or dusty surface.
Can Old Concrete Mix Be Used?
A bag that has remained completely dry and powdery may still be usable within its recommended shelf life. Discard material containing hardened lumps, because moisture has already triggered partial hydration.
Can Concrete Be Mixed Directly in a Post Hole?
Only when the specific product is labeled for that method. Certain fast-setting post mixes can be poured dry into the hole and watered, but ordinary concrete mix should generally be premixed.
Conclusion
Successful concrete mixing is less about brute strength than careful control. Choose the correct mix, prepare the site, wear protective equipment, measure clean water, blend the batch thoroughly, and resist the temptation to make it soupy. Once the concrete is placed, consolidate and finish it at the proper time, then protect it through the curing period.
The bag instructions should always remain your primary guide because formulations and water requirements vary. Follow those directions, work in manageable batches, and concrete becomes a dependable DIY material rather than a 200-pound lesson in regret.
Note: Structural foundations, suspended slabs, driveways, reinforced work, and projects governed by local building codes may require an engineered mix, permits, inspections, or professional installation.