Your stairs work harder than almost any other part of your house. They handle shoes, socks, muddy paws, grocery bags, late-night snack missions, and the occasional dramatic entrance. Yet they are often ignored until the carpet looks exhausted, the wood is scratched beyond recognition, or every step squeaks like it is auditioning for a haunted-house soundtrack.
Stair caps offer a smart way to give tired stairs a major visual upgrade without rebuilding the entire staircase. Also called stair tread caps, stair covers, retrofit treads, or stair overlays, these pieces fit over existing stair treads to create a cleaner, more finished appearance. Depending on the material, they can make old carpeted stairs look like hardwood, improve traction, hide cosmetic damage, or bring your staircase closer to the style of your updated flooring.
Before you start ordering oak caps like you are furnishing a tiny forest, it helps to understand how stair caps work, which materials make sense, and where safety matters more than aesthetics. A staircase makeover can be a satisfying DIY project, but stairs are not the place for “close enough.”
What Are Stair Caps?
Stair caps are finished coverings designed to sit over an existing stair tread. Most have a flat horizontal surface for the tread and a rounded or squared front edge that wraps over the stair nosing. Some systems include matching risers, return pieces for open-sided stairs, and trim components for landings.
Unlike a loose stair rug or removable carpet tread, a stair cap is usually a more permanent renovation product. It may be made from solid hardwood, engineered wood, laminate, luxury vinyl, rubber, composite material, or other durable materials designed for repeated foot traffic.
The biggest appeal is simple: instead of tearing out and rebuilding each stair tread, you use the existing staircase as the foundation for a fresh surface. It is a bit like giving your stairs a tailored suit instead of sending them to a full-body reconstruction program.
When Stair Caps Are a Good Choice
Stair caps work especially well when the existing staircase is structurally sound but visually worn. They are a practical option for homeowners who want to remove old carpet, cover stained or damaged treads, update a dated finish, or coordinate stairs with new flooring.
Good candidates for stair caps include:
- Stairs with worn carpet and solid wood or plywood treads underneath.
- Existing wood stairs with scratches, uneven stain color, or cosmetic dents.
- Basement stairs that need a cleaner, more finished appearance.
- Staircases that feel outdated after a flooring renovation.
- Homes where a stair runner or non-slip tread can be added later for extra grip.
However, stair caps are not a cure for structural problems. If your stair treads are cracked, flexing, rotted, loose, or badly uneven, address those issues first. A beautiful stair cap installed over a failing tread is still a failing tread wearing a fancy hat.
Choose the Right Type of Stair Cap
The best stair cap material depends on your budget, your style, how much traffic the stairs receive, and whether the staircase is indoors or outdoors.
Solid Hardwood Stair Caps
Solid wood stair caps are popular for interior stair renovations because they offer a traditional, high-end appearance. Oak, maple, hickory, and walnut are common choices. Hardwood can be stained to match nearby flooring or finished in a contrasting tone for a more dramatic look.
Wood caps are ideal when you want a classic staircase with visible grain and long-term durability. They also pair beautifully with painted white risers, dark handrails, black balusters, or a centered stair runner.
Engineered Wood Stair Caps
Engineered wood caps have a real wood veneer over a layered core. They can be more dimensionally stable than solid wood in changing indoor conditions, especially in homes with seasonal humidity swings. They are often available in prefinished colors, which can reduce the amount of staining and sealing required on-site.
Luxury Vinyl or Laminate Stair Caps
Luxury vinyl and laminate stair caps are useful when you are extending the same flooring design from the main level onto the stairs. They can be durable, easy to clean, and available in wood-look finishes that mimic oak, maple, walnut, or weathered farmhouse planks.
Make sure the product is specifically designed for stairs. Regular flooring planks and a random stair nosing piece do not always create a secure, comfortable, or attractive stair surface.
Rubber and Composite Stair Covers
Rubber and composite stair covers are practical for garages, utility stairs, workshop steps, basement entrances, porches, and outdoor areas. They often provide better traction than smooth wood and can tolerate moisture, mud, and heavy use. They may not give your foyer “historic mansion” energy, but they are excellent when safety and durability are the main goals.
Measure Before You Buy Anything
The golden rule of stair-cap projects is this: measure every stair, not just one stair. Older homes are famous for tiny surprises. A staircase may look uniform until you discover that the third step is slightly deeper, the bottom step is wider, and the wall bows inward just enough to mock your perfectly cut cap.
Measure These Areas Carefully
- Width of each tread from wall to wall or stringer to stringer.
- Depth of each tread from the front nosing to the riser behind it.
- Height of each riser.
- Thickness of the stair cap.
- Location of balusters, posts, walls, skirt boards, and open sides.
- Landing dimensions and transition areas at the top and bottom of the stairs.
Mark each stair with a number and write down its exact dimensions. Do not trust memory after measuring twelve nearly identical steps. By step nine, every tread begins to look like it has been cloned in a secret stair laboratory.
For open-sided staircases, you may need return caps or custom-cut pieces that wrap around the exposed edge. For enclosed stairs, standard no-return caps may be enough. Always check the manufacturer’s terminology before ordering because “left return” and “right return” are based on viewing direction, and getting that wrong can turn a simple order into an expensive wooden puzzle.
Check Stair Height Before Installing Caps
This is the most important technical step in the project. Adding a cap changes the height of the tread surface. When every tread receives the same cap thickness, the middle steps may remain consistent with one another, but the first and last step can change relative to the floor or landing.
For example, if you add a three-quarter-inch stair cap to every tread, the first rise from the floor to the first step becomes taller. At the top of the stairs, the final rise to the landing may become shorter. Even a modest difference can feel strange underfoot because people climb stairs by rhythm and muscle memory, not by carefully reading every step like a legal document.
Building codes commonly require stair risers and tread depths to remain consistent within a flight. Before beginning, measure the first and last riser after accounting for cap thickness. If the change creates an uneven transition, consult a qualified contractor, stair professional, or local building official about the correct solution.
Also consider handrail height. Raising the tread surfaces reduces the distance between the tread and the handrail. In many cases the change is small, but it is still worth measuring before you commit.
Tools and Materials You May Need
Your exact shopping list depends on the stair cap system, but most projects require a reliable set of basic tools.
- Tape measure and pencil.
- Combination square or framing square.
- Miter saw, circular saw, or jigsaw.
- Fine-tooth blade suitable for your cap material.
- Construction adhesive approved for the cap and stair substrate.
- Caulk gun.
- Finish nailer or trim screws, if permitted by the product instructions.
- Wood filler, paintable caulk, or color-matched repair putty.
- Hammer, pry bar, utility knife, scraper, and pliers.
- Vacuum, shop brush, and clean cloths.
- Safety glasses, hearing protection, gloves, and dust protection.
Read the installation instructions for your specific product before buying adhesive. Some stair caps are designed for construction adhesive and finish nails, while others require a flooring adhesive, a proprietary adhesive, or a locking system. The manufacturer’s directions are not merely decorative literature.
How to Install Stair Caps Step by Step
1. Remove Old Carpet, Staples, and Trim
If your stairs are carpeted, remove the carpet, padding, tack strips, staples, and old adhesive residue. This stage is often less glamorous than the before-and-after photos suggest. Expect dust, staples, and at least one mystery object that may have been living under the carpet since the previous decade.
Use pliers, a flat pry bar, and a scraper to remove debris without damaging the existing treads. Vacuum thoroughly so the cap sits on a clean, solid surface.
2. Repair and Prep the Existing Stairs
Inspect each tread and riser for movement, cracks, squeaks, loose fasteners, or major gaps. Tighten loose screws, repair minor defects, and replace damaged structural components before adding caps.
For wood stair caps, lightly sand high spots and remove paint drips or dried adhesive that could prevent the cap from sitting flat. A cap should rest evenly on the tread. If it rocks, wobbles, or leaves a major gap, stop and correct the problem before installation.
3. Dry-Fit Every Cap
Before adhesive enters the conversation, place each cap on its intended step and check the fit. Confirm that the cap reaches both sides cleanly, the front nosing sits flush, and the piece does not interfere with trim, balusters, or walls.
Use a scribe tool or cardboard template for walls that are not perfectly straight. Houses settle, walls wander, and staircases occasionally have opinions of their own.
4. Cut Slowly and Test Again
Cut each cap slightly long when possible, then trim gradually for a precise fit. Use a sharp blade and support the material well to reduce splintering or chipping. For hardwood, a fine-finish blade can make a noticeable difference.
Always test the cut piece before moving to adhesive. A dry fit takes a few minutes. Fixing a badly cut tread after adhesive has cured can take several new vocabulary words.
5. Apply Adhesive Correctly
Use an adhesive recommended for your stair cap material and the existing tread surface. Make sure the surface is clean, dry, and free of dust. Apply adhesive in the pattern recommended by the manufacturer, usually in beads or a troweled layer that provides full support without creating excessive squeeze-out.
Do not use huge blobs of adhesive in the hope that more glue automatically means more strength. Too much adhesive can create uneven support, force the cap upward, or squeeze out around the edges. A consistent bond is more important than a dramatic glue performance.
6. Set and Secure the Stair Cap
Press the cap firmly into place, aligning the front nosing and side edges. If your system allows finish nails or trim screws, use them as directed to hold the cap while the adhesive cures. Predrill hardwood when necessary to reduce splitting.
Wipe away excess adhesive immediately with a product-safe cloth. Once cured, construction adhesive becomes much less cooperative and may require scraping, sanding, or a minor emotional recovery period.
7. Install Risers and Return Pieces
If your project includes matching risers, install them according to the system instructions. Painted risers can create a sharp contrast with natural wood caps, while wood risers create a seamless, furniture-like staircase.
On open-sided stairs, install return caps carefully around balusters and newel posts. This area often requires detailed measuring and custom cuts, so take your time. The visible edge is where small mistakes become very noticeable.
8. Finish Nail Holes and Edges
Fill nail holes with color-matched wood filler or repair putty. Use paintable caulk only where appropriate, such as a small joint between a painted riser and a painted skirt board. Avoid filling every wood joint with thick caulk, especially in areas where seasonal movement is likely.
For unfinished wood caps, stain and seal them according to the finish product instructions. Many homeowners prefer prefinished caps because they reduce the risk of drips, uneven stain, and having the staircase unavailable while multiple coats dry.
Design Ideas for a Fresh Staircase
Stair caps can support almost any interior style, from traditional to modern. The key is deciding whether you want the staircase to blend into the house or become an intentional focal point.
Classic White Risers and Natural Wood Caps
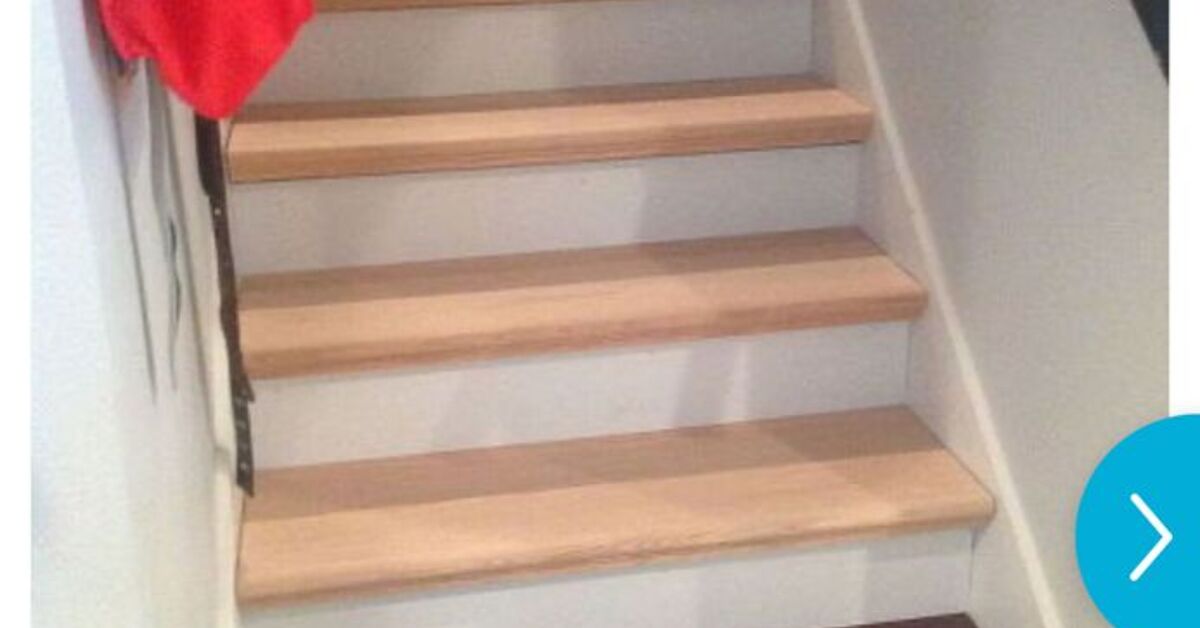
This combination is timeless for a reason. White risers brighten the staircase, while oak or maple caps add warmth and texture. It works in farmhouse, transitional, coastal, and traditional homes.
Dark Caps With Light Walls
Deep walnut, espresso, or charcoal-toned caps can create a dramatic staircase, especially when paired with white walls and black metal balusters. This approach works well in contemporary homes and entryways that need stronger visual contrast.
Match the Main Flooring
Matching stair caps to the flooring on the main level creates a more connected look. This is especially effective in open-concept homes where the staircase is visible from the living room, foyer, or kitchen.
Add a Runner for Comfort and Grip
After installing wood caps, you can add a stair runner down the center for warmth, sound reduction, and traction. A runner still allows the finished cap edges to remain visible, giving you the best of both worlds: polished wood and fewer sock-related surprises.
Common Stair Cap Installation Mistakes
- Installing caps over damaged or loose treads.
- Measuring only one stair and assuming the rest match.
- Ignoring the first and last riser height changes.
- Using adhesive that is incompatible with the cap material.
- Cutting all pieces before dry-fitting the first few steps.
- Forgetting return pieces for open-sided stairs.
- Using too much adhesive and creating uneven support.
- Walking on newly installed caps before the adhesive has cured.
- Choosing a glossy finish that becomes slippery in socks.
How to Maintain Stair Caps
Once installed, stair caps need surprisingly little maintenance. Sweep or vacuum regularly to remove grit that can scratch the finish. Clean with a product appropriate for the cap material, and avoid soaking wood caps with excessive water.
Use felt pads on furniture near the staircase, encourage people to avoid dragging heavy objects across the treads, and inspect the nosing occasionally for loosening or wear. For wood caps, touch up scratches before they become larger finish failures. For vinyl or laminate caps, use manufacturer-approved cleaners rather than harsh abrasives.
Outdoor rubber or composite stair covers should be cleaned regularly to remove leaves, algae, mud, and moisture buildup. A non-slip tread cannot help much if it is buried under a slippery layer of wet debris.
Real-World Experiences: What Homeowners Learn After Updating Stairs With Caps
Most homeowners who install stair caps say the biggest surprise is how much the staircase changes the feel of the entire house. A worn staircase often blends into the background because everyone is used to seeing it every day. Once the carpet is removed and finished caps are installed, the stairs suddenly become part of the home’s design rather than merely a route to the bedroom.
One common experience is realizing that preparation takes longer than installation. Pulling carpet, removing staples, scraping old adhesive, patching holes, and fixing squeaks can easily consume more time than attaching the caps themselves. The actual installation feels satisfying because the transformation becomes visible quickly, but the prep work determines whether the finished stairs look professional or slightly haunted.
Homeowners also learn that every staircase has a personality. New construction stairs may be relatively uniform, but older homes often include slight variations in tread width, wall angles, and riser height. A cap that fits perfectly on one step may need a small adjustment on the next. The people who get the best results tend to measure every tread, label every piece, and dry-fit before opening the adhesive.
Another lesson is that stair caps can dramatically reduce visual noise. Old carpet patterns, mismatched stains, chipped paint, and scratched treads create a busy, tired look. Clean caps in a single finish make the staircase look calmer and more intentional. Even modest materials can look upscale when the cuts are precise and the edges are clean.
Many homeowners choose white risers with natural wood caps because the combination makes narrow staircases feel brighter. Others prefer darker caps because they hide dirt and match darker flooring. Both approaches can work beautifully, but the best choice usually depends on lighting. A staircase with little natural light often benefits from lighter risers or a lighter wood tone, while a bright entryway can handle deeper finishes without feeling gloomy.
Families with children, pets, or older adults often discover that traction deserves as much attention as color. Smooth hardwood is elegant, but it can be slippery with socks, wet shoes, or energetic dogs who believe every staircase is a racetrack. Adding a runner, non-slip pads, textured finishes, or carefully selected tread covers can make the stairs feel more secure without hiding the renovation.
People also notice that stair caps can help quiet minor creaks when installed over stable existing treads with proper adhesive support. They are not a magical cure for structural movement, but they can reduce small vibrations and spread foot pressure more evenly across the surface. If a stair still squeaks loudly after installation, the problem is usually deeper in the framing, fasteners, or stringers.
The most important experience, however, is learning not to rush the first and last step. Those transition areas are where cap thickness affects stair geometry most noticeably. A staircase can look perfect from across the room and still feel awkward if the bottom rise is too tall or the top rise is too short. Smart homeowners measure those areas before ordering materials, not after the final cap has already been glued down.
In the end, the best stair-cap projects feel less like a quick cosmetic patch and more like a thoughtful upgrade. The stairs look newer, the home feels more finished, and the trip upstairs becomes a little less ordinary. That is not bad for a collection of steps that used to spend most of their life under tired carpet and questionable lighting.
Conclusion
Using stair caps to update your stairs is one of the most effective ways to refresh a dated staircase without a complete rebuild. The right caps can cover cosmetic damage, replace worn carpet, coordinate with new flooring, and turn a neglected staircase into a polished design feature.
The secret is careful planning. Measure every tread, inspect the structure, choose a material that suits your household, dry-fit each cap, and pay close attention to riser consistency at the bottom and top of the staircase. With patience and the right installation method, stair caps can deliver a transformation that feels custom, durable, and far more expensive than it actually was.
Note: Always review the stair-cap manufacturer’s installation instructions and confirm local residential code requirements before altering stair dimensions, handrail clearance, riser height, or tread depth.