The optic nerve is the eye’s information highway. It carries visual signals from the retina to the brain, which means when something is wrong with it, the problem can show up as blurry vision, dim vision, faded colors, missing spots in the visual field, or a pupil that acts like it has suddenly forgotten its job. In other words, the optic nerve is a pretty big deal.
If you are wondering how to test the optic nerve, the short answer is this: you do not rely on one trick. You use a group of simple, structured checks that look at vision, pupils, color perception, visual fields, and the optic disc itself. The good news is that a basic optic nerve screening does not require a spaceship control panel. The bad news is that a penlight, a vision chart, and careful technique still matter quite a lot.
This guide walks through 12 practical steps that mirror the way clinicians screen optic nerve function in real life. It is written for education, not for self-diagnosis. If you or someone else has sudden vision loss, a new blind spot, severe headache with visual symptoms, or pain with eye movement and reduced vision, do not play detective at home. Get prompt medical care.
What Does an Optic Nerve Test Actually Check?
An optic nerve exam is not one single test. It is a bundle of checks that answer a few important questions: Is vision reduced? Is color washed out? Is part of the field missing? Do the pupils respond normally to light? Does the optic disc look swollen, pale, or otherwise abnormal? When these answers are put together, they can point toward conditions such as optic neuritis, papilledema, ischemic optic neuropathy, glaucoma-related damage, compression of the optic nerve, or other neurologic and eye disorders.
Now let us go step by step.
How to Test the Optic Nerve in 12 Steps
Step 1: Start With Symptoms and Timing
Before any equipment comes out, ask what the person is experiencing. Optic nerve problems often cause blurred or dim vision, reduced color perception, visual field loss, pain with eye movement, flashing lights, or a sense that one eye sees the world as if someone turned down the brightness. Timing matters too. A sudden change over hours to days can raise concern for optic neuritis, vascular problems, retinal emergencies, or other urgent causes.
Also ask whether the problem affects one eye or both, whether there is headache, nausea, recent infection, trauma, high blood pressure, multiple sclerosis, diabetes, or known eye disease. A good optic nerve exam starts with a good story. Medicine loves clues, and symptoms are the opening scene.
Step 2: Check Visual Acuity One Eye at a Time
Visual acuity is the first hard number in the exam. Test each eye separately using a standard distance chart if available. If you do not have one, a near card can help, but standardized charts are better. Make sure the person uses their usual glasses or contact lenses if they normally wear them. Cover one eye, then test the other.
Reduced acuity does not automatically mean optic nerve disease, but it is a major clue. In optic neuritis, for example, acuity can range from nearly normal to severely reduced. If the person struggles, repeat the test with a pinhole if you have one. Improvement with pinhole points more toward refractive blur; no improvement can raise concern for retinal, optic nerve, or neurologic causes.
Step 3: Ask About Brightness and Contrast Between the Eyes
This step is simple and surprisingly useful. Ask the person whether one eye sees the room as dimmer than the other. You can have them cover one eye, then switch, and compare. Optic nerve dysfunction often causes a subjective drop in brightness or contrast, even before the person can fully describe what feels “off.”
This is not the fanciest test in the room, but it is a practical one. Patients often say things like, “The left eye looks dull,” or “The right eye feels darker.” That complaint should not be brushed aside. When paired with reduced acuity, color loss, or an abnormal pupil response, it can help support concern for optic neuropathy.
Step 4: Inspect the Pupils at Rest
Before shining a light, look at the pupils in normal room lighting. Are they equal in size? Round? Centered? Do they look symmetric? Pupils that are irregular, very unequal, or fixed may point to other neurologic or ocular problems, so this quick visual check matters.
While pupil size alone does not diagnose optic nerve disease, it sets up the next steps. You are checking the afferent pathway, which begins with the retina and optic nerve, and the efferent pathway, which controls constriction. Think of this step as making sure the stage is set before the spotlight comes on.
Step 5: Test the Direct Light Response
Dim the room slightly if possible. Shine a bright light into one eye and watch that same pupil. It should constrict promptly. Then repeat on the other side. A sluggish response can happen for several reasons, but in optic nerve disease the signal coming in may be weak, so the pupil may not constrict as strongly as expected.
Use a proper bright light if you can. Tiny dim penlights sometimes make subtle findings harder to detect. You are not trying to interrogate the eye like it owes you money. You are simply checking whether light entering the eye produces an appropriate neural response.
Step 6: Test the Consensual Light Response
Now shine the light into one eye and watch the opposite pupil. It should constrict too. That is the consensual response, and it confirms that the afferent signal got in and the brainstem pathways sent the message back out to both pupils. Repeat on the other side.
This step helps you understand whether the problem is in the incoming optic nerve signal or the outgoing motor pathway. If one pupil does not respond when light enters either eye, you may be looking beyond the optic nerve alone. That is why optic nerve testing is never just about staring heroically at a pupil and hoping intuition shows up.
Step 7: Perform the Swinging Flashlight Test for a Relative Afferent Pupillary Defect
This is one of the classic optic nerve tests. Swing the light back and forth between the eyes every few seconds while watching the pupils carefully. In a normal response, both pupils stay constricted. In a relative afferent pupillary defect, also called a Marcus Gunn pupil, both pupils paradoxically dilate when the light is moved onto the affected eye because the incoming signal is weaker there.
This finding strongly suggests asymmetric optic nerve dysfunction or severe retinal disease. It is especially useful in unilateral or uneven optic neuritis, ischemic optic neuropathy, traumatic optic neuropathy, and other optic nerve injuries. If you only remember one bedside optic nerve trick, this is the celebrity guest star.
Step 8: Check Color Vision
Color vision often takes a hit in optic nerve disease, sometimes more dramatically than standard acuity. If you have Ishihara color plates, use them. Test one eye at a time. If you do not have formal plates, ask whether colors look less vivid in one eye, especially red tones.
A patient with optic neuritis may say red looks rusty, faded, brownish, or just wrong. Color loss that seems out of proportion to the level of blurred vision is a useful clue. Keep in mind that congenital color blindness can complicate interpretation, so compare both eyes and pair this test with the rest of the exam rather than treating it like a solo performance.
Step 9: Test Red Desaturation
Red desaturation is a quick bedside extension of color testing. Use a bright red object, such as a red cap or red target. Ask the person to look at it with one eye and then the other. If one eye sees the red as duller, less bright, or washed out, that can suggest optic nerve dysfunction.
This test is especially helpful when visual acuity is still relatively good but the patient insists something is wrong. And sometimes the patient is absolutely right. A red target that looks like faded brick in one eye and bright fire-engine red in the other is not subtle. It is the optic nerve waving a red flag, which feels oddly appropriate.
Step 10: Screen the Visual Fields by Confrontation
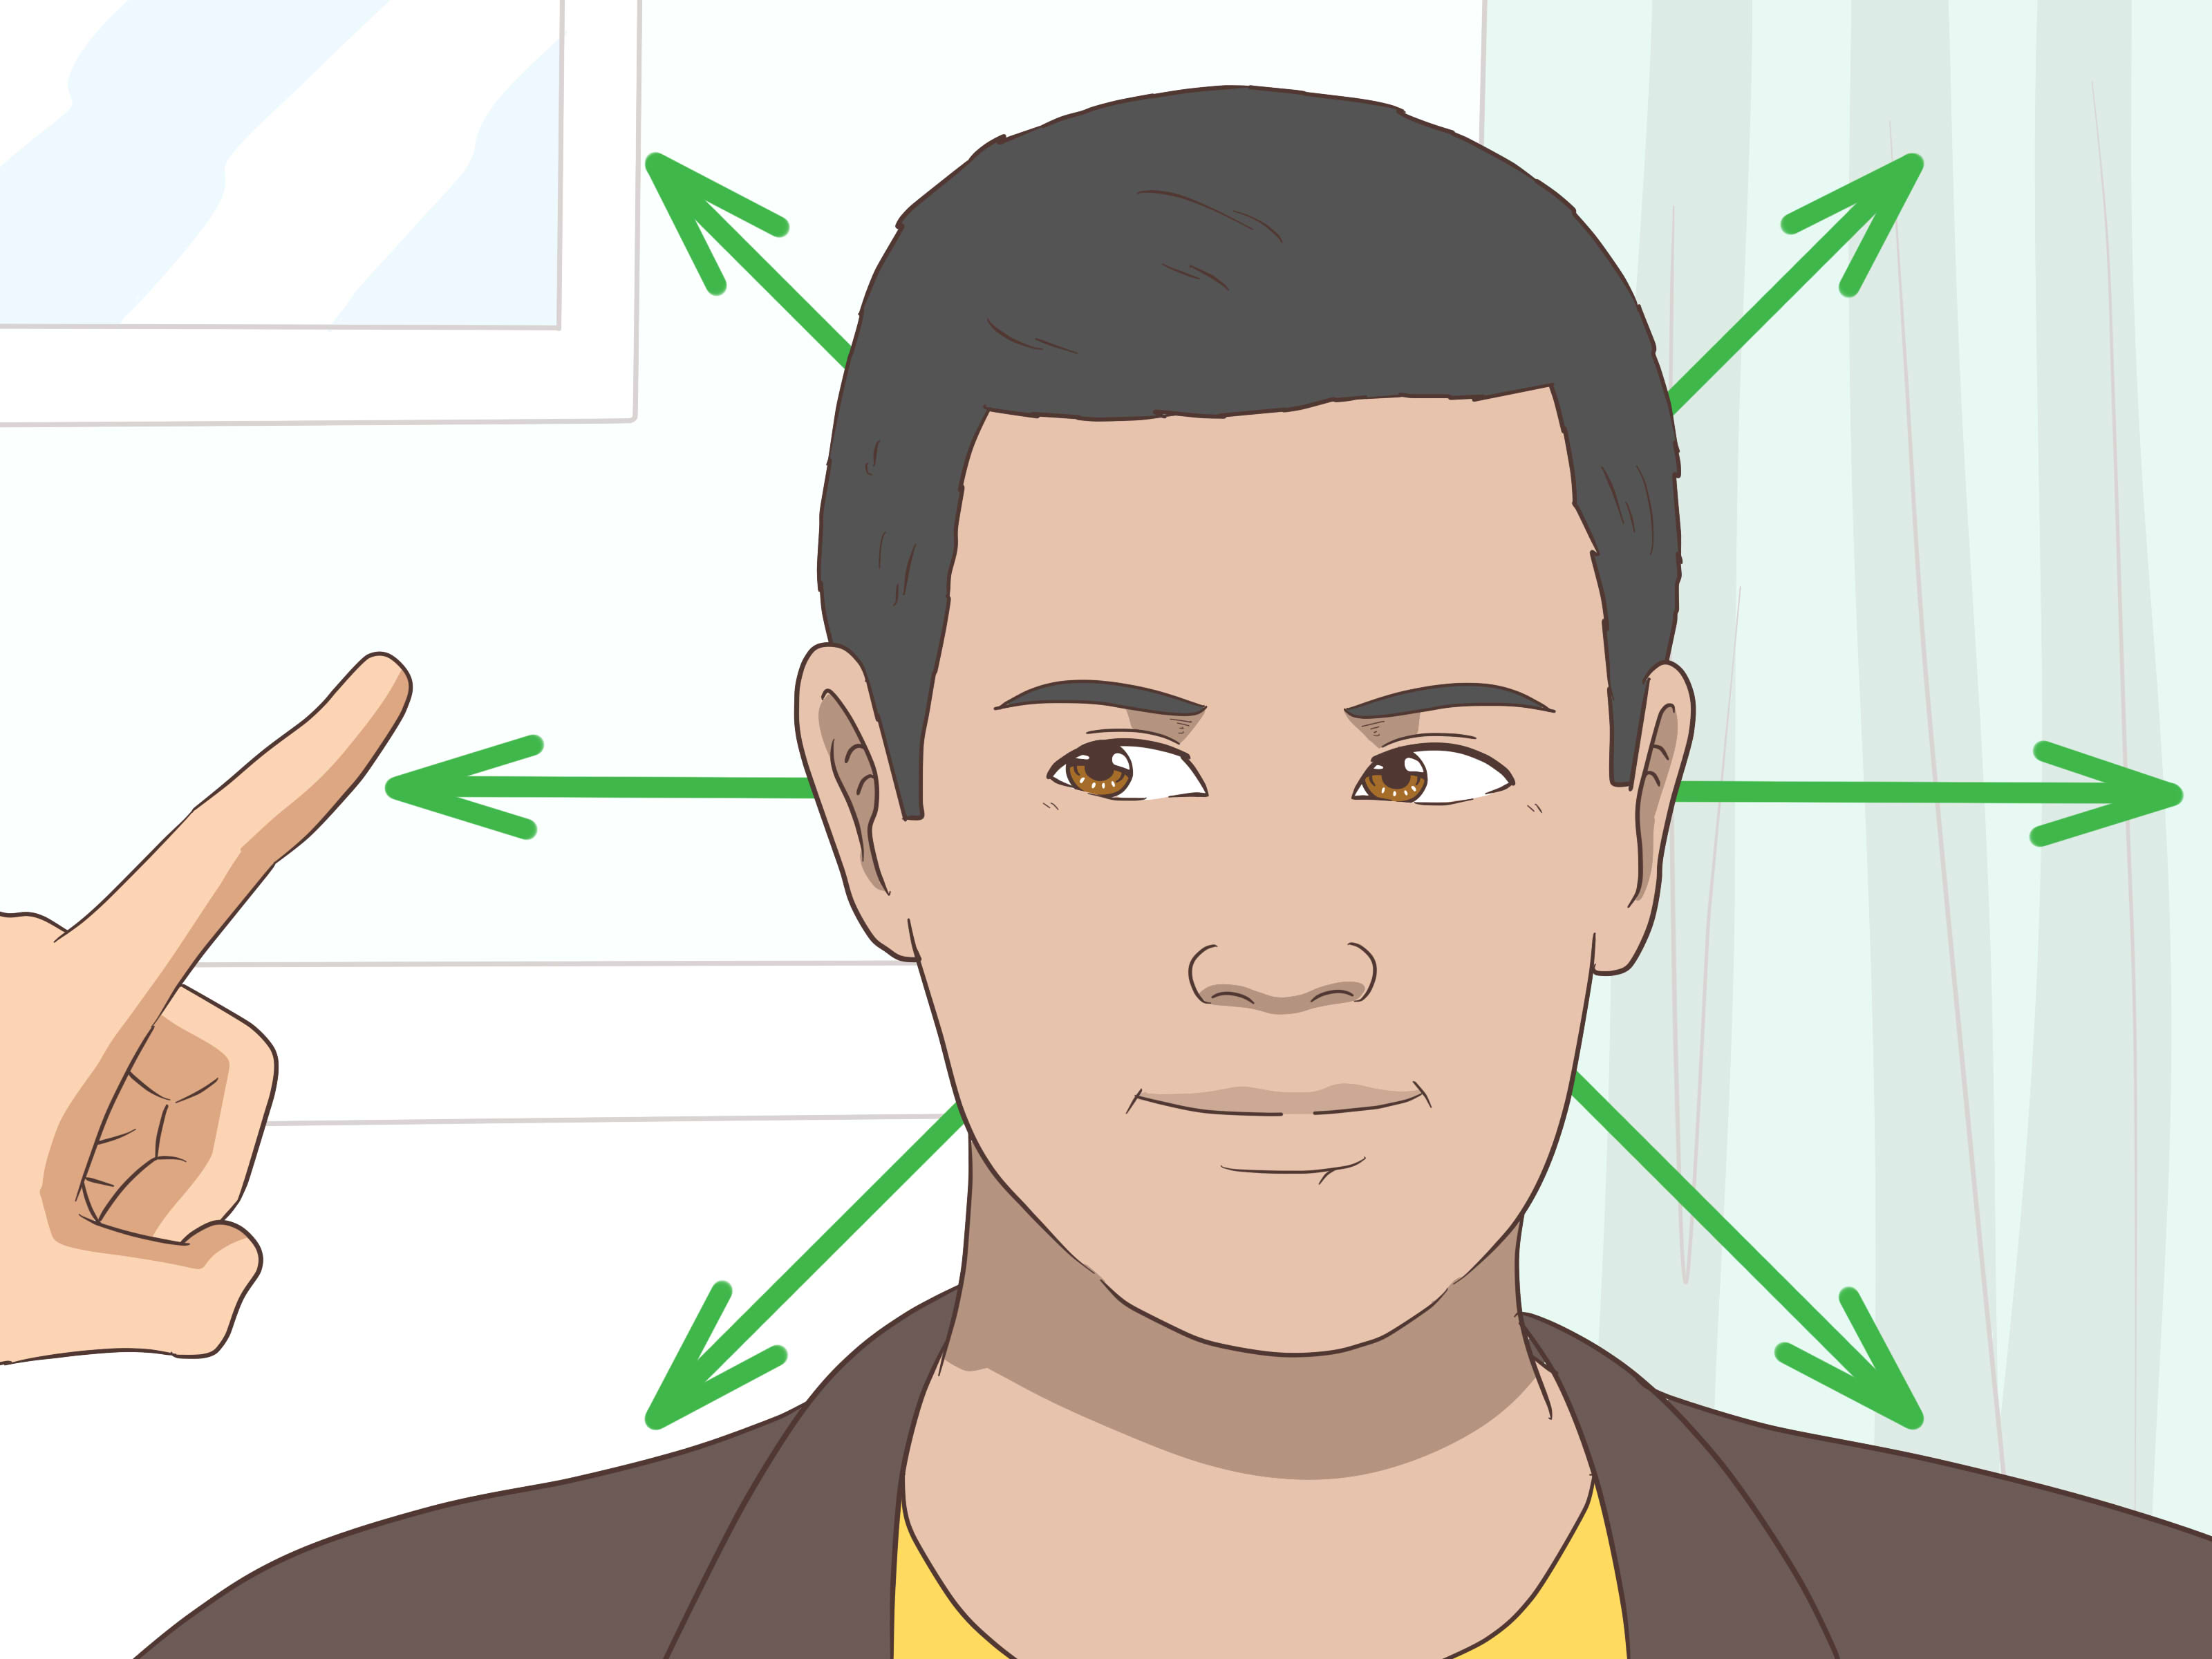
Have the person look straight at your nose while you compare their peripheral vision to yours. Bring fingers or a target in from the edge in different quadrants and ask when they first see it. Test each eye separately. Confrontation field testing is basic, but it can uncover central defects, peripheral loss, or asymmetric field problems that point toward optic nerve disease or other neurologic issues.
Optic neuritis often causes central scotomas, while papilledema may enlarge the blind spot. More formal perimetry is better, of course, but bedside confrontation remains valuable, especially when used systematically. Fast is fine, sloppy is not.
Step 11: Check Eye Movements and Ask Whether Movement Causes Pain
Eye movements are not purely an optic nerve test, but they belong in the evaluation because they add useful context. Ask the person to follow your finger in the main directions of gaze. Watch for restriction, double vision, or nystagmus, and ask whether moving the eye causes pain.
Pain with eye movement is a classic feature in many cases of optic neuritis. It does not confirm the diagnosis by itself, but when paired with reduced acuity, washed-out colors, or a relative afferent pupillary defect, it becomes much more meaningful. Sometimes one extra question turns a vague complaint into a clear clinical pattern.
Step 12: Examine the Optic Disc With Ophthalmoscopy and Decide Whether It Is Urgent
Finally, look at the back of the eye with ophthalmoscopy if you are trained and able. You are checking the optic disc for swelling, blurred margins, pallor, hemorrhages, vessel changes, or other abnormalities. Optic disc swelling can suggest papilledema, optic neuritis, ischemic optic neuropathy, or other pathology. Pallor can indicate previous optic nerve damage. A normal disc does not fully rule out optic neuritis, because some cases are retrobulbar, meaning the inflammation is behind the eye and the disc may initially look normal.
This step is where the exam becomes more than academic. If there is sudden vision loss, a positive relative afferent pupillary defect, disc swelling, headache, neurologic symptoms, or severe pain, the patient needs prompt evaluation by an eye care professional or emergency service. Optic nerve problems are not a “see how it goes next week” kind of hobby.
How to Interpret the Findings
The most concerning pattern for optic nerve disease is a combination of reduced vision, faded color vision, abnormal brightness comparison, a relative afferent pupillary defect, visual field loss, and optic disc abnormalities. That cluster should raise suspicion for optic neuritis or another optic neuropathy.
Some examples make this easier:
Example 1: A patient has pain with eye movement, reduced color vision, a central scotoma, and a positive swinging flashlight test. That pattern fits optic neuritis more than simple eye strain.
Example 2: A patient has headache, nausea, transient visual obscurations, and swollen optic discs. That pattern raises concern for papilledema and increased intracranial pressure, which needs urgent evaluation.
Example 3: A patient has sudden painless monocular vision loss with an afferent pupillary defect. That may signal a retinal or anterior optic nerve emergency and should not be ignored.
Common Mistakes to Avoid
One common mistake is relying only on visual acuity. A person can still read reasonably well and have meaningful optic nerve dysfunction, especially early on. Another mistake is using a dim light and rushing through the swinging flashlight test. Subtle pupillary findings are easy to miss when technique is lazy.
It is also easy to over-interpret a single abnormality. Color vision changes alone are not enough. A normal-looking optic disc does not exclude retrobulbar optic neuritis. And bedside visual field testing is helpful, but it is not a substitute for formal perimetry. The best optic nerve assessment is structured, consistent, and interpreted as a whole rather than as a collection of random mini-drama episodes.
When to Seek Medical Care Right Away
Seek urgent or emergency medical evaluation if there is sudden vision loss, rapidly worsening vision, eye pain with reduced vision, a new blind spot, severe headache with vomiting or neurologic symptoms, or suspected optic disc swelling. These can signal optic neuritis, papilledema, vascular events, retinal emergencies, or other serious conditions. Time matters, especially when vision or brain-related causes are involved.
Conclusion
Learning how to test the optic nerve means learning how to think systematically. You start with symptoms, measure visual acuity, compare brightness, check pupil reactions, look for a relative afferent pupillary defect, assess color and red desaturation, screen visual fields, and examine the optic disc. No single step wins the trophy alone, but together they create a meaningful picture of optic nerve function.
The biggest takeaway is simple: optic nerve testing is practical, structured, and surprisingly elegant. It is also something that becomes far more powerful in experienced hands. For students, clinicians, and curious readers alike, these 12 steps offer a solid framework. For patients, they offer something even better: a reminder that subtle vision changes deserve serious attention before they become major problems.
Real-World Experiences Related to Optic Nerve Testing
In real clinics, optic nerve testing rarely begins with a dramatic announcement like, “Today we shall challenge cranial nerve II.” It usually starts with a patient saying something oddly ordinary: “My vision feels off,” “One eye seems dim,” or “Red doesn’t look right.” Those small comments matter because optic nerve problems often announce themselves quietly before they become obvious on a chart.
Many patients describe the experience not as blur alone, but as a change in quality. One eye may feel darker, flatter, or less vivid. A white wall may look slightly gray through one eye. A stop sign may appear red-orange on one side and tired-looking on the other. During testing, that is why brightness comparison and red desaturation are so useful. Patients often feel relieved when a clinician takes those complaints seriously instead of dismissing them as “just eye strain.”
The swinging flashlight test is also a memorable moment for both patients and trainees. Patients usually do not know what the examiner is looking for, but they can tell the person holding the light has suddenly become very focused. For students, this is often the step where optic nerve testing stops being abstract and starts feeling real. The first time you clearly see a relative afferent pupillary defect, it is one of those classic clinical moments where the textbook and the patient finally shake hands.
Color vision testing creates another surprisingly human moment. People expect an eye exam to ask how small letters look. They do not expect to be asked whether red seems less red. Yet that question often unlocks the whole story. Some patients say the change is subtle, while others immediately notice that one eye sees color as if someone washed the world with dishwater. That kind of description can be more revealing than a dozen vague adjectives about blur.
Clinicians also learn quickly that the optic disc can be humbling. Sometimes the fundus exam shows obvious swelling, blurred margins, or pallor, and the diagnosis feels like it is holding up a giant sign. Other times, especially in retrobulbar optic neuritis, the optic disc looks normal even when the patient’s symptoms are not. That experience teaches an important lesson: never let a normal early fundus exam bully you into ignoring the history, the pupil findings, or the field defect.
From the patient’s side, the experience of being evaluated can be emotionally loaded. Vision changes are scary. A person may come in worried about needing new glasses and leave learning they need urgent neurologic or ophthalmic follow-up. That is why good communication matters. Explaining each step clearly helps. “I’m checking how well each optic nerve carries the light signal.” “I’m comparing color between the eyes.” “I’m looking for swelling at the optic disc.” Calm explanations reduce fear and help patients understand why these simple tests matter so much.
For clinicians, repeated experience builds pattern recognition. The combination of dim vision, pain with eye movement, red desaturation, and a positive swinging flashlight test starts to feel recognizable. So does the pattern of headache, transient visual symptoms, and disc swelling that raises concern for papilledema. Experience does not replace careful testing, but it does sharpen it. Over time, you stop seeing isolated findings and start seeing coherent stories.
That is the real value of optic nerve testing. It is not just a checklist. It is a way of translating a patient’s experience into clinical evidence. When done well, it turns “something feels wrong” into useful information that can guide urgent decisions, specialist referral, imaging, and treatment. Not bad for a penlight, a chart, and a little disciplined curiosity.