A dated tile floor can make an otherwise lovely room fceramic or porcelain tile does not always need demolition, a dumpster, and a renovation budget that makes your bank app nervous. With the right floor coating, a reusable stencil, and some patient prep work, you can create a personalized tile floor with serious custom character.
The trick is to treat this project like a flooring upgrade rather than a casual craft afternoon. Clean surfaces, strong adhesion, thin paint layers, careful alignment, and full cure time matter far more than artistic talent. This guide explains how to stencil a tile floor from the planning stage through the final protective coat.
Is a Stenciled Tile Floor Right for Your Space?
A painted tile floor works best when the existing tile is firmly attached, reasonably flat, and simply outdated. It can be a smart option for powder rooms, laundry rooms, lightly used bathrooms, kitchens, mudrooms, and entryways. The most successful projects begin with tile that is boring but structurally soundnot tile that is cracked, loose, water-damaged, or plotting a full rebellion from the subfloor.
Repair loose grout, broken tile, and water problems before painting. A stencil can disguise an unfortunate color, but it cannot repair a failing floor. Avoid using a standard DIY paint system on shower floors or areas that stay wet for long periods unless the exact coating is rated for that environment. Older resilient flooring should never be sanded or ground without confirming it does not contain hazardous materials.
Choose a Personalized Tile Floor Design
Start by measuring the visible face of your tile. A stencil that closely matches the tile size creates a neat faux-encaustic look. A larger repeating stencil can create a continuous, rug-like pattern over several tiles. Both approaches work well, but a tile-by-tile stencil is usually easier for beginners because grout lines provide natural alignment guides.
Easy Color Combinations That Look Custom
- Black and warm white: Graphic, classic, and easy to pair with almost any fixture finish.
- Soft gray and ivory: Calm, flexible, and ideal for a subtle bathroom refresh.
- Terracotta and cream: Warm and handmade-looking for cottage, Mediterranean, or farmhouse spaces.
- Navy and pale beige: A dramatic but timeless option for a small powder room.
- Charcoal and greige: A practical choice for high-traffic spaces where dirt should not become part of the design story.
For a small room, two colors are usually enough. Three-color patterns can look beautiful, but they require more planning and drying time. Keep one color dominant so the floor feels designed rather than visually caffeinated.
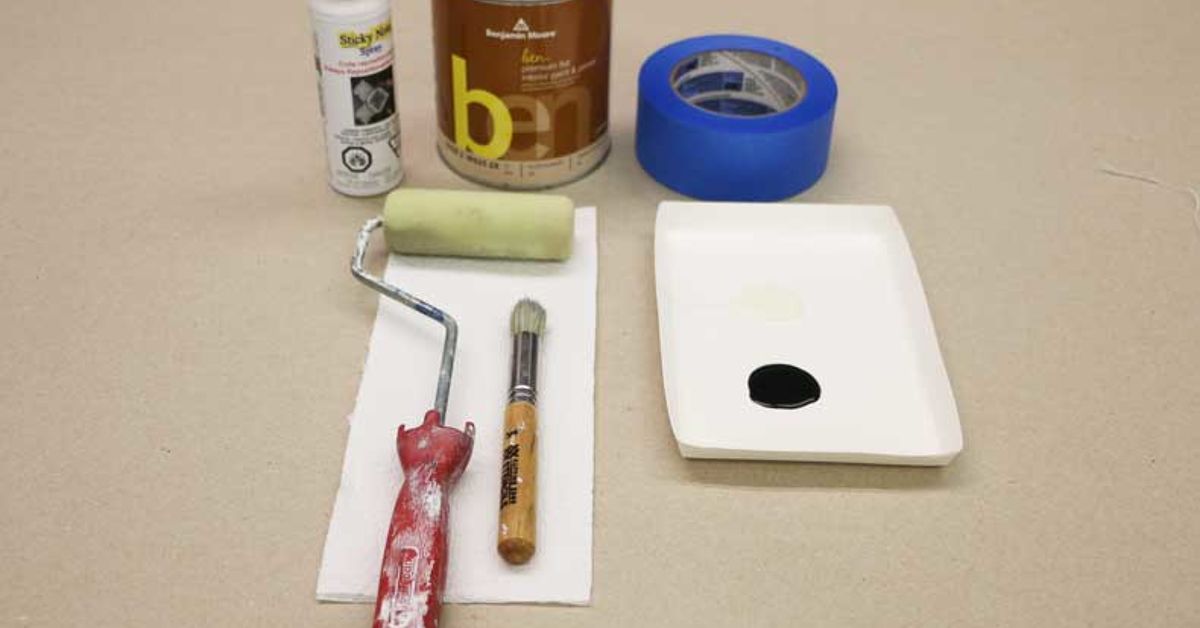
Tools and Materials You Will Need
- Tile stencil sized for your floor tile or pattern repeat
- Tile-compatible floor paint or floor-coating system
- Bonding primer, unless your selected system is designed for direct application to tile
- Compatible clear protective topcoat
- Degreasing cleaner, clean water, microfiber cloths, and a vacuum
- Fine sanding sponge or 220-grit abrasive, when allowed by product instructions
- Painter’s tape and optional repositionable stencil adhesive
- Foam mini rollers, small angled brush, paint tray, and tray liners
- Disposable gloves, knee pads, eye protection, and ventilation equipment required by the coating label
Choose products that are intended to work together. A primer, base coat, stencil color, and topcoat from the same system are less likely to create adhesion problems. Paint chemistry is not the place for improv theater.
How To Stencil a Personalized Tile Floor Step by Step
1. Clear the Room and Plan the Layout
Remove rugs, furniture, trash cans, and anything else that can collect dust or become accidentally painted. Tape off baseboards, cabinets, thresholds, and nearby walls. Before opening a paint can, dry-fit the stencil in several places.
For an allover design, find the room’s center by measuring the length and width, then marking the midpoint of each wall. Use those marks to establish a centered layout. For a tile-by-tile design, decide where you want the most complete motifs to appear. In a tiny bathroom, a full stencil pattern in the main doorway view matters more than a perfect motif behind the toilet.
2. Clean the Tile Thoroughly
Vacuum the floor first. Then wash tile and grout with a degreasing cleaner suitable for the surface. Kitchen floors can hold invisible cooking residue, while bathroom floors may have soap film, hairspray, and mystery splashes from products nobody remembers buying.
Rinse away cleaner residue and allow the floor to dry completely. Paint adheres to clean, dry, solid surfaces. It does not adhere to dust, grease, or optimistic vibes. Repair damaged grout and replace any loose tile before moving forward.
3. Lightly Scuff Glossy Tile and Test Adhesion
Glazed ceramic and porcelain tile can be very slick. When your coating manufacturer allows it, lightly scuff glossy tile with a fine sanding sponge or 220-grit abrasive. The goal is to reduce the shine, not sand through the tile finish or generate heavy dust.
Vacuum carefully, wipe away remaining residue with a damp microfiber cloth, and let the floor dry. Then create a small test patch in a hidden spot. Apply the full planned system: primer, base coat, stencil paint, and topcoat. After the product reaches the manufacturer’s stated cure time, test adhesion with strong painter’s tape. If the coating peels or feels soft, stop and correct the preparation process before painting the whole room.
4. Prime the Tile or Apply the Approved Base System
Use a bonding primer designed for difficult, nonporous surfaces unless your floor-coating system specifically says primer is unnecessary. Brush around walls and fixtures, then roll the open floor in thin, even coats. Avoid puddling in grout lines.
Once the primer has dried according to the label, apply the base color. Work in small sections and maintain a wet edge. Multiple thin coats generally look smoother and last longer than one thick coat that takes forever to dry and still feels a little suspicious.
5. Practice the Stencil Method Before Painting the Floor
Practice on cardboard, a spare tile, or a hidden area first. Secure the stencil with painter’s tape or a light coating of repositionable stencil adhesive. Load a foam roller with a small amount of paint, then roll off most of it on a paper towel or tray liner.
The roller should be nearly dry. This is the single best way to prevent stencil bleed. Apply paint with light passes rather than pressing hard. Lift a corner of the stencil to check coverage, then remove it carefully while the paint is still wet. Wipe the underside of the stencil regularly so dried paint does not stamp unwanted blobs onto the next tile.
6. Stencil the Main Floor Pattern
Start at the point farthest from the room exit and work backward toward the doorway. This prevents the classic DIY problem of painting yourself into a very attractive corner. For tile-by-tile stenciling, line up the stencil with grout joints. For a continuous pattern, use the stencil’s registration marks to match the previous motif.
Use a patient rhythm: position, align, lightly roll, lift, wipe, repeat. It may feel slow at first, but the pattern builds quickly. Avoid rushing with extra paint. A wetter roller may seem faster for one tile, but it can create blurry edges that require much more time to repair.
7. Finish Edges and Touch Up Imperfections
Use smaller stencil pieces or a small brush for edges around cabinets, toilets, thresholds, and walls. Let the painted pattern dry before stepping back for a full-room review. Small flaws often look enormous while you are kneeling six inches away from them and practically disappear at normal standing height.
Touch up only the obvious problems: paint bleed, thin spots, and noticeable misalignment. Use a tiny artist brush with the base color to sharpen edges, then restore the stencil color where needed. The goal is a floor that looks intentional, not a floor that proves you own a microscope.
8. Apply a Protective Topcoat
After the stencil paint has dried for the recommended period, apply the compatible clear topcoat. Use thin, even coats and follow the manufacturer’s instructions about recoat windows, ventilation, footwear, and cure time. A topcoat protects the decorative paint from normal foot traffic, cleaning, moisture, and everyday life.
Do not confuse “dry to the touch” with “ready for furniture, rugs, wet shoes, pets, and a dropped shampoo bottle.” Keep the room off-limits until the coating system has fully cured. Satin and matte finishes are often practical choices because high-gloss floor coatings can become slippery when wet.
Common Stenciled Tile Floor Mistakes
Using Standard Wall Paint
Wall paint is not designed for repeated foot traffic, cleaning, or abrasion. Use a floor-rated coating or a tile-compatible paint system with a durable protective topcoat.
Skipping Surface Preparation
Even the best paint struggles on greasy, dusty, glossy tile. Cleaning, light scuffing where appropriate, and adhesion testing are the unglamorous steps that decide whether the finish lasts.
Applying Too Much Paint Through the Stencil
Heavy paint creates fuzzy edges and leaks beneath the stencil. Use a nearly dry foam roller and build opacity through thin passes.
Rushing the Cure Time
Area rugs, furniture legs, and wet feet can damage a finish that has not cured fully. Plan the project for a period when the room can stay unused long enough for the coating to harden properly.
How To Maintain a Painted Tile Floor
Use a microfiber dust mop, soft broom, or hard-floor vacuum for routine cleaning. Wash with a pH-neutral cleaner or the product manufacturer’s recommended cleaner. Avoid abrasive scrub pads and harsh chemicals that can dull the protective layer.
Wipe up spills promptly, use felt pads under furniture, and keep a small amount of leftover paint and topcoat for future touch-ups. Avoid steam mops unless your coating manufacturer clearly approves them. Heat and moisture can turn a simple cleaning day into an unexpected finish test.
Real-World Experiences With a Personalized Tile Floor
The first experience many people have with a stenciled tile floor is mild panic. The first few tiles can look oddly isolated, like little decorative islands floating in a sea of base paint. Then the pattern begins to repeat. After two or three rows, the floor starts looking intentional. By the time the design reaches the doorway, the original tile often becomes difficult to remember without checking the before photos.
One of the best lessons from a stenciled floor project is that artistic skill matters less than consistency. You do not need the hand of a muralist. You need the patience to align the stencil, use very little paint, lift it carefully, and clean it often. The project becomes almost meditative once the process settles into a rhythm. Position. Check. Roll lightly. Lift. Repeat. It is not glamorous, but neither is folding laundry, and this produces a floor people actually compliment.
Lighting changes everything. A gray-and-white floor may feel crisp and modern in morning daylight but warmer and softer under evening bathroom lights. Testing paint colors next to cabinets, wall paint, hardware, and towels saves frustration later. A color that looks neutral on a sample card can become unexpectedly blue, pink, or yellow once it meets the rest of the room.
Layout is also more important than people expect. The most visible places are usually the doorway, the central walking path, and the area in front of a vanity or sink. Spending extra time on those sections makes the entire room feel more balanced. Partial patterns around the edges are normal and often disappear behind cabinets or fixtures. A strangely cropped motif in the middle of the room, however, can look accidental even when the paintwork is technically perfect.
Another real-world benefit is that a patterned floor is forgiving. Small scuffs and future touch-ups are less obvious on a busy design than on a flat solid color. The pattern creates visual movement, which helps everyday wear blend into the room. That makes this project especially useful in laundry rooms, half baths, mudrooms, and other hardworking spaces where pristine perfection is more of a hopeful concept than a lifestyle.
The finished floor also changes how the room feels. A small bathroom can become playful. A laundry room can feel more welcoming. An entry can suddenly have a memorable first impression. The design does not need to look expensive because it tells a better story: someone looked at a tired floor and decided it deserved a personality.
Conclusion
Learning how to stencil a personalized tile floor is one of the most satisfying ways to refresh a room without replacing the existing tile. Choose a pattern that suits the space, prepare the floor carefully, use a compatible coating system, keep stencil paint layers thin, and protect the final design with a clear topcoat. The project takes patience, but the result can make an ordinary room feel custom, creative, and surprisingly high-end.