Painting patterns onto rugs is one of those DIY projects that feels slightly rebellious in the best way. A rug is supposed to sit there quietly, behave itself, and collect crumbs. But with a little paint, painter’s tape, a stencil, and a brave heart, that plain floor covering can become the star of the room. Suddenly, your beige rug is wearing stripes. Your tired outdoor mat has a geometric border. Your inexpensive flatweave looks like something from a boutique that serves cucumber water.
The good news? You do not need to be a professional artist. You do need patience, the right paint, a clean surface, and a plan that does not begin with “I’ll just wing it.” Painting rugs works especially well on flatweave cotton rugs, sisal rugs, jute rugs, low-pile indoor-outdoor rugs, and coir doormats. Thick shag rugs, delicate antique rugs, silk rugs, and heirloom wool pieces should stay far away from this experiment unless you enjoy emotional damage.
This guide explains how to paint patterns onto rugs step by step, including how to choose paint, make crisp lines, use stencils, avoid crunchy texture, and keep your design looking intentional rather than “craft table accident.”
Why Paint Patterns Onto Rugs?
Custom rugs can be expensive, and finding the exact size, color, and pattern you want can feel like trying to find one matching sock in a laundry basket full of betrayal. Painting a rug gives you control. You can match your decor, refresh a faded rug, cover stains, add personality to a rental space, or turn a budget rug into something that looks custom.
Painted rugs are especially useful in spaces where style matters but perfection does not need to be museum-level: patios, porches, entryways, kitchens, laundry rooms, craft rooms, kids’ rooms, and casual living areas. The result can be bold, subtle, modern, farmhouse, coastal, boho, minimalist, or wildly cheerful. Your rug, your rules.
Best Rugs for Painting
Not every rug is a good candidate for paint. The best rugs for painting have a tight, low-profile surface that allows paint to sit evenly without disappearing into a forest of fibers.
Flatweave Cotton Rugs
Flatweave cotton rugs are beginner-friendly because the surface is relatively smooth. They accept fabric paint well and are easy to tape or stencil. They are a great choice for stripes, diamonds, borders, checkerboards, and simple line designs.
Sisal and Jute Rugs
Sisal and jute rugs have a natural texture that looks beautiful with painted patterns. Their woven surface works well with bold geometric designs, especially outdoor-inspired stripes, chevrons, and borders. Because the fibers are rough, expect a slightly rustic finish rather than razor-sharp perfection.
Indoor-Outdoor Rugs
Many indoor-outdoor rugs are made from synthetic fibers and designed to handle moisture and wear. They can be painted, but test first. Some slick synthetic surfaces resist paint unless you use the right product and allow proper curing time.
Coir Doormats
Coir mats are excellent for painted words, monograms, seasonal designs, and bold stenciled shapes. Use outdoor paint or exterior-rated craft paint, and dab the paint into the fibers rather than brushing sideways.
Rugs to Avoid
Skip high-pile shag rugs, expensive handmade rugs, silk rugs, antique wool rugs, and anything with a sentimental value higher than your confidence level. Paint can stiffen fibers, change texture, and become difficult to remove. When in doubt, practice on a thrift-store rug first.
Supplies You Need
Before you begin, gather your materials. A good setup prevents the classic DIY moment where you are kneeling on a half-painted rug, holding wet tape, whispering, “Why am I like this?”
- Clean low-pile rug or mat
- Vacuum or lint roller
- Drop cloth or plastic sheet
- Painter’s tape
- Measuring tape or ruler
- Pencil, chalk, or washable fabric marker
- Stencil, cardboard template, or printed pattern
- Fabric paint, outdoor paint, chalk-finish paint, or acrylic paint mixed with textile medium
- Stencil brush, foam roller, sponge, or small paintbrush
- Paper towels or rag for blotting excess paint
- Small tray or paper plate for paint
- Optional clear fabric-safe or outdoor sealer
Choose the Right Paint
The paint you choose matters more than the pattern. A gorgeous stencil with the wrong paint can leave your rug stiff, flaky, sticky, or crunchy enough to sound like breakfast cereal.
Fabric Paint
Fabric paint is one of the best options for cotton and fabric rugs because it is designed to flex with fibers. It usually dries softer than regular acrylic paint and is less likely to crack.
Acrylic Paint With Textile Medium
If you already have acrylic craft paint, mix it with textile medium according to the product instructions. Textile medium helps acrylic paint bond to fabric and improves flexibility. This is a smart option when you want a custom color that matches your room.
Chalk-Finish Paint
Chalk-finish paint is popular for sisal, jute, and outdoor-style rugs because it gives good coverage and a matte look. It may need to be thinned slightly with water so it glides over rough fibers instead of clumping on top.
Outdoor Paint
For doormats, porch rugs, and patio rugs, choose paint labeled for exterior use. Outdoor paint is made to handle more moisture, sunlight, and foot traffic than standard craft paint.
Step-by-Step: How To Paint Patterns Onto Rugs
Step 1: Clean the Rug Thoroughly
Start by vacuuming both sides of the rug. Shake it outside if possible. Use a lint roller for pet hair, fuzz, and mysterious fibers that appear out of nowhere. Paint sticks better to a clean surface, and dirt trapped under paint can create uneven spots.
If the rug is washable, wash and dry it according to the care label before painting. Make sure it is completely dry. Damp fibers can dilute paint and blur your pattern unless you are intentionally using a washed, watercolor-style effect.
Step 2: Protect Your Work Area
Place the rug on a drop cloth, plastic sheet, or old shower curtain. Paint can bleed through thin rugs, so do not work directly on hardwood floors or carpet. That is not a design choice; that is a future apology.
Work in a well-ventilated area, especially if you are using outdoor paint, spray paint, or any product with strong fumes. Open windows, use fans, and follow the label instructions.
Step 3: Plan the Pattern
Decide whether you want stripes, chevrons, diamonds, a border, a medallion, a checkerboard, a Moroccan-inspired stencil, abstract shapes, or a simple painted edge. For beginners, stripes and borders are easiest. For intermediate DIYers, try diamonds or repeating stencil patterns. For confident painters, go freehand.
Measure the rug and mark the center point. Lightly sketch guide marks with pencil, chalk, or washable fabric marker. Keep the pattern proportional to the rug. A tiny stencil on a huge rug can look timid, while oversized shapes on a small mat can look like the rug is yelling.
Step 4: Tape or Secure the Design
For stripes and geometric patterns, use painter’s tape. Press the tape firmly into the fibers, especially along the edges. On textured rugs, tape will not seal as perfectly as it does on a wall, so use less paint and apply it carefully.
For stencils, secure the stencil with painter’s tape or temporary spray adhesive if the stencil material allows it. Use registration marks or guide points to keep repeating patterns aligned. If the stencil shifts, the pattern will look tipsy, and not in a charming way.
Step 5: Load the Brush Lightly
This is the secret to crisp painted rug patterns: use less paint than you think. Dip the stencil brush, sponge, or roller into paint, then blot off the excess on a paper towel. The applicator should feel almost dry.
Too much paint causes bleeding under tape and stencils. It also creates stiff patches. Several thin coats are better than one thick, gloopy coat. Gloopy is rarely the look we are going for in home decor.
Step 6: Apply Paint With an Up-and-Down Motion
When using a stencil, dab the paint straight up and down instead of brushing side to side. This pushes color into the fibers without forcing paint under the stencil. For taped stripes, use a stencil brush or foam roller and work from the tape edge inward to reduce bleeding.
On rough natural-fiber rugs, you may need to stipple firmly so paint reaches the uneven surface. On cotton rugs, use a lighter touch to avoid soaking the fabric.
Step 7: Build the Color Slowly
Let the first coat dry until it is no longer tacky. Then apply a second thin coat if needed. Light colors over dark rugs may require extra coats. Dark paint over light rugs usually covers faster.
If you want a faded, vintage look, stop after one coat. If you want a crisp modern look, build the paint gradually until the color looks even.
Step 8: Remove Tape Carefully
Remove painter’s tape while the final coat is still slightly damp or after it has dried, depending on the paint and rug texture. Pull the tape back slowly at an angle. If paint has bridged over the tape edge, use a craft knife carefully to score the line before lifting.
Do not yank the tape like you are starting a lawn mower. Slow and steady protects the pattern.
Step 9: Let the Rug Cure
Drying and curing are not the same. Paint may feel dry within hours, but it can take longer to fully cure and bond. Keep the rug flat and avoid heavy foot traffic for at least 24 to 72 hours, or longer if the paint label recommends it.
If the paint requires heat-setting, follow the product directions. Some fabric paints need heat to become permanent, but not every rug material can safely handle heat. Always test first.
Step 10: Seal If Needed
For outdoor rugs and doormats, a compatible sealer can add durability. Use a sealer designed for the paint type and rug location. For indoor fabric rugs, sealing may make the surface stiffer, so use caution. A test patch is your best friend.
Pattern Ideas for Painted Rugs
Classic Stripes
Stripes are simple, clean, and hard to mess up if you measure carefully. Try navy stripes on a natural jute rug, black stripes on a cotton runner, or soft beige stripes on a white flatweave.
Chevron Design
A chevron rug adds energy to patios, playrooms, and entryways. Use painter’s tape to create repeating V shapes. Keep the spacing consistent with a ruler or homemade cardboard spacer.
Checkerboard Pattern
A painted checkerboard rug feels playful and modern. Use two neutral colors for a subtle look or high contrast for drama. This design works best on flat rugs with straight edges.
Border Pattern
If you want impact without painting the entire rug, add a border. Paint a Greek key pattern, simple double line, scalloped edge, or corner accents. Borders are great for making inexpensive rugs look more finished.
Moroccan-Inspired Stencil
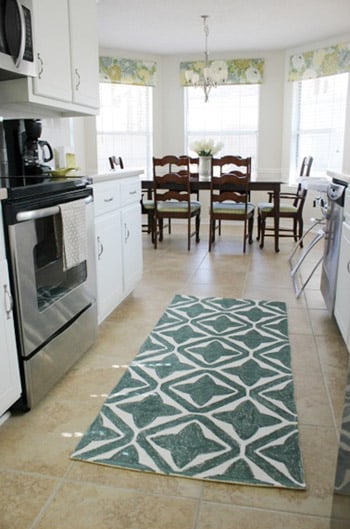
A Moroccan-style stencil can turn a plain rug into a decorative feature. Use a large stencil and repeat it carefully across the rug. Choose tone-on-tone colors for elegance or bright contrast for a statement.
Organic Freehand Shapes
Not every pattern needs to involve measuring until your eyes cross. Try freehand arches, dots, leaves, waves, or abstract blobs. The trick is to repeat the shapes enough that they look intentional.
Common Mistakes to Avoid
Using Too Much Paint
This is the number one mistake. Excess paint bleeds, stiffens, and clumps. Keep the brush dry and build color slowly.
Skipping the Test Patch
Always test paint on a corner, underside, or scrap material. You need to see how the rug absorbs paint, how the color dries, and whether the texture changes too much.
Choosing a Complicated Pattern First
If this is your first painted rug, start with stripes, a border, or a small stencil. Save the elaborate twelve-color peacock mandala for your second act.
Painting a Dirty Rug
Dust, lint, and pet hair can ruin clean lines. Clean first, paint second, admire third.
Rushing the Dry Time
Walking on the rug too soon can smudge the pattern or transfer paint. Let it cure properly before returning it to daily use.
How To Care for a Painted Rug
Painted rugs need gentle care. Vacuum with low suction or shake them outside. Avoid aggressive scrubbing, harsh cleaners, and soaking unless the paint product says the surface is washable. For spills, blot gently with a damp cloth. Do not rub like you are trying to erase a crime scene.
Outdoor painted rugs should be kept under a covered area when possible. Sun, rain, mud, and constant foot traffic will eventually wear down any painted design. The good news is that touch-ups are easy if you save a little leftover paint.
My Practical Experience With Painting Rug Patterns
The first time I painted a rug, I was convinced it would take one afternoon, one cup of coffee, and the relaxed confidence of a lifestyle blogger wearing linen. Naturally, it took longer, the coffee got cold, and I discovered that painter’s tape on a textured rug behaves more like a polite suggestion than a legal contract.
The project was a plain flatweave runner for an entryway. It was inexpensive, slightly boring, and exactly the right victim for experimentation. I chose a simple black border with small diamond accents because I wanted something graphic but not so ambitious that I would need a compass, a prayer candle, and a second personality.
The biggest lesson came immediately: preparation makes or breaks the result. Vacuuming once was not enough. The rug looked clean, but after I ran a lint roller over it, enough fuzz appeared to knit a small emotional-support hamster. If that fuzz had stayed on the rug, it would have become part of the painted design forever. Charming? No. Educational? Unfortunately, yes.
Measuring also mattered more than expected. A rug is soft, flexible, and not always perfectly square. I marked the center, then measured from multiple points instead of trusting the edge alone. That helped keep the border straight. When I tried to eyeball one corner, it immediately looked suspicious. Not disastrous, just suspicious enough that guests might tilt their heads.
For paint, I tested acrylic paint mixed with textile medium on the underside. Regular acrylic alone dried too stiff for my taste, but the textile medium made the finish more flexible. The painted area still felt different from the unpainted rug, which is normal, but it did not feel like walking on dried glue. That was the goal.
The best technique was using a nearly dry stencil brush. I dipped the brush lightly, blotted it on a paper towel, and dabbed straight down. At first, it felt too slow. Then I tried loading more paint, and the edge bled under the tape like it had somewhere urgent to be. After that, I became a devoted member of the “less paint, more patience” club.
Removing the tape was the most satisfying part. It revealed clean lines in most places and a few tiny bleeds in others. Instead of panicking, I used a small detail brush and the base color to tidy the edges. Painted rugs are forgiving if you do not expect factory perfection. In fact, a tiny handmade irregularity can make the rug look more interesting.
After the rug dried, I let it cure for two full days before putting it back in the entryway. That waiting period was annoying but worth it. The paint held up better because it had time to bond. Over the next few months, the highest-traffic areas softened slightly, giving the pattern a lived-in look. I liked it more that way. It felt less like a craft project and more like something that belonged in the room.
My strongest advice is to start with a design that matches your patience level. If you love precision, use tape and rulers. If you enjoy loose, artistic results, try freehand shapes. If you are nervous, paint only the border. A rug does not need to be covered from corner to corner to feel transformed.
Also, choose colors you already use in the room. The easiest way to make a painted rug look intentional is to repeat a color from your pillows, curtains, wall art, cabinets, or planters. A painted rug should feel like it joined the decor conversation, not like it kicked the door open wearing tap shoes.
In the end, painting patterns onto rugs is less about perfection and more about possibility. It lets you rescue a boring rug, customize a space, and create something useful with your own hands. And if the first attempt is not perfect? Put a plant nearby. Plants are excellent at distracting guests from minor design crimes.
Conclusion
Learning how to paint patterns onto rugs is a practical, affordable way to customize your home without buying a brand-new designer rug. The key is choosing the right rug, using flexible paint, cleaning the surface, applying thin coats, and giving the design enough time to dry and cure. Flatweave cotton, sisal, jute, indoor-outdoor rugs, and coir mats are the best places to start.
Whether you create crisp stripes, playful checkerboards, elegant borders, or bold stenciled motifs, the process is approachable for beginners and rewarding for experienced DIY decorators. Keep the paint light, the measurements steady, and the expectations realistic. Your rug does not have to be flawless to be fabulous. It just has to look better than it did yesterday.
Note: This article is written for web publication and synthesizes practical guidance from reputable U.S. DIY, home-improvement, craft-paint, and indoor air-quality resources. Always follow the specific paint label and test before painting the full rug.