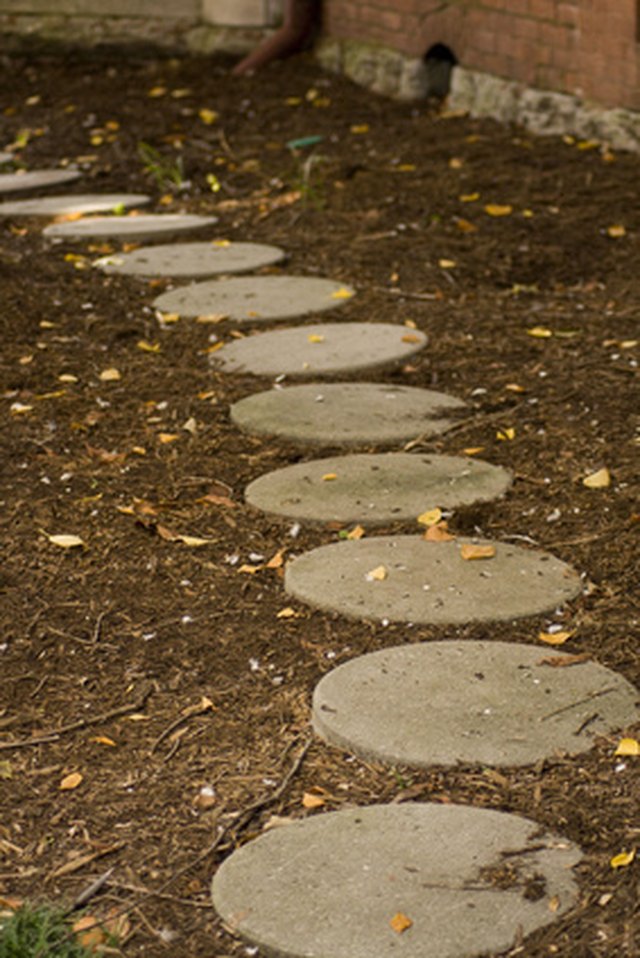
Concrete stepping stones are the unsung heroes of the garden. They guide muddy shoes, rescue flower beds from accidental trampling, and politely say, “Please walk here, not through the basil.” But plain gray concrete can feel a little too sidewalk-serious for a yard full of flowers, mulch, herbs, and personality. The good news? You can paint concrete stepping stones and turn them into colorful garden accents without needing a contractor, a professional studio, or a mystical relationship with a paintbrush.
The trick is not simply slapping paint on concrete and hoping for the best. Concrete is porous, outdoors is rude, and moisture has a talent for ruining lazy paint jobs. To get a finish that looks fresh longer, you need the right prep, the right paint, and the right sealer. This guide walks you through how to paint concrete stepping stones step by step, including cleaning, priming, painting, sealing, design ideas, mistakes to avoid, and practical maintenance tips.
Whether you want modern black stepping stones, cheerful mosaic-style garden pavers, faux natural stone, stenciled patterns, or a whimsical path that looks like it wandered out of a storybook, this project is absolutely doable. Just bring patience, outdoor paint, and the emotional strength to wait for things to dry.
Can You Paint Concrete Stepping Stones?
Yes, you can paint concrete stepping stones, but you need to treat them like outdoor walking surfaces, not like a craft-store picture frame. Stepping stones sit in rain, sun, dirt, humidity, sprinkler overspray, leaf stains, and foot traffic. That means regular wall paint is not enough. For the best results, use exterior concrete paint, masonry paint, porch and patio floor paint, or a concrete-safe acrylic coating designed for outdoor use.
The most durable painted stepping stones usually have four layers of success: a clean surface, a bonding primer when needed, thin coats of outdoor concrete paint, and a clear exterior sealer. Skip one of those steps and your stones may still look cute for a weekend, but they might start peeling faster than a sunburned tourist in July.
Best Paint for Concrete Stepping Stones
The best paint for concrete stepping stones is a product made for exterior masonry or concrete surfaces. Look for labels that mention concrete, masonry, porch, patio, floor, walkway, or outdoor use. These coatings are formulated to grip porous mineral surfaces and handle more abrasion than standard latex wall paint.
Good paint options include:
- Exterior concrete paint: A dependable choice for solid-color stepping stones.
- Porch and patio floor paint: Designed for foot traffic and outdoor exposure.
- Masonry paint: Works well on porous concrete, brick, stucco, and stone-like surfaces.
- Outdoor acrylic craft paint: Useful for decorative details, but it should be sealed well.
- Concrete stain: A more natural-looking alternative that soaks into porous concrete instead of sitting on top like paint.
If your stepping stones are purely decorative and rarely walked on, you can get away with more creative finishes. If they form the main path from the patio to the grill, choose durability over delicate artistry. A stone that looks like a tiny Renaissance fresco is charming until Uncle Dave’s sneakers turn it into abstract expressionism.
Tools and Materials You’ll Need
Gathering everything before you begin makes the project smoother. It also prevents the classic DIY sprint through the house with wet paint on your gloves while yelling, “Where did I put the sealer?”
- Concrete stepping stones
- Stiff-bristle brush or scrub brush
- Mild detergent or concrete cleaner
- Degreaser for oily spots, if needed
- Garden hose or bucket of clean water
- Painter’s tape, optional
- Drop cloth or cardboard
- Concrete bonding primer or masonry primer
- Exterior concrete paint or porch and patio paint
- Outdoor acrylic paint for details, optional
- Paintbrushes and small foam rollers
- Stencil brushes or sponges, optional
- Clear exterior concrete sealer
- Fine-grit sanding block, optional
- Gloves and eye protection
- Non-slip additive, optional but smart for walking surfaces
Step 1: Choose the Right Weather
Painting concrete stepping stones is an outdoor project, so the weather gets a vote. Choose a stretch of dry, mild weather with no rain in the forecast. Avoid painting in direct blazing sun because paint can dry too quickly on the surface while staying soft underneath. Also avoid high humidity, chilly temperatures, or windy days that blow leaves, dust, and one suspiciously determined mosquito into your fresh finish.
A comfortable temperature range listed on your paint and sealer labels is the safest guide. Most coatings perform best when the surface is dry and the air temperature is moderate. Remember that concrete can stay damp even when it looks dry, especially if the stones have been sitting on wet soil.
Step 2: Clean the Concrete Thoroughly
Cleaning is the least glamorous part of painting concrete stepping stones, but it is the step that decides whether your paint job lasts. Dirt, algae, moss, mildew, dust, and old sealers can block adhesion. If paint cannot grip the concrete, it will eventually peel, flake, bubble, or come off in sad little chips that make you question your life choices.
Start by brushing away loose dirt and debris. Then scrub each stone with mild detergent and water. For stubborn grime, use a concrete cleaner or degreaser. If the stones have moss or algae, scrub until the surface is clean and textured again. Rinse well. Cleaner residue can interfere with paint, so do not leave soap behind.
After washing, let the stepping stones dry completely. Depending on the weather and how porous the concrete is, this may take a full day or longer. Do not rush this part. Painting damp concrete traps moisture under the coating, and trapped moisture is the villain in many peeling-paint stories.
Step 3: Check for Sealers, Old Paint, or Smooth Spots
Concrete paint needs a slightly porous surface. If water beads on the stepping stone instead of soaking in, the stone may already have a sealer or coating on it. In that case, paint may not bond well until the surface is sanded, stripped, etched, or otherwise prepared according to the product instructions.
You can do a simple water test: place a few drops of water on the clean stone. If the water darkens the concrete and absorbs within a few minutes, the surface is likely porous enough for many concrete coatings. If the water sits on top like a tiny swimming pool, you need more prep.
For previously painted stones, scrape away loose paint and sand rough edges. Do not paint over peeling paint. That is not a makeover; that is just giving the problem a colorful hat.
Step 4: Repair Chips and Cracks
Small chips can add rustic charm, but cracks that collect water can shorten the life of your paint job. Fill larger cracks, pits, or broken edges with a concrete repair product suitable for outdoor use. Let the repair cure fully according to the manufacturer’s directions before priming or painting.
If your stepping stones are new concrete, make sure they are fully cured before painting. Many concrete products recommend waiting about 28 days before painting, because fresh concrete continues to cure and release moisture. Painting too early may lead to adhesion problems, discoloration, or coating failure.
Step 5: Prime the Stones
Primer helps paint bond to concrete, evens out porosity, and improves coverage. Some concrete paints are self-priming, but many projects still benefit from a concrete bonding primer or masonry primer, especially if the stones are very porous, stained, patched, or exposed to heavy foot traffic.
Use a brush for edges and textured details, then use a small roller for flat areas. Apply a thin, even coat. Thick primer is not better; it is just slower to dry and more likely to create a gummy surface. Let the primer dry fully before painting. The label on your specific product should always be the final authority because drying times vary by brand, temperature, humidity, and surface condition.
Step 6: Paint the Base Coat
Now comes the fun part: color. Stir your concrete paint well. Apply the first coat thinly and evenly with a brush or foam roller. If your stepping stones have rough texture, use a brush to push paint into the surface without creating puddles in low spots. Puddles dry unevenly and can peel.
Let the first coat dry according to the paint label, then apply a second thin coat. Two light coats usually look better and last longer than one heavy coat. If you are painting the sides, lift the stone onto small blocks or scrap wood so the edges are easier to reach. Do not paint the bottom unless the product specifically allows it. Leaving the underside unpainted can help moisture escape.
Step 7: Add Designs, Stencils, or Patterns
Once the base coat is dry, you can add personality. This is where concrete stepping stones become more than garden flooring. They become tiny outdoor canvases with jobs.
Popular design ideas include:
- Faux flagstone: Use several earthy colors and irregular lines to mimic natural stone.
- Stenciled patterns: Try Moroccan tiles, leaves, vines, geometric borders, or sunbursts.
- Garden labels: Paint words like “thyme,” “mint,” “basil,” or “watch your step.”
- Modern monochrome: Use charcoal, white, sand, or sage for a clean landscape look.
- Whimsical stones: Paint ladybugs, flowers, moons, stars, bees, or paw prints.
- Mosaic effect: Create colorful broken-tile shapes with painted grout lines.
For crisp stencil work, use very little paint on the brush or sponge. Dab off excess paint before touching the stencil. Too much paint bleeds under the edges and turns your elegant pattern into a mysterious blob. Charming? Maybe. Intentional? Not usually.
Step 8: Improve Safety with Texture
Painted outdoor surfaces can become slippery when wet. Since stepping stones are meant to be stepped on, safety matters. Choose a low-sheen or slip-resistant coating when possible. You can also mix a non-slip additive into the final paint coat or sprinkle it lightly into wet paint, depending on the product directions.
Avoid glossy finishes on the walking surface unless the sealer or coating is specifically designed to remain slip-resistant outdoors. Glossy stones may look glamorous in photos, but in a rainstorm they can behave like tiny decorative banana peels.
Step 9: Seal the Painted Concrete
Sealing helps protect painted concrete stepping stones from moisture, UV exposure, dirt, stains, and abrasion. Use a clear exterior sealer compatible with your paint. Water-based acrylic concrete sealers are common for DIY projects, but always check that the sealer can be used over painted surfaces and outdoors.
Apply sealer in thin coats with a brush, roller, or sprayer. Thin coats cure more evenly than thick coats. Let each coat dry as directed. Two light coats often provide better protection than one heavy coat. If the stones are used frequently, choose a durable sealer made for walkways, patios, or concrete floors.
Let the sealed stones cure before placing them back into service. Dry to the touch does not always mean ready for foot traffic. Give the coating time to harden so your beautiful new path does not collect shoe prints, grass clippings, or the autograph of a curious squirrel.
Step 10: Reinstall and Maintain Your Painted Stepping Stones
Once fully dry and cured, place the stepping stones back in the garden. Set them level so they do not wobble. A rocking stepping stone wears unevenly and can crack coatings faster. If needed, remove a little soil, add sand or gravel underneath, and tamp it flat before resetting the stone.
For maintenance, sweep or rinse the stones regularly. Clean with mild soap and water rather than harsh chemicals. Avoid aggressive pressure washing, which can damage paint and sealer. If the finish starts to dull after a season or two, clean the stones and apply a fresh coat of compatible sealer. Small chips can be touched up with leftover paint and resealed.
Common Mistakes to Avoid
Painting Dirty Concrete
This is the number one mistake. Paint sticks to dirt, not the stone, and then the dirt lets go. Clean like you mean it.
Skipping Primer
Some paints do not need primer, but many concrete surfaces benefit from it. If the product recommends primer, use it. Your future self will be smugly grateful.
Using Interior Wall Paint
Interior paint is not designed for rain, soil contact, sun, and shoes. Use outdoor concrete paint or masonry-safe coatings.
Applying Thick Coats
Thick paint may seem faster, but it often dries poorly and peels sooner. Thin, patient coats are the grown-up answer.
Forgetting Slip Resistance
A garden path should not become a backyard skating rink. Use low-sheen products or non-slip additives for stones that will be walked on.
Sealing Too Soon
If paint has not fully dried, sealer can trap moisture or solvents underneath. Follow the label and give the coating time.
Color Ideas for Concrete Stepping Stones
Color changes the mood of a garden path quickly. Soft neutrals like taupe, warm gray, cream, and sand blend into natural landscaping. Black, charcoal, and white create a modern look, especially with gravel, ornamental grasses, and minimalist planters. Greens and browns disappear into the garden, while terracotta and clay tones add warmth.
For cottage gardens, try soft blue, sage green, lavender, butter yellow, or faded coral. For children’s gardens, go playful with rainbow stones, alphabet letters, animal tracks, or glow-style stars. For a more upscale look, use stencils in two related colors, such as charcoal over light gray or white over sandstone beige.
One practical tip: very light colors show mud, and very dark colors can get hot in full sun. Mid-tone colors are forgiving, handsome, and less dramatic about footprints.
Paint vs. Stain: Which Is Better?
Paint and stain both work on concrete, but they create different effects. Paint sits on the surface and provides opaque color. It can cover discoloration, patch marks, and old stains. It is ideal when you want bold designs, stencils, or complete color transformation.
Concrete stain penetrates into porous concrete and usually creates a more natural, translucent effect. It does not hide flaws as well as paint, but it can wear more gracefully because it becomes part of the surface rather than forming a film on top. For stepping stones, paint is best for decorative designs, while stain is best for earthy, stone-like color.
How Long Will Painted Stepping Stones Last?
With careful prep, quality outdoor concrete paint, and a compatible sealer, painted concrete stepping stones can look good for several seasons. Longevity depends on climate, drainage, sun exposure, foot traffic, product quality, and how well the surface was prepared. Stones in a shaded, damp area may wear faster because moisture lingers. Stones in full sun may fade sooner. Stones on a main walkway will need touch-ups earlier than decorative stones near a flower bed.
The best mindset is maintenance, not immortality. Outdoor paint lives a hardworking life. Clean the stones, reseal when needed, and touch up chips before water gets under the coating. That little bit of care can keep your garden path looking intentional instead of abandoned.
Real-World Experience: What I’ve Learned from Painting Concrete Stepping Stones
The first thing experience teaches you about painting concrete stepping stones is that concrete is honest. It reveals every shortcut. If you rush the cleaning, the paint will find the dusty spot. If you paint while the stone is damp, moisture will announce itself later with peeling. If you apply one heroic, gloopy coat because you are tired and dinner is calling, the finish will dry like a pancake with commitment issues.
One of the most useful lessons is to paint a test stone before doing the whole path. Colors look different outdoors than they do on a paint card. A soft cream can look bright white in full sun. A peaceful green can disappear into the lawn. A stylish black can look fantastic near gravel but too harsh beside pastel flowers. Testing one stone lets you see the color in morning light, afternoon sun, and evening shade before you turn twelve stepping stones into a permanent opinion.
Another practical lesson: elevate the stones while painting. Setting each stone on small scrap wood blocks makes it easier to coat the edges without sticking the stone to cardboard or grass. It also helps airflow. If you paint directly on a flat drop cloth, the bottom edge may stay tacky longer, and you may accidentally peel paint when you lift it. The stones are heavy, the paint is delicate, and gravity is not interested in your feelings.
Stencils are wonderful, but they reward restraint. The best stencil results usually come from a nearly dry brush and several light passes. When the brush is overloaded, paint sneaks under the stencil and blurs the design. A little imperfection looks handmade and charming; too much bleeding looks like the stencil saw a ghost and fainted. Painter’s tape helps, but patience helps more.
Sealing is where many DIYers get nervous, because the stones already look finished. It feels tempting to stop. Don’t. Outdoor painted concrete needs that protective topcoat, especially if the stones are walked on. The key is to choose a sealer that matches the paint and the purpose. A low-sheen, exterior-rated concrete sealer is usually more practical than a high-gloss finish. Gloss may look dramatic at first, but it can highlight scratches and may become slick when wet.
Placement matters too. Painted stepping stones last longer when they are not sitting in puddles. Before reinstalling them, check the ground. If a stone rests in a low spot where water collects, improve drainage with a shallow base of sand or gravel. A level, stable stone is safer to walk on and gentler on the paint. Wobbly stones flex slightly underfoot, and coatings do not love that.
Finally, save a small container of each paint color. Label it with the project date and where you used it. Future touch-ups are much easier when you are not standing in a paint aisle trying to remember whether the color was “Warm Pebble,” “Toasted Pebble,” or “Pebble That Went to Design School.” A quick touch-up once or twice a year can keep the whole path looking fresh with very little effort.
Conclusion
Painting concrete stepping stones is one of the simplest ways to refresh a garden path, patio edge, side yard, or backyard walkway. The project is affordable, creative, and beginner-friendly, but it does demand respect for the basics: clean the concrete, repair damage, let everything dry, use outdoor concrete paint, apply thin coats, add slip resistance when needed, and seal the finished surface.
The reward is a custom path that fits your home instead of looking like it arrived with a municipal sidewalk permit. You can go subtle with stone-inspired neutrals, bold with bright garden colors, elegant with stencils, or playful with hand-painted details. With the right preparation and maintenance, your painted stepping stones can bring color, structure, and personality to your outdoor space season after season.
Note: Always follow the instructions on your specific primer, paint, patching compound, and sealer. Product formulas vary, and the label is the bossy little instruction manual that keeps your project from becoming an outdoor peeling experiment.