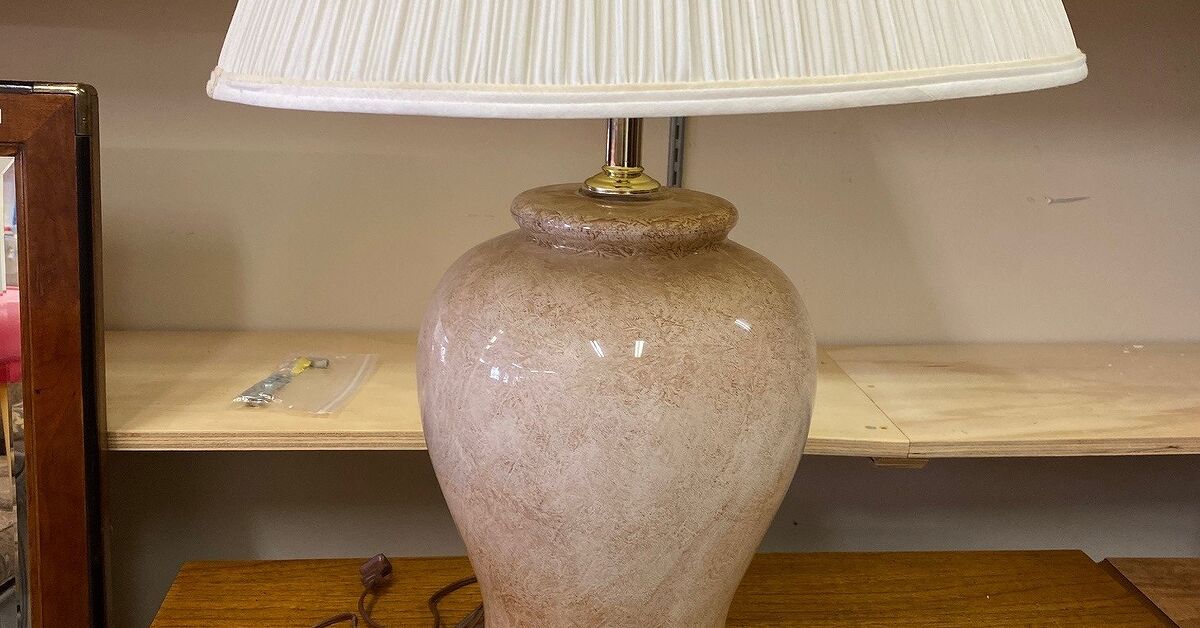
An old lamp can be a lot like an old haircut: technically functional, but not doing the room any favors. Fortunately, you do not need to replace a perfectly good light fixture just because its brass finish belongs in another decade. With basic supplies, careful preparation, and a little patience, you can transform a dated lamp into a stylish accent piece for a fraction of the cost of buying a new one.
This guide explains how to paint a lamp in six easy steps, whether the base is made from metal, wood, ceramic, glass, plastic, or resin. You will learn how to select the right paint, prepare the surface, prevent drips, protect the electrical parts, and give the finish enough time to cure properly.
The project is beginner-friendly, but preparation matters. Spray paint may appear magical, yet even magic gets grumpy when applied over dust, grease, rust, or glossy surfaces. Spend a little more time preparing the lamp, and you will spend much less time wondering why your beautiful new finish is peeling off like a bad sunburn.
What You Need to Paint a Lamp
Gather your supplies before starting so you are not wandering through the garage with wet paint on your gloves, searching for masking tape that somehow disappeared in 2019.
- A lamp with undamaged wiring and electrical components
- Drop cloth, cardboard, or plastic sheeting
- Microfiber cloths or lint-free rags
- Mild dish soap or an appropriate degreasing cleaner
- Fine-grit sandpaper, generally 180 to 220 grit
- Painter’s tape
- Plastic bags, foil, or paper for masking
- Primer compatible with the lamp material
- Spray paint or brush-on paint designed for that surface
- Disposable gloves
- Protective eyewear
- A respirator or mask suitable for the product being used
- Optional clear protective topcoat
Always read the instructions and safety warnings on the paint can. Drying times, recoating windows, suitable temperatures, and ventilation requirements vary by product. The label outranks advice from the internet, your neighbor, and your uncle who once painted a motorcycle in his kitchen.
Before You Begin: Identify the Lamp Material
The best paint for a lamp depends on what the lamp is made from. A coating that adheres beautifully to wood may slide off smooth glass or flexible plastic. Inspect the base carefully before purchasing paint.
Metal
Steel, iron, aluminum, brass, and other metal lamp bases are excellent candidates for spray paint. Remove grease, loose paint, oxidation, and rust before applying a compatible metal primer. Bare or heavily rusted metal generally benefits from priming, while some modern all-in-one coatings are designed for direct application to properly prepared surfaces.
Wood
Wooden lamps can be painted with furniture paint, acrylic enamel, chalk-style paint, or suitable spray paint. Sand glossy finishes and prime bare wood, patched areas, or woods that may release tannins through the new color.
Ceramic or Glass
Smooth ceramic and glass require especially thorough cleaning and a coating labeled for slick, nonporous surfaces. A bonding primer can improve adhesion. Ordinary wall paint is not the correct choice unless you enjoy watching paint detach in decorative sheets.
Plastic or Resin
Choose paint specifically approved for plastic or multiple surfaces. Test an inconspicuous area first because certain solvents can soften, wrinkle, or damage some plastics.
Fabric Lampshades
Painting a lampshade is a separate project from painting the base. Water-based acrylic paint and products designed for fabric shades are common options, but thick applications can make the material stiff and reduce the amount of light passing through it. The shade must be completely dry and cured before it is returned to the lamp.
How to Paint a Lamp in 6 Easy Steps
Step 1: Unplug and Disassemble the Lamp
Unplug the lamp before cleaning, sanding, masking, or painting it. Remove the light bulb, shade, harp, finial, and any decorative parts that can be detached without disturbing the wiring.
Do not paint a lamp that has a frayed cord, cracked socket, loose switch, exposed wire, scorch marks, or other electrical damage. Repair or replace damaged components before using the lamp again. Unplugging the lamp and checking its condition are not optional formalities; damaged sockets and wiring can create shock, overheating, and fire hazards.
If the socket or electrical assembly cannot be removed safely, leave it in place and mask it thoroughly. Do not dismantle wired components unless you understand lamp wiring and can reassemble them correctly. When in doubt, take the lamp to a qualified repair professional.
Move the lamp to a well-ventilated work area. Outdoors is often best for spray painting, provided the weather is dry and calm. A garage with the door fully open may also work, but protect nearby objects from overspray. Spray mist possesses an impressive ability to discover cars, bicycles, windows, and every other object you did not cover.
Step 2: Clean and Degrease the Surface
Paint needs direct contact with the surface. Dust, hand oils, furniture polish, candle residue, nicotine, cooking grease, and cleaning-product buildup can interfere with adhesion.
Start by wiping away loose dust. Wash the base with mild dish soap and water when appropriate for the material, using a damp cloth rather than soaking the lamp. For stubborn oil on metal, use a compatible degreaser according to its directions. Remove any cleaner residue and let the lamp dry completely.
Pay special attention to grooves, seams, feet, handles, and decorative details. Cotton swabs or a soft toothbrush can reach tight spaces. Manufacturers consistently emphasize removing contamination before painting because grease, dirt, oil, loose coatings, and residue can cause adhesion failure.
Do not assume a thrift-store lamp is clean simply because it looks clean. Decorative lamps are frequently touched, dusted with polishing products, and displayed near scented candles. That invisible film can be the tiny villain responsible for a large peeling problem.
Step 3: Sand, Repair, and Remove Loose Finish
Once the lamp is clean and dry, lightly sand glossy or previously painted surfaces. The purpose is usually not to strip the lamp to bare material. You are creating a uniformly dull texture that gives the primer or paint something to grip.
For many metal and wooden bases, 180- to 220-grit sandpaper works well. Use light pressure around edges and raised details, where aggressive sanding can flatten decorative features. A flexible sanding sponge is useful for curves.
Remove flaking paint and loose rust with sandpaper or a small wire brush. Feather the edges between intact paint and bare areas so they do not remain visible beneath the new finish. Fill dents, chips, or deep scratches with a repair product suitable for the lamp material, allow it to harden, and sand it smooth.
After sanding, wipe away every trace of dust with a clean, slightly damp cloth or tack cloth approved for the coating. Let the surface dry again. A clean, dry, dull surface offers significantly better adhesion than a glossy one, especially when painting over an existing finish.
If the lamp is an antique or has a very old painted coating, avoid aggressive sanding until you have considered whether the finish may contain lead. Follow current lead-safe practices and local regulations when disturbing questionable old paint.
Step 4: Mask the Electrical Components and Apply Primer
Cover everything that should remain paint-free. Use painter’s tape around the socket, switch, plug, cord entry point, threaded rods, labels, and moving joints. Wrap the cord in a plastic bag or foil and secure the covering with tape.
Do not spray paint into the socket, over the switch mechanism, onto plug prongs, or inside ventilation openings. Keep paint away from threaded areas where buildup could prevent parts from fitting together correctly.
Place the lamp on a piece of cardboard so you can rotate the entire platform without touching the freshly coated base. If practical, elevate the lamp slightly on small blocks or disposable cups to reach the lower edge.
Apply primer when recommended for the material or paint system. Primer is particularly helpful on:
- Bare metal
- Rusted or repaired areas
- Glass and glazed ceramic
- Very glossy surfaces
- Raw or patched wood
- Dark surfaces being changed to a pale color
- Surfaces with uneven porosity
Shake aerosol primer for the amount of time specified on the label. Hold the can at the recommended distance and begin spraying just before the stream reaches the lamp. Sweep smoothly across the surface, releasing the nozzle after passing the opposite edge.
Apply one or more light, even coats rather than one heavy coat. Primer that is too thick can drip, wrinkle, or hide fine details. Use a primer formulated for the lamp’s material; metal, plastic, glass, ceramic, and wood do not always require the same chemistry.
Step 5: Paint the Lamp With Thin, Even Coats
Once the primer is ready for topcoating, apply the paint using the same controlled sweeping motion. Several thin coats produce a smoother, more durable finish than one enthusiastic blast.
Keep the aerosol can moving. Starting or stopping directly over the lamp can create concentrated wet spots. Slightly overlap each pass, and rotate the cardboard platform as you work. Spray detailed areas from different angles, but avoid flooding recesses.
Follow the manufacturer’s instructions for spraying distance and recoating time. Depending on the product, recoating too soon or waiting beyond a specified window can cause wrinkling. Do not improvise because the surface “feels kind of dry.” Paint chemistry is not persuaded by optimism.
Common finishes include:
- Matte: Soft and contemporary, but more likely to show oily fingerprints.
- Satin: A versatile low-sheen finish that hides minor imperfections.
- Semi-gloss: Easier to wipe clean and visually sharper.
- Gloss: Dramatic and reflective, although it highlights dents and uneven preparation.
- Metallic: Useful for creating brass, copper, bronze, gold, or brushed-metal effects.
- Textured: Helpful for disguising minor flaws or creating a stone-like appearance.
Avoid spraying too close to the surface, which can cause pooling and runs. Direct sunlight, strong wind, high humidity, low temperatures, and extreme heat can also affect application and drying. Use the temperature and humidity range printed on the product.
If you notice a drip, resist the urge to wipe it immediately. Let the coating dry as directed, sand the defect smooth, remove the dust, and apply another light coat. Trying to perform wet-paint surgery usually converts one drip into a larger abstract artwork.
Step 6: Let the Paint Cure and Reassemble the Lamp
Drying and curing are not the same thing. Paint may feel dry to the touch while remaining soft underneath. Reassembling the lamp too soon can leave fingerprints, tape marks, dents, scratches, or parts permanently bonded to the new coating.
Allow the lamp to dry and cure for the full period stated by the manufacturer. Environmental conditions affect that timing. Cool temperatures, stagnant air, and high humidity can slow the process. Gentle air circulation may help, but avoid using intense heat unless the paint manufacturer specifically permits it.
After curing, remove the masking tape carefully. Pull it back slowly rather than yanking it upward. If paint has bridged across an edge, lightly score the line with a sharp craft knife before removing the tape.
Reinstall the harp, shade, finial, and bulb. Use a bulb type and wattage permitted by the lamp manufacturer. Make sure the socket, switch, cord, and plug remain clean and operate correctly before returning the lamp to service.
Should You Apply a Clear Topcoat?
A clear topcoat is optional. It may add protection to frequently handled lamps, high-gloss finishes, decorative effects, and metallic paint. However, it can also alter the color or sheen. Some clear coats make metallic finishes look duller, darker, or less realistic.
Choose a topcoat compatible with the paint underneath. Whenever possible, stay within the same manufacturer’s coating system. Test the combination on scrap material first, especially when using specialty finishes.
Apply the clear coating only after the color coat has reached the stage specified by the manufacturer. As with paint, use thin applications. More is not automatically better; sometimes more is simply stickier.
Choosing the Best Paint for Different Lamp Surfaces
Best Paint for a Metal Lamp
Use a metal-compatible enamel, multi-surface spray paint, or paint-and-primer product. Remove rust and oxidation first. For bare, lightly rusted, or previously painted metal, a suitable metal primer can improve adhesion and corrosion resistance.
Best Paint for a Wooden Lamp
Acrylic enamel, furniture paint, chalk-style paint, and many all-purpose spray paints can work on wood. Prime raw wood and stains that may bleed. Brush-on paint creates a handmade appearance, while spray paint delivers a more uniform finish around curves and carved details.
Best Paint for a Ceramic or Glass Lamp
Use paint labeled for glass, ceramic, or slick surfaces. A bonding primer is often the safest route for long-term durability. Do not use oven-curing craft paint on an assembled electrical lamp unless the product explicitly permits that application; your table lamp should not become tonight’s casserole.
Best Paint for a Plastic Lamp
Select a coating that lists plastic as an approved substrate. Clean gently, lightly scuff when recommended, and test first. Some plastics contain additives that make adhesion difficult, while certain solvents may damage the surface.
Common Lamp-Painting Mistakes to Avoid
Skipping the Cleaning Stage
Painting over dust or furniture polish is one of the fastest ways to create peeling paint. Cleaning is not glamorous, but neither is repainting the same lamp next weekend.
Using the Wrong Primer
A general-purpose primer may not bond properly to glass or certain plastics. Check both the primer and paint labels for the actual lamp material.
Applying One Heavy Coat
Heavy coats create drips, sags, bubbles, soft spots, and blocked details. Thin coats require more passes but usually save time overall.
Painting the Socket or Switch
Paint must not interfere with electrical contacts, moving switches, threaded connections, or ventilation. Mask these areas thoroughly.
Working Without Adequate Ventilation
Aerosol coatings can release paint mist and solvent vapors. Work outdoors or establish effective cross-ventilation, keep ignition sources away, and follow the personal-protection instructions on the label. The EPA and CPSC emphasize ventilation and source control as important ways to reduce exposure to indoor painting pollutants.
Handling the Lamp Before It Cures
Touch-dry paint can still be vulnerable. Allow sufficient curing time before installing hardware, tightening parts, or placing the lamp on a finished table.
Real-World Experiences and Lessons From Painting Old Lamps
Painting a lamp sounds like a tiny project, and technically it is. Yet small objects can be surprisingly unforgiving. A wall offers several square feet in which minor flaws can disappear. A lamp sits at eye level under its own light, proudly illuminating every drip you hoped nobody would notice.
One of the most useful lessons is that preparation usually takes longer than painting. On a typical thrift-store metal lamp, the actual spraying may require only a few minutes per coat. Cleaning old polish from the grooves, sanding chipped edges, masking the socket, and waiting for each layer to dry can occupy most of the project. That is normal. Rushing through preparation to reach the “fun part” often creates a finish that looks good for three days and then chips when the switch is touched.
Color choice also looks different on a three-dimensional lamp than it does on a paint cap. A bright metallic gold can become overwhelming on a large, heavily detailed base. A muted brass, satin bronze, matte black, warm white, or deep green may look more convincing in an actual room. Testing the paint on a disposable cup or piece of cardboard helps reveal its true color and sheen. Place the sample near the furniture and observe it during daylight and at night.
Another lesson is to paint the bottom edge early. Beginners often place the lamp directly on cardboard and beautifully coat every visible area, only to discover a thin ring of the original color around the base. Elevating the lamp slightly allows the spray to reach the lower edge. The underside usually does not need a decorative finish, but the visible perimeter does.
Patience between coats makes an enormous difference. When the first coat looks patchy, the natural reaction is to keep spraying until the color becomes solid. That is precisely when runs begin. The first coat does not need to hide everything. Think of it as an introduction rather than a marriage proposal. A light foundation followed by two or three controlled coats creates a much smoother result.
Metallic finishes require extra restraint. Spraying from inconsistent distances can create alternating shiny and dull bands. The most realistic metallic appearance usually comes from steady passes applied in the same direction during the final coat. Excessive clear coating may reduce the metallic effect, so testing is especially important.
Masking can produce its own surprise. If tape remains on the lamp throughout a long curing period, the edge may become difficult to remove cleanly. On the other hand, removing it while the paint is extremely wet may cause smearing. Following the coating instructions and scoring any bridged paint produces a cleaner boundary.
Finally, not every lamp should be painted. Valuable antiques, designer pieces, collectible finishes, and lamps with damaged electrical systems deserve evaluation before alteration. A $12 thrift-store lamp is a cheerful candidate for experimentation. A signed mid-century lamp inherited from a grandparent may deserve professional restoration and a quiet conversation with the rest of the family.
The most satisfying lamp makeovers are not necessarily the most complicated. A plain satin color, careful preparation, and a new shade can create a more polished result than five decorative techniques fighting for attention. Let the shape of the lamp guide the design. Ornate bases often look best in restrained colors, while simple geometric lamps can carry bolder finishes.
Conclusion
Learning how to paint a lamp is an affordable way to update a bedroom, office, entryway, or living room without replacing a functional fixture. The basic process is straightforward: unplug and disassemble the lamp, clean it thoroughly, sand the surface, mask and prime it, apply several thin coats, and allow the finish to cure before reassembly.
The secret is not an expensive paint can or a mysterious professional trick. It is patient surface preparation. Match the coating to the lamp material, protect every electrical component, follow the product label, and resist the temptation to apply one enormous coat. Your lamp may still be old underneath, but after a successful makeover, it will have the confidence of something that just arrived from a designer showroom.
Note: Painting changes only the decorative exterior of a lamp. It does not repair unsafe wiring, damaged sockets, overheating components, or structural defects. Stop using any lamp that shows signs of electrical damage and have it repaired or replaced before reconnecting it to power.