If your front yard feels a little too polite for Halloween, it may be time to invite a few witches over. Not real witches, of course. Real witches have schedules, opinions about herbs, and probably better things to do than stand in your mulch bed all October. We are talking about DIY yard witches: tall, spooky, budget-friendly outdoor Halloween decorations made from tomato cages, fabric, hats, brooms, lights, and a suspicious amount of hot glue.
The beauty of making yard witches is that they look impressive without requiring professional prop-building skills. You do not need a workshop, a fog machine the size of a suitcase, or a degree in haunted architecture. With a few inexpensive materials and a little creativity, you can build a whole coven for your lawn, porch, driveway, garden path, or front steps. They can be cute, creepy, elegant, dramatic, or so delightfully weird that the neighbors slow down just to figure out what is happening near your hydrangeas.
This guide explains how to make yard witches step by step, including the classic tomato cage witch, a twig-and-light witch, an upside-down planter witch, and styling ideas that turn one lonely witch into a full Halloween yard display. You will also find safety tips, weatherproofing advice, and real-world experience from actually putting these decorations outside where wind, rain, squirrels, and curious children all have strong opinions.
Why DIY Yard Witches Are So Popular
Outdoor Halloween decorations have become bigger, brighter, and more theatrical every year, but yard witches remain popular because they hit the perfect sweet spot. They are affordable, customizable, easy to store, and instantly recognizable. A witch hat and a dark cloak can do a lot of storytelling before you even add a face.
Unlike giant inflatables or complicated animatronics, homemade yard witches can be built with ordinary supplies: tomato cages, black tablecloths, pool noodles, garden stakes, plastic cauldrons, battery lights, and thrift-store accessories. They also scale beautifully. One witch is a decoration. Three witches are a scene. Five witches gathered around a glowing cauldron is suddenly a neighborhood landmark and possibly a local traffic hazard because everyone wants to look.
Another advantage is flexibility. A tomato cage creates a stable cone-shaped body. A pool noodle can become arms. A foam head adds personality. A broom creates instant witch energy. Add purple lights and your witch becomes magical. Add green hands and a crooked nose and she becomes cartoonish. Add no face at all and she becomes mysterious, which is a nice way of saying “I ran out of time but it looks intentional.”
Materials You Need To Make Yard Witches
Before you start, gather your supplies. You can make one witch or build several at once. If you are creating a coven, buy materials in multiples so the witches look related but not identical. Think of them as spooky cousins who share a dramatic fashion sense.
Basic Supplies for One Tomato Cage Yard Witch
- One tomato cage, preferably 42 to 54 inches tall
- One foam mannequin head, foam ball, plastic pumpkin, or milk jug for the head
- One witch hat
- Two black plastic tablecloths, black fabric, landscape fabric, or trash bags
- One pool noodle or flexible foam tube for arms
- Zip ties, twine, floral wire, or black string
- Garden stakes or landscape pins
- Battery-operated string lights or outdoor-rated LED lights
- Hot glue, duct tape, or weather-resistant adhesive
- Optional: gloves, scarf, ribbon, fake hair, broom, cauldron, faux crow, or cheesecloth
If you want your yard witches to last more than one season, choose stronger materials. Fabric holds up better than thin plastic tablecloths. Outdoor-rated lights are safer than indoor lights. A sturdy garden stake keeps your witch from flying into the neighbor’s yard during the first windy night, which is funny once but not ideal as an annual tradition.
Step-by-Step: How To Make a Tomato Cage Yard Witch
The tomato cage witch is the easiest and most reliable version. It stands well, has a natural dress shape, and can be made in less than an afternoon. It is also forgiving. If the fabric hangs unevenly, congratulations: your witch now has movement.
Step 1: Flip the Tomato Cage Upside Down
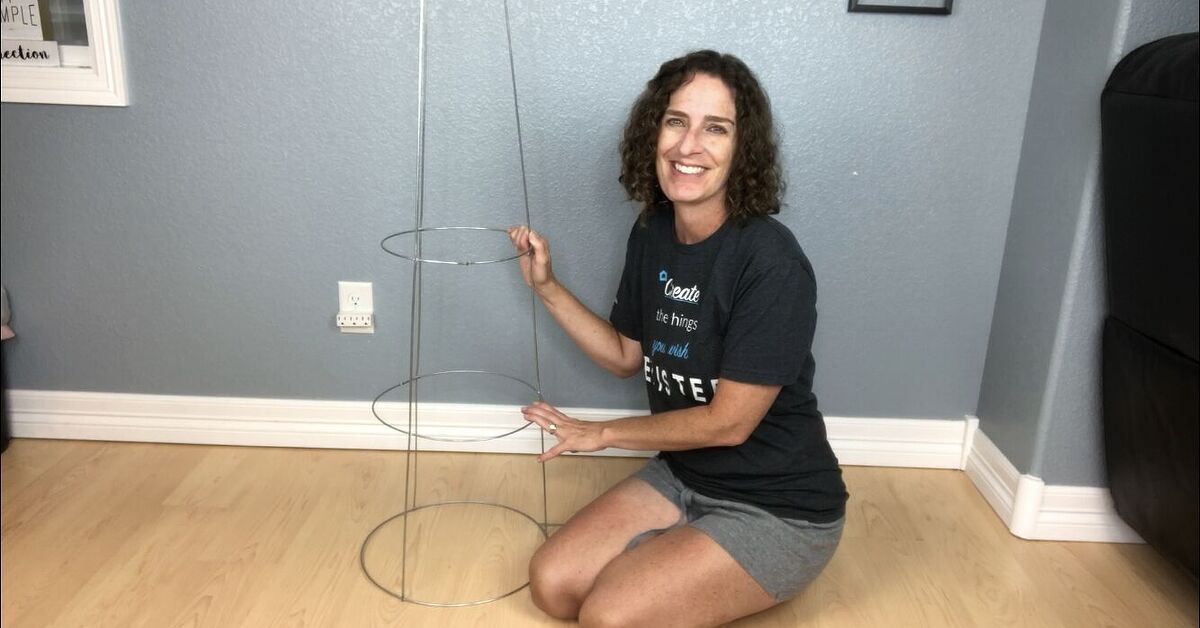
Place the tomato cage upside down so the large circular ring sits on the ground and the pointed legs face upward. The wide base gives the witch balance, while the pointed top gives you a place to attach the head. Gather the top prongs together and secure them with zip ties, twine, or floral wire. Make sure the frame feels tight and stable before moving on.
Step 2: Add the Head
Press a foam mannequin head or foam ball onto the top prongs. If you are using a plastic pumpkin or milk jug, cut a small opening in the bottom and slide it over the prongs. Secure it with tape, wire, or glue. Do not worry if the head tilts slightly. A crooked witch head can look wonderfully suspicious, like she just heard gossip from the mailbox.
Step 3: Create Arms With a Pool Noodle
Slide a pool noodle through the upper part of the tomato cage to form arms. If the noodle is too long, trim it with a utility knife. Bend the ends slightly forward so your witch looks like she is reaching toward a cauldron, holding a broom, or dramatically explaining why the candy bowl is already empty.
For more realistic arms, cut the pool noodle in half and attach each section separately with zip ties. Add black gloves to the ends and stuff them lightly with newspaper, plastic bags, or fabric scraps. Green gloves make the witch playful; black gloves make her creepier; striped gloves make her look like she works part-time in a haunted candy shop.
Step 4: Drape the Dress and Cloak
Drape one black tablecloth or piece of fabric from front to back over the head and body. Drape the second piece from side to side so the tomato cage is covered all around. Adjust the fabric until it creates a full skirt shape. Tie the material loosely around the neck area with twine, ribbon, or black string.
Do not pull the fabric too tight. Yard witches look better when their clothing has flow and shadow. Cut ragged edges along the bottom for a tattered effect. If you want extra texture, layer cheesecloth, black mesh, or strips of old fabric over the cloak. The goal is “spooky enchantress,” not “perfectly ironed conference attendee.”
Step 5: Add the Witch Hat
Place the witch hat on the head and secure it with hot glue, wire, or a few hidden stitches. If your yard gets windy, do not trust gravity. Gravity is not your friend in October. Run floral wire through the brim and attach it to the tomato cage or head underneath the fabric.
To make each witch unique, add a patterned scarf, ribbon, faux flowers, feathers, tiny spiders, or a buckle made from cardboard and metallic paint. A floppy hat creates a whimsical look. A tall pointed hat creates a classic silhouette. A damaged hat from the discount bin creates instant backstory.
Step 6: Add Lights
Wrap battery-operated string lights around the inside of the tomato cage before closing the fabric completely. Purple, green, orange, or warm white lights all work. Battery lights are easiest because you do not need to run cords across the lawn. If you use plug-in lights, choose outdoor-rated products and keep cords away from walkways.
Lighting makes a huge difference. During the day, your witch is a fun craft project. At night, she becomes an actual Halloween decoration. Place the lights low in the body for a glowing skirt, around the head for a spooky face effect, or inside a nearby cauldron for a magical gathering point.
Step 7: Stake the Witch Into the Yard
Move the witch to the yard and secure the tomato cage base with landscape pins, tent stakes, or garden stakes. If the ground is soft, push stakes at an angle for stronger hold. If you are placing the witch on a porch, weigh down the base with bricks, sandbags, or a planter hidden under the skirt.
This step is not optional. A lightweight yard witch can become a flying yard witch in bad weather, which sounds seasonal but is mostly annoying.
Alternative Yard Witch Ideas
Once you understand the basic structure, you can make different types of yard witches. Mixing styles makes your Halloween display more interesting and helps avoid the “copy-paste coven” look.
The Twig Witch
A twig witch uses branches, sticks, and string lights to create a rustic, woodland look. Build a cone shape from long branches, tie them together at the top, and wrap the structure with dark fabric or mesh. Add a witch hat and place lights inside the frame. This version looks especially good near trees, garden beds, or a front walkway.
For a dramatic effect, let some branches stick out like wild arms. The twig witch should look as if she assembled herself from the forest and then came to judge your pumpkin-carving skills.
The Upside-Down Witch
The upside-down witch is more funny than frightening. Use a large planter, two pool noodles, striped stockings, and a pair of old boots. Place the pool noodles into the planter so they stick upward like legs. Cover them with stockings, add boots, and surround the top with leaves, moss, or black fabric. The result looks like a witch crash-landed into your flowerpot.
This is a great option for small porches because it does not require much space. It also gets laughs from kids and adults, especially if you add a sign that says “Landing Lessons Needed.”
The Cauldron Coven
For the most eye-catching display, make three tomato cage witches and arrange them around a plastic cauldron. Fill the cauldron with battery lights, green tissue paper, white craft fluff, or plastic ornaments that look like bubbles. Place the witches so their arms point inward, as if they are brewing something extremely questionable.
Add brooms, faux crows, pumpkins, lanterns, and a “Broom Parking” sign to complete the scene. This layout works well in a front yard because it reads clearly from the street.
How To Style Yard Witches Like a Pro
The secret to a great Halloween yard display is not buying more stuff. It is arranging what you have so it tells a story. A single witch standing alone can look random. A witch beside a broom, a cauldron, and a glowing lantern suddenly has purpose. She is not just standing there; she is clearly up to something.
Use odd numbers when arranging witches. Groups of three or five usually look more natural than groups of two or four. Vary their heights by using different tomato cage sizes, planters, or ground levels. Face them slightly toward one another rather than lining them up like they are waiting at the DMV.
Color also matters. Black is the base, but accents bring the display to life. Purple suggests magic. Green adds monster energy. Orange ties the witches to pumpkins and fall leaves. Silver looks moonlit and elegant. A small amount of color goes a long way, especially at night.
Weatherproofing and Outdoor Safety Tips
Because yard witches live outside, they need to survive weather. Use outdoor-safe lights whenever electricity is involved. Avoid damaged cords, cracked sockets, overloaded extension cords, and cords crossing walkways where trick-or-treaters may trip. Battery-operated LED lights are often the simplest choice for homemade decorations.
If your display includes plug-in lights, keep connections raised off the ground and protected from pooling water. Do not staple or nail through cords. Use clips, ties, or hooks that do not damage wiring. If your outlet is exposed to the weather, use appropriate outdoor covers and follow the product instructions.
Wind is the other big villain. Secure witches with stakes, pins, or hidden weights. If a storm is coming, bring lightweight props inside or move them to a sheltered porch. Thin plastic tablecloths can tear in rough weather, so consider fabric, landscape cloth, or reusable outdoor material if you want a longer-lasting project.
For wildlife-friendly Halloween decorating, skip fake spider webs outdoors, especially near bushes and trees. They can trap birds, bats, and small animals. Use natural materials such as branches, leaves, straw, gourds, and untreated pumpkins when possible. Set bright decorative lights on timers so your yard does not glow all night like a tiny haunted airport runway.
Common Mistakes To Avoid
The first common mistake is making the witch too top-heavy. A large head, heavy hat, and flimsy base are a bad combination. Keep the top light and the bottom secure. If you want a big dramatic hat, wire it down and add weight near the base.
The second mistake is using too little fabric. A tomato cage needs enough coverage to hide the frame and create a full silhouette. If you can see the metal rings through the dress, add another layer or use darker material.
The third mistake is forgetting how the witch looks at night. Halloween decorations are often seen after sunset, so test your display in the dark. You may discover that the face is invisible, the lights are too dim, or the witch is accidentally staring directly into your neighbor’s kitchen window. Adjust accordingly.
The fourth mistake is putting decorations where people walk. Keep witches, cords, stakes, and cauldrons away from steps, narrow paths, and driveways. A Halloween display should scare people emotionally, not physically launch them into the shrubbery.
Budget-Friendly Tips for Making a Whole Coven
If you want several yard witches without spending much, shop creatively. Tomato cages are often cheaper at the end of gardening season. Thrift stores are great for scarves, hats, shawls, belts, and old boots. Dollar stores often carry plastic tablecloths, battery lights, skeleton hands, faux spiders, and small cauldrons.
You can also reuse materials from year to year. Store hats flat or stuffed with newspaper so they keep their shape. Fold fabric instead of crumpling it. Remove batteries from lights before storing them. Keep small accessories in labeled bags so next October you are not digging through a bin muttering, “Where are the witch hands?” like a person with very specific problems.
For a high-end look on a low budget, focus on silhouettes. From the street, people notice shape, height, light, and movement before they notice tiny details. A tall black figure with a pointed hat and glowing center will look impressive even if the body is basically a tomato cage wearing a tablecloth. Halloween is generous that way.
Real-World Experiences: What I Learned Making Yard Witches
The first time you make yard witches, you may feel wildly confident for about ten minutes. The tomato cage stands up, the hat fits, the fabric drapes nicely, and you think, “Why doesn’t everyone do this?” Then a breeze arrives, the hat tilts sideways, the cloak flips up, and your elegant witch suddenly looks like she is losing a fight with invisible laundry. This is when you learn the first rule of outdoor Halloween decorating: secure everything twice.
In practice, garden stakes are the difference between a display that lasts all month and a decoration that migrates. Pushing stakes straight down works in calm weather, but angled stakes hold better. I have also learned to hide a brick or two under the fabric when placing witches on a porch. Nobody sees the weight, but the witch stands with the confidence of someone who owns the property.
Lighting is another lesson. It is tempting to wrap lights randomly and hope for magic, but placement matters. Lights around the lower body make the witch glow like a lantern. Lights near the head create a spooky face effect, especially if the head is a pale foam form or translucent plastic jug. A few lights inside a cauldron can make the entire display feel intentional. The best moment is always dusk, when the yard shifts from “craft project” to “small neighborhood legend.”
Fabric choice matters more than expected. Thin plastic tablecloths are cheap and easy, but they can flap loudly in wind and tear if they catch on branches. Heavier fabric hangs better and looks richer, but it costs more and may hold moisture. Landscape fabric is a practical middle ground because it is dark, lightweight, and made for outdoor use. Cheesecloth adds wonderful texture, but if you use it outside, keep it away from shrubs and low branches where animals might encounter it.
One of the most fun experiences is giving each witch a personality. A scarf under the hat makes one look fashionable. A crooked broom makes another look busy. A pair of green gloves makes one seem mischievous. A crow on the shoulder makes her look like she has a sidekick with legal authority. Kids notice these details. Adults do too, although they pretend they are just admiring your “curb appeal.”
The biggest surprise is how social these decorations become. People stop to comment. Delivery drivers smile. Neighbors ask how you made them. Children point out their favorite witch. A simple DIY yard witch can turn a regular front lawn into a seasonal conversation piece. And because the project is flexible, you can add to it every year: another witch, a bigger cauldron, a broom parking area, a few pumpkins, or a sign warning visitors that spell testing is in progress.
Making yard witches is not about perfection. In fact, the slightly messy parts usually make them better. A ragged hem, tilted hat, uneven sleeve, or strange expression gives the witch character. Halloween is the rare holiday where a craft mistake can become a design feature. If the cloak rips, she survived a storm. If the hat bends, she flew under a low branch. If the arms are uneven, she has been stirring potions all night. That is the charm of DIY Halloween decor: the story gets better when things are a little crooked.
Conclusion
Learning how to make yard witches is one of the easiest ways to create a memorable outdoor Halloween display without spending a fortune. Start with a tomato cage, add a head, drape dark fabric, secure a witch hat, include lights, and stake everything firmly into place. From there, the project becomes pure creative fun. You can make a spooky coven, a silly upside-down witch, a rustic twig witch, or a glowing cauldron scene that makes your yard feel ready for October.
The best yard witches are safe, sturdy, weather-aware, and full of personality. Use outdoor-rated or battery-operated lights, keep pathways clear, avoid wildlife hazards, and secure decorations before wind does its own decorating. Then step back at dusk, admire your handmade Halloween magic, and enjoy the fact that your lawn now looks like it has a social life after midnight.