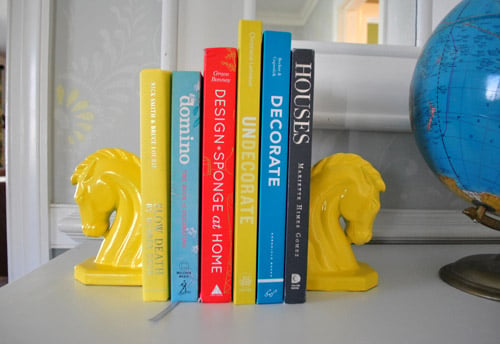
Books have an annoying little habit: the moment you arrange them beautifully on a shelf, they start leaning like a group of tired commuters waiting for the last train home. Colorful DIY bookends solve that problem while giving you an excuse to add something bright, personal, and genuinely useful to your room.
The good news is that homemade bookends do not require advanced woodworking skills, a garage full of power tools, or the ability to pronounce every type of hardwood at the lumberyard. A simple pair can be made from a few small pieces of wood, wood glue, primer, paint, and a little patience. Better yet, the project is easy to customize with geometric patterns, rainbows, terrazzo-style speckles, color blocking, or whatever combination makes your bookshelf look less like furniture and more like you.
This guide explains how to make colorful DIY bookends from start to finish, including material selection, construction, sanding, painting, stability improvements, design ideas, troubleshooting, and lessons that become obvious once you have experimented with a few sets.
Why Make Your Own Colorful Bookends?
Store-bought bookends work perfectly well, but DIY bookends give you control over the three things mass-produced accessories rarely get exactly right: size, color, and personality.
You can coordinate painted bookends with a bedroom wall, desk accessories, children’s room, home office, or living-room palette. Leftover paint from another project can become part of the design, and small wood offcuts that might otherwise collect dust can suddenly become useful bookshelf decor.
Small wooden projects are also friendly territory for beginners. The Home Depot specifically recommends starting with compact objects such as wooden boxes, trays, and frames when learning furniture-painting techniques. The same principle works beautifully for bookends: there is enough surface area to practice sanding and painting without committing your entire weekend to rescuing a six-drawer dresser.
Best Design for Simple DIY Wooden Bookends
The easiest structure is an L-shaped bookend consisting of a horizontal base and a vertical back. The books rest on the base, while the upright panel prevents them from tipping sideways.
Suggested Dimensions
For an average shelf containing novels, paperbacks, and medium-size hardcovers, try these dimensions for each bookend:
- Base: approximately 5 inches wide by 6 inches deep
- Upright: approximately 5 inches wide by 7 inches tall
- Wood thickness: about 1/2 to 3/4 inch
These dimensions are only a starting point. A row of oversized cookbooks or art books benefits from taller, deeper, and heavier bookends. A children’s bookshelf can use smaller pieces with rounded corners. Stability matters more than following a particular measurement.
Plywood is an especially practical material because it is affordable, can be sanded and painted, and is commonly used in bookshelf construction. Pine and other solid woods also work well.
Materials and Tools You Will Need
Materials
- Four pieces of wood for two L-shaped bookends
- Wood glue
- 120-, 150-, 180-, or 220-grit sandpaper
- Wood primer
- Water-based furniture paint, latex paint, or suitable craft paint
- Painter’s tape
- Clear protective topcoat, optional
- Felt or rubber furniture pads
- Wood filler, if necessary
- Small metal plates or additional wood for extra weight, optional
Tools
- Small paintbrushes or foam brushes
- Foam roller, optional
- Clamps
- Measuring tape or ruler
- Pencil
- Dust mask and eye protection for sanding
- Drop cloth or scrap cardboard
You do not need a power sander for something this small. Hand sanding is usually faster than locating the orbital sander, finding an extension cord, and discovering that the dust bag has mysteriously vanished.
How To Make Colorful DIY Bookends Step by Step
Step 1: Cut and Test-Fit the Wood
Cut two matching bases and two matching upright pieces. If you do not own a saw, many home-improvement stores can help with basic lumber cuts, or you can purchase precut craft boards.
Before opening the glue, place each upright against its base and check the angle. You want approximately 90 degrees between the two pieces. Stand a few books against the temporary structure to visualize the final height and depth.
This dry-fitting stage catches surprisingly common mistakes. Discovering that one upright is half an inch shorter is mildly irritating before gluing. Discovering it after everything has been painted in six colors is the kind of personal growth nobody requested.
Step 2: Sand the Wood
Sanding may be the least glamorous part of making colorful DIY bookends, but it has an outsized effect on the finished appearance.
This Old House notes that sanding bare wood removes small imperfections and helps paint adhere more effectively. Depending on the condition of your wood, approximately 120- to 180-grit paper can handle initial smoothing, followed by a finer grit for the finishing pass. Sand with the grain whenever practical.
Pay special attention to cut edges. They are where inexpensive boards tend to feel roughest and where a rushed DIY project most obviously announces, “Hello, I was finished at 11:47 p.m.”
After sanding, remove the dust thoroughly. Lowe’s and other finishing guides recommend wiping or vacuuming away sanding residue before primer because paint should adhere to the project surface rather than a microscopic blanket of sawdust.
Step 3: Glue the L-Shaped Pieces Together
Spread wood glue evenly along the joining edge and press the vertical panel firmly against the base. Make sure the pieces remain square while clamping them.
Wood-glue manufacturers recommend clean, dry, close-fitting surfaces and even adhesive coverage. Clamp the assembly according to the specific glue manufacturer’s instructions instead of relying on guesswork.
Some common woodworking glues require only a relatively short clamping period but need much longer to reach full cure. For example, Gorilla states that its wood glues typically require about 20 to 30 minutes of clamping and approximately 24 hours for full cure. Always follow the instructions for the exact adhesive you use.
Wipe away glue squeeze-out before it hardens. Dried adhesive can interfere with sanding, staining, or painting and is much less entertaining to remove tomorrow than it is today.
Step 4: Fill Imperfections
Once the adhesive has cured, inspect the joints and surfaces. Small dents, gaps, nail holes, or chipped edges can be filled with wood filler.
Allow the filler to dry completely, then sand it flush with the surrounding surface. Lowe’s recommends sanding repaired areas smooth before priming so flaws do not telegraph through the final paint finish.
Step 5: Apply Primer
Primer is especially worthwhile when working with bare wood, dark wood, patched surfaces, or wood that may release tannins through a light paint color.
Benjamin Moore, KILZ, Lowe’s, and other finishing authorities recommend selecting primer according to the substrate and condition of the wood. Stain-blocking formulations can be useful when painting tannin-rich or previously stained material, while a suitable multipurpose wood primer is generally appropriate for clean bare wood.
Apply a thin, even layer and allow it to dry according to the product label. If the surface feels rough after priming, lightly smooth it with fine sandpaper and remove all dust before painting.
Step 6: Choose Your Color Palette
Now we arrive at the part for which everyone tolerated sanding.
Choose three to five colors that either coordinate or intentionally clash in a fun way. A useful rule is to combine one dominant color, one supporting color, and one or two accents.
For example:
- Coral, peach, cream, and mustard for a warm retro look
- Navy, sky blue, mint, and white for a cooler modern palette
- Terracotta, dusty pink, sage, and beige for earthy decor
- Red, orange, yellow, green, and blue for rainbow bookends
- Lilac, lavender, blush, and pale yellow for playful pastel decor
Paint finishes also change the personality of the piece. Matte paint feels soft and contemporary, satin is easygoing and practical, while glossy paint makes saturated colors appear even bolder.
Step 7: Paint the Base Color
Apply the first color in thin coats rather than attempting full coverage with one heroic scoop of paint.
Home Depot recommends multiple light coats instead of heavy applications because thin layers tend to level more evenly. Lowe’s similarly advises thin, even coats and following manufacturer-specified drying and recoating times.
Water-based furniture or latex paints are convenient for indoor decorative projects because they are widely available and easy to tint. Whatever product you select, make sure it is suitable for wood and follow its ventilation, application, and drying instructions.
Step 8: Add a Colorful Pattern
Allow the base coat to dry sufficiently before applying painter’s tape or adding another color.
Color-Block Bookends
Divide the upright diagonally with painter’s tape. Paint one half coral and the other pink, for example. Remove the tape according to the paint and tape manufacturer’s recommendations for crisp lines.
Rainbow Arch Bookends
Sketch three or four nested arches in pencil. Paint each band a different color using a small artist’s brush. Slight irregularities actually make the design feel handmade rather than factory printed.
Terrazzo-Style Bookends
Paint the entire bookend a pale neutral shade, then scatter irregular little shapes across the surface in coral, blue, mustard, green, and black. Keep the shapes varied in size and orientation.
Geometric Bookends
Use painter’s tape to create triangles, stripes, semicircles, or asymmetrical blocks. Repeat at least one color on both bookends to visually connect the pair.
Ombre Bookends
Start with your strongest color near the base and gradually mix in increasing amounts of white as you move upward. Blend while the neighboring areas remain workable.
Step 9: Lightly Sand Between Coats If Needed
If a dried paint coat develops dust bumps, raised grain, or obvious brush marks, very light sanding can improve the next coat. WOOD Magazine and Rockler both discuss fine sanding between finish coats as a method of leveling surface imperfections before subsequent layers.
The key word is lightly. You are smoothing the finish, not attempting to excavate the lumber beneath it.
Step 10: Add a Protective Finish
A clear coat is optional for decorative bookends but useful if they will be handled frequently, moved around, or used in a child’s room.
Several furniture-painting guides recommend compatible clear protective coatings for frequently used painted surfaces. Always verify that your chosen topcoat is compatible with the underlying paint and follow the manufacturer’s cure-time instructions.
Step 11: Add Non-Slip Pads
Attach thin felt or rubber pads underneath each bookend. Felt protects a delicate shelf finish, while grippy rubber pads can reduce sliding.
If your book collection consists mainly of thick textbooks, encyclopedias, and cookbooks capable of doubling as defensive equipment, consider increasing the depth and weight of the base as well.
How to Make DIY Bookends More Stable
Beautiful bookends are less impressive when six novels push them across the shelf like tiny wooden curling stones.
Three factors determine stability: base depth, bookend weight, and friction against the shelf.
A longer base lets the books themselves help hold the bookend down. Added weight can also improve resistance to tipping. For especially heavy books, you can attach a thin steel plate beneath a wooden base and cover it with felt, provided all edges are safely enclosed and the construction remains flat.
Another strategy is simply scaling everything up. A 7-inch-tall bookend that behaves perfectly beside paperbacks may be overwhelmed by 13-inch art books.
Common DIY Bookend Mistakes
Skipping Sanding
Paint can exaggerate splinters, scratches, and uneven edges rather than hiding them. Proper preparation is repeatedly emphasized by furniture-painting and woodworking authorities because surface quality directly affects adhesion and appearance.
Painting Over Dust
Always remove sanding residue. Otherwise your beautiful second coat may contain the texture of a beach towel.
Applying Paint Too Thickly
Heavy coats are more likely to run, stay soft longer, and obscure crisp details. Several light coats usually produce a cleaner result than one overloaded coat. Rust-Oleum also recommends appropriate surface preparation, primer, and proper ventilation when spray-painting wood.
Rushing the Drying and Curing Process
“Dry to the touch” does not necessarily mean “ready for aggressive handling.” Lowe’s specifically cautions that a painted surface may feel dry while lower layers are still curing. Follow the manufacturer’s stated recoat and cure times.
Using Too Small a Base
A tiny footprint may look elegant in photos but can lose the argument when confronted by a dozen heavy books. Build for the books you actually own.
Creative Colorful Bookend Ideas
Once you understand the basic construction, the same L-shaped structure can support dozens of variations.
- Sunset bookends: Paint large overlapping circles in orange, coral, pink, and burgundy.
- Memphis-style bookends: Add squiggles, dots, triangles, and playful black lines over a pastel background.
- Kids’ bookends: Paint clouds, dinosaurs, fruit, rockets, flowers, or friendly monsters.
- Minimalist bookends: Use two contrasting colors divided by one clean diagonal line.
- Botanical bookends: Paint simple leaves over sage green or warm cream.
- Monogram bookends: Add initials or a short word using a stencil.
- Desk bookends: Match the colors to pencil cups, trays, storage boxes, or a desk lamp.
HGTV’s broader DIY bookshelf guidance also demonstrates how reclaimed materials and simple construction can become decorative storage features rather than purely functional objects. That is the real charm of homemade bookshelf decor: storage and decoration stop being separate jobs.
What Experience Teaches You After Making a Few Sets of DIY Bookends
The first lesson most makers discover is that construction takes less time than finishing. Cutting and gluing four pieces of wood feels wonderfully productive. Then sanding, priming, painting, drying, taping, painting again, touching up, and sealing arrive like relatives who apparently intend to stay all week.
That is not bad news. It simply means you should design the project around drying time instead of trying to finish everything in one uninterrupted session. Assemble the wood one evening, prime it the next, and add the colorful design later. The process becomes relaxing rather than a race against increasingly sticky paint.
Another practical lesson is that perfect geometric designs require less paint and more patience. Painter’s tape can create beautiful lines, but only when the underlying coat has dried enough to tolerate it. Press the edge carefully, use modest amounts of paint near the boundary, and resist repeatedly brushing across the taped line. When color does creep beneath the tape, a tiny artist’s brush usually fixes the problem faster than dramatically announcing that the entire project is ruined.
Color selection also looks different on wood than it does on a phone screen. A palette that seems beautifully balanced digitally may become overwhelmingly bright when spread across four physical surfaces. Testing colors together on a scrap board or piece of cardboard is an easy way to avoid surprises. In many successful combinations, one quieter neutral gives the brighter shades somewhere to breathe.
Then there is stability. A common beginner instinct is to focus on the upright portion because that is the decorative part everyone sees. In actual use, however, the humble horizontal base does much of the important work. If the base is too shallow or too light, making the upright thicker will not magically convince gravity to cooperate. Testing the unfinished bookends with your heaviest books before painting can reveal whether the bases need to be deeper or heavier.
You also quickly learn that smooth edges make inexpensive material look much more polished. Spending several extra minutes rounding sharp corners and refining end grain can make basic pine or plywood feel intentional. The paint finish becomes smoother, the bookends are nicer to handle, and children’s-room versions become less aggressively pointy.
Finally, DIY bookends are one of those projects where tiny imperfections often improve the finished object. Hand-painted arches do not have to be mathematically identical. Terrazzo flecks should not all match. A slightly wonky stripe can provide character. The goal is not to reproduce something that came from a factory. If factory perfection were the goal, you could simply buy bookends and spend the afternoon doing literally anything else.
The most satisfying sets usually balance careful construction with playful finishing: square joints, smooth surfaces, stable bases, and colors that are allowed to feel handmade. Once you have made one pair, it becomes easy to adjust the proportions and designs for other rooms, gifts, children’s shelves, home offices, or that suspicious pile of books currently leaning against a houseplant.
Conclusion
Learning how to make colorful DIY bookends is an approachable way to combine basic woodworking, painting, and creative home decor in one weekend-friendly project. Start with a sturdy L-shaped structure, sand the wood carefully, use primer when appropriate, build color with thin coats, and give adhesives and finishes enough time to cure.
From rainbow arches and geometric blocks to terrazzo patterns and minimalist two-tone designs, there is no single correct way to decorate homemade bookends. The best pair is simply sturdy enough for your books and colorful enough to make you happy every time you walk past the shelf.
And unlike many decorative DIY projects, these actually have a job. They hold books upright. In the world of crafts, that practically qualifies them for employee benefits.