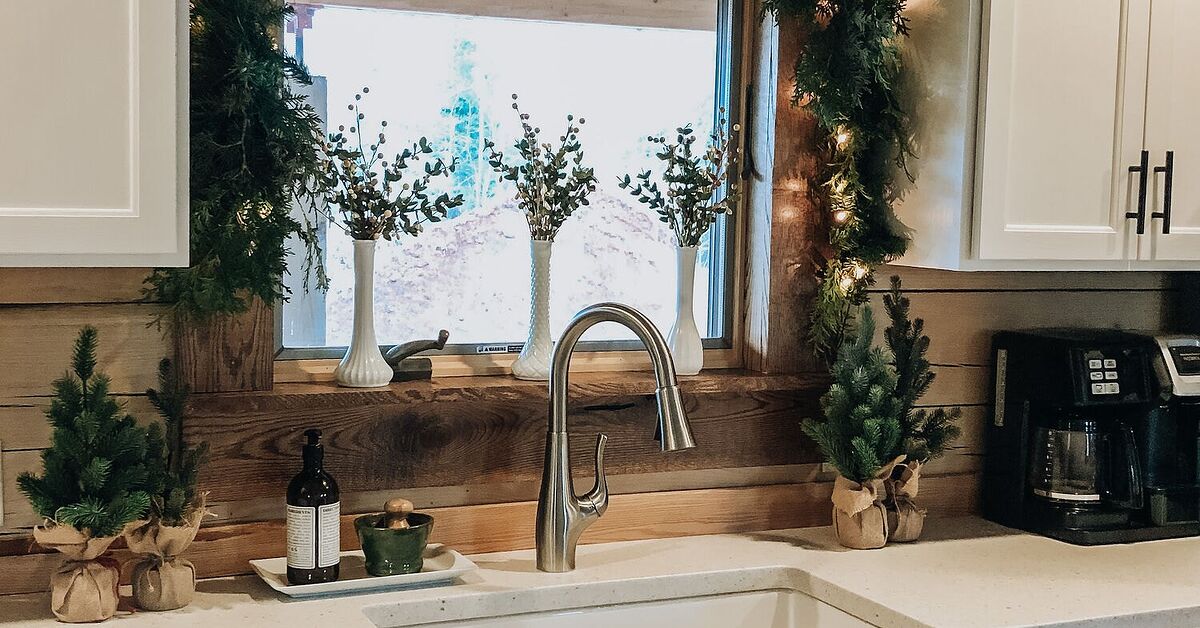
A fresh Christmas evergreen garland is the holiday decorating equivalent of opening the front door and hearing a choir of tiny pine-scented angels say, “Yes, someone here has their life together.” It drapes over mantels, winds around banisters, frames doorways, and makes even a basic windowsill look like it belongs in a cozy winter movie where nobody ever loses the tape dispenser.
The best part? You do not need to be a professional florist, a craft-store wizard, or the kind of person who owns twelve kinds of ribbon. With fresh greenery, floral wire, sturdy rope, and a little patience, you can make a lush, fragrant Christmas garland that looks expensive but feels personal. This guide walks you through how to make a fresh Christmas evergreen garland from scratch, how to choose the right greens, how to keep it looking alive instead of “holiday salad gone wrong,” and how to style it beautifully indoors or outdoors.
Why Make a Fresh Christmas Evergreen Garland?
Artificial garland is convenient, but fresh evergreen garland has something faux greenery can only imitate: natural fragrance, movement, texture, and that just-cut-from-the-forest charm. Fresh cedar, pine, fir, spruce, eucalyptus, magnolia, rosemary, and holly all bring different colors, scents, and shapes to a holiday display.
A handmade garland also gives you control. You can make it thick and dramatic for a staircase, narrow and elegant for a table centerpiece, rustic for a porch railing, or polished for a formal mantel. You can use locally sourced greenery, add pinecones and dried oranges, skip glitter entirely, or go full “North Pole boutique hotel.” Your house, your rules.
Best Evergreens for Christmas Garland
The secret to a beautiful fresh Christmas garland is mixing greenery with different textures. One type of evergreen works fine, but a blend creates depth and makes the garland look fuller.
Cedar
Cedar is soft, flexible, fragrant, and naturally drapey, which makes it excellent for doorways, mantels, and banisters. Western red cedar and incense cedar are popular choices because they create a flowing look and hold their shape well.
Fir
Fir branches, especially noble fir and Fraser fir, have sturdy needles and a classic Christmas scent. Fir is great for structure because it gives the garland body without becoming too floppy.
Pine
White pine has long, soft needles that add volume and a graceful, feathery texture. Pine is perfect when you want your garland to feel lush, relaxed, and woodland-inspired.
Spruce
Spruce offers bold color and strong holiday character, but it can be prickly. Use it as an accent rather than the entire garland unless you enjoy decorating while being gently attacked by a Christmas tree.
Magnolia, Eucalyptus, and Herbs
Magnolia leaves add glossy green tops and velvety brown undersides. Eucalyptus brings a silvery tone and fresh scent. Rosemary, bay, and sage can be tucked in for fragrance, especially in a kitchen garland or dining table arrangement.
Tools and Materials You Will Need
Before you start, set up a work area on a garage floor, porch, large table, or covered kitchen island. Fresh greenery sheds needles and sap, so protect surfaces with kraft paper, an old sheet, or a tarp.
- Fresh evergreen clippings, 6 to 12 inches long
- Sturdy rope, jute twine, or thick floral garland base
- Green floral wire or paddle wire
- Pruning shears or sharp garden clippers
- Gloves to protect your hands from sap and prickly stems
- Measuring tape
- Bucket or tub of water for soaking greenery
- Optional accents: pinecones, dried orange slices, cinnamon sticks, berries, bells, ornaments, ribbon, or battery-operated LED lights
Step 1: Measure the Space
Measure where the garland will hang before cutting anything. A mantel garland usually looks best when it is slightly longer than the mantel so the ends can drape naturally. For a doorway, measure both sides and the top, then add extra length for curves and fullness. For a staircase, measure the banister and add at least one to two feet if you want soft swags between attachment points.
As a general rule, make more garland than you think you need. Fresh garland looks best when it is generous. A skinny garland can still be pretty, but a lush one says, “I planned ahead,” even if you were panic-wiring pine branches at 10 p.m. while watching holiday movies.
Step 2: Choose and Prepare Fresh Greenery
Use the freshest greenery you can find. Branches should feel flexible, smell fragrant, and have rich color. Avoid stems that are brittle, yellowing, brown, or dropping needles before you even bring them home. If cutting from your own yard, harvest selectively and never remove too much from one plant. Morning is often a good time to cut because stems are naturally hydrated.
After gathering greenery, trim the cut ends and soak the branches in cool or room-temperature water for several hours, or overnight if possible. This helps hydrate the stems before they become part of the garland. Let the greenery dry before assembling, especially if you plan to hang it on wood, painted surfaces, fabric, or near electrical lights.
Step 3: Create Small Greenery Bundles
Cut your evergreen pieces into manageable sections, usually 6 to 12 inches long. Then create small bundles with three to six stems each. Place sturdier greenery such as fir or pine in the back, then layer softer cedar, eucalyptus, or accent leaves toward the front.
Wrap floral wire tightly around the stem end of each bundle several times. Do not cut the wire after every wrap if you are using paddle wire; keeping it attached makes assembly faster. The bundle method is the classic technique because each new bundle overlaps the previous one, hiding the stems and wire while building fullness.
Step 4: Attach Bundles to the Garland Base
Lay your rope or base flat. Place the first greenery bundle at one end, with the leafy tips pointing outward. Wrap floral wire around the bundle stems and rope several times until secure. Place the next bundle a few inches down, overlapping it so the foliage covers the wired stems of the previous bundle.
Continue down the rope, always overlapping in the same direction. Keep checking the shape as you go. If one section looks thin, add another bundle. If the garland becomes too bulky, use smaller bundles or trim heavier stems. For a natural look, allow some pieces to extend farther than others. Perfect symmetry is not required; in fact, it can make fresh greenery look stiff. Nature is charming because it refuses to use a ruler.
Step 5: Finish the Ends Neatly
When you reach the final section, turn the last bundle in the opposite direction so the leafy tips face outward at the end. Tuck the stems under the previous greenery and secure them with wire. This creates a finished look on both ends rather than leaving one side full and the other side looking like it gave up.
Use clippers to trim stray stems, but do not over-prune. Fresh Christmas evergreen garland should look abundant and slightly wild, not like it just passed a corporate dress code inspection.
Step 6: Add Decorative Accents
Once the base garland is complete, add decorative details. Pinecones can be wired in for rustic texture. Dried orange slices add color and a subtle old-fashioned charm. Cinnamon sticks bring fragrance. Ribbon can make the garland feel classic, romantic, farmhouse, or elegant depending on the fabric and color.
If you use berries, choose carefully. Some natural berries can be messy or unsafe around pets and children. Faux berries are often a practical choice because they keep their color and do not drop onto the floor like tiny red holiday confetti. If adding lights, use battery-operated or low-heat LED lights and keep the battery pack accessible.
How to Hang Fresh Evergreen Garland
Fresh garland is heavier than it looks. A full garland contains water, woody stems, wire, and possibly ornaments, so secure it properly. Use removable adhesive hooks for lightweight sections, zip ties for banisters, floral wire for railings, and clear fishing line where you want invisible support. For heavy garlands over doors or mantels, use strong hooks or a garland hanger designed for the job.
Do not rely on one attachment point. Support the garland every few feet to prevent sagging. For a staircase, attach it at the top, bottom, and at intervals along the rail. For a mantel, secure the center first, then shape the sides. For a doorway, start at the top center and work down both sides.
Where to Display Your Garland
On the Mantel
A mantel is the classic stage for Christmas garland. Let the garland drape slightly over the front edge and cascade down one or both sides. Keep it away from open flames and avoid placing fresh greenery directly against hot surfaces.
On a Staircase
Fresh garland on a staircase creates instant holiday drama. Secure it to the banister with zip ties or floral wire, then cover attachment points with ribbon. Leave enough handrail exposed for safety, especially if guests, children, or anyone carrying holiday leftovers will be using the stairs.
Around a Doorway
Doorway garland makes guests feel welcomed before they even remove their coats. Use sturdy hooks and consider outdoor placement if your climate is cool. Fresh greenery tends to last longer outside in shaded, cold conditions than indoors in dry heated air.
As a Table Runner
A fresh evergreen garland can become a dramatic holiday table centerpiece. Keep it low enough for guests to see each other across the table. Add candles only if they are safely enclosed or flameless. Nobody wants the dinner conversation to include the phrase, “Is the centerpiece smoking?”
How to Keep Fresh Garland Looking Good Longer
Fresh garland dries out over time, but good care can extend its beauty. Start with hydrated greenery, keep it cool, and avoid direct heat. Indoor heating vents, sunny windows, fireplaces, and wood stoves can dry greenery quickly. If your garland is indoors, mist it lightly every day or two, focusing on the stems and undersides. For outdoor garlands, misting a few times a week may help in dry weather.
Do not soak a finished garland after adding ribbon, lights, ornaments, or delicate decorations. Hydrate before assembly, then maintain with misting. If a section begins to look tired, tuck in fresh sprigs rather than rebuilding the entire garland. This small refresh can make the whole piece look new again.
Important Safety Tips
Fresh evergreen garland is beautiful, but dry greenery can become a fire risk. Keep garlands away from candles, fireplaces, heaters, radiators, and heat vents. Use LED lights instead of older lights that become hot. Check light cords and battery packs before use. If the greenery becomes brittle, brown, or drops needles heavily, remove it from the home.
Also think about pets. Cats may see a garland as a climbing challenge personally designed by Santa. Dogs may investigate pinecones, berries, ribbon, or dangling ornaments. Keep fragile or potentially unsafe accents out of reach, and avoid using toxic plant material in areas where pets or children might chew on it.
Common Garland Mistakes to Avoid
Using Dry Greenery
If the greenery is already dry when you start, your garland will not magically become fresh. Choose supple, fragrant branches from the beginning.
Skipping the Soak
Soaking the greenery before assembly gives it a better chance of staying attractive through the season. This step is simple, but it makes a noticeable difference.
Making Bundles Too Large
Huge bundles can make the garland heavy, lumpy, and hard to hang. Smaller bundles are easier to control and create a more graceful shape.
Forgetting the Weight
Fresh garland is heavier than faux garland. Use strong support, especially over doorways, shelves, and staircases.
Putting It Too Close to Heat
Heat is the enemy of fresh greenery. A garland over a working fireplace may look magical in photos, but it needs safe spacing and careful monitoring.
Fresh Garland Style Ideas
For a traditional Christmas look, combine fir, cedar, pinecones, red ribbon, and warm white lights. For a natural woodland style, use mixed evergreens, dried oranges, cinnamon sticks, and simple twine. For a modern look, keep the greenery full but minimal, then add black velvet ribbon or brass bells. For a farmhouse style, use cedar, pine, cotton stems, burlap ribbon, and wooden beads. For a luxurious look, layer magnolia, eucalyptus, velvet ribbon, ornaments, and oversized bows.
The easiest way to make a garland look designer-level is to vary texture. Mix flat cedar with spiky fir, soft pine, glossy magnolia, and airy eucalyptus. The eye reads those layers as richness, even if the materials are simple.
How Long Does Fresh Christmas Garland Last?
Fresh evergreen garland can last anywhere from one week to several weeks depending on the greenery, location, temperature, humidity, and care. Outdoor garlands in cool, shaded areas usually last longer. Indoor garlands dry faster because heated homes often have low humidity. Cedar and fir tend to perform well, while some delicate accents may fade sooner.
If you are decorating early in the season, consider placing fresh garland outdoors first and bringing it inside closer to Christmas. Another option is to use faux garland as a base and tuck fresh clippings into it for fragrance and realism. This hybrid method gives you a fuller look with less drying.
What to Do With Garland After Christmas
When the season ends, remove ribbons, wire, lights, ornaments, and non-compostable decorations. Fresh greenery can often be composted or used as winter mulch around outdoor plants. Pine needles and evergreen branches can help cover garden beds, though you should follow local composting and yard-waste guidelines.
Do not compost wire, glittered decorations, plastic berries, or flocked greenery unless your local program specifically allows it. A little sorting now saves your garden from becoming a craft drawer with worms.
Experience Section: Real-Life Tips for Making a Fresh Christmas Evergreen Garland
The first time you make a fresh Christmas evergreen garland, you may imagine a peaceful afternoon with cocoa, holiday music, and greenery politely arranging itself under your hands. The reality is still lovely, but it may also involve sap on your sleeves, pine needles in your socks, and one mysterious branch that refuses to face the same direction as everyone else. That is part of the charm.
One of the most useful lessons is to prepare more greenery than you think you need. Fresh garland eats materials quickly, especially if you want that full, magazine-worthy look. A pile of branches that looks enormous on the porch can become a surprisingly modest six-foot garland once everything is bundled and overlapped. If you are decorating a long staircase or doorway, gather extra cedar or pine for filling gaps at the end.
Another experience-based tip is to work in batches. Instead of cutting one bundle, wiring it, attaching it, and repeating the process from scratch, make several bundles first. Lay them out by size: fuller bundles for the center and thinner bundles for ends, corners, or tight spaces. This makes the assembly process faster and helps the finished garland look balanced.
Gloves are not optional if you are using spruce, holly, or anything prickly. They may feel clumsy at first, but they save your hands from tiny scratches and sticky sap. Keep a damp rag nearby for your clippers, too. Sap can build up on the blades, making cutting harder as you go.
When hanging garland on a mantel, protect the surface. Fresh greenery can release moisture or sap, and wire can scratch paint or wood. A strip of kraft paper, felt pads, or a narrow protective runner under the garland can prevent damage. If the garland is going on a painted banister, use soft ribbon or pipe cleaners over zip ties to avoid marks.
The most common beginner mistake is trying to make the garland perfect. Fresh evergreen garland should not look like it was assembled by a machine. Let some cedar spill forward. Let pine needles fan out. Let a few pieces curve naturally. The small irregularities are what make the garland feel alive. If one section looks too flat, tuck in a fresh sprig and wire it lightly. If one section sticks out too far, trim it after the garland is hung, not before. Garland changes shape when it is lifted, draped, and secured.
For fragrance, place the freshest garland where people pass by often: the entryway, staircase, kitchen doorway, or living room mantel. A garland hidden in a guest room may be pretty, but it will not deliver that wonderful evergreen scent as often. For the strongest aroma, include cedar, fir, pine, rosemary, or eucalyptus.
If you are decorating with children, let them help with safe accents like dried oranges, ribbon pieces, bells, or pinecones. Keep the wire cutting and branch trimming for adults. Kids love seeing the garland take shape, and they are excellent at pointing out “holes” in the greenery with the honesty of tiny design critics.
Finally, remember that fresh garland is temporary. That is not a flaw; it is the reason it feels special. It changes slightly every day, releases its scent, softens into the season, and eventually makes way for the new year. A handmade evergreen garland is not just decoration. It is a holiday ritual, a little bit messy and wonderfully memorable.
Conclusion
Learning how to make a fresh Christmas evergreen garland is easier than it looks, and the reward is enormous. With the right greenery, a sturdy base, floral wire, and a few thoughtful accents, you can create a holiday decoration that feels personal, fragrant, and beautifully festive. Choose fresh cedar, fir, pine, or mixed evergreens; hydrate them before assembling; overlap small bundles for fullness; and hang the garland safely away from heat and open flames.
Whether you drape it over a mantel, wind it around a staircase, frame a doorway, or use it as a holiday table runner, a fresh evergreen garland brings natural warmth into the home. It may shed a few needles, but honestly, so do most holiday plans. The beauty is worth it.
Note: This article was written as original, publish-ready content based on practical evergreen garland techniques, common holiday greenery care guidance, and safe decorating practices.