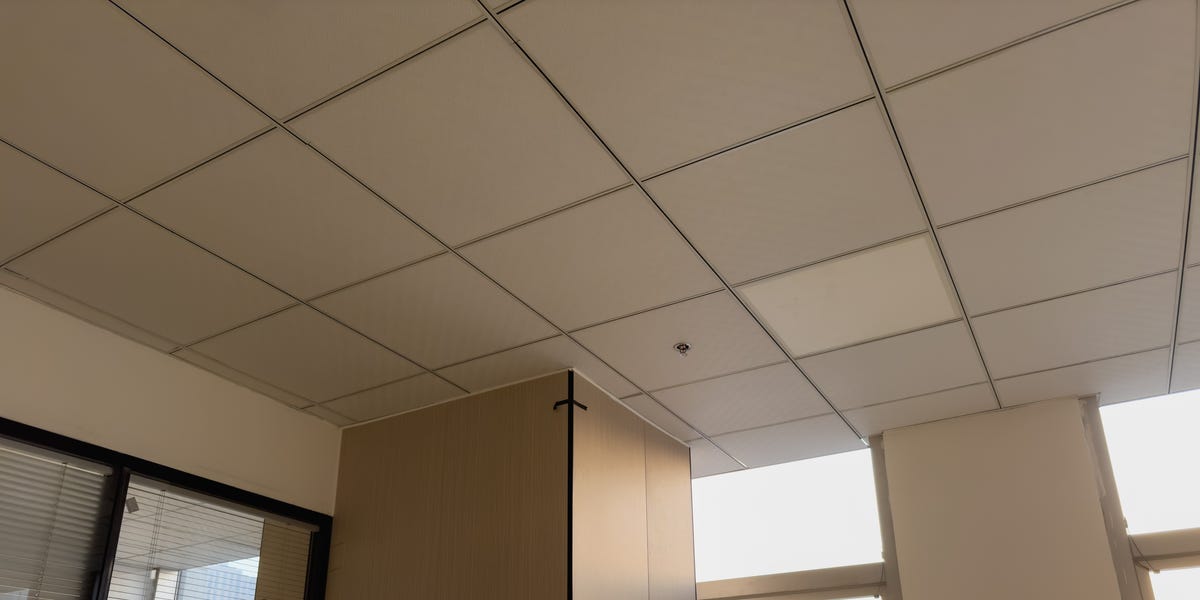
If your basement ceiling currently looks like a mechanical octopus exploded overhead, a suspended ceiling can be a real mood saver. It hides pipes, wires, and ductwork, improves the look of the room, and still gives you access when something upstairs decides to misbehave. Better yet, installing suspended ceiling tiles is one of those DIY projects that feels intimidating right up until the moment the grid starts coming together. Then it becomes oddly satisfying, like building a giant adult-size puzzle over your head.
The trick is not brute force. It is planning. A suspended ceiling system works best when the layout is square, the perimeter is level, and the tiles fit cleanly at the borders instead of ending in awkward skinny strips that scream, “I measured this on vibes alone.” In this guide, you will learn exactly how to install suspended ceiling tiles easily, what tools you need, how to avoid rookie mistakes, and how to get a neat finished look that feels intentional instead of improvised.
What Is a Suspended Ceiling, and Why Do Homeowners Use One?
A suspended ceiling, also called a drop ceiling, is a secondary ceiling hung below the original structure using wall molding, hanger wires, main beams, and cross tees. Ceiling tiles drop into the grid openings, creating a finished ceiling surface that can be removed later for access.
That access is the big selling point. In basements, utility rooms, laundry areas, and some home offices, a suspended ceiling hides visual clutter while still letting you reach plumbing shutoffs, junction boxes, cable runs, and HVAC components. It can also improve acoustics, soften echo, and give an unfinished room a cleaner, more polished look. In short, it is the rare ceiling option that is both practical and forgiving.
Before You Start: Tools, Materials, and Smart Prep
Basic tools
Have these ready before you begin: tape measure, chalk line, level or laser level, utility knife, straightedge, tin snips, drill or driver, pliers, ladder, pencil, clamps, gloves, and safety glasses. If you are working alone, add patience and a decent playlist.
Core materials
You will typically need wall molding, hanger wire or approved hanging hardware, main beams, cross tees, and your ceiling tiles. Some projects also need extra support hardware for lights, diffusers, vents, or access panels.
Acclimate your tiles
Do not skip this step. Let the tiles sit in the room for at least 24 hours before installation so they can adjust to the temperature and humidity. That small wait can help prevent fit and appearance issues later.
Check the room conditions
Pick tiles that match the space. Mineral fiber tiles are common and budget-friendly. Fiberglass tiles are lighter and often handle moisture better. PVC or washable decorative panels can be useful in damp-prone spaces where easy cleaning matters. If the room is humid, do not casually choose a tile made for dry office conditions and expect it to enjoy basement life.
How To Install Suspended Ceiling Tiles Easily: Step-by-Step
1. Measure the room and sketch a layout
Start by measuring the room length and width at ceiling level. Then draw the room to scale on graph paper. Mark any obstacles such as soffits, columns, ductwork, recessed lights, vents, speakers, pipes, or access points you need to preserve.
This layout stage matters more than people think. Good installers try to create border tiles that are balanced on opposite sides of the room. That means instead of ending with a sad little 3-inch strip on one side, you aim for border cuts that look even and intentional. If your room uses 2-by-2 or 2-by-4 tiles, plan the grid so the cut edges are as large as possible around the perimeter.
2. Decide on the ceiling height
Choose the finished ceiling height based on the lowest obstruction overhead. In many residential systems, you need roughly 3 inches of clearance below the old ceiling or joists to maneuver tiles into place, and often more when you are working under drywall or adding lights and fixtures. If you are installing below an existing drywall ceiling, confirm your system requirements and locate the joists carefully before hanging anything.
A good rule of thumb is simple: do not set the ceiling so high that the tiles cannot tilt up into the grid. If you do, installation becomes a weird overhead wrestling match you will absolutely regret.
3. Mark a level perimeter line
Use a level or laser to mark the desired ceiling height on the walls. Then snap a chalk line around the room. This line becomes your reference for the perimeter wall molding, and it must be level even if the original ceiling is not. Never trust an old ceiling to be perfectly level. Old houses in particular enjoy surprise slopes.
4. Install the wall molding
Attach the wall molding along the chalk line using the right fasteners for your wall type. Fasten into studs when possible. On masonry or concrete walls, use appropriate anchors. Cut inside and outside corners neatly, and take your time here, because a crooked perimeter makes the whole ceiling feel off even if the rest of the work is solid.
The wall molding creates the support lip around the room and defines the visual finish at the perimeter, so think of it as the frame of the picture.
5. Locate joists and mark hanger points
Main beams usually run perpendicular to the joists. If the joists are hidden above drywall or plaster, locate them with a stud finder or by confirming their centers carefully and marking them with chalk lines. From your plan, mark where the main beams will go and where the hangers need to attach.
In a standard residential layout, main beams are commonly spaced 4 feet on center, with cross tees forming either 2-by-4 or 2-by-2 openings depending on your tile size. Always follow the exact spacing and hardware requirements for the ceiling system you bought, because grid systems are not a place for creative freestyling.
6. Install hanger wire or approved hanging hardware
Attach the hanger supports to the joists at the recommended intervals. Use leveling strings stretched across the room so you can bend and align the wires accurately. Wrap the hanger wire securely around itself as required by the system instructions. The goal is a stable, level structure before the grid pieces go in.
If you are using proprietary hanging hardware instead of traditional wire, make sure your installation conditions match the manufacturer’s requirements. Some products work for exposed joists but are not approved below finished drywall.
7. Hang the main beams
Cut the first main beam so the first cross tee slot lands at the correct border tile distance from the wall. Set the end of the main beam on the wall molding, then hang it from the wires or approved hardware. Install the next main beam parallel to it according to your layout. Keep checking level as you go.
This is where the project starts looking like a real ceiling instead of a hopeful collection of metal sticks. Stay precise. A small alignment error here multiplies quickly across the room.
8. Install border tees and cross tees
Measure and cut the border tees to fit between the wall molding and the nearest main beam. Then install the full cross tees in the correct slots to form the tile openings. Many systems let the tees snap into place with an audible click. That little click is satisfying for a reason. It means the connection is seated correctly.
As you build the grid, keep checking for square by measuring diagonals or using string lines. A square grid makes tile installation much easier and helps the finished ceiling look crisp rather than slightly tipsy.
9. Level and fine-tune the grid
Before you install a single tile, check that the grid is level across the room. Adjust the hanger wires or hardware as needed. The main beams should rest properly on the wall molding, and the tees should align cleanly. If the grid is off now, the tiles will advertise that fact to everyone forever.
10. Cut border tiles the right way
Measure each border opening individually. Even in a room that looks perfectly square, small variations can show up at the edges. Mark the tile face carefully and cut mineral fiber or fiberglass tiles face up with a sharp utility knife and straightedge. Decorative tiles may need different cutting methods, so check the product instructions.
If you have tegular or reveal-edge tiles, pay attention to how the edge detail needs to be recreated at the perimeter. This is one of those small details that separates a neat professional-looking install from a ceiling that feels close enough but not really.
11. Drop in the ceiling tiles
Most suspended ceiling tiles install without additional hardware. Tilt each tile, lift it through the grid opening at an angle, and lower it gently into place. Many installers like to begin near the center and work outward so the grid stays aligned while the room fills in.
Be gentle. Ceiling tiles are not emotionally resilient, and some are not physically resilient either. Finger dents, chipped corners, and smudges happen fast if you handle them roughly.
12. Handle lights, vents, and other penetrations carefully
Tiles can usually be cut for vents, speakers, and light openings, but fixtures themselves often need independent support. A tile is not supposed to carry the full weight of a recessed light or similar component by itself. If you are adding lighting, use the support method required by the light manufacturer and by local code. Also make sure the fixture type is appropriate for the tile material and heat conditions.
Common Mistakes That Make Suspended Ceiling Installation Harder Than It Needs To Be
Skipping the layout: This is how you end up with tiny border strips and crooked fixtures.
Assuming the old ceiling is level: It usually is not.
Installing too close to the structure above: If you cannot tilt the tile into place, you have built yourself a very shiny problem.
Forgetting fixture support: Ceiling tiles are not weightlifters.
Cutting all border tiles to the same measurement: Rooms are often slightly off, so measure each edge opening.
Ignoring product instructions: Grid spacing, hanger locations, and tile edge details vary by system. This is one project where reading the manual is not optional decor.
Best Places To Use Suspended Ceiling Tiles
Basements
This is the classic suspended ceiling habitat. You can hide pipes and ductwork while preserving access for repairs and upgrades.
Home offices
Acoustical tiles can soften echo and create a more finished, professional feel, especially in converted basement rooms.
Laundry and utility spaces
Easy access matters here. Choose moisture-tolerant tiles if the room gets humid.
Workshops and hobby rooms
Sound-absorbing tiles can help tame noise, and removable panels make wiring changes easier down the road.
How To Make the Finished Ceiling Look Better
Use equal border tiles whenever possible. Keep the grid square. Wipe smudges off the tiles with clean hands or gloves. Plan light placement early so fixtures land neatly within the grid pattern. Choose tile textures that suit the room instead of defaulting to the most generic option on the shelf. A suspended ceiling can look much better than its office-building reputation suggests when the proportions and finishes are handled well.
For example, a basement media room may benefit from darker acoustical panels and well-placed recessed lighting, while a laundry room might look best with bright white washable tiles and simple flush fixtures. Same system, totally different vibe.
Experience-Based Tips: What Makes This Job Easier in Real Life
The most useful experience-based lesson is this: the ceiling tiles are the easy part. The grid is the job. People often imagine the challenge is lifting tiles overhead, but the real make-or-break point is whether the grid is level, square, and logically laid out. When the layout is right, the tiles almost feel like the reward. When the layout is sloppy, every tile becomes a witness to your mistakes.
Another real-world truth is that measuring once is never enough at the perimeter. On paper, a room can look perfectly rectangular. In actual houses, especially older ones, walls drift, corners wander, and nothing seems to have signed a contract with geometry. Measuring each border opening separately takes a little longer, but it saves a lot of frustration and prevents a pile of almost-right cuts that are now only useful as modern art.
It also helps to install with the room’s future use in mind. If the ceiling is going in a basement family room, think ahead about speaker wires, projector cables, internet lines, future plumbing access, or a spot where a shutoff valve might need to be reached quickly. A suspended ceiling is wonderful because it is accessible, but only if you do not bury important elements behind hard-to-reach fixtures or decorative features that are annoying to remove.
Handling the tiles gently is another lesson that only takes one bad cut to learn. Many ceiling tiles mark easily, especially the lighter acoustical ones. Clean hands matter. A sharp blade matters. A flat cutting surface matters. Rushing does not help. The good news is that once you settle into a rhythm, cutting and placing the border pieces becomes surprisingly manageable.
People also underestimate how much better the project goes with a clear centerline and string lines. They may not feel glamorous, but they are the difference between “nice ceiling” and “why does that whole row look like it had a long night?” String lines keep your hanger wires honest, your beams consistent, and your confidence intact.
One more practical experience: lights change everything. The moment lighting enters the conversation, your simple ceiling project becomes a coordination project. Tile openings, support brackets, heat considerations, wiring access, and local code all matter. So if the room will have recessed lights, LED panels, speakers, or vents, plan them before the first beam goes up. Retrofitting later is possible, but it is never as pleasant as pretending it will be.
Finally, give yourself grace on the first few rows. Suspended ceiling installation is one of those jobs where the beginning feels fussy, the middle feels smoother, and the end suddenly makes you look far more skilled than you felt two hours earlier. Stay methodical, keep the grid square, and let the system do the work. A neat suspended ceiling is not magic. It is mostly patience, clean lines, and refusing to let one crooked tee ruin your day.
Conclusion
If you want to install suspended ceiling tiles easily, focus on the fundamentals: plan the layout, mark a level perimeter, hang the grid correctly, and cut the border tiles with care. That is the formula. The project is not about speed. It is about accuracy early, so the finish looks clean later. Once the grid is level and square, the tiles fall into place, the room instantly looks more finished, and all the overhead chaos disappears behind a practical, removable, good-looking ceiling.
In other words, you do not need wizard powers. You just need a tape measure, a level, a decent knife, and the self-control not to guess at the last tile cut.
Note: Always follow your specific ceiling system instructions and local building code requirements, especially for clearance, hanger spacing, fixture support, fire-rated assemblies, and moisture-prone areas.