Learning how to install a rivet nut is one of those workshop skills that feels small until it saves the entire project. Need strong threads in thin sheet metal? Want to bolt something onto a hollow frame, trailer panel, aluminum bracket, van wall, appliance housing, or motorcycle fairing where you cannot reach the back side with a regular nut? A rivet nutalso called a rivnut, nutsert, threaded insert, or blind rivet nutsteps in like the quiet hero wearing safety glasses.
A rivet nut creates a permanent threaded insert in material that is too thin to tap or impossible to access from behind. Once installed, it lets you remove and reinstall bolts without chewing up the base material. That makes it useful for automotive repairs, metal fabrication, DIY van builds, HVAC panels, furniture frames, robotics, marine projects, and home workshop fixes that need clean, reusable threads.
The trick is that rivet nuts are wonderfully useful but a little unforgiving. Drill the hole too large and the insert may spin. Choose the wrong grip range and it may crush poorly. Pull too hard and you can distort the panel. Pull too little and the rivet nut may sit there looking innocent while secretly plotting to loosen later. The good news: with the right tool, correct hole size, and a calm hand, installing a rivet nut is very doableeven if your previous mechanical experience mostly involved assembling flat-pack furniture and muttering at tiny Allen keys.
What Is a Rivet Nut?
A rivet nut is a tubular metal insert with internal threads. During installation, a rivet nut tool pulls on the threaded mandrel, compressing the body of the insert. The backside expands or “bulbs” against the hidden side of the material, locking the insert in place. After that, you can thread a machine screw or bolt into it just like you would with a regular nut.
Unlike a standard nut and bolt, a rivet nut only needs access from one side. That is why it is called a blind fastener. If you are working on a closed tube, hollow panel, chassis rail, cabinet wall, or sheet metal enclosure, a rivet nut can provide a strong threaded mounting point without welding, tapping, or reaching behind the panel with the world’s most flexible wrist.
Tools and Materials You’ll Need
Before starting, gather everything so you do not have to perform the classic garage dance: install one part, search for a missing wrench, lose the pencil, find the pencil behind your ear, repeat.
- Rivet nuts in the correct thread size, material, body style, and grip range
- Rivet nut installation tool, hand tool, lever tool, pneumatic tool, or compatible mandrel-style tool
- Correct mandrel and nosepiece for the rivet nut thread size
- Drill and manufacturer-recommended drill bit
- Center punch or automatic punch
- Deburring tool, countersink bit, or file
- Calipers or ruler for checking material thickness and hole size
- Marker or scribe
- Safety glasses and gloves
- Test bolt or screw that matches the rivet nut threads
- Optional: masking tape, cutting oil, torque wrench, anti-seize, threadlocker, primer, or touch-up paint
How to Choose the Right Rivet Nut
The best installation starts before you drill. A rivet nut must match the job, not just the bolt you happen to have in a coffee can labeled “probably useful someday.”
Thread Size
Pick the thread size based on the bolt you plan to use and the load the connection must handle. Common sizes include #10-24, 1/4-20, 5/16-18, 3/8-16, M5, M6, M8, and M10. Small inserts are good for light brackets and covers. Larger inserts handle heavier accessories, but they require bigger holes and more installation force.
Grip Range
Grip range is the material thickness range the rivet nut is designed to clamp. This is critical. If the panel is thinner or thicker than the specified grip range, the insert may not collapse correctly. Measure the actual material thickness, including any overlapping layers if the insert passes through more than one sheet.
Material
Aluminum rivet nuts are easier to install and work well in light-duty aluminum or softer materials. Steel rivet nuts are stronger and common for automotive and general fabrication work. Stainless steel resists corrosion but takes more force to set. For outdoor, marine, or wet environments, pay attention to corrosion compatibility between the rivet nut, bolt, and base material.
Body Style
Round-body rivet nuts are common and easy to install. Knurled, ribbed, splined, or hex-body rivet nuts resist spinning better, especially in smooth sheet metal. A hex-body rivet nut requires a hex-shaped hole but offers excellent resistance to rotation. Large-flange heads spread load over a wider area, while countersunk heads sit flush when the hole is properly prepared.
How to Install a Rivet Nut: 11 Steps
Step 1: Plan the Location
Mark where the rivet nut will go. Make sure there is enough front-side room for the flange and enough backside room for the collapsed bulb. This is easy to forget because the backside is hidden, which is exactly why you are using a blind fastener in the first place. Check for wires, hoses, fuel lines, insulation, brackets, glass, or anything else behind the panel that would not appreciate being drilled.
Also consider edge distance. Installing a rivet nut too close to the edge can weaken the material or cause distortion when the insert expands. When possible, leave enough surrounding material to support the clamping force.
Step 2: Select the Correct Rivet Nut
Choose a rivet nut that matches your bolt size, base material, expected load, and panel thickness. Confirm the grip range on the package or product chart. For example, if your panel is 0.090 inch thick, the rivet nut must include 0.090 inch within its approved grip range. Do not guess by length alone; rivet nut body length and grip range are not the same thing.
If the connection may face vibration, choose a body style with spin resistance, such as knurled or hex. If the insert will be exposed to water or dirt, consider a closed-end rivet nut. If you need a flush surface, choose a countersunk style and prepare the hole accordingly.
Step 3: Choose the Correct Drill Bit Size
The hole size is one of the most important parts of rivet nut installation. A hole that is too small prevents the insert from seating fully. A hole that is too large allows the insert to rotate, loosen, or pull out. Always use the drill size recommended by the rivet nut manufacturer for that exact insert.
As a general example, a 1/4-20 rivet nut may require a drill size near 25/64 inch or another nearby size depending on the specific insert design. Metric rivet nuts also vary by body type and manufacturer. The correct answer is not “whatever bit looks close.” In rivet nut land, “close enough” is how spinning inserts are born.
Step 4: Center Punch the Mark
Use a center punch to create a small dimple at the marked location. This keeps the drill bit from wandering across the surface like it is exploring new career opportunities. On smooth metal, a punch mark is especially helpful. If appearance matters, apply masking tape first, mark on the tape, and punch carefully.
For curved surfaces or tubing, take extra care to keep the punch centered. A crooked hole can make the rivet nut sit at an angle, which can lead to poor clamping and awkward bolt alignment later.
Step 5: Drill the Hole Straight
Put on safety glasses. Drill at a steady speed, keeping the bit perpendicular to the surface. For metal, use light pressure and cutting oil if appropriate. Thin sheet metal can grab when the bit breaks through, so hold the drill firmly and avoid forcing it.
If you are working with a larger hole, it may help to start with a smaller pilot hole and then step up to the final size. A step drill can also create clean holes in sheet metal, but stop exactly at the correct diameter. Overshooting the size by one step can ruin the fit.
Step 6: Deburr and Clean the Hole
After drilling, remove burrs from the front and, if accessible, the back side of the hole. Burrs can stop the rivet nut flange from sitting flat. They can also interfere with proper collapse. Use a deburring tool, countersink bit, file, or light sandpaper. The goal is a clean edge, not a giant chamfer unless you are installing a countersunk rivet nut.
Wipe away chips, dust, and oil. If you drilled bare steel and corrosion is a concern, add primer or touch-up paint to the exposed edge and let it dry before installation. Rust is sneaky, and it loves unprotected holes.
Step 7: Test-Fit the Rivet Nut
Insert the rivet nut into the hole by hand. It should slide in without heavy force, but it should not wobble loosely. The flange should sit flat against the surface. If it rocks, remove it and check for burrs, paint buildup, or a crooked hole.
Do not hammer the rivet nut into place unless the manufacturer specifically allows light tapping for that style. Forcing it can damage the threads, distort the body, or scratch the panel. A proper fit should feel snug and controlled.
Step 8: Thread the Rivet Nut Onto the Tool
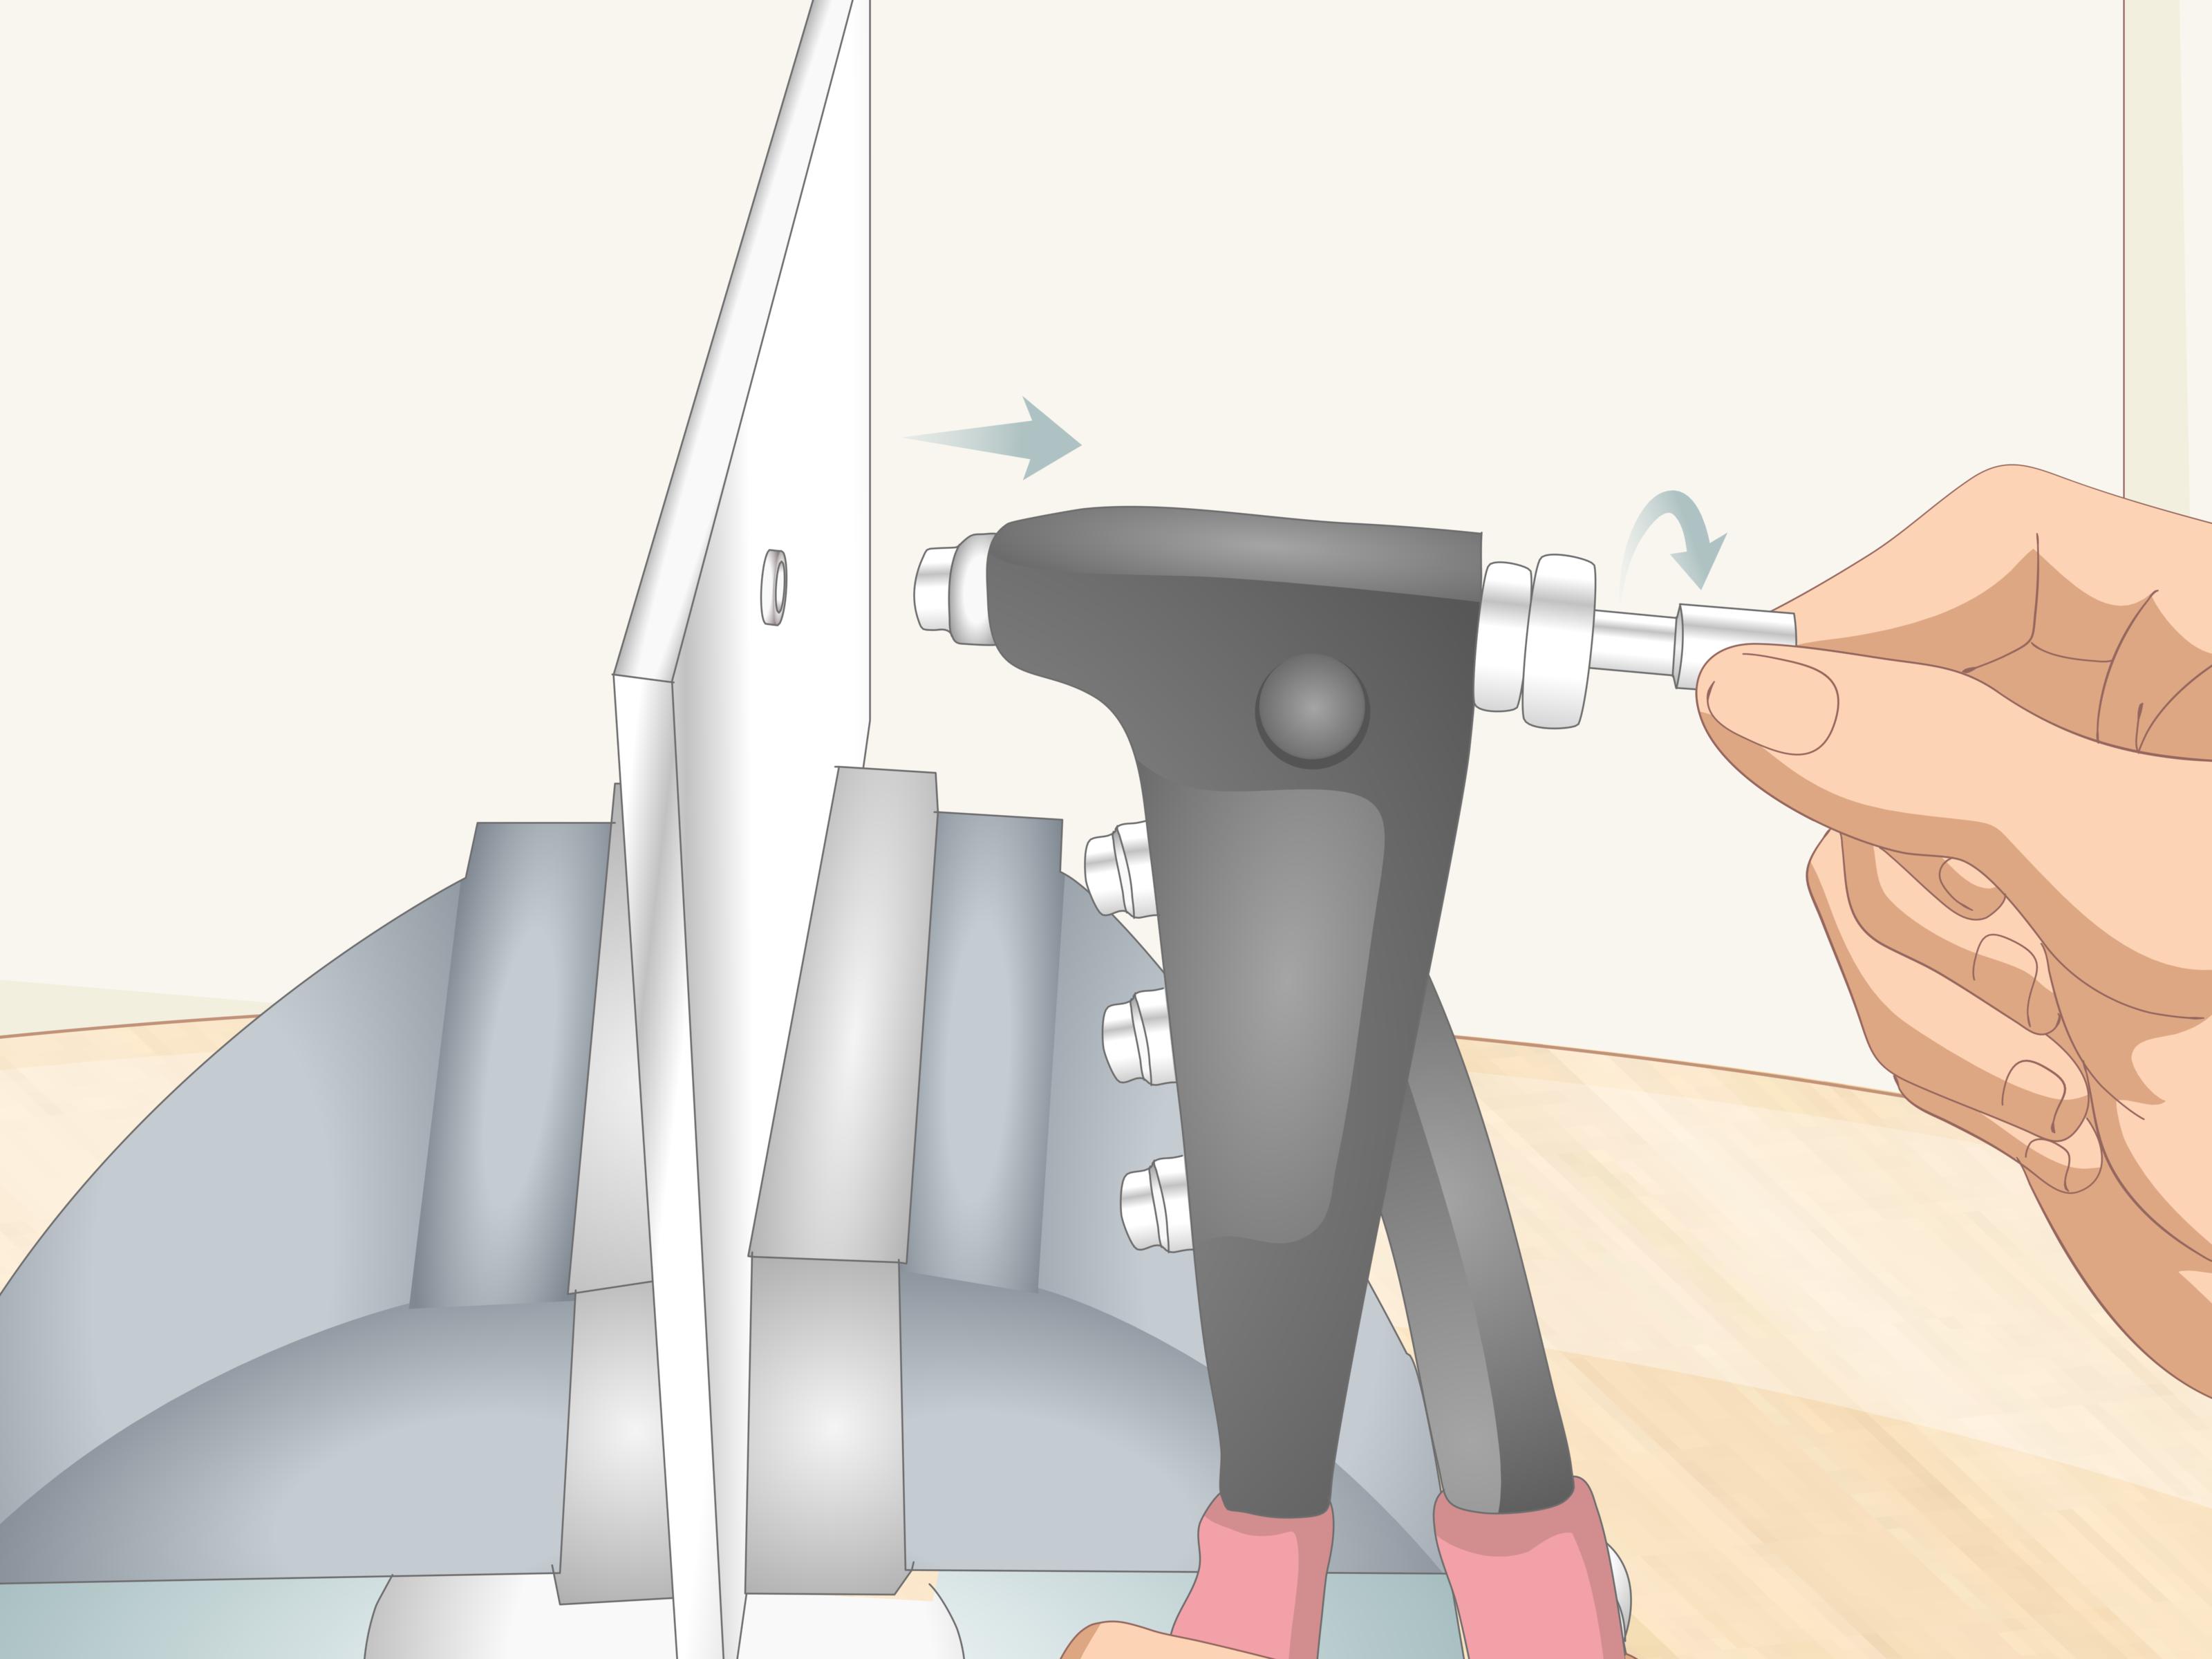
Install the correct mandrel and nosepiece on your rivet nut tool. Thread the rivet nut onto the mandrel until it sits squarely against the tool’s nosepiece. The mandrel should fully engage the threads, but do not bottom it out so hard that it jams.
Tool setup matters. If the mandrel is too short, the insert may not set fully. If the stroke is too long, the insert may over-compress. Many lever and professional tools allow stroke adjustment. For hand tools, practice on scrap material first so you know how much force is needed.
Step 9: Insert the Rivet Nut and Keep the Tool Square
Place the rivet nut into the drilled hole. Hold the tool perpendicular to the surface. This is where many bad installations begin: the tool tilts, the insert collapses unevenly, and suddenly the bolt threads in like it is climbing a hill.
Keep steady pressure against the flange so it remains seated flat. If the insert starts crooked, stop before setting it. Remove it, inspect the hole, and correct the problem. Once a rivet nut is crushed in place, changing your mind becomes more dramatic.
Step 10: Set the Rivet Nut
Squeeze the handles, pull the lever, or activate the tool according to its instructions. The mandrel pulls the threaded portion of the rivet nut toward the tool, compressing the body and forming a bulge on the blind side of the material. This bulge clamps the panel between itself and the front flange.
Use firm, controlled pressure. Do not wildly crush the insert like you are settling a personal grudge. Under-setting can leave the rivet nut loose. Over-setting can distort the panel, strip threads, or weaken the insert. With manual tools, you will usually feel resistance increase as the rivet nut collapses and locks into place. With adjustable tools, use the recommended stroke or practice setting.
Step 11: Remove the Tool and Test the Threads
Unthread the mandrel from the rivet nut. The insert should stay fixed in the material without spinning. Thread in the correct bolt by hand to confirm smooth engagement. If the bolt binds immediately, the rivet nut may be tilted, over-compressed, contaminated with chips, or cross-threaded.
Once the bolt threads in smoothly, tighten it only to the recommended torque for the bolt size, rivet nut material, and application. Over-torquing the bolt can spin the insert or damage the base material. For vibration-prone projects, use a washer, flange bolt, threadlocker, or lock washer if appropriate.
Common Rivet Nut Installation Mistakes
Using the Wrong Hole Size
An oversized hole is the classic villain. It reduces the insert’s ability to grip and may cause spinning when the bolt is tightened. An undersized hole can damage the rivet nut during insertion or prevent the flange from seating. Always follow the recommended drill size.
Ignoring Grip Range
If the material thickness does not match the rivet nut’s grip range, the collapsed bulb may form incorrectly. In thin material, the insert may not clamp enough. In thick material, it may not collapse fully. Either way, the result is a weak connection with a bad attitude.
Tilting the Tool
A crooked tool creates a crooked set. Keep the tool straight through the entire pull. If working on vertical or overhead panels, support the tool with both hands when possible.
Over-Compressing the Insert
More force is not always better. Over-compression can buckle thin sheet metal, distort the rivet nut, damage threads, or make the bolt difficult to install. Practice on scrap material if you are using a new tool or unfamiliar insert size.
Installing Into Weak or Brittle Material Without Support
Thin plastic, fiberglass, soft aluminum, and composites may need specialty rivet nuts designed to spread load. A standard insert may crush the material or pull through. When in doubt, test first and choose a large-flange, rubber, or material-specific insert.
Troubleshooting: What If Something Goes Wrong?
The Rivet Nut Spins
A spinning rivet nut usually means the hole is too large, the insert was under-set, the grip range was wrong, or the body style could not bite into the material. If it spins before the bolt is tightened, the installation is not secure. You may need to remove it and install a larger insert, a knurled insert, a hex-body insert, or a rivet nut made for the material.
The Bolt Will Not Thread In
Check for cross-threading, damaged internal threads, chips, or tool mandrel damage. Try threading the bolt by hand only. If it binds, do not force it. Forcing a bolt into damaged threads can spin the insert and turn a small problem into a vocabulary-building event.
The Panel Buckled
Panel distortion usually happens from over-setting, using too much force, or installing a rivet nut in material that is too thin for the insert. Use a wider flange, lower installation force, backing support if accessible, or a rivet nut designed for thin material.
The Insert Pulls Out
Pull-out can happen when the hole is oversized, the load is too high, the material is too weak, or the insert is not fully set. Use a larger size, stronger material, correct grip range, or a load-spreading design.
Best Uses for Rivet Nuts
Rivet nuts shine when you need reusable threads in thin or hollow material. They are great for mounting brackets to sheet metal, attaching accessories to vehicle panels, adding threaded points to aluminum extrusion covers, installing handles on cabinets, securing inspection plates, and building removable panels.
For example, a van builder might use M6 rivet nuts to mount interior wall panels to the van’s ribs. A fabricator might use 1/4-20 steel rivet nuts in square tubing to attach a removable equipment plate. A DIYer might add threaded inserts to a metal gate frame for a latch bracket. In each case, the rivet nut creates a clean, repeatable fastening point without needing rear access.
Safety Tips for Installing Rivet Nuts
Wear eye protection whenever drilling or setting metal fasteners. Metal chips are tiny, sharp, and weirdly enthusiastic about finding eyeballs. Clamp small workpieces before drilling. Keep hands clear of pinch points on lever tools. If drilling into a vehicle, appliance, or wall panel, inspect behind the area first. Avoid drilling near electrical wiring, fuel lines, refrigerant lines, brake lines, or structural components unless you know exactly what is there.
Use the correct bolt length after installation. A bolt that is too short may not engage enough threads. A bolt that is too long may bottom out in a closed-end insert or hit something behind the panel. For high-load or safety-critical applications, follow engineering guidance or use manufacturer-approved fasteners and torque values.
of Real-World Experience: What Installing Rivet Nuts Teaches You
The first time many people install a rivet nut, they treat it like a regular fastener. Drill a hole, squeeze the tool, done. Technically, yesbut the little details decide whether the result feels professional or like a bracket held on by optimism. The biggest lesson is that preparation matters more than arm strength. A clean, correctly sized hole will make a basic hand tool look good. A sloppy hole will make even an expensive tool seem cursed.
One useful habit is to keep a small scrap piece of similar material nearby. Before installing rivet nuts in the actual project, drill the same size hole in the scrap and set one test insert. This quick test shows how much force the tool needs, whether the grip range is right, and whether the flange sits flat. It also gives you a chance to check bolt fit before the real workpiece becomes the test subject. Scrap metal is cheaper than regret, and it never judges your technique.
Another practical tip is to label your rivet nut containers clearly. Mixing M6 and 1/4-20 inserts, or fine-thread and coarse-thread versions, can create confusion later. They may look similar at a glance, especially when scattered on a workbench beside drill bits, washers, and one mysterious screw that appears in every project. Keep the matching bolts nearby and test the threads before installation.
In automotive and outdoor projects, corrosion deserves attention. Installing a steel rivet nut into aluminum can create galvanic corrosion if moisture is present. Protective coatings, compatible materials, sealant, or anti-corrosion compounds can help. Closed-end rivet nuts are useful where you want to reduce water or dust entry, but remember that bolt length becomes more important because the bolt cannot pass through the closed end.
For thin sheet metal, the insert body style can make or break the job. Smooth round rivet nuts may work in some applications, but knurled or ribbed bodies often grip better. If an insert spins after installation, it is usually not because the universe dislikes youthough it may feel that way. More often, the hole was slightly oversized, the insert was not fully collapsed, or the material was too thin or slick for that body style.
Finally, learn to stop tightening when the fastener is secure. Rivet nuts are strong, but they are not magic. Over-torquing the final bolt can spin the insert, crush the material, or strip the threads. Tighten with control, use washers where helpful, and use a torque wrench for critical assemblies. A well-installed rivet nut should feel boring in the best possible way: the bolt threads in smoothly, the bracket sits flat, and nothing wiggles. In the workshop, “boring” is often another word for “done correctly.”
Conclusion
Installing a rivet nut is a simple process when you respect the details: choose the right insert, drill the correct hole, deburr cleanly, keep the tool square, and set the rivet nut with controlled force. Whether you call it a rivet nut, rivnut, nutsert, or blind threaded insert, the goal is the samecreate strong, reusable threads where a regular nut cannot go.
Once you understand grip range, hole size, body style, and installation pressure, rivet nuts become one of the most useful fasteners in the workshop. They turn thin sheet metal and hollow sections into practical mounting points, making repairs cleaner and custom projects easier. Start with a test piece, follow the manufacturer’s specifications, and your finished insert should be secure, straight, and ready for the bolt it was born to meet.
Note: This guide is for general DIY and workshop education. Always follow the rivet nut manufacturer’s specifications for drill size, grip range, installation stroke, material compatibility, and torque limits.