Oats may look humble in a cereal bowl, but in the garden or field they are secret overachievers. They grow quickly, handle cool weather like champions, suppress weeds, protect bare soil, feed livestock, produce straw, andif you are patient enoughcan give you your own homegrown grain. Not bad for a plant most people meet only after it has been flattened, toasted, and introduced to brown sugar.
Learning how to grow oats is not complicated, but timing matters. Oats are cool-season annual grasses, which means they prefer the crisp side of the calendar. Plant them too late in spring and summer heat can reduce yield. Plant them at the right time, give them well-drained soil, steady moisture, and modest fertility, and they will usually reward you with a lush green stand that looks far more impressive than the effort it required.
This guide explains how to plant oats, care for them, use them as a cover crop, and harvest them for grain, straw, or forage. Whether you have a backyard bed, a small homestead patch, or a larger field, the basic rules are the same: plant early, seed thick enough, avoid soggy soil, and harvest at the right stage.
What Are Oats?
Common oats, botanically known as Avena sativa, are annual cereal grains grown for food, animal feed, hay, straw, pasture, and cover cropping. They are especially valued in cooler regions because they germinate in cool soil and grow fast before hot weather arrives. Unlike wheat or rye, oats are not typically winter-hardy in many northern areas, which makes them useful as a fall-planted cover crop that dies naturally after hard freezes.
Gardeners like oats because they are forgiving. Farmers like them because they fit well into crop rotations. Soil appreciates them because their roots help hold the ground in place, take up leftover nutrients, and add organic matter when the crop residue breaks down. In other words, oats are the friend who shows up early, helps clean the kitchen, and does not ask for applause.
Best Time to Plant Oats
Spring Planting for Grain
For grain production, oats should be planted as early in spring as the soil can be worked. In many northern and Midwestern areas, that means late March through April. In colder northern regions, planting may extend into early May, but earlier is usually better. Oats develop more tillers, larger panicles, and better grain quality when they grow during cool spring weather.
Late planting is one of the most common reasons oat crops disappoint. As temperatures rise, oats face more heat stress during grain fill. That can reduce kernel size, test weight, and overall yield. If your soil is workable and not waterlogged, do not wait for “perfect” garden weather. Oats are not tomatoes; they do not need a spa day of warmth before they begin.
Fall Planting for Cover Crops
If you are growing oats as a cover crop, sow them in late summer or early fall after vegetables or early crops are harvested. The goal is to give the oats enough time to germinate and produce meaningful growth before hard frost. In many regions, this means planting from mid-August through September, though exact timing depends on your first frost date.
Fall-planted oats are popular in home gardens because they usually winterkill in cold climates. By spring, the dead oat residue forms a soft mulch that protects soil and can often be planted through, moved aside, or lightly incorporated. That is much easier than wrestling with a winter-hardy cover crop that refuses to leave the party.
Choosing the Right Oat Seed
For serious grain production, choose certified oat seed from a reputable supplier. Certified seed gives you a known variety, better germination information, and fewer weed seed surprises. If you are growing oats for food, look for varieties adapted to your region and, when possible, select disease-resistant types.
For cover cropping, whole feed oats can work well if they are untreated and viable. Avoid rolled oats, steel-cut oats, instant oats, or anything from the breakfast aisle. Those have been processed and will not sprout, no matter how nicely you ask. Seed oats should look like whole, intact grain with hulls still present.
Hulled oats are the standard type. Hull-less oats can be grown too, but they may have lower germination if the embryo is damaged during handling. They are interesting for small-scale food growers because they reduce the headache of removing hulls, but they still need careful harvesting and cleaning.
Ideal Growing Conditions for Oats
Sunlight
Oats grow best in full sun. Aim for at least six hours of direct sunlight per day. They can tolerate light shade, but dense shade leads to thinner growth, weaker stems, and less grain.
Soil
Well-drained soil is important. Oats dislike standing water and compacted ground. They grow best in moderately well-drained to well-drained soil with a pH around 5.5 to 7.0. If you are unsure about your soil, get a soil test before planting, especially if you are growing oats for grain rather than just soil cover.
Temperature
Oats are cool-season plants. They germinate in cool soil and perform best before hot summer weather arrives. Heat during flowering and grain filling can reduce yield and quality, which is why early planting is such a big deal.
Moisture
Keep the seedbed evenly moist until germination. Once established, oats need consistent moisture, especially during stem elongation, heading, and grain fill. They do not need swamp conditions; they need steady water without drowning.
How to Prepare the Soil
Start by removing weeds, old crop residue, rocks, and compacted clumps. Oats germinate best when the seed has good contact with soil. In a garden bed, loosen the top few inches of soil and rake it smooth. In a field, prepare a firm seedbed that is not powdery or overly fluffy.
Add compost if your soil is low in organic matter, but do not go wild with nitrogen. Too much nitrogen can cause oats to lodge, which means the stems fall over before harvest. Lodged oats are frustrating to cut, dry poorly, and make you question your life choices. A soil test is the best way to decide whether fertilizer is needed.
If oats follow a legume crop such as peas, beans, clover, or alfalfa, they may need less added nitrogen. If they follow a heavy-feeding crop like corn, they may need more. Keep fertility balanced and avoid dumping on fertilizer just because the bag looks official.
How to Plant Oats Step by Step
1. Decide Your Purpose
Before planting, decide whether you want grain, straw, forage, or a cover crop. Your goal affects planting date, seeding rate, harvest timing, and how carefully you manage the crop.
2. Measure the Area
For small gardens, measure the bed so you can seed evenly. For grain or dense cover, a rough target is about 1.5 to 3 pounds of seed per 1,000 square feet, depending on your purpose and seed size. Lighter rates may be enough for a simple cover crop, while denser stands are better for weed suppression and grain production.
3. Sow the Seed
Broadcast seed evenly by hand, with a hand-crank spreader, or with a drill for larger areas. If broadcasting, scatter half the seed walking in one direction and the other half walking across the bed at a right angle. This crisscross method helps prevent bald patches, which weeds will treat like a luxury resort.
4. Cover the Seed
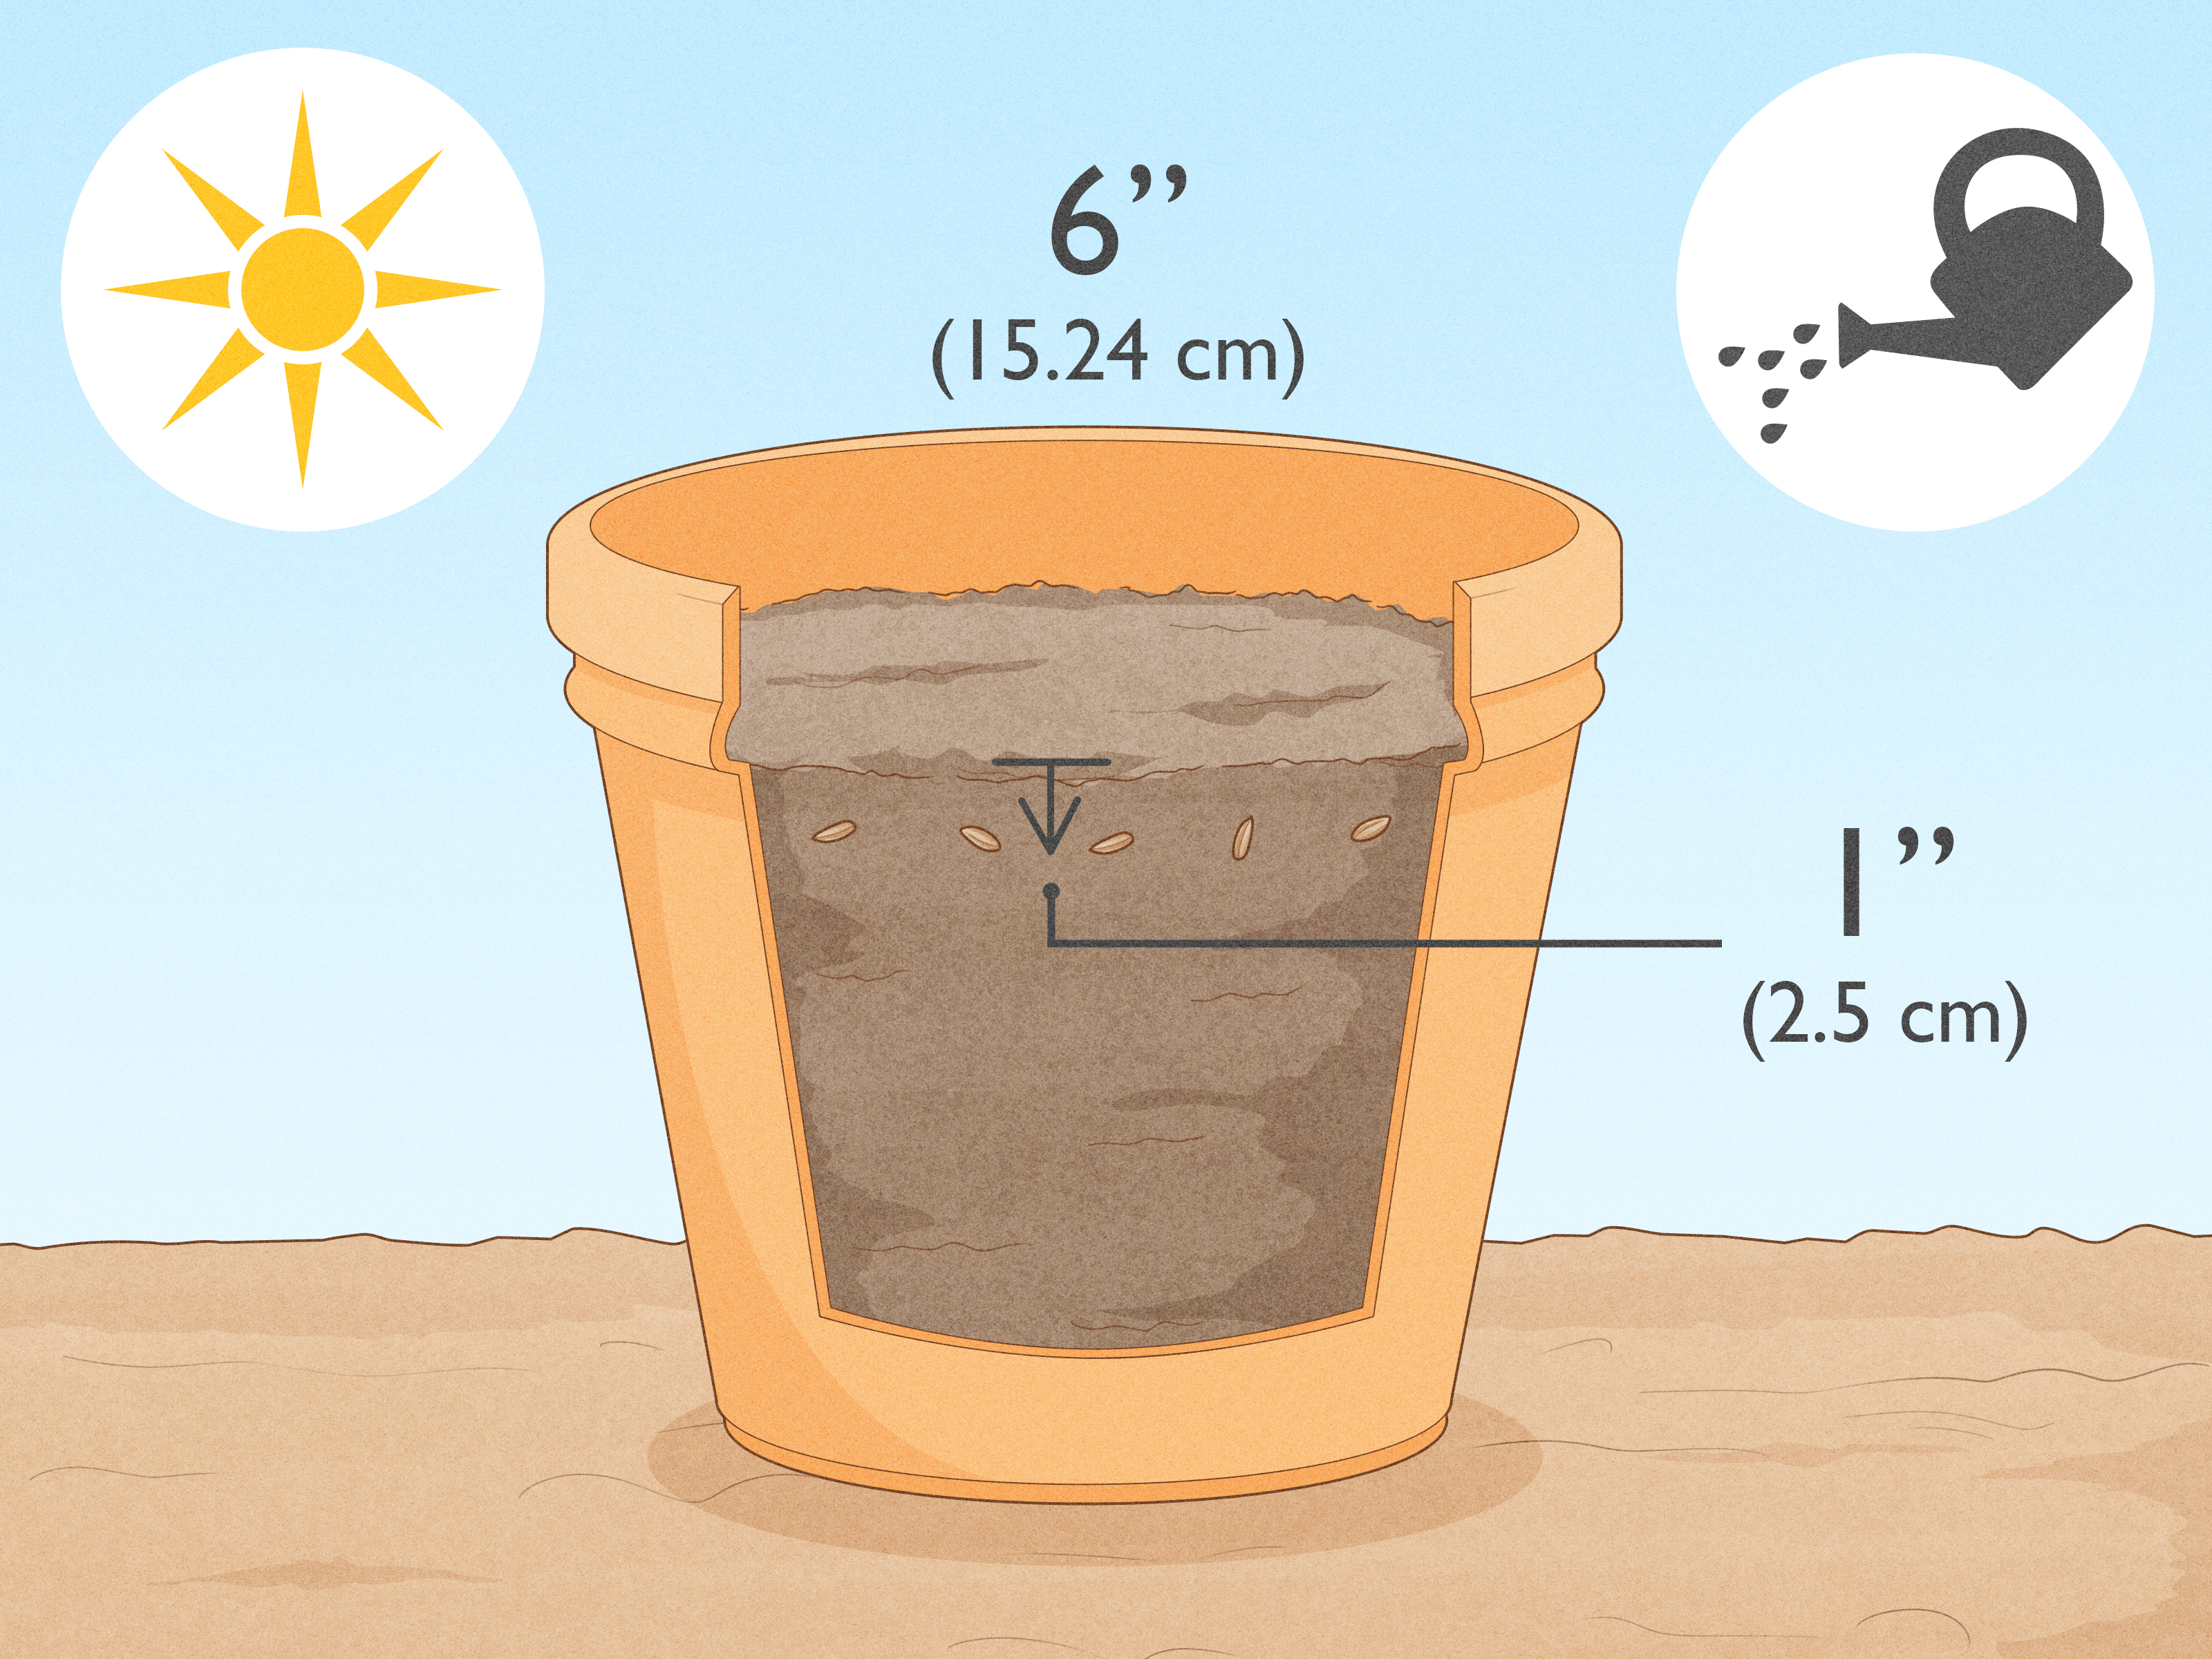
In loose garden soil, rake oats in about 1 to 1.5 inches deep. In field conditions, oats are commonly seeded deeper, around 1.5 to 2.5 inches, especially when moisture is lower. The key is to place seed deep enough to stay moist but not so deep that seedlings struggle to emerge.
5. Firm and Water
After sowing, firm the soil lightly with the back of a rake, a roller, or gentle foot pressure. Water thoroughly but gently. Keep the seedbed moist until seedlings emerge, usually within a week or so under good conditions.
Oat Plant Care
Watering
Oats need the most attention during germination and early establishment. Water every few days if rainfall is lacking. Once plants are several inches tall, water deeply when the top inch or two of soil dries out. A general target is about 1 inch of water per week, including rainfall, though sandy soils and hot weather may require more.
Fertilizing
Use fertilizer based on soil test results. Oats often need nitrogen and phosphorus, but the exact amount depends on soil fertility, previous crops, and yield goals. In a home garden, a moderate layer of compost before planting is often enough for cover-crop use. For grain production, more precise fertility planning pays off.
Avoid excessive nitrogen. It can produce lush growth that looks wonderful until a storm flattens it. Strong oat crops should stand tall, not recline dramatically like they are posing for a Renaissance painting.
Weed Control
Oats are naturally competitive when planted early and thickly. The best weed control is a strong stand. Prepare a clean seedbed, plant at the right rate, and avoid gaps. In small gardens, hand-pull or lightly hoe weeds while oat seedlings are young. Once the canopy closes, oats do a good job shading the soil.
Wild oats are a special problem in farm fields because they are closely related to cultivated oats. If wild oats are already a major issue, rotation and preplant control are important. You cannot easily remove wild oats from an oat crop without damaging the crop itself.
Pests and Diseases
Common oat issues include crown rust, stem rust, aphids, and barley yellow dwarf virus. Crown rust often appears as orange-yellow pustules on leaves and is favored by warm, moist conditions. Barley yellow dwarf is spread by cereal aphids and can cause yellowing, reddening, stunting, and poor kernel set.
The best defense is prevention: plant early, use adapted varieties, choose resistant seed when available, rotate crops, encourage airflow, and avoid stressing plants. In small gardens, removing volunteer grain plants and grassy weeds nearby can also help reduce pest and disease pressure.
Growing Oats as a Cover Crop
Oats are one of the easiest cover crops for beginners. They germinate quickly, grow fast, cover bare soil, and help reduce erosion. In vegetable gardens, they are especially useful after summer crops finish. Sow oats into empty beds in late summer or early fall, water them in, and let them grow until frost.
In cold regions, oats usually die after repeated hard freezes. The dead plants create a protective mat that can reduce spring weeds and shield soil from erosion. In spring, you can move the residue aside to plant transplants, lightly incorporate it, or leave it as surface mulch.
If you mow oats while they are still vegetative, they may regrow. If you wait until seed heads form, mowing is more likely to terminate them. For cover-crop residue that is incorporated into soil, wait two to four weeks before planting vegetables. This gives the plant material time to break down and prevents the microbial feeding frenzy from competing with new seedlings.
Companion Planting and Oat Mixes
Oats are often mixed with legumes such as field peas, crimson clover, or red clover. The oats provide quick cover and upright support, while legumes add nitrogen to the system. Oats can also be paired with forage radish or turnips for cover-crop blends that protect soil and help loosen compacted areas.
When mixing oats with peas for forage, reduce the oat seeding rate slightly so the peas have room to grow. In garden beds, do not overthink the mix. A simple oats-and-peas blend can be an excellent starter combination: fast, affordable, and useful.
When and How to Harvest Oats
Harvesting Oats for Grain
Oats grown for grain are usually ready about 90 to 120 days after planting, depending on variety, weather, and planting date. Watch the seed heads, not just the calendar. The panicles should turn yellow to brown, and the kernels should feel firm. Some stems may still have a little green when the grain is ready.
For a small plot, cut the stalks with garden shears, a sickle, or a scythe. Bundle the stems and hang them in a dry, airy place until fully dry. Once dry, thresh the oats by rubbing, beating, or treading the seed heads to release the grain. Then winnow by pouring the grain between containers in a light breeze or in front of a fan so the chaff blows away.
Remember that most oats have hulls. Homegrown oats are not instantly oatmeal. You may need a small grain dehuller or mill if your goal is edible oat groats. Without dehulling equipment, your harvest may be better suited for animal feed, seed saving, crafts, or the world’s most rustic table decoration.
Harvesting Oats for Straw
Oat straw is harvested after the grain matures and the stems dry. Cut, bundle, and store it in a dry place. Straw can be used for animal bedding, mulch, compost carbon, or garden pathways.
Harvesting Oats for Forage
For high-quality forage, harvest timing depends on how the feed will be used. Earlier harvest, such as late boot stage, gives higher protein and digestibility. Later harvest, around soft dough stage, gives more dry matter but lower feed quality. The longer oats stand after heading, the more yield you may gain, but the more tenderness and palatability you lose.
How to Store Harvested Oats
Dry storage is essential. Grain should be thoroughly dried before being stored in bins, buckets, bags, or jars. For long-term storage, the grain must be dry enough to prevent mold. Store oats in a cool, dry, rodent-proof location. Label containers with the harvest date and variety if known.
If you plan to save seed, choose grain from healthy, vigorous plants. Keep seed dry and protected from insects. Test germination before planting the following season by sprouting a small sample on a damp paper towel.
Common Mistakes When Growing Oats
Planting Too Late
Late spring planting exposes oats to summer heat during grain fill. This can reduce yield and quality. Plant as early as your soil conditions allow.
Using Processed Grocery Oats
Rolled oats, quick oats, and steel-cut oats are food, not seed. They will not grow. Buy whole seed oats instead.
Overfertilizing
Too much nitrogen can cause lodging and disease-prone growth. Feed the soil, but do not turn your oat patch into a jungle gym for fungal problems.
Seeding Too Thinly
A thin oat stand leaves room for weeds. If your goal is weed suppression or grain production, seed evenly and at an adequate rate.
Harvesting Too Wet
Wet grain can mold in storage. Let oats dry properly before storing, and keep them in a dry, ventilated place.
Practical Experiences From Growing Oats
The first lesson many gardeners learn from oats is that they grow faster than expected. One week the bed looks like someone sprinkled birdseed by accident; the next week it has become a tidy green carpet. That quick growth is one reason oats are so satisfying for beginners. You do not need months of suspense. Oats show progress early, which is encouraging when the rest of the garden is still pretending to think about germination.
A common experience in small gardens is that oats are easiest when treated like a living mulch rather than a precious crop. After tomatoes, beans, squash, or sweet corn come out, rake the bed, scatter oats, cover lightly, water, and let the plants do their job. They hold the soil through fall rains, reduce winter erosion, and make the garden look intentionally managed instead of abandoned to weeds and gardening guilt.
Another practical lesson is that seed-to-soil contact matters more than fancy equipment. Gardeners who simply throw seed onto hard, dry soil often get patchy results. The better method is to scratch the surface first, spread seed evenly, rake again, press lightly, and water. Those few extra minutes can turn a disappointing sprinkle of seedlings into a thick stand. Oats are easy, but they are not magic dust.
Watering during the first week can make or break the stand. If rain is unreliable, a gentle watering every couple of days helps the seed swell and germinate. Once the oats are up and rooted, they become much more self-sufficient. In raised beds, they may need extra moisture because raised beds drain quickly. In heavier soils, the bigger issue may be avoiding soggy conditions.
Gardeners growing oats for grain often discover that harvesting is the simple part; processing is the adventure. Cutting and drying small bundles is straightforward. Threshing can be done by hand. Winnowing is oddly satisfying, especially with a fan and a large tub. But removing hulls for edible oats is the step that surprises people. This does not mean backyard oats are pointless. They are excellent for learning, seed saving, animal treats, straw, and soil building. Just do not expect a single raised bed to replace your grocery store oatmeal supply unless your breakfast portions are mouse-sized.
For cover cropping, the most pleasant surprise is spring cleanup. In cold climates, oats usually winterkill and leave a mellow mat that is much easier to manage than living rye or wheat. You can push residue aside for transplants, plant through thin areas, or incorporate it a few weeks before sowing vegetables. The soil underneath often feels less crusted and more protected.
The best overall experience tip is simple: start small. Try one bed or one corner of a field first. Watch how oats behave in your soil, your climate, and your schedule. Once you see how quickly they grow and how useful they are, expanding is easy. Oats are not fussy divas. They are practical, hardworking plants that quietly improve a garden while asking for very little in return.
Conclusion
Growing oats is a smart project for gardeners, homesteaders, and small farmers who want a crop that is useful from seed to straw. Plant oats early in spring for grain, or sow them in late summer to early fall for an easy cover crop. Give them full sun, well-drained soil, steady moisture, and reasonable fertility. Seed thickly enough to suppress weeds, watch for rust and aphids, and harvest based on the crop’s purpose.
If you want grain, be ready for drying, threshing, winnowing, and possibly dehulling. If you want soil protection, oats are one of the friendliest cover crops you can grow. Either way, this humble cereal grain proves that sometimes the simplest crops are the hardest workers in the garden.