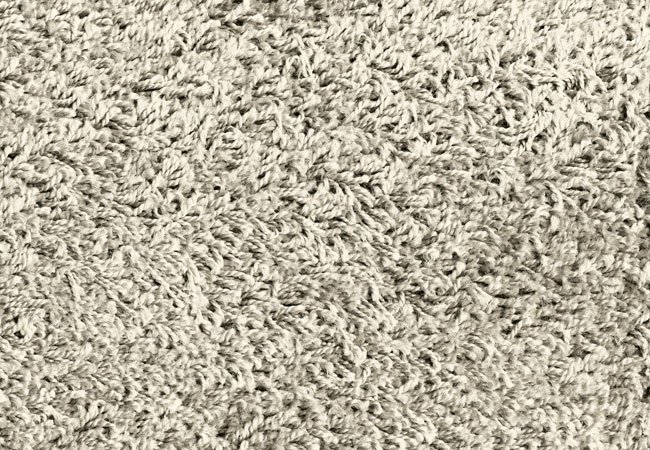
Replacing wall-to-wall carpet can be expensive, disruptive, and surprisingly good at revealing all the dust bunnies your furniture has been sheltering. When the carpet is still structurally sound but looks faded, stained, or hopelessly stuck in another decorating decade, dyeing it may offer a practical second life.
Carpet dyeing is not the same as painting a floor. A suitable dye penetrates receptive carpet fibers instead of forming a stiff coating on top. Done correctly, the carpet should still feel like carpet rather than a crunchy craft project. Done incorrectly, the result may resemble a camouflage pattern designed by spilled grape juice.
This DIY project summary explains how to dye carpet safely, which carpet fibers can be recolored, how to choose an achievable shade, and how to avoid uneven coverage. The project requires careful preparation, consistent measurements, and enough patience to finish the room once application begins.
Can Your Carpet Be Dyed?
Before buying dye, identify the carpet fiber. The fiber type determines whether the color can bond successfully.
Carpet fibers that usually accept dye
Traditional in-place carpet dyeing works best on:
- Nylon: The most common candidate for residential carpet recoloring. Nylon contains dye sites that can accept properly formulated acid dyes.
- Wool: Wool responds well to acid dyes, although valuable wool carpeting deserves extra care because heat, excess moisture, and incorrect chemistry can damage it.
- Some wool-and-nylon blends: These may accept color, but the final shade can vary if the fibers absorb dye at different rates.
Acid dyes are formulated to bond with protein fibers and polyamide fibers such as wool and nylon. The word “acid” sounds as though the carpet is about to enter a supervillain laboratory, but the acidic component in many dye systems is a controlled pH modifier such as citric acid or vinegar.
Carpet fibers that are poor DIY candidates
Standard carpet-dyeing systems generally do not work reliably on polyester, polypropylene or olefin, acrylic, and many triexta carpets. These synthetic fibers are often engineered to resist moisture and stains, which is excellent when someone drops salsa but inconvenient when you deliberately want the carpet to absorb color.
Solution-dyed fibers can also be difficult or impossible to recolor. Their original pigment is incorporated during manufacturing, and some products have few available dye sites. Heavy stain-resistant treatments may create another barrier. Carpet fibers commonly found in the United States include nylon, polyester, polypropylene, triexta, and wool, and each has different colorfastness and absorption characteristics.
How to identify the fiber safely
Check the original invoice, a manufacturer label, installation paperwork, or a leftover carpet sample. A flooring retailer may also identify a small tuft cut from a hidden edge.
Some older DIY instructions recommend burning a fiber sample and judging the flame, odor, ash, or melted bead. Because indoor flame tests introduce unnecessary fire and fume risks, documentation or professional identification is the safer approach. If the fiber cannot be confirmed, do not gamble on an entire room.
What Carpet Dye Can and Cannot Fix
Carpet dye can refresh faded color, reduce the contrast of small bleach marks, disguise certain permanent stains, and coordinate an outdated carpet with a new decorating scheme. It cannot repair worn pile, separated backing, loose seams, ripples, mold, pet-damaged padding, or odors coming from below the carpet.
Dye is transparent rather than magically opaque. The existing carpet color remains part of the final result. A pale beige carpet may become brown, charcoal, burgundy, forest green, or navy. A dark brown carpet cannot become cream. Dye adds color; it does not subtract the old color first.
Stains also influence the outcome. A dark red stain beneath blue dye may create a purplish area. A bleach spot may absorb more dye than the surrounding carpet and turn unusually dark. This is why a hidden test area is not optional. It is the carpet’s audition before you give it the leading role.
Choosing the Right Carpet Dye Color
Choose a shade darker than the current carpet. Small changes within the same color family are usually easier to control than dramatic transformations.
Practical color changes include:
- Ivory to medium beige
- Light beige to warm brown
- Pale gray to charcoal
- Faded blue to navy
- Muted green to deep olive
Riskier changes include beige to bright blue, pink to gray, red to green, or any attempt to turn a dark carpet into a lighter neutral. Opposing undertones can combine into muddy colors that no interior designer has ever requested with a straight face.
Use a product specifically labeled for installed carpet and the identified fiber. Ordinary craft dye or laundry dye may require immersion, prolonged heat, or rinsing methods that cannot be reproduced safely on wall-to-wall carpet. Carpet-specific products are designed for controlled spray application and often include pH-adjustment instructions.
Tools and Materials
- Carpet dye compatible with the carpet fiber
- Manufacturer-recommended pH stabilizer or pretreatment
- Carpet extraction machine or approved cleaning equipment
- Vacuum cleaner
- Pump sprayer rated for the hot dye mixture
- Heat-resistant plastic bucket
- Measuring cups or graduated containers
- Funnel
- Carpet rake or stiff nylon-bristle brush
- Painter’s tape and plastic sheeting
- Drop cloths or cardboard
- Chemical-resistant gloves
- Splash-resistant eye protection
- Clean white towels
- Fans for air circulation
Read the carpet-dye label and Safety Data Sheet before beginning. Follow the stated requirements for gloves, eye protection, water temperature, ventilation, disposal, and first aid. Do not combine the dye with bleach, ammonia, carpet cleaner, or any chemical that the manufacturer has not instructed you to use.
How to Dye Carpet Step by Step
Step 1: Measure the carpeted area
Multiply the room’s length by its width to calculate square footage. Measure closets and alcoves separately, then add at least 10 percent for testing, overlap, sprayer residue, and minor measuring differences.
Purchase enough product from the same manufacturing batch when possible. Running out halfway across the room can create a visible boundary if the replacement batch differs slightly in strength or temperature.
Step 2: Empty and inspect the room
Remove furniture, floor lamps, electronics, curtains that touch the floor, floor registers, and anything else vulnerable to overspray. Inspect the carpet for loose seams, tears, delamination, dampness, mold, and severe wear.
Repair structural problems before dyeing. If pet urine has reached the padding or subfloor, surface dye will not remove the odor. That problem requires lifting the carpet and treating or replacing the contaminated materials.
Step 3: Protect walls and permanent surfaces
Remove baseboards when practical, labeling the back of each piece for easier reinstallation. Otherwise, mask them carefully with painter’s tape and plastic. Protect thresholds, tile, hardwood, doors, cabinets, and adjacent rooms.
Do not underestimate overspray. Carpet dye is remarkably skilled at locating the one strip of white trim you forgot to cover.
Step 4: Vacuum thoroughly
Vacuum slowly in two directions. Pay special attention to corners, edges, traffic lanes, and areas that were beneath furniture. Dry soil left in the pile can interfere with absorption and create small light-colored patches.
Step 5: Deep-clean the carpet
Oil, detergent residue, spot-treatment chemicals, and embedded dirt can prevent even dye penetration. Clean the carpet using a method approved for its fiber and construction. Work in small sections, extract as much water as possible, and rinse away shampoo residue when the equipment or cleaner manufacturer recommends it.
Always test the cleaning method in a hidden spot first. Wool and delicate natural-fiber carpets may require professional cleaning rather than standard rental equipment. Lowe’s, The Home Depot, and Rug Doctor all emphasize following manufacturer instructions, testing hidden areas, and allowing adequate drying after extraction.
Step 6: Correct pH problems if required
Carpet dye depends on controlled chemistry. Residue from alkaline cleaners, pet accidents, or previous treatments can change how individual sections absorb color. A compatible pH stabilizer or neutralizing treatment helps create a more uniform surface.
Use only the product and concentration recommended by the dye manufacturer. More chemical is not more effective. It is simply more chemical, which is rarely the inspiring ending of a home-improvement story.
Step 7: Prepare ventilation and safety equipment
Open windows when weather permits and position fans to move air out of the work area. Keep children and pets away. Wear gloves, protective clothing, and eye protection during mixing and spraying.
The U.S. Environmental Protection Agency recommends following product labels, avoiding unapproved chemical mixtures, and increasing ventilation while using cleaning, painting, or remodeling products indoors.
Step 8: Test the dye
Prepare a small batch using precise measurements. Apply it behind a large piece of furniture or inside a closet. Brush or rake it into the pile exactly as you plan to treat the main room.
Allow the sample to dry completely before judging it. Wet carpet nearly always looks darker. Examine the test in daylight and artificial light, and rub it with a clean white towel to check for unexpected transfer after the manufacturer’s stated curing period.
If the test is blotchy, stop and investigate. Possible causes include the wrong fiber, stain-resistant treatment, residual cleaner, inconsistent dampness, pH differences, or a dye mixture that was too cool.
Step 9: Mix consistent batches
Follow the carpet-dye instructions exactly. Some acid-dye systems call for very hot water, often within a specified range around 160 to 180 degrees Fahrenheit. Other products use different temperatures or additives. The label for the chosen product is the final authority.
Record the amount of water, dye, stabilizer, and any other approved component used in each batch. Use the same measuring tools every time. Small-batch consistency is more important than creative improvisation.
Mix only as much as can be applied while it remains within the recommended temperature range. Hot dye can cool quickly inside a sprayer, particularly in an air-conditioned room.
Step 10: Lightly dampen the work area
If the product requires a damp carpet, mist the first section evenly with clean water. The fibers should be uniformly damp, not saturated. Standing water can dilute the dye, spread it unpredictably, or carry moisture into the backing and pad.
Step 11: Spray and work in small sections
Begin at the corner farthest from the exit. Treat an area small enough to spray and brush before the dye cools or dries. Maintain a consistent sprayer height, overlap passes slightly, and avoid flooding the edges.
Immediately work the dye into the pile with a carpet rake or stiff nylon brush. Use consistent strokes from several directions so the color reaches the sides of the fibers rather than sitting only on top.
Continue toward the doorway, comparing each section with the previous one. Bob Vila’s project guidance likewise recommends starting opposite the exit, spraying manageable areas, and brushing the dye into the carpet before proceeding.
Step 12: Blend boundaries while they are wet
Visible stripes usually form where one section dries before the next section overlaps it. Keep a wet edge and feather each new area into the previous one. Do not stop in the middle of a large open floor unless the product specifically allows it.
Natural breaks such as doorways, closet openings, or transitions are better stopping points. Enlist a helper for a large room, but assign clear roles. Two people independently adjusting the mixture is how a beige bedroom acquires an experimental accent zone.
Step 13: Apply additional color cautiously
Some dye systems reach the target shade in one controlled application. Others may allow another light pass. Follow the product directions rather than assuming that every carpet needs two or three coats.
Judge the color after it dries. Applying extra dye merely because the wet carpet looks uneven can oversaturate the fibers and produce a shade much darker than planned.
Step 14: Let the carpet dry completely
Keep the room ventilated and prevent foot traffic during the initial drying period. Many projects require at least 24 hours, while humidity, carpet density, temperature, and the amount of liquid applied may extend drying to several days.
Do not return furniture until the carpet and pad are completely dry. Moisture trapped under heavy furniture can slow drying, transfer color to furniture legs, create indentations, and encourage musty odors.
Step 15: Groom and inspect the finished carpet
When the carpet is fully dry and the product instructions allow it, vacuum gently to lift the pile. Inspect the room from several angles. Pile direction can make identical sections appear lighter or darker, so groom neighboring areas consistently before deciding that the color is uneven.
Reinstall baseboards and furniture using protective pads under the legs. Keep freshly dyed carpet away from wet cleaning, spot treatments, and heavy traffic for the full curing period listed by the dye manufacturer.
Common Carpet-Dyeing Mistakes
Trying to make the carpet lighter
Carpet dye adds pigment. It cannot reliably convert a dark carpet to white, cream, or pale gray. Bleaching an installed carpet is not a dependable shortcut and can weaken fibers, damage backing, create permanent patches, or release irritating fumes.
Using dye on unknown fibers
Polyester or olefin may appear to accept color while wet and then dry with weak, uneven, or transferable results. Confirming the fiber before beginning is far cheaper than discovering the mistake across 400 square feet.
Skipping the deep clean
Traffic oils and cleaner residue behave like invisible masking tape. The room may look clean while still containing enough contamination to produce streaks.
Mixing by eye
A little more powder here and a little less water there can create noticeable shade changes. Use written ratios and identical batches.
Overwetting the carpet
Excess liquid can reach the pad, loosen adhesives, distort backing, increase drying time, and spread contaminants. Uniform dampness is helpful only when required; saturation is not.
Ignoring warranties
Permanent recoloring may affect or void the carpet manufacturer’s warranty. Review the warranty before applying any aftermarket dye, especially if the carpet is relatively new.
When to Hire a Professional Carpet Dyer
Professional help is sensible when the carpet is valuable wool, the fiber is uncertain, the room is very large, several connected rooms must match, or the carpet contains extensive bleach damage. A professional can also evaluate pH, identify incompatible stain treatments, mix custom colors, and use heated application equipment.
Replacement is usually the better choice when the carpet has widespread wear, damaged backing, failed seams, mold, recurring pet odors, badly contaminated padding, or a color that must become substantially lighter. Dye can improve appearance, but it cannot restore missing fiber or reverse structural aging.
Practical Experiences and Lessons From Carpet-Dyeing Projects
The most important lesson from real-world carpet recoloring is that preparation controls the result more than spraying technique. Many beginners focus on the exciting partwatching the floor change colorand treat cleaning as an annoying opening act. Unfortunately, a carpet remembers every oily traffic path, soap residue, and mystery spot even when the human eye does not see them.
One typical project involves a light beige nylon carpet with faded areas near sunny windows and several pale cleaning marks. A medium brown dye may look like an easy solution, but the window sections can absorb color differently because ultraviolet exposure and previous spot cleaning have altered the fibers. Testing only inside a dark closet would not reveal that problem. A better test includes one hidden normal section and a small portion of the faded area.
Another common experience is underestimating how much the original color affects the new shade. A homeowner may select a neutral charcoal sample, apply it over warm tan carpet, and discover that the result has a brown undertone. The dye did not fail; the two colors combined. Successful projects treat the existing floor as the first ingredient in the color formula rather than a blank white canvas.
Batch management also separates tidy results from striped ones. During a medium-size bedroom project, the first batch may be mixed accurately, while the second is prepared hurriedly because the sprayed edge is beginning to dry. A difference of only a little water or powder can become visible after curing. Writing the formula on tape attached to the bucket prevents the classic “I’m pretty sure that was three scoops” moment.
Working speed matters, but rushing does not help. The efficient rhythm is simple: mist if required, spray, rake, inspect, and move forward. Spraying half the room before brushing allows the upper fibers to absorb more color than the lower pile. The surface may look rich while the carpet changes shade whenever someone walks across it and moves the fibers.
Edges deserve special attention. Overspray can stain baseboards, while overly cautious spraying leaves a pale border around the room. Removing the trim produces the cleanest result. When that is not possible, careful masking and a small hand sprayer or controlled brush near the perimeter can bridge the gap without redecorating the walls.
Drying often tests patience more than application. A carpet may feel dry on top while moisture remains near the backing. Returning a heavy sofa too early can trap dampness and leave dark rectangles around the legs. Fans, open interior doors, moderate temperature, and sufficient ventilation are more useful than repeatedly walking on the carpet to “check.”
Finally, not every successful decision ends with dyeing. A test patch that rejects color is valuable information, not a failed project. It may prevent an expensive mistake and point toward a professional spot-repair service, strategic area rugs, carpet tiles, or replacement. The smartest DIY result is sometimes knowing when to put the sprayer down.
Conclusion
Dyeing carpet can extend the useful life of a structurally sound nylon or wool floor, conceal mild discoloration, and update a room for less disruption than full replacement. The best results come from confirming the fiber, selecting a darker achievable shade, cleaning thoroughly, controlling pH, measuring every batch, and working in small overlapping sections.
The process is permanent, and the original color and stains will influence the final appearance. Test first, follow the specific dye manufacturer’s instructions, ventilate the room, and resist the urge to improvise with household dyes or unapproved chemicals.
Note: This guide is educational and does not replace the instructions, safety information, or warranty requirements supplied by the carpet and dye manufacturers. Research was synthesized from practical guidance published by Bob Vila, the Carpet and Rug Institute, Angi, Lowe’s, The Home Depot, The Spruce, the EPA, Rug Doctor, Rit, Jacquard Products, CDC/NIOSH, and University of Georgia Extension resources.