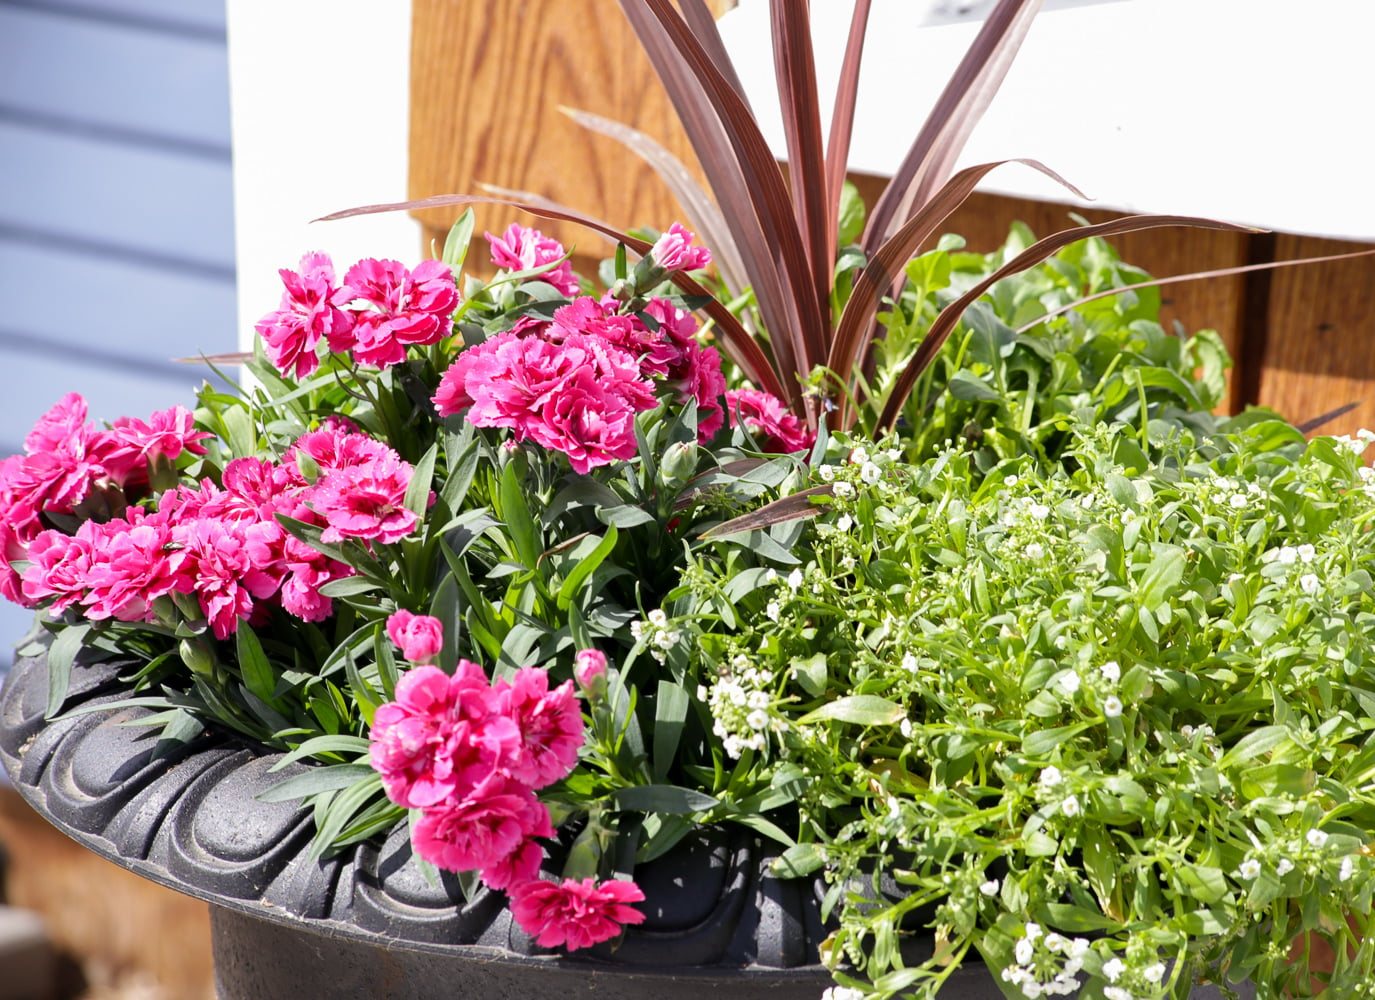
Beautiful outdoor pots and planters can turn a plain porch, patio, balcony, or front step into a miniature garden with serious personality. Better yet, you do not need a landscape-design degree, a truckload of rare plants, or a suspiciously large collection of gardening gloves. You simply need the right container, compatible plants, dependable drainage, and a plan for keeping everything alive after the first glamorous week.
Container gardening works in spaces where traditional garden beds may be impossible. Pots can also be moved, refreshed, rearranged, and replanted as the seasons change. That flexibility makes outdoor planters useful for renters, beginning gardeners, busy homeowners, and experienced gardeners who enjoy experimenting with color and texture.
Begin With the Location, Not the Plants
The fastest route to a disappointing planter is buying flowers first and figuring out where to put them later. Before visiting the garden center, watch the intended location for a full day. Determine how many hours of direct sunlight it receives and whether that sunlight arrives in the cooler morning or the hotter afternoon.
Most flowering annuals marketed for full sun perform best with at least six hours of direct light. Shade-tolerant plants may appreciate bright indirect light or a few hours of gentle morning sun but can struggle when baked against a west-facing wall. Buildings, pavement, fences, and dark surfaces may also reflect heat, creating a much warmer microclimate around the pot.
Match Plants to the Actual Conditions
Read plant labels carefully and group varieties with similar requirements. Plants sharing one container must generally agree on light, moisture, fertilizer, and temperature. Pairing a drought-tolerant succulent with a thirsty impatiens is less a design experiment and more a botanical custody dispute.
For a sunny location, consider combinations involving petunias, calibrachoa, lantana, verbena, ornamental grasses, geraniums, marigolds, or sweet potato vine. For partial shade, try coleus, begonias, impatiens, fuchsias, ferns, lobelia, or creeping Jenny. Local climate matters, so use these as starting points rather than rigid national rules.
Choose a Container That Is Both Attractive and Practical
Outdoor pots are available in terra-cotta, glazed ceramic, plastic, resin, fiberglass, concrete, metal, wood, and fabric. You can also repurpose barrels, buckets, crates, baskets, troughs, and other sturdy objects. Whatever you choose, it must be safe for the intended plants, large enough for their mature roots, and capable of releasing excess water. Never grow edible plants in a container that previously held toxic chemicals.
Compare Common Planter Materials
Terra-cotta has a classic appearance and porous walls that allow moisture to evaporate. That can benefit plants that dislike wet soil, but terra-cotta may require frequent watering in hot or windy weather.
Plastic and resin are lightweight, affordable, and better at retaining moisture. High-quality resin planters can imitate stone or ceramic without requiring three adults and a hand truck every time you rearrange the patio.
Glazed ceramic provides bold color and substantial visual weight. It is often heavier and may crack in freezing weather if left wet outdoors.
Concrete and stone are stable and excellent for large permanent displays, although moving them after planting can become an unexpected strength-training program.
Wood gives planters a warm, natural appearance. Use rot-resistant wood or a suitable liner, and make sure water can escape from the bottom.
Metal creates a contemporary or farmhouse look but can heat rapidly in direct sun. A plastic nursery pot placed inside a decorative metal container can reduce direct root contact with hot surfaces.
Select the Right Size
Larger pots hold more growing medium, support larger root systems, and usually dry more slowly than tiny containers. They are often easier to maintain during summer. Choose a pot that will remain visually balanced as the plants mature; tall or vigorous plants need enough soil volume and a wide enough base to avoid becoming top-heavy.
Before filling a large container, place it in its final location. Wet potting mix is heavy, and mature plants add even more weight. Confirm that decks, balconies, shelves, and railings can safely support the finished arrangement.
Make Drainage Nonnegotiable
A successful outdoor planter needs at least one unobstructed drainage hole. Without drainage, water pushes air out of the growing medium, leaving roots vulnerable to decline and rot. Decorative pots without holes are best used as cachepots holding removable nursery containers, unless you can safely drill appropriate openings.
Do not create a deep layer of rocks, gravel, or broken pottery as a substitute for drainage holes. These materials reduce the volume available for roots without solving the underlying problem. Instead, cover large holes with a small piece of mesh, screen, or a coffee filter so potting mix stays inside while water moves out.
Raise heavy containers slightly with pot feet or sturdy spacers when they sit on a flat surface. This keeps drainage openings from becoming sealed against the patio and improves airflow beneath the pot. Empty saucers after watering unless you are using a carefully managed self-watering system.
Use Potting Mix Rather Than Ordinary Garden Soil
Garden soil behaves differently when confined inside a pot. It can compact, drain poorly, lose air spaces, and become extremely heavy. A commercial potting mix is generally a better choice because it is designed to balance moisture retention, drainage, and aeration.
Look for a fresh, lightweight mix intended for outdoor containers. Many products contain ingredients such as composted bark, peat moss or alternative organic fibers, perlite, vermiculite, and slow-release fertilizer. Mixes vary, so read the label rather than assuming every bag contains the same recipe.
Fill the planter to approximately one inch below the rim. This space forms a small watering reservoir and prevents water and potting mix from washing over the sides. Avoid pressing the mix into a dense brick. Lightly firm it around the roots while preserving the air spaces plants need.
Design the Planter Before Planting It
A beautiful container does not require dozens of plant varieties. Strong designs often use three to five varieties repeated in a clear pattern. Limiting the palette creates harmony, while variations in height, form, foliage, and flower shape provide interest.
Use the Thriller, Filler, and Spiller Formula
The classic container-design formula includes a vertical focal plant, rounded plants that fill the middle, and trailing plants that soften the edge. These roles are commonly called the thriller, filler, and spiller. It is a reliable framework, not a law handed down on stone tablets by the gardening gods.
- Thrillers add height and drama. Examples include cordyline, canna, elephant ear, dracaena, tall coleus, salvia, and ornamental grass.
- Fillers create body around the central plant. Consider begonias, marigolds, petunias, coleus, lantana, parsley, or compact zinnias.
- Spillers trail over the rim. Sweet potato vine, creeping Jenny, ivy, bacopa, lobelia, verbena, and calibrachoa are familiar options.
A container viewed from all directions usually places the thriller near the center. For a planter displayed against a wall, place the tallest plant toward the rear and arrange shorter plants in front.
Coordinate Color With the Surroundings
Consider the color of the house, patio furniture, front door, and container itself. Red brick, gray siding, warm wood, and white trim create different backgrounds. The planter should look intentional within that setting rather than resembling a flower shop that experienced turbulence.
Monochromatic combinations use several shades of one color and tend to feel calm and polished. Analogous colors, such as pink, purple, and blue, create gentle transitions. Complementary colors, such as purple and yellow, provide stronger contrast. A 60-30-10 approach can also work: use one dominant color, a smaller amount of a secondary color, and a limited accent shade.
Let Foliage Do Some of the Work
Flowers are wonderful, but foliage holds a planter together between bloom cycles. Combine broad leaves with fine or grassy foliage, glossy leaves with matte surfaces, and deep green with silver, bronze, burgundy, or variegated patterns. A planter containing attractive foliage can still look complete when several flowers take an unscheduled personal day.
Try These Outdoor Planter Combinations
A Bright Full-Sun Container
Place purple fountain grass in the center, surround it with yellow calibrachoa and magenta verbena, and finish with lime-green sweet potato vine trailing over the edge. This combination delivers height, bold color, movement, and strong contrast.
A Relaxed Partial-Shade Planter
Use a tall burgundy coleus as the focal point, add pink wax begonias and silver dichondra, and allow creeping Jenny to spill over the rim. The foliage keeps the display interesting even when flowering slows.
An Edible Kitchen-Door Pot
Combine compact basil, curly parsley, chives, thyme, and edible nasturtiums in a wide container. Place herbs with similar moisture and light needs together, and harvest them regularly to encourage fresh growth. Mint is usually better in its own pot because its enthusiastic roots have no respect for personal boundaries.
A Modern Minimalist Arrangement
Plant one sculptural specimen, such as an agave, dwarf ornamental grass, boxwood, or compact conifer, in a simple oversized container. Repetition can be especially effective: three identical pots containing the same plant may create more impact than three complicated mixtures.
A Pollinator-Friendly Pot
Choose a succession of nectar-rich flowers suitable for your region, emphasizing native species when practical. A mixture of plants flowering at different times extends the display and provides more consistent resources for bees, butterflies, and other visiting pollinators.
Plant the Container Step by Step
- Clean the planter. Remove old roots, mineral deposits, and debris. Sanitize reused pots when previous plants showed signs of disease.
- Confirm drainage. Make sure each opening is clear and elevate the pot if necessary.
- Moisten the potting mix. Slightly damp mix is easier to distribute and less likely to repel water during the first irrigation.
- Fill partway. Add enough mix so the tops of the root balls will sit slightly below the rim.
- Arrange plants in their nursery pots. Test several layouts before removing anything. This five-minute rehearsal prevents the classic “Why is the giant plant blocking every other plant?” moment.
- Remove and inspect each plant. Loosen tightly circling roots gently and remove dead or damaged foliage.
- Plant at the original depth. Avoid burying stems or crowns deeper than they were growing in the nursery containers.
- Fill around the roots. Lightly firm the mix to remove major air pockets without compacting it.
- Water thoroughly. Apply water slowly until it flows from the drainage holes.
Keep Outdoor Pots Attractive All Season
Water According to Conditions
Containers generally dry faster than garden beds because their roots occupy a limited volume of growing medium exposed to sun, wind, and warm air. Check the soil regularly by inserting a finger approximately one to two inches below the surface. Water when that upper layer feels dry rather than following a rigid calendar.
Water slowly and thoroughly until excess moisture drains from the bottom. Shallow sprinkles encourage roots to remain near the surface and may leave the lower root ball dry. During extremely hot weather, small pots and hanging baskets may require daily watering or, in some situations, a second check later in the day.
Morning is often a convenient watering time because plants begin the day hydrated. Apply water to the growing medium rather than repeatedly soaking flowers and foliage. Grouping containers by water needs can make maintenance faster and prevent drought-tolerant plants from receiving the same treatment as moisture-loving varieties.
Replace Nutrients Carefully
Water moving through a pot gradually carries nutrients out of the root zone. Some potting mixes contain starter fertilizer, but plants may need additional feeding later. Follow the fertilizer label and consider the needs of the specific plants. More fertilizer is not automatically better; excess salts can damage roots and reduce flowering.
A controlled-release fertilizer can provide gradual nutrition, while diluted water-soluble fertilizer offers more direct control. Never add concentrated fertilizer to severely dry roots. Water first, allow the plant to recover, and fertilize later if needed.
Prune, Pinch, and Deadhead
Remove faded flowers when appropriate, trim damaged leaves, and pinch overly long stems to encourage fuller growth. Some modern annuals are self-cleaning and need little deadheading, but almost every mixed container benefits from an occasional haircut. Rotate pots periodically when plants lean toward the light.
Watch for Trouble Early
Inspect the undersides of leaves and crowded stems for aphids, mites, whiteflies, caterpillars, and signs of disease. Yellow leaves can result from several causes, including overwatering, underwatering, poor drainage, nutrient problems, root crowding, or normal aging. Examine the entire plant and its growing conditions before reaching for a treatment.
Refresh Planters With the Seasons
Outdoor pots do not need to remain unchanged from spring through winter. Cool-season flowers, bulbs, evergreen branches, ornamental kale, small conifers, and decorative natural materials can extend the display beyond summer.
In spring, combine pansies, violas, snapdragons, bulbs, and trailing ivy. In summer, shift to heat-tolerant annuals and tropical foliage. In fall, use ornamental peppers, asters, chrysanthemums, sedges, heuchera, kale, and pumpkins. Winter arrangements may include evergreen cuttings, bare branches, pinecones, berries, and weather-resistant ornaments.
Perennial plants kept in containers may require winter protection because their roots are more exposed to cold than roots planted in the ground. Appropriate care depends on the plant, container material, and regional climate. Options may include moving pots to a protected location, insulating them, grouping them together, or temporarily burying suitable containers.
Common Outdoor Planter Mistakes
- Using a pot without drainage: Attractive containers cannot compensate for waterlogged roots.
- Choosing a container that is too small: Small soil volumes dry rapidly and restrict vigorous plants.
- Mixing incompatible plants: Sun-loving, drought-tolerant plants will not enjoy the same care as shade-loving, moisture-dependent varieties.
- Using dense garden soil: Compaction and poor aeration can undermine an otherwise excellent design.
- Planting too sparsely: A mixed decorative container should usually appear reasonably full from the beginning, while still leaving room for growth.
- Ignoring mature size: That adorable plant in a four-inch nursery pot may become the neighborhood landlord by midsummer.
- Watering only the surface: A wet top layer does not guarantee that the entire root ball is hydrated.
- Forgetting maintenance: Even “low-maintenance” planters require observation, watering, pruning, and occasional feeding.
Conclusion
Creating beautiful outdoor pots and planters is a blend of horticulture and visual design. Begin with the available light, choose a suitably large container with reliable drainage, use a high-quality potting mix, and combine plants that share similar growing requirements. Then create interest through height, color, texture, repetition, and trailing forms.
The most successful container garden is not necessarily the one containing the rarest plants or the most expensive pottery. It is the one that suits its location, receives consistent care, and makes you smile when you walk past it. Start with one well-designed pot, learn how it responds, and build from there. Patios have a habit of becoming gardens one container at a time.
Experience Notes From Creating Outdoor Planters
One of the most useful lessons from working with outdoor containers is that a simple design usually ages better than an overcrowded collection of unrelated plants. At the garden center, every flower looks like it deserves a place in the cart. Back at home, however, twelve exciting varieties can turn one pot into visual static. Limiting a large container to a strong focal plant, two dependable fillers, and one trailing variety often creates a more polished result.
It also helps to photograph the empty location before shopping. A quick picture records the colors of the house, the width of the space, nearby furniture, and the visual scale of the entrance. Without that reference, it is surprisingly easy to buy a beautiful twelve-inch pot that looks like a coffee mug beside a large front door. Wider entrances and open patios generally need fewer but larger containers rather than a scattered army of tiny pots.
Another practical discovery is that plants should be selected for their behavior, not just their appearance on planting day. Some annuals pause after transplanting and then expand rapidly in warm weather. Others look full in the nursery but decline when summer heat arrives. Keeping brief notes about which plants performed well in a specific location makes next year’s shopping much easier. A simple record might say, “West porch: intense afternoon heat; lantana excellent; lobelia surrendered by June.” That sentence can save both money and emotional negotiations with another tray of lobelia.
Watering habits make an enormous difference. New planters may remain moist for several days because their roots have not filled the container. Later in the season, the same pot can dry rapidly as foliage expands and temperatures rise. Checking the mix with a finger or moisture probe is more reliable than assuming yesterday’s schedule still applies. Moving a thirsty planter away from a reflective wall or giving it light afternoon shade can sometimes reduce stress more effectively than watering it repeatedly.
Large pots have consistently proven easier to manage than collections of small ones. They provide room for roots, retain moisture longer, and create more visual impact. When weight is a concern, lightweight resin or fiberglass containers offer the appearance of ceramic or stone without requiring heroic lifting. Even so, they should be positioned before filling, particularly when stairs are involved.
Foliage plants have also been more valuable than expected. Flowers attract attention in the nursery, but coleus, ornamental grasses, heuchera, sweet potato vine, dusty miller, and other foliage plants provide structure every day. Using at least one strong foliage plant keeps the arrangement interesting when heavy rain damages flowers or a blooming variety temporarily rests.
Finally, no container remains perfect all season. Stems stretch, plants compete, flowers fade, and weather leaves evidence. The best displays are edited regularly. Removing one struggling plant and replacing it can revive an entire arrangement. Trimming an aggressive spiller may reveal plants that were disappearing beneath it. Container gardening becomes much less stressful once the planter is viewed as a changing composition rather than a finished object that must remain frozen in its opening-day pose.