Building a retail point-of-sale system with Excel may sound like using a bicycle to tow a food truck, but for a small shop, pop-up booth, school store, weekend market stand, or early-stage retail business, it can be surprisingly useful. Excel is not a full commercial POS platform, and it should never be treated like a secure payment processor. Still, it can help you organize products, record sales, calculate totals, update inventory, and review basic reports without immediately paying for complex software.
The secret is to keep the system simple. A good Excel POS workbook should answer four daily questions: What did we sell? How much did the customer owe? What stock is left? And what happened today that we should know about before tomorrow arrives wearing a fake mustache? With a clean setup, Excel can become a lightweight retail checkout tracker and inventory assistant.
This guide explains how to create a retail POS system in Excel in four practical steps. You will learn how to structure your workbook, build a product catalog, create a checkout sheet, track inventory movement, and design sales reports. The goal is not to replace professional POS software forever. The goal is to create a reliable, low-cost starting point that helps your business run with fewer sticky notes, fewer mystery numbers, and far fewer “Where did that receipt go?” moments.
What Is an Excel Retail POS System?
An Excel retail point-of-sale system is a workbook that records sales transactions, calculates prices and taxes, tracks payment methods, and updates inventory records. Instead of using a dedicated POS app, you use worksheets, tables, formulas, drop-down lists, and basic reports to manage retail activity.
A simple Excel POS system usually includes:
- A product database with SKUs, item names, categories, prices, costs, and stock levels
- A sales entry sheet for recording transactions
- Formula-based calculations for subtotal, discount, sales tax, and grand total
- An inventory tracker that subtracts sold quantities from available stock
- Daily, weekly, or monthly sales reports
- A printable receipt or order summary
This type of system works best for small operations with modest transaction volume. Think local boutiques, home-based sellers, craft fair vendors, community shops, small repair counters, or test stores that need proof of concept before investing in a full POS platform.
However, Excel should not process card payments by itself. For card transactions, use a compliant payment terminal or trusted payment provider. Never store full card numbers, CVV codes, magnetic stripe data, chip data, or other sensitive authentication details in your workbook. Excel can record that a customer paid by card, but the secure payment process belongs outside the spreadsheet.
Step 1: Plan the Workbook Structure Before Typing Randomly
Before creating formulas, design the workbook like a tiny retail command center. Many spreadsheet problems begin when someone opens Sheet1 and starts typing with the confidence of a squirrel crossing traffic. A POS workbook needs structure from the beginning.
Create the Main Worksheets
Start with five core sheets:
- Products: Stores product details such as SKU, name, category, price, cost, tax status, reorder level, and starting stock.
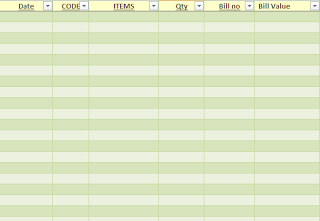
- Sales: Records each transaction line, including date, receipt number, SKU, quantity, price, discount, tax, and payment method.
- Checkout: Acts as the cashier screen where you select products and enter quantities.
- Inventory: Calculates stock on hand, units sold, low-stock warnings, and reorder needs.
- Reports: Summarizes sales totals, best-selling items, gross profit, payment types, and daily performance.
This separation keeps your workbook clean. The Products sheet is your reference library. The Sales sheet is your transaction history. The Checkout sheet is where the action happens. The Inventory and Reports sheets turn raw data into business insight.
Use Excel Tables Instead of Plain Ranges
Format each major data area as an Excel Table. Select your product list, press Ctrl + T, confirm that your table has headers, and give the table a meaningful name such as tblProducts. Do the same for sales data with a name like tblSales.
Tables make your workbook easier to maintain because formulas can reference column names instead of fragile cell addresses. For example, a formula can refer to tblProducts[Price] instead of a mysterious range like D2:D500. When you add a new product or sale, the table expands automatically. It is like giving your spreadsheet elastic pants, which is useful after a busy sales day.
Decide Which Data Must Be Entered Manually
Keep manual entry to a minimum. The more your team types, the more chances there are for “Blue Hoodie” to become “Bule Hoddie,” which then becomes a new product category in spreadsheet folklore.
Manual fields should include only what humans truly need to enter: quantity sold, payment method, discount amount, and maybe customer name if your business tracks customers. Product names, prices, costs, and tax status should be pulled automatically from the product table using lookup formulas.
Step 2: Build the Product Catalog and Inventory Foundation
The product catalog is the heart of your Excel POS system. If the catalog is messy, every sale, stock report, and profit calculation will wobble like a shopping cart with one dramatic wheel.
Create Product Columns
On the Products sheet, create these columns:
- SKU: A unique product code, such as TSH-BLK-M or CANDLE-VAN-8OZ
- Product Name: The customer-friendly item name
- Category: Apparel, accessories, home goods, snacks, books, or another group
- Unit Price: The selling price
- Unit Cost: What you paid for the item
- Taxable: Yes or No
- Opening Stock: Quantity available before sales begin
- Reorder Level: Minimum quantity before restocking
- Supplier: Vendor name or source
- Status: Active, discontinued, seasonal, or hidden
The SKU is especially important. Do not rely only on product names, because names can change or repeat. A unique SKU gives every item a permanent identity. It is the product’s passport, driver’s license, and tiny backstage pass all in one.
Add Drop-Down Lists to Reduce Errors
Use Excel Data Validation to create drop-down lists for fields like Category, Taxable, Payment Method, and Status. For example, instead of letting a cashier type “Cash,” “cash,” “CASH,” or “money rectangle,” give them a clean list: Cash, Card, Gift Card, Store Credit, Other.
Drop-down lists improve consistency, which matters when you later create reports. If payment methods are typed inconsistently, your report may split the same payment type into several categories. Data validation is one of the simplest ways to make your Excel POS system feel more professional.
Calculate Stock on Hand
Inventory tracking can be handled with a formula that subtracts sold units from opening stock. On the Inventory sheet, use your product list as the base, then calculate units sold from the Sales table.
A basic formula may look like this:
This means Excel checks the Sales table for every sale matching that SKU, adds the sold quantities, and subtracts the result from opening stock. You can also add received stock if you create a Purchases sheet later.
For better inventory control, add a Low Stock column:
Now Excel can politely tell you when a product needs attention. It will not physically reorder inventory, call your supplier, or bring you coffee, but it will help prevent surprise stockouts.
Step 3: Create the Checkout Sheet and Sales Log
The Checkout sheet is where your Excel POS system starts to feel like a real register. This is the place where you select products, enter quantities, apply discounts, calculate tax, and create a receipt-style total.
Design a Simple Checkout Area
Create columns such as:
- Line Number
- SKU
- Product Name
- Quantity
- Unit Price
- Discount
- Tax
- Line Total
Use a drop-down list in the SKU column so the cashier can select a product code. Then use a lookup formula to pull the product name and unit price from the Products sheet. In modern Excel, XLOOKUP is a clean option for this task.
Once the SKU is selected, the product name and price appear automatically. That small automation saves time and reduces pricing mistakes, especially when your store has similar items in different colors, sizes, or scents. Nobody wants to sell the luxury candle for the price of a clearance keychain unless chaos is part of the brand strategy.
Add Line Total, Subtotal, Tax, and Grand Total
For each product line, calculate the line total:
At the bottom of the checkout area, create summary cells for:
- Subtotal: Sum of quantity times unit price before tax
- Total Discount: Sum of discounts
- Sales Tax: Calculated based on taxable items and local tax rules
- Grand Total: Final amount due
- Amount Paid: Customer payment amount
- Change Due: Amount paid minus grand total
Sales tax rules vary by state, city, product type, and business situation, so do not guess. Add a tax rate cell that can be updated easily, and confirm your actual requirements with local tax guidance or a qualified professional. In Excel, flexibility is helpful; accidental tax math is not.
Record Each Sale in the Sales Sheet
After completing a transaction, copy or append each sold item as a row in the Sales sheet. Every row should include:
- Date and time
- Receipt number
- Cashier name or initials
- SKU
- Product name
- Quantity
- Unit price
- Discount
- Tax
- Line total
- Payment method
You can do this manually, but if you are comfortable with Excel macros, you can create a button that copies completed checkout lines into the Sales table and clears the checkout area afterward. If you use macros, save the workbook as a macro-enabled file and restrict editing permissions so someone does not accidentally turn your register into digital confetti.
Create a Basic Receipt
Add a printable receipt section on the Checkout sheet or create a separate Receipt sheet that references the current transaction. Include your store name, address, date, receipt number, items purchased, quantities, totals, payment method, return policy, and a friendly thank-you message.
For example:
This receipt does not need to be fancy. It needs to be clear, accurate, and easy to print or save as a PDF.
Step 4: Add Reports, Controls, and Safety Rules
A POS system is not just a calculator with better posture. It should help you understand what happened in your business. The Reports sheet turns sales rows into useful retail decisions.
Create Sales Reports
Start with simple metrics:
- Total sales today
- Total transactions
- Average order value
- Sales by payment method
- Sales by product category
- Best-selling products
- Gross profit by item
- Low-stock products
You can build these reports with PivotTables, SUMIFS formulas, COUNTIFS formulas, and charts. A PivotTable is especially useful because it lets you summarize sales by date, category, cashier, payment method, or SKU without rebuilding formulas every time.
For example, to calculate total sales for a selected date:
To calculate total units sold for a product:
These reports help answer practical questions. Which products deserve more shelf space? Which items are selling slowly? Which day of the week is strongest? Are discounts helping or simply nibbling at profit like a raccoon in a snack drawer?
Protect Important Cells
Protect formula cells so users do not accidentally overwrite them. Leave only the input cells unlocked, such as SKU, quantity, discount, payment method, and amount paid. Then protect the sheet with a password known to the owner or manager.
This is not high-level cybersecurity. It is spreadsheet seatbelts. It helps prevent honest mistakes during busy checkout moments.
Back Up the Workbook Daily
Backups are not optional. Save a copy of the workbook at the end of each business day. Use a file naming format like:
Store backups in a secure cloud folder or external drive. If multiple people use the file, consider OneDrive or SharePoint with version history. Your sales records should not depend on one laptop that may someday meet a spilled latte.
Keep Payment Data Out of Excel
This point deserves a neon sign: do not store sensitive payment card information in Excel. Your workbook may record payment method, last four digits if your payment provider allows it, transaction ID, and approval status. It should not store full card numbers, CVV codes, PINs, magnetic stripe data, or chip data.
Use a compliant card reader or payment processor for actual card payments. Excel can help track the sale after payment is approved, but it should not become the vault for cardholder data. That is a job for secure payment systems, not a workbook named Final_POS_Real_Final_v7.xlsx.
Example Layout for a Small Retail Excel POS System
Imagine a small gift shop selling candles, mugs, cards, and local art prints. The owner creates a Products table with 250 items. Each item has a SKU, category, cost, price, tax status, and opening stock. At checkout, the cashier selects SKUs from a drop-down list, enters quantities, and Excel fills in the product name and price.
A customer buys two candles, one greeting card, and a ceramic mug. Excel calculates the subtotal, applies a 10% discount to the mug, calculates sales tax on taxable items, and shows the final amount due. The customer pays with a card using a separate payment terminal. The cashier records “Card” as the payment method and enters the processor transaction ID in the Sales sheet.
At the end of the day, the owner opens the Reports sheet and sees total sales, best-selling items, low-stock alerts, and gross profit. The report shows that vanilla candles sold fast, greeting cards had strong margins, and one mug style is moving slower than a Monday morning printer. The owner knows what to reorder and what to promote next week.
Pros and Cons of Creating a POS System in Excel
Advantages
Excel is affordable, flexible, familiar, and easy to customize. Many business owners already know the basics, and you can design the workbook around your store’s exact workflow. It is excellent for testing a new retail idea, managing a small catalog, or learning what data matters before upgrading to dedicated POS software.
Limitations
Excel is not ideal for high-volume retail, multi-register checkout, real-time online inventory sync, barcode scanner integration, employee permissions, loyalty programs, or built-in payment processing. It also requires careful backups and disciplined data entry. As your business grows, a professional POS system may become the better choice.
The smartest approach is to treat Excel as a starter system or internal management tool. Use it to understand your workflow, clean up your product data, and build reporting habits. When your needs outgrow it, you will know exactly what to look for in a commercial POS platform.
Best Practices for a Better Excel POS Workbook
Use Consistent Product Codes
Create a SKU system that is easy to understand. For example, a black medium T-shirt could be TSH-BLK-M. A vanilla 8-ounce candle could be CND-VAN-8. Consistent SKUs make searching, reporting, and inventory tracking much easier.
Separate Sales from Inventory Adjustments
Sales are not the only reason inventory changes. Products may be returned, damaged, donated, lost, received from suppliers, or used as samples. For better accuracy, create an Inventory Adjustments sheet where you record non-sale changes with a reason code.
Review Reports Weekly
Daily sales reports are useful, but weekly review is where patterns appear. Look at top products, low-margin items, frequent discounts, slow inventory, and payment trends. A good report should lead to action, not just sit there looking official.
Keep the Design Simple
A beautiful workbook is nice, but reliability matters more. Avoid overly complex formulas that nobody understands. Use clear labels, locked formula cells, consistent formatting, and visible instructions. The best POS spreadsheet is one your team can actually use when the store is busy.
Real-World Experience: What You Learn After Using an Excel POS System
Using Excel as a retail POS system teaches you something important: checkout is only the visible part of retail. The real work happens behind the scenes in product setup, inventory control, pricing accuracy, and reporting discipline. At first, many store owners think they only need a sheet that adds up purchases. After a few weeks, they realize the bigger value is understanding the business.
One common experience is discovering how often product information changes. Prices get updated. Suppliers change costs. Seasonal items come and go. New colors arrive. A product name that made sense in January suddenly looks confusing in July. This is why a clean Products table matters so much. When the product catalog is organized, the checkout process feels calm. When it is messy, every transaction becomes a tiny detective story.
Another lesson is that inventory accuracy depends on habits, not just formulas. Excel can calculate stock on hand, but it cannot know that someone forgot to record a damaged item or sold a product during a busy event without entering it. The workbook is only as honest as the data you feed it. That is not Excel being difficult; that is Excel being a mirror with gridlines.
Many small retailers also learn that reports change decision-making. Without reports, buying inventory can feel like guessing with enthusiasm. With reports, you may notice that a product you personally love barely sells, while a plain-looking item quietly pays the rent. Sales data can be humbling, but it is also freeing. It helps you stop arguing with your shelves and start listening to your customers.
Excel POS systems also reveal workflow problems. If checkout takes too long, maybe the SKU list needs better organization. If discounts are entered inconsistently, maybe you need predefined discount options. If reports are hard to read, maybe your categories are too broad. A spreadsheet forces you to define your process, and that definition is valuable even if you later move to Square, Shopify POS, Lightspeed, or another professional platform.
The best experience comes from starting small. Build the first version with only the features you truly need: product lookup, quantity, price, tax, payment method, receipt number, and inventory reduction. Use it for a few days, then improve it. Add reports after you have real sales data. Add inventory alerts after your product list is stable. Add macros only when the manual process is clearly repetitive. This gradual approach prevents the workbook from becoming a giant spreadsheet octopus with formulas in every tentacle.
Finally, an Excel POS system teaches respect for backups. A retail workbook contains sales history, stock records, pricing details, and operational notes. Losing it can be painful. Daily backups, version history, and limited editing access are simple habits that protect your work. In retail, surprises are guaranteed. Your spreadsheet should not be one of them.
Conclusion
Creating a retail point-of-sale system with Excel is a practical way to manage basic checkout, sales tracking, and inventory control when your business is small or just getting started. By planning your workbook structure, building a clean product catalog, designing a simple checkout sheet, and adding reports and safety controls, you can create a lightweight POS tool that saves time and improves visibility.
Excel will not replace a full POS platform for every business, and it should never be used to store sensitive card data. But for small retailers, it can be an excellent stepping stone. It helps you understand your products, your customers, your sales patterns, and your inventory needs before you invest in more advanced software. In other words, Excel may not wear a cashier apron, but it can still help your store run smarter.