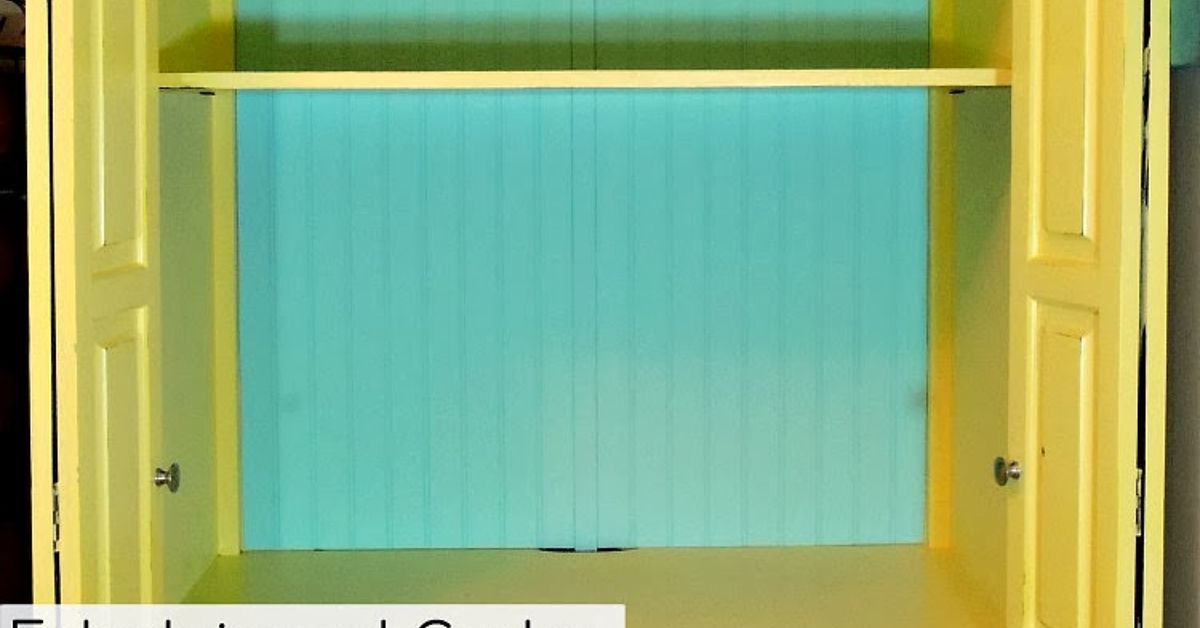
An outdated entertainment center may look like a bulky reminder of the era when televisions were approximately the size of studio apartments. Before dragging it to the curb, however, take another look. Those deep shelves, roomy cabinets, cord openings, adjustable compartments, and sturdy doors can become an exceptionally useful craft storage center.
With thoughtful planning and a few coats of paint, an old media cabinet can organize yarn, fabric, scrapbook paper, cutting tools, paints, ribbons, sewing supplies, and unfinished projects. Better yet, the finished piece can look intentional rather than like a television cabinet wearing a fake mustache.
Why an Old Entertainment Center Makes Excellent Craft Storage
Traditional entertainment centers were designed to manage a surprisingly complicated collection of electronics. They often included a large central opening, shelves for media players, drawers for movies, cabinets for speakers, and holes for cables. Although streaming technology made many of these features unnecessary, the basic structure remains ideal for storage.
Better Homes & Gardens has featured entertainment centers repurposed as entryway organizers, demonstrating how open shelves, baskets, hooks, labels, and fresh paint can give these large pieces an entirely different job. The same principles transfer naturally to a sewing station, scrapbook cabinet, gift-wrapping center, or general craft supply organizer.
It Offers Both Open and Hidden Storage
Craft supplies are not all equally photogenic. Neatly stacked fabric can look charming on an open shelf. A half-used bag of pom-poms, fourteen tangled charging cords, and a jar labeled “miscellaneous googly eyes” may be happier behind a door.
An entertainment center usually provides both display space and concealed compartments. Frequently used tools can remain visible and accessible, while bulk materials, unfinished projects, and backup supplies stay behind closed doors.
It Uses Vertical Space Efficiently
A tall cabinet stores more without consuming the floor area required by several small carts or drawer units. Vertical organization is especially valuable in a multipurpose room, guest bedroom, basement, or dining area that occasionally becomes a craft studio. Craft-room designers frequently rely on wall storage, tall paper racks, shelves, and pegboards to free work surfaces and reduce floor clutter.
It Can Become a Complete Creative Work Zone
The original television opening can hold a cutting machine, sewing machine, task light, pegboard, magnetic board, or small desktop. Lower cabinets can store heavy supplies, while narrow side shelves can organize paper, paint, thread, or vinyl rolls. Instead of scattering materials through several closets, one piece of furniture creates a central craft station.
Plan the Craft Storage Makeover Before Opening the Paint Can
Paint is powerful, but it is not clairvoyant. It cannot decide where your supplies should go, repair a sagging shelf, or explain why you own 63 shades of nearly identical blue cardstock. Begin with a practical plan.
Inspect the Furniture
Check the frame, shelves, hinges, backing, and base. Tighten loose fasteners and look for swollen particleboard, peeling laminate, water damage, mold, unstable joints, or severe warping. Minor scratches and empty hardware holes can usually be filled, but crumbling composite material may not be worth rebuilding.
Identify whether the unit is solid wood, wood veneer, MDF, laminate, or particleboard. The surface determines how aggressively it should be sanded and which primer is likely to bond properly. Thin veneer can be damaged by heavy sanding, while MDF edges may absorb coatings quickly and require additional sealing.
Measure the Supplies, Not Just the Cabinet
Measure scrapbook paper, cutting mats, fabric bolts, storage bins, sewing machines, printers, and electronic cutting machines. Include the space required to open lids, pull out drawers, feed material through equipment, and reach electrical outlets.
A machine may fit inside the cabinet yet become impossible to operate because its mat needs another two feet of clearance. That is the DIY equivalent of buying shoes that fit perfectly as long as you never walk.
Create Storage Zones
Divide the cabinet according to activity or supply type. A useful arrangement might include:
- A central equipment zone for a sewing machine or cutting machine
- A paper zone with vertical dividers or magazine files
- A paint zone with shallow bins that keep labels visible
- A fabric zone with folded textiles or clear containers
- A tool zone for scissors, rulers, adhesives, and punches
- A project zone for works in progress
- A refill zone for duplicate and rarely used supplies
Organizing a creative room by task makes it easier to begin projects and put materials away afterward. Keeping an empty drawer or basket for active projects can also protect unfinished work without forcing you to dismantle it every evening.
Tools and Materials for the Makeover
The exact supply list depends on the cabinet’s condition and surface, but most entertainment center craft storage projects require the following:
- Screwdrivers, drill, and basic hand tools
- Degreasing cleaner and clean cloths
- Wood filler or a suitable surface-repair compound
- Sanding sponges or fine- to medium-grit sandpaper
- Vacuum, tack cloth, or lint-free cloth
- Bonding or stain-blocking primer appropriate for the surface
- Durable furniture, cabinet, trim, or enamel paint
- Quality brushes and small foam or microfiber rollers
- Painter’s tape and drop cloths
- Optional protective clear coat
- New knobs, pulls, hinges, baskets, bins, and labels
- Anti-tip furniture anchors
Follow the instructions printed on each coating. Drying time, recoating time, ventilation requirements, and surface compatibility vary by product.
How to Turn an Entertainment Center into Craft Storage
Step 1: Empty, Disassemble, and Label Everything
Remove shelves, doors, drawers, knobs, magnetic catches, and unnecessary media hardware. Place screws and hinges in labeled bags. Photograph the original configuration before disassembly, especially when several hinges look identical but secretly have different personalities.
Decide which parts should return. Removing bulky television doors can create a convenient open workstation. Keeping lower doors preserves hidden storage. An obsolete swivel platform may be removed, fixed in place, or reused as a rotating base for a machine if it remains structurally sound.
Step 2: Clean Thoroughly
Old furniture may hold wax, polish, kitchen grease, smoke residue, adhesive, dust, or fingerprints from three generations of remote-control searches. Paint applied over contamination is likely to peel or separate.
Vacuum corners first, then wash the surfaces with an appropriate degreaser. Rinse or wipe away cleaner residue as directed and allow the cabinet to dry completely. Furniture-painting guidance consistently emphasizes removing dust, oil, grime, and glossy contamination before priming.
Step 3: Repair Damage
Fill unwanted hardware holes, dents, deep scratches, and chipped edges. Replace weak backing panels and reinforce shelves that will support heavy machines. Sand repaired areas until they blend smoothly with the surrounding surface.
If you plan to move a shelf, fill its former support holes only after confirming that they will not be useful later. Adjustable storage is valuable because craft collections have a habit of expanding when nobody is watching.
Step 4: Scuff-Sand the Surface
The goal is usually to dull the existing finish and create a surface the primer can grip, not to excavate the cabinet until it becomes a pile of nostalgic sawdust. Lightly sand glossy wood, veneer, and laminate unless the coating manufacturer specifies a different process.
Sand solid wood in the direction of the grain. Use extra care around veneer edges. After sanding, vacuum thoroughly and wipe away remaining dust. Even tiny particles can become permanent bumps beneath a smooth painted finish.
Step 5: Apply the Correct Primer
Primer is particularly important on slick laminate, dark finishes, patched areas, bare wood, MDF, and surfaces that may release stains or tannins. A bonding primer improves adhesion, while a stain-blocking product can prevent old discoloration from appearing through a light paint color.
Coat corners, shelf edges, trim, and repaired spots carefully. MDF edges may need additional primer because they are more absorbent than the smooth faces. Allow the primer to dry according to the manufacturer’s instructions, then lightly sand rough areas if recommended.
Step 6: Paint in Thin, Controlled Coats
Use a quality angled brush for corners and molding, then roll broad flat areas for a smoother finish. Thin coats generally level and cure better than one heroic coat thick enough to preserve footprints.
Allow each coat to dry for the specified period. Lightly sanding between coats may improve smoothness when permitted by the product directions. Two finish coats are common, although a dramatic change from dark brown to pale white may require additional coverage.
Furniture and cabinet paints are practical choices because they are designed for surfaces that receive regular handling. Chalk-style paint can create a matte decorative appearance, but the required preparation and protective finish vary by brand.
Step 7: Add a Protective Finish Where Needed
A compatible clear topcoat can add resistance to scratches and chips on frequently handled shelves, doors, and work surfaces. It is especially useful where bins slide in and out or where wet glue, paint bottles, and tools may touch the finish.
Not every furniture paint needs a separate sealer, so check the label before adding one. Combining incompatible products can cause yellowing, cloudiness, or poor adhesion. Allow the entire system to cure before loading the cabinet; “dry to the touch” does not always mean ready for a thirty-pound machine.
Step 8: Upgrade the Interior
Paint alone changes the appearance, but interior additions create the real storage transformation. Consider installing:
- Pegboard or a magnetic panel in the former television opening
- Hooks for scissors, rulers, rotary cutters, or embroidery hoops
- Vertical dividers for paper and cutting mats
- Shallow drawers for stamps, thread, beads, and fasteners
- Pull-out trays for machines or printers
- Dowels or tension rods for ribbon
- Door-mounted pockets for patterns and instruction sheets
- LED task lighting for the central work area
- A corkboard, dry-erase panel, or inspiration board
Pegboards, modular accessories, drawer organizers, rolling components, wall racks, and vertical dividers are widely used in craft spaces because they keep tools accessible while preserving work surfaces.
Step 9: Reassemble and Anchor the Cabinet
Reinstall the doors, shelves, drawers, and hardware only after the finish has cured sufficiently. Place heavier materials on lower shelves and lighter supplies higher up.
Because an entertainment center is tall and may become top-heavy when doors or drawers are open, secure it to the wall with appropriate anti-tip hardware. The U.S. Consumer Product Safety Commission advises anchoring furniture with doors, drawers, or shelves and keeping heavy items low to reduce tip-over hazards.
Smart Ways to Organize Craft Supplies Inside
Use Clear Containers Selectively
Clear bins are useful for supplies that are difficult to describe or easily forgotten. They let you see ribbon, punches, beads, stamps, and decorative materials without opening every container. Matching opaque baskets may look calmer on open shelves, so a combination of both types often works best.
Choose Straight-Sided Bins
Square or rectangular containers generally use shelf space more efficiently than heavily tapered baskets. Measure the shelf depth and door clearance before buying organizers. A beautiful bin that prevents the cabinet door from closing is simply decorative sabotage.
Label by Category and Purpose
Labels should be specific enough to guide cleanup but broad enough to remain useful. “Adhesives” may work better than separate containers for every glue formula. Other practical labels include “card making,” “sewing tools,” “vinyl scraps,” “gift wrap,” “unfinished projects,” and “refills.”
Professional organization advice commonly recommends labels, designated homes for small items, and consistent categories. Color-coding can also make a creative space easier to scan while turning supplies into part of the display.
Keep Everyday Supplies at Eye or Waist Level
Place frequently used tools where they can be reached without crouching or climbing. Reserve the highest shelves for lightweight, seasonal, or rarely used items. Store heavy paint containers, machines, paper stacks, and bulk supplies near the bottom.
Protect an Empty Space for Active Projects
Leave one basket, shelf, or drawer intentionally empty. It provides a temporary home for a project that cannot be completed in one sitting. Without this buffer, unfinished work tends to colonize the dining table and declare independence.
Do Not Fill Every Inch Immediately
A little open space allows the system to adapt. Your current collection may fit perfectly, but future hobbies can arrive without warning. One innocent watercolor set can lead to brushes, paper blocks, masking fluid, palettes, storage jars, and a sudden strong opinion about pigment granulation.
Choosing a Color for the #powerofpaint Transformation
The color determines whether the entertainment center quietly blends into the room or becomes a creative focal point.
- Soft white or warm cream: Brightens a dark cabinet and makes colorful supplies stand out.
- Deep navy or charcoal: Gives ornate or oversized furniture a more tailored appearance.
- Sage, dusty blue, or muted teal: Adds personality without overwhelming a shared room.
- Bold coral, yellow, or turquoise: Turns the cabinet into an energetic craft-room centerpiece.
- Two-tone treatment: Uses a darker exterior with a lighter interior to add depth and improve visibility.
Painting the backing panel a contrasting color can visually separate the central workstation from the surrounding storage. Wallpaper, removable liner, stencil patterns, or thin decorative panels can add detail without covering every surface in a bold color.
Furniture makeovers frequently use contrasting interiors, upgraded hardware, painted back panels, and divided shelves to make ordinary storage pieces feel customized.
Common Mistakes to Avoid
- Skipping the cleaning stage: Sanding alone does not reliably remove grease, wax, or polish.
- Using the wrong primer: Slick laminate and stain-prone wood may require specialized products.
- Applying paint too heavily: Thick coats can drip, wrinkle, or remain soft longer.
- Reloading the cabinet too soon: Bins and machines can leave marks in paint that has dried but not cured.
- Ignoring equipment ventilation: Printers and electronic machines should have adequate airflow and cord clearance.
- Creating shelves without measuring supplies: A row of attractive compartments is less impressive when standard scrapbook paper misses fitting by half an inch.
- Forgetting lighting: Deep cabinets can become shadowy caves without a task light.
- Failing to anchor the furniture: Tall cabinets should not rely on optimism as a safety device.
Maintaining the Finished Craft Storage Center
Once the makeover is complete, maintain it with a simple routine. Return tools after each project, wipe spills promptly, and review supplies every few months. Remove dried adhesives, empty containers, unusable scraps, and duplicate tools you never reach for.
Keep a small inventory list inside one door for frequently replaced materials. A dry-erase panel can track glue sticks, blades, tape, thread, paint, or printer supplies. The goal is not to create a museum-quality cabinet that nobody touches. It should remain easy to use, easy to reset, and flexible enough for real creative work.
A Realistic Entertainment Center Craft Storage Experience
The following is a representative DIY project experience based on common furniture-makeover challenges and solutions.
The project usually begins with unreasonable confidence. You look at the entertainment center and think, “A little paint, a few baskets, done by lunch.” This optimism lasts until the first door is removed and reveals twelve oddly placed screws, a broken magnetic catch, and a mysterious cable that appears to lead directly into the furniture’s soul.
The first meaningful lesson is that preparation takes longer than painting. Emptying the cabinet, removing hardware, cleaning old residue, filling holes, sanding glossy areas, and wiping away dust may consume most of the first work session. It is not the glamorous part of the #powerofpaint story, but it determines whether the final finish looks durable or begins peeling the first time a storage bin slides across a shelf.
The second lesson appears during planning. The giant central opening seems enormous until you place a cutting machine inside it. Suddenly, the power cord needs room, the lid needs to open, and a cutting mat must travel through the machine without hitting the back panel. Moving one shelf up by two inches can make the difference between a useful workstation and an expensive display niche.
Color selection brings another surprise. A paint chip that looks calm in the store can feel much darker across a seven-foot cabinet. Testing the color on a removable shelf or hidden panel helps reveal how it behaves in the room’s actual light. A two-tone design often solves the problem: a rich exterior gives the piece character, while a pale interior reflects light and makes small supplies easier to find.
The most satisfying moment is usually the first finish coat. The dated orange-brown cabinet begins to look like something chosen rather than inherited. Fresh hardware sharpens the transformation. A painted backing panel makes the former television cavity feel like a deliberate studio zone. At this stage, it becomes easy to understand the power of paint: the furniture has not changed size or shape, yet its visual identity is completely different.
Organization produces its own reality check. Buying containers before sorting supplies often leads to an impressive collection of bins that do not fit the shelves. Sorting first is slower but smarter. Once supplies are grouped, it becomes obvious which categories need drawers, which can share a basket, and which should be displayed vertically.
The best adjustment is often leaving some space empty. An unused drawer becomes a home for works in progress. A partially open shelf makes room for a future hobby. One unassigned basket handles the temporary clutter that would otherwise spread across the room.
After several weeks of use, the most successful features are rarely the most decorative ones. They are the shelf positioned at the correct height, the hook that keeps scissors within reach, the labeled container that ends a ten-minute search, and the lower cabinet that hides bulky refills. The makeover succeeds when starting a project requires less setup and cleanup no longer feels like a second hobby.
There may still be imperfections. A repaired edge might remain visible in certain light. One roller mark may refuse to disappear. A hinge may need adjustment after the doors are reinstalled. Those details do not erase the achievement. The finished entertainment center has avoided disposal, replaced several smaller organizers, and created a dedicated place for creativity. It has also proved that obsolete furniture is not always useless; sometimes it is simply waiting for a better job description.
Conclusion
Turning an entertainment center into craft storage combines practical organization, furniture reuse, and the dramatic #powerofpaint. The project works because the cabinet already contains the bones of an efficient storage system: deep compartments, adjustable shelves, hidden cabinets, and a generous central opening.
The strongest results come from planning storage zones before painting, preparing the surface carefully, selecting compatible coatings, and organizing supplies according to how they are actually used. Add labels, vertical dividers, task lighting, upgraded hardware, and anti-tip anchors, and the former media center can become a safe, durable, and attractive creative station.
Most importantly, the makeover does not require the furniture to pretend it was always something else. It simply gives a sturdy old piece a colorful second actpreferably one involving fewer tangled cords and more neatly organized glitter.