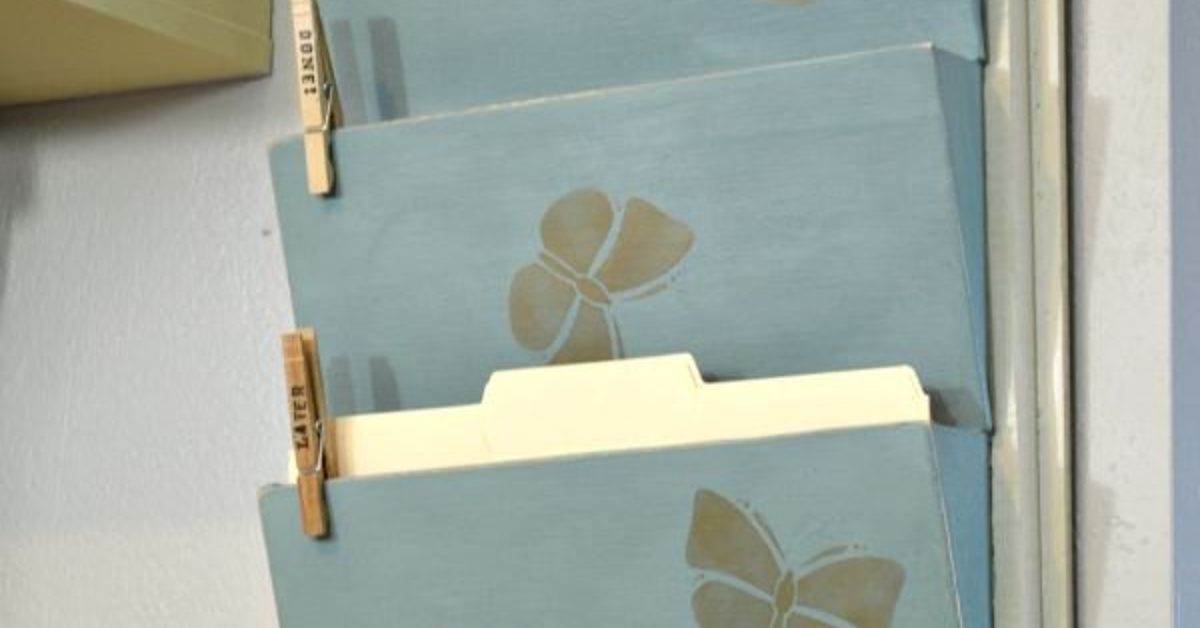
Paper has a special talent for multiplying when nobody is watching. One minute, your desk holds a single school form; the next, it appears to be hosting a convention for bills, receipts, permission slips, coupons, and mysterious envelopes you are afraid to open. A DIY wall file organizer gives all that paperwork a proper home without stealing valuable desk or counter space.
This beginner-friendly woodworking project creates three roomy wall pockets for mail, folders, homework, magazines, project notes, or household documents. The organizer uses straightforward square cuts, basic lumber, and simple fasteners. No advanced joinery degree is required, and your high school shop teacher does not need to supervise.
The finished organizer described below measures approximately 24 inches wide, 32 inches tall, and 4 inches deep. You can paint it, stain it, label each pocket, or adjust the dimensions to fit your space. More importantly, you will finally have somewhere to put the electricity bill besides “under that other thing.”
Why Build a Wall-Mounted File Organizer?
A wall-mounted file organizer turns unused vertical space into practical storage. It works especially well in a home office, kitchen command center, entryway, mudroom, classroom, craft room, or family homework station. Because the pockets remain open and visible, papers are easier to retrieve than documents buried in a drawer.
The organizer can also support a simple paper-management routine. Assign one pocket to incoming papers, one to items requiring action, and one to documents ready to file or archive. This prevents every sheet from entering the same terrifying pile.
Benefits of This DIY Design
- Uses easy-to-find plywood and standard boards
- Requires mostly straight, square cuts
- Provides three full-width storage pockets
- Can be built with screws or a brad nailer
- Fits standard letter-size folders and papers
- Can be customized with paint, stain, labels, or hooks
- Keeps paperwork accessible while clearing horizontal surfaces
Finished Dimensions and Design
This plan produces a three-pocket wooden wall file organizer measuring approximately:
- Width: 24 inches
- Height: 32 inches
- Depth: About 4 inches
- Pocket-front height: 7 1/4 inches
- Usable pocket width: About 22 1/2 inches
The tall back panel supports three box-style pockets. Each pocket has a solid front, two side pieces, and a bottom board. The open top allows file folders and papers to extend above the front edge, making folder labels easy to see.
A 24-inch width gives the unit a balanced appearance and allows it to hold multiple folders without feeling cramped. However, the plan is flexible. A narrow 14- to 16-inch version works well beside a desk, while a wider organizer can become a full family command center.
Materials for the DIY Wall File Organizer
Lumber and Sheet Goods
- One piece of 1/2-inch plywood, at least 24 by 32 inches
- Two 1-by-8 boards for the pocket fronts and sides
- One 1-by-4 board for the pocket bottoms
- Optional 1-by-2 board for a decorative top rail or label strip
Remember that nominal lumber dimensions are not the same as actual dimensions. A 1-by-8 board is generally about 3/4 inch thick and 7 1/4 inches wide, while a 1-by-4 is approximately 3/4 inch thick and 3 1/2 inches wide.
Hardware and Finishing Supplies
- 1 1/4-inch wood screws or 18-gauge brad nails
- Wood glue
- Wood filler
- 120-grit and 180- or 220-grit sandpaper
- Primer and paint, or wood stain and a clear protective finish
- Appropriate wall screws and anchors
- Washers for mounting screws
- Optional metal label holders, vinyl lettering, hooks, or knobs
Tools
- Tape measure
- Pencil
- Carpenter’s square
- Circular saw, miter saw, or table saw
- Drill and driver bits
- Clamps
- Orbital sander or sanding block
- Brad nailer, if using nails
- Stud finder
- Level
- Safety glasses, hearing protection, and a dust mask
A home-improvement store may be able to cut the plywood panel to size. This is useful if you do not own a table saw or if transporting a full sheet of plywood would turn your car into a very unsuccessful lumberyard.
DIY Wall File Organizer Cut List
Measure the actual width and thickness of your boards before cutting. Small variations in store-bought lumber can affect the final dimensions.
- Back panel: One piece of 1/2-inch plywood at 24 by 32 inches
- Pocket fronts: Three pieces of 1-by-8 at 24 inches long
- Pocket bottoms: Three pieces of 1-by-4 at 22 1/2 inches long
- Pocket sides: Six pieces of 1-by-8 at 3 1/2 inches long
- Optional top rail: One piece of 1-by-2 at 24 inches long
Each pocket front is 24 inches wide. The two 3/4-inch-thick side pieces sit behind the front, leaving 22 1/2 inches between them. That is why each bottom board is cut to 22 1/2 inches.
How to Build a DIY Wall File Organizer
Step 1: Inspect and Mark the Wood
Choose the cleanest face of the plywood for the front of the back panel. Check the boards for severe warping, large splits, or loose knots. Minor imperfections can add character, but a board shaped like a potato chip is not the kind of character this project needs.
Use a tape measure and carpenter’s square to mark every cut. Draw a small X on the waste side of each line so you know which side to remove. This simple habit prevents the classic DIY moment when a perfectly cut board turns out to be exactly 3/4 inch too short.
Step 2: Cut the Back Panel and Pocket Parts
Cut the plywood back to 24 by 32 inches. A circular saw guided by a clamped straightedge can produce a clean, accurate cut. Support the plywood on rigid foam insulation or scrap boards so the offcut does not drop and tear the veneer.
Cut the three 24-inch pocket fronts from the 1-by-8 boards. Next, cut six side pieces, each 3 1/2 inches long. Finally, cut three 22 1/2-inch bottom boards from the 1-by-4.
Dry-fit one pocket before cutting additional material if your boards differ from standard dimensions. Place the two side pieces behind the front board and fit the bottom between them. The pieces should form a shallow open-top box.
Step 3: Sand Before Assembly
Sand all visible faces and edges with 120-grit sandpaper. Follow with 180- or 220-grit paper for a smoother finish. Sand in the direction of the wood grain and soften sharp corners slightly, especially along the upper edges of the pocket fronts.
Do not aggressively round the surfaces where pieces will be joined. Flat mating surfaces produce tighter joints. Remove sanding dust with a vacuum and a clean cloth before applying glue or finish.
Step 4: Assemble the First Pocket
Lay one pocket front face down on a protected work surface. Position a side piece behind each end, keeping the outer edges flush with the ends of the front board. Place the 22 1/2-inch bottom board between the side pieces and align it with the lower edge of the front.
Apply a thin, continuous bead of wood glue where the pieces meet. Clamp the assembly and confirm that the sides are square to the front. Fasten the pieces with brad nails or predrilled wood screws.
If using screws, drill pilot holes to reduce the chance of splitting the boards. Countersink the screw heads slightly so they can be concealed with wood filler. If using a brad nailer, keep your hands away from the nail path because thin fasteners can occasionally follow the grain and exit through the side of a board.
Step 5: Build the Remaining Pockets
Repeat the process for the other two pockets. Use the first completed pocket as a visual reference, but continue checking each assembly with a square. Small errors become more obvious when three pockets are mounted in a neat vertical row.
Wipe away wet glue squeeze-out with a damp cloth. Dried glue can block stain from penetrating evenly, leaving pale patches that look suspiciously like fingerprints from a tiny woodworking ghost.
Step 6: Lay Out the Pockets on the Back Panel
Place the plywood back panel face up. Mark horizontal reference lines for the bottom of each pocket at approximately 1 1/2 inches, 11 1/2 inches, and 21 1/2 inches from the bottom of the back panel.
This spacing leaves visible areas of the back panel between the pockets. The gaps make folder labels easier to read and provide accessible locations for wall-mounting screws.
Set all three pockets on the panel before fastening anything. Use a square and tape measure to verify that the pockets are level, centered, and evenly spaced. Step back and look at the complete layout. Your eyes often notice a crooked pocket before your tape measure admits anything is wrong.
Step 7: Attach the Pockets to the Back
Once the arrangement looks correct, trace lightly around each pocket. Remove the pockets and drill pilot holes through the back panel where the screws will enter the pocket bottoms and side pieces.
Apply wood glue to the rear edges of the first pocket. Position it on the layout marks and clamp it in place. Drive screws through the back panel into the pocket bottom and sides. Use screws that are long enough to secure the joint but not so long that their tips emerge through the front.
Attach the other pockets the same way. Recheck alignment after every pocket because wet glue allows pieces to slide. Let the adhesive cure according to the manufacturer’s directions before loading or mounting the organizer.
Step 8: Fill, Sand, and Finish
Fill visible nail holes, countersunk screw heads, and small gaps with wood filler. Allow it to dry, then sand the repaired areas smooth. Remove every trace of dust before painting or staining.
For a painted organizer, apply a suitable primer first, particularly over plywood edges and knots. Follow with two thin coats of durable interior paint. Light sanding between coats can help create a smoother result.
For a natural wood look, test the stain on a scrap from the same board. Pine and other softwoods may absorb stain unevenly, so a compatible pre-stain conditioner can help reduce blotchiness. Finish with a clear protective coating after the stain has dried.
Allow the completed organizer to cure fully before installation. A finish that feels dry may still be soft enough to collect fingerprints, paper fibers, and evidence of impatience.
How to Mount the Wall File Organizer Safely
A loaded paper organizer can become surprisingly heavy. Whenever practical, fasten it directly to wall studs. Use a stud finder to identify the stud locations, then confirm that the selected mounting points will pass through open sections of the back panel rather than through a pocket.
Hold the organizer against the wall and use a level to position it. Mark the mounting points, remove the unit, and drill the required pilot holes. Drive suitable structural or wood screws through the back panel and into the studs. Washers under the screw heads help distribute pressure across the plywood.
If studs are not available in the required locations, use wall anchors specifically rated for the wall material and the expected combined weight of the organizer and its contents. Follow the anchor manufacturer’s instructions regarding drill-bit size, wall thickness, spacing, and load limits. Do not rely on ordinary screws driven only into drywall.
Before drilling, consider the possibility of electrical wiring, plumbing, or other utilities behind the wall. Avoid drilling directly above or below outlets, switches, plumbing fixtures, and other obvious service locations unless you have confirmed the area is clear.
Ways to Customize Your Wooden File Organizer
Add Labels
Install metal label holders on the pocket fronts or apply removable vinyl lettering. Useful categories include “Incoming,” “Action,” “To File,” “School,” “Bills,” and “Projects.” Clear labels prevent the pockets from becoming three identical versions of the original paper pile.
Add Hooks or a Small Shelf
Mount hooks along the bottom for keys, lanyards, scissors, headphones, or reusable shopping bags. A narrow shelf above the top pocket can hold a small calendar, decorative object, or container of pens.
Use Contrasting Colors
Paint the back panel one color and the pocket fronts another. A dark back with natural wood pockets creates a modern appearance, while soft neutral colors work well in a kitchen or entryway. For a child’s homework station, each pocket can have a different cheerful color.
Create a Chalkboard or Dry-Erase Area
Leave several inches of open back panel above the top pocket and coat that section with chalkboard paint. Another option is to mount a small dry-erase panel for reminders, meal plans, deadlines, or messages such as “Please stop putting unopened mail on the toaster.”
Adjust the Number of Pockets
A compact organizer may need only two pockets. A busy household might prefer four or five. When increasing the height, strengthen the back panel and use additional mounting points. Keep the organizer proportionate so it does not become a wooden filing cabinet hanging several feet above the floor.
Simple Organization Systems That Actually Work
Building the organizer solves only half the problem. The other half is deciding how each pocket should function. A three-stage paper workflow is easy to maintain:
- Incoming: Newly received mail, school papers, receipts, and documents that have not been reviewed.
- Action: Bills to pay, forms to sign, invitations requiring a response, and paperwork connected to current tasks.
- To File: Documents that have been handled but must be stored elsewhere for future reference.
Review the incoming pocket several times a week and schedule a regular time to empty the action pocket. Recycle unneeded papers immediately. Sensitive documents should be shredded rather than left in an open organizer.
A wall file system works best for active paperwork, not permanent records. Birth certificates, tax documents, legal papers, financial statements, and medical records belong in a secure filing system appropriate for their sensitivity and retention requirements.
Common DIY Wall Organizer Mistakes to Avoid
Making the Pockets Too Shallow
Very shallow pockets look sleek but hold little more than a few envelopes. A depth of approximately 3 1/2 inches gives this design enough room for folders and thicker document groups without creating a bulky cabinet.
Skipping the Dry Fit
Always assemble the pieces without glue first. A dry fit reveals incorrect cuts, twisted boards, and layout problems while they are still easy to correct.
Forgetting About Folder Height
Standard file folders are taller than ordinary letter paper. Leave enough back panel visible above each pocket so tabs remain readable and papers are easy to grab.
Using Too Much Glue
More glue does not automatically create a stronger joint. Apply enough to cover the mating surface with a thin film. Excess glue creates cleanup work and can interfere with stain.
Mounting With Inadequate Fasteners
The organizer must support its own weight plus the weight of stored papers. Use studs whenever possible or properly rated anchors suited to the wall material. Adhesive strips are not an appropriate substitute for secure mechanical mounting on this project.
Loading the Organizer Too Soon
Allow the glue and finish to cure before installation and use. Loading the pockets prematurely can shift joints, mark the finish, or turn an otherwise tidy project into modern art.
Real-World Build Experience: What This Project Teaches You
One of the first lessons from building a DIY wall file organizer is that “simple” does not mean “careless.” The project uses square pieces, but accurate measuring still matters. A side piece that is slightly longer than its partner can twist the entire pocket. The best approach is to set a stop block on a miter saw or clamp a reference block near the cutting line. Repeated parts then come out the same length without measuring each one from scratch.
The dry-fitting stage is also more valuable than it initially appears. Many beginner builders feel tempted to start gluing as soon as the pieces are cut. Then the bottom board refuses to fit between the sides, the front sits upside down, and the glue begins forming a skin while everyone negotiates with the lumber. Arranging all the pieces first makes the actual assembly calm and predictable.
Another common experience involves sanding. The project may look smooth after the first pass, but sharp pocket edges quickly become noticeable during everyday use. Papers drag across those edges, hands reach into the bins, and folder corners catch on rough fibers. Slightly easing the upper edges with fine sandpaper makes the organizer feel more polished and prevents splinters. It is a tiny detail with an outsized effect.
Painted versions often look best when the builder pays special attention to the plywood edges. Exposed plywood layers absorb primer and paint differently from the face veneer. Applying an extra coat of primer, sanding lightly, and then repainting can make those edges look cleaner. Iron-on edge banding is another option, but it is not essential for a casual farmhouse or workshop-style organizer.
The mounting stage tends to produce the biggest reality check. An empty organizer feels fairly light, so it is easy to underestimate the final load. Once three pockets contain catalogs, folders, notebooks, and a month of unopened mail, the weight increases quickly. Direct attachment to studs provides the most reassuring result. When anchors are necessary, selecting them based on the wall material and expected load is far better than grabbing whatever plastic object happens to be rolling around in the bottom of a toolbox.
Using the organizer also reveals whether the original categories make sense. A pocket labeled “Miscellaneous” usually becomes a legal sanctuary for clutter. More specific labels create better habits. “Needs Signature,” “Pay This Week,” or “School Papers” tells users exactly what belongs inside. Removable labels are helpful during the first few weeks because the system can evolve as the household learns what it actually needs.
Capacity is another practical lesson. Deep pockets are useful, but they can encourage overfilling. A stuffed bin makes papers difficult to see and can stress the mounting hardware. The organizer works best as a short-term processing station rather than permanent document storage. A five-minute weekly review keeps the pockets useful and prevents the lowest bin from becoming an archaeological site.
Finally, this project is an excellent confidence builder. It introduces measuring, repetitive cutting, clamping, drilling, sanding, finishing, and wall mounting without demanding complicated joinery. Small mistakes can usually be filled, sanded, or hidden behind a folder. The result is useful enough to earn a permanent place in the home, which feels much better than building a practice box that spends the rest of its life holding random screws in the garage.
Conclusion
An easy-build DIY wall file organizer is a practical weekend project for taming mail, homework, bills, and active paperwork. The three-pocket design uses basic materials, straightforward cuts, and beginner-friendly assembly methods. It can be customized for nearly any room and finished to match modern, traditional, farmhouse, or colorful family décor.
The most important steps are accurate cutting, careful alignment, smooth finishing, and secure wall mounting. Build the pockets square, leave enough space for folder tabs, and attach the finished organizer with hardware appropriate for the wall and expected load.
Once installed, label each pocket and give every category a clear purpose. Your paperwork may continue arriving with impressive determination, but at least it will no longer be allowed to roam freely across the kitchen counter.

