A hot glue gun is the pocket-size power tool of the craft world: fast, inexpensive, slightly dramatic, and always ready to attach a pom-pom to something that probably did not need one. Used well, it can produce neat wreaths, sturdy cardboard models, quick fabric accents, holiday decorations, and lightweight repairs. Used carelessly, it produces lumpy seams, spiderweb strings, scorched foam, and the unmistakable dance known as “I just touched molten glue.”
The difference is technique. These DIY hot glue gun tips and tricks explain how to select the right tool, match temperature to materials, create cleaner bonds, prevent drips, remove mistakes, and work more safely.
What Hot Glue Does Best
Hot glue is a thermoplastic adhesive. A glue gun melts a solid stick, and the adhesive hardens as it cools. That fast cooling cycle makes it useful for crafts because parts can often be held briefly and released without waiting hours for liquid glue to cure.
It performs especially well on textured or porous materials such as cardboard, unfinished wood, felt, ribbon, cork, and artificial flowers. It can also grip glass, metal, ceramic, and some plastics when surfaces are clean and the project is light-duty. However, hot glue is not automatically structural, waterproof, flexible, or heatproof. A bond may soften in a hot car, loosen outdoors, pop from a glossy surface, or crack on an item that bends repeatedly. Use it for fast assembly, not as a substitute for screws, epoxy, stitching, or construction adhesive.
Choose the Right Glue Gun
Mini vs. Full-Size
A mini glue gun is light and easy to control on tiny decorations, paper crafts, jewelry components, and narrow seams. A full-size model delivers more adhesive and is better for wreaths, large wood crafts, foam-board structures, and repetitive assembly.
Always match the glue-stick diameter to the gun. Common mini sticks are about 0.27 inch in diameter, while common full-size sticks are about 0.43 inch. Check the tool label because forcing the wrong stick into the feed tube can cause uneven flow, jams, or backflow.
Low, High, or Dual Temperature
Use low temperature for delicate materials such as craft foam, lace, ribbon, lightweight fabric, thin paper, and heat-sensitive floral supplies. High temperature is better suited to sturdy materials such as unfinished wood, metal, thick plastic, and glass. A dual-temperature gun is the most versatile option for a mixed craft box.
Temperature and wattage are not the same. Temperature determines how hot the adhesive becomes; wattage mainly affects heat-up speed and how well the gun maintains flow during continuous use. Higher wattage is useful for long beads and production-style crafting, while a modest gun is usually enough for occasional projects.
Corded vs. Cordless
Corded guns provide steady heat for long sessions. Cordless models are easier to maneuver around large wreaths, displays, and awkward corners, but some cool quickly away from their charging base. Check runtime before choosing one for a large project.
Set Up a Safer, Cleaner Workstation
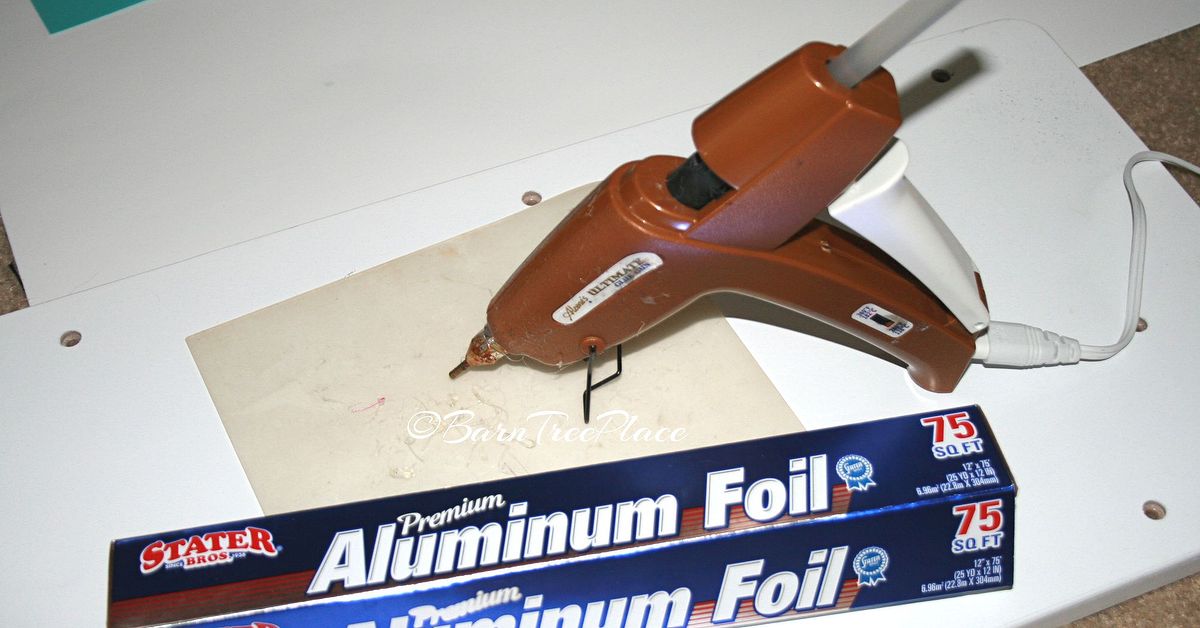
Place the gun on a stable, heat-resistant surface before plugging it in. A silicone craft mat is ideal because cooled glue usually peels away easily. Put a ceramic tile, metal tray, or folded cardboard beneath the nozzle to catch drips. Use the built-in stand instead of laying the hot gun on its side, and keep the cord away from elbows, scissors, paint cups, pets, and curious children.
Work in a dry, well-lit area clear of flammable clutter. Safety glasses are sensible when gluing overhead or pressing springy materials. Silicone finger protectors help when holding tiny parts near a fresh bead, but they do not make the nozzle safe to touch. Children should use an age-appropriate low-temperature tool only with close adult supervision; for many kids’ projects, white glue is the calmer choice.
Prepare Before the Glue Gets Hot
Hot glue rewards organization and punishes improvisation. Dry-fit every piece first. Mark alignment points, arrange embellishments in order, cut ribbon to length, and place clamps or clothespins within reach. Once glue is dispensed, the useful working window can be short.
Surfaces should be clean, dry, and free of dust, oil, wax, or loose paint. Lightly scuffing a hidden glossy area with fine sandpaper may improve grip, but test first. Valuable, painted, plated, antique, or unfamiliar materials deserve a discreet test spot before the main application.
Master the Basic Technique
Load Before Heating
Insert the correct stick before turning on the gun. Do not pull a partially used stick backward after it has softened. When it becomes short, feed another stick behind it.
Let the Gun Preheat Fully
Many craft guns need roughly three to five minutes, although the exact time depends on the model. Test the flow on scrap material. If the trigger feels stiff or the glue emerges in a thick curl, wait longer. Forcing the trigger before the adhesive melts can damage the feed mechanism or cause a sudden blob.
Use Less Glue Than You Think
A huge blob does not automatically create a stronger bond. Apply a thin bead, short line, or a few dots that match the contact area. Keep the nozzle close to the surface so the glue lands where intended. On larger parts, use a zigzag or perimeter bead but leave room for the adhesive to spread when pressed.
Join Immediately
Press the pieces together as soon as the glue is applied. Hold steady until the adhesive firms. Clothespins, binder clips, painter’s tape, or light clamps can act as extra hands as long as they do not mark the project.
Break Strings Cleanly
Release the trigger before lifting the nozzle, then make a small circular or sideways motion close to the surface. Moving straight upward while still squeezing creates the classic hot-glue cobweb. If stringing remains excessive, lower the temperature, let the gun stabilize, clean residue from the cooled nozzle, and confirm that the sticks are the correct size.
Hot Glue Gun Tricks for Cleaner Results
Hide the Adhesive
Place beads along inside seams, beneath overlapping trim, behind ribbon folds, or on the back of decorative pieces. On wreaths, attach elements from the base outward so later layers cover earlier glue points. Good hot-glue work often looks effortless because the adhesive is doing its job offstage.
Use a Toothpick for Tiny Parts
Place a small dot of hot glue on scrap cardboard, then transfer a controlled amount with a wooden toothpick. This works well for miniature flowers, model details, beads, and narrow corners. Keep your fingers well away from the hot adhesive.
Work in Short Sections
For ribbon, trim, garlands, or upholstery accents, avoid one heroic bead across the entire project. Apply glue in short sections and press each area before continuing. This prevents the first half from cooling before the second half is positioned.
Make Temporary Bumpers or Grips
Dots of cooled hot glue can add temporary traction to lightweight hangers, small decor bases, rulers, or craft jigs. Test first and allow the glue to cool completely. Never rely on homemade hot-glue grips for ladders, wet floors, mobility devices, cookware, electrical equipment, or anything safety-critical.
Use Silicone Molds for Embellishments
Colored or clear glue can be dispensed into small heat-safe silicone molds to create faux gems, dots, labels, or decorative shapes. Let the piece cool fully before removing it, verify that the mold is heat-rated, and never return a craft mold to food use.
Reduce Drips, Strings, and Jams
A small drip from an idle gun is normal because heated adhesive expands. Excessive dripping can result from an overly hot setting, residue around the nozzle, poor-quality sticks, or an incorrect diameter. Keep the gun upright, use a drip pad, and select the lowest effective temperature.
Once the tool is unplugged and completely cool, remove loose exterior residue according to the manufacturer’s instructions. Never poke metal objects into a powered gun, immerse it, or use flammable solvents on a warm nozzle.
If glue backs up from the rear feed tube, unplug the gun and stop using it. Check the stick size and make sure the feed was not forced. A damaged cord, smoking body, cracked housing, repeated overheating, or unreliable trigger is a reason to replace the tool, not begin an experimental repair.
How to Remove Hot Glue Mistakes
Hard Surfaces
Let the glue cool, then lift an edge with a plastic scraper or fingernail. On compatible surfaces, a little isopropyl alcohol applied around the edge may loosen the bond. Spot-test first, ventilate the area, and keep all liquids away from the electrical tool.
Fabric
Do not smear warm glue deeper into fibers. Let it harden, chill the area with a sealed cold pack, and gently flex the fabric to peel the glue away. Delicate, synthetic, coated, or valuable textiles may need professional care because aggressive pulling can stretch fibers or remove color.
Skin
If hot glue contacts skin, do not rip off adhesive stuck to the burn. Cool the area under cool running water and do not use ice. Seek medical attention for blistering, deep or large burns, severe pain, or burns involving the face, eyes, hands, joints, or another sensitive area.
Common Mistakes to Avoid
- Starting too soon: Poorly melted glue creates weak, uneven beads.
- Using high heat on everything: Foam, ribbon, thin plastic, and paper may warp or discolor.
- Gluing dusty surfaces: The adhesive may bond to dirt instead of the project.
- Using hot glue structurally: Furniture, shelving, wiring, plumbing, and load-bearing items need proper repair methods.
- Leaving the gun unattended: Unplug or switch it off during extended breaks.
- Touching the nozzle to test it: The nozzle has already submitted its report: hot.
- Storing it too soon: Let the gun cool completely before putting it away.
Five Hundred Words of Real-World Hot Glue Experience
The first lesson hot glue teaches is that speed is not the same as rushing. On my earliest projects, I plugged in the gun and began squeezing almost immediately. The trigger resisted, so naturally I responded with the thoughtful precision of a person trying to close an overpacked suitcase: I pushed harder. A few moments later, the gun warmed up and released a surprise blob large enough to have its own ZIP code. Waiting for a smooth test bead would have saved glue, cardboard, and several creative explanations.
The second lesson is to stage the project before touching the trigger. When I began laying out wreath pieces, ribbon, and small decorations in their final order, my work became cleaner almost overnight. Hot glue gives you seconds, not a committee meeting. Dry-fitting reveals which pieces need trimming, which surfaces barely touch, and which charming ornament has a crooked back that will require extra support. It also prevents the classic problem of gluing the prettiest piece first and discovering that it blocks the next six pieces.
I also learned that smaller glue beads usually look better and often hold just as well for lightweight crafts. Early on, I treated hot glue like frosting and every joint like a cupcake. The results were secure but not elegant. A narrow bead placed on the hidden side of a seam is easier to control, cools faster, and does not squeeze out around the edges. For tiny parts, transferring a dot with a toothpick gives more control than aiming the nozzle directly at an object the size of a lentil.
Material testing has saved more projects than any flashy hack. One ribbon may tolerate low-temperature glue beautifully while another shrivels. One plastic container may grip well after cleaning while another releases the glue in a perfect cast of the original bead. I now test scraps whenever the material is unfamiliar, glossy, coated, flexible, or important. The test answers three questions: Will the surface deform? Will the bond hold? Will removal damage the finish?
Another practical discovery is that the best glue-gun accessory is not glamorous. It is a silicone mat. Drips cool on it and peel away, failed pieces can be parked on it, and the worktable avoids becoming an archaeological record of holiday crafts. A small ceramic tile beneath the nozzle also works well. Add finger protectors, clothespins, and a container for glue strings, and the workstation becomes much calmer.
Finally, I learned to recognize when hot glue is the wrong answer. It is wonderful for speed, positioning, decor, prototypes, and lightweight assemblies. It is less wonderful for washable garments, outdoor objects exposed to heat, constantly flexing items, valuable finishes, and repairs whose failure could hurt someone. Choosing another adhesive is not admitting defeat. It is evidence that the craft drawer has achieved wisdom.
Conclusion
A hot glue gun becomes far more useful when you treat it as a temperature-controlled tool rather than a point-and-squeeze gadget. Match the gun and stick size, choose heat based on the material, prepare every part before application, use the smallest effective bead, and let the bond cool under pressure. Keep the nozzle clean, the gun upright, and the workstation protected. Most importantly, know the limits of hot-melt adhesive and switch to a stronger or more flexible joining method when the project demands it.
Note: Glue-gun temperatures and operating procedures vary by model. Read the manufacturer’s instructions, check current recall information for an unfamiliar or malfunctioning tool, supervise young users closely, and seek appropriate medical care for significant burns.