Note: This article is written for educational and editorial use. Vintage amplifiers can contain dangerous voltages even after being unplugged, so hands-on repair should be done only by people who understand electrical safety, discharge procedures, and proper test equipment.
Introduction: When an Old Amplifier Refuses to Stay Dead
A current dumping amplifier is one of those audio inventions that sounds like it should belong in a sci-fi garage: part elegant engineering, part stubborn British minimalism, and part “why use twenty parts when five will do?” The best-known example is the legendary Quad 405, a compact power amplifier from the 1970s that used Peter Walker’s current dumping topology to solve a problem that haunted many transistor amplifiers: crossover distortion.
Bringing a current dumping amplifier back to life is not just a matter of replacing a fuse and hoping the smoke stays inside. These amplifiers combine a small, precise Class A stage with a larger, muscle-bound Class B output stage. The clever bit is that the Class A section corrects the errors of the heavy-duty output devices, allowing the amplifier to deliver power without needing the same biasing rituals, thermal fussing, or adjustment drama found in many conventional Class AB designs.
In plain English: the little amplifier does the thinking, the big amplifier does the lifting, and the speaker gets the music. When everything works, it is beautifully simple. When it fails, the restoration process can feel like detective work with a soldering iron.
What Is a Current Dumping Amplifier?
A current dumping amplifier uses two cooperating amplifier sections. The first is a low-power, high-quality amplifier that handles accuracy. The second is a high-power output stage that supplies current to the loudspeaker. Instead of asking the output stage to be perfectly linear, the circuit uses feedback and bridge correction techniques to cancel much of the output-stage error.
This design became famous through the Quad 405, introduced in the mid-1970s. The idea was radical because it promised low distortion, fewer parts, no output bias adjustment, and improved long-term stability. That last point is especially attractive for restorers. A design with fewer adjustments means fewer opportunities for a previous owner to “improve” the amplifier with a screwdriver and dangerous confidence.
Why the Design Still Matters
Modern amplifiers have moved in many directions: Class D, MOSFET outputs, digital signal processing, and compact switching power supplies. Yet the current dumping amplifier remains fascinating because it solved an old problem with analog elegance. It did not simply throw more bias current at crossover distortion. It used a correction method that allowed the power devices to dump current into the load while the smaller amplifier cleaned up the mess.
That is why restorers still care. A healthy current dumping amplifier can sound smooth, controlled, and surprisingly modern. It may not impress people who judge amplifiers by glowing meters and chrome faceplates, but it has a quiet charm: the kind of charm that says, “I am here to play records, not audition for a spaceship dashboard.”
Common Problems in a Sleeping Current Dumping Amplifier
When a vintage current dumping amplifier refuses to power up, hums loudly, blows fuses, distorts, or produces no sound, the first suspect is often the power supply. That is not glamorous, but neither is changing the batteries in a TV remote, and yet civilization depends on it.
Power supply faults are common because capacitors age. Electrolytic capacitors dry out over decades, causing higher equivalent series resistance, reduced capacitance, ripple, hum, heat, and unreliable startup behavior. In some units, old tantalum capacitors can fail short, creating mysterious faults that make the amplifier look far more broken than it really is.
1. Failed or Weak Capacitors
Capacitors are the usual suspects in vintage audio restoration. Main filter capacitors smooth the rectified supply rails. Smaller electrolytics and tantalums appear around input stages, compensation networks, and local decoupling points. When these parts drift, leak, or short, the amplifier may hum, oscillate, distort, or refuse to stabilize.
Replacing capacitors should not mean blindly ripping out every part on the board. A careful restorer checks value, voltage rating, polarity, physical size, ripple current, temperature rating, and circuit position. In audio circuits, the “best” capacitor is not always the fanciest one. It is the part that matches the electrical job without creating a new problem wearing a shiny sleeve.
2. Power Supply Ripple and Rail Imbalance
A current dumping amplifier depends on clean, stable supply rails. If the positive and negative rails are uneven, noisy, or sagging under load, the amplifier cannot perform correctly. The symptoms may include hum through the speakers, weak bass, unstable output, heating, or protection circuits triggering too early.
During restoration, the rails should be measured carefully with a multimeter and, ideally, checked with an oscilloscope for ripple. A rail that looks acceptable on a meter may still carry enough ripple to turn quiet passages into an unwanted duet with the power line.
3. Output Device Trouble
Output transistors in old amplifiers can fail short, open, or partially degraded. A shorted output device is especially dangerous because it can place DC on the speaker terminals. That is a fast way to turn a woofer into a toaster with a cone.
Before connecting speakers, a restorer should test the output devices, check for shorts, confirm correct emitter resistor values, inspect driver transistors, and measure DC offset at the output. Dummy loads are strongly recommended. Speakers are for music, not troubleshooting sacrificial rituals.
4. Bad Solder Joints and Heat Stress
Vintage amplifiers live through decades of heat cycles. Boards expand and contract. Solder joints crack. Connectors oxidize. Resistors darken. Thermal compound dries into ancient chalk. A visual inspection under bright light can reveal cracked joints, scorched resistors, loose hardware, and questionable repairs from someone whose soldering iron apparently doubled as a fireplace poker.
A Practical Restoration Workflow
Bringing a current dumping amplifier back to life should be methodical. The goal is not to win a speed contest. The goal is to understand the fault, correct it safely, and preserve the character of the original design.
Step 1: Document Everything Before Touching Anything
Take photos of the amplifier from every angle before removing boards or wires. Mark connectors. Record capacitor values. Compare the unit to available schematics or service data. Many classic amplifiers went through production revisions, so do not assume every board matches the first diagram you find online.
Step 2: Inspect the Power Supply
Check the fuse rating, transformer condition, rectifier bridge, main filter capacitors, wiring, grounding points, and any signs of overheating. If a fuse is blown, do not simply replace it and apply full power. A fuse is not a tiny glass inconvenience; it is evidence.
Use a current-limited startup method such as a dim-bulb tester or a variac with proper monitoring. If the bulb glows brightly and stays bright, the amplifier is drawing too much current. That is your cue to stop, not to “try a bigger fuse.” Bigger fuses are how repair stories become insurance claims.
Step 3: Replace Known-Bad Capacitors Thoughtfully
If testing confirms failed electrolytics or tantalums, replace them with high-quality modern parts of appropriate value and voltage rating. In power supply positions, choose capacitors with suitable ripple current and temperature ratings. In signal or feedback positions, respect the original function. Changing a capacitor type in a sensitive network can affect stability, noise, or frequency response.
For tantalum capacitors, many restorers choose modern electrolytic, film, or polymer alternatives depending on the circuit location. The decision should be based on electrical behavior, not internet superstition. That said, old solid tantalums have earned their dramatic reputation, and they are rarely invited to birthday parties.
Step 4: Check the Bridge and Correction Network
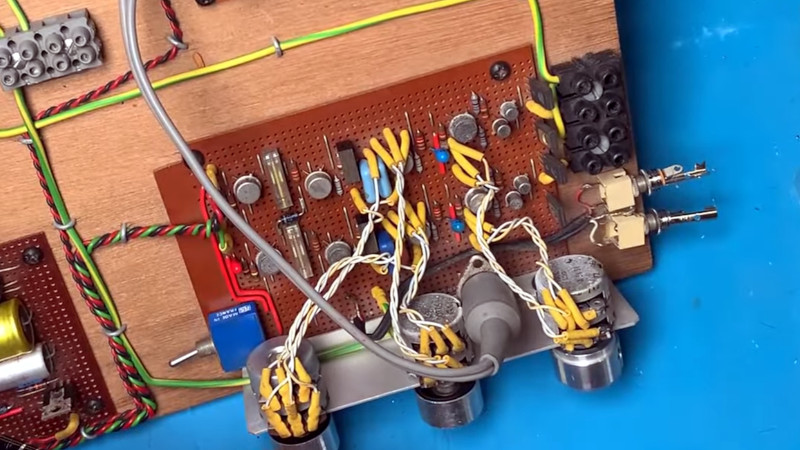
The current dumping concept relies on a carefully balanced correction network. In the Quad-style topology, certain resistors, capacitors, and inductors help generate the error correction behavior. If parts in this area drift badly or are replaced with poor substitutes, the amplifier may still make sound, but distortion and stability can suffer.
This is where restoration becomes more than “recapping.” A current dumping amplifier deserves respect for its topology. Do not randomly upgrade bridge components because a forum comment said “silver mica equals magic.” Measure, understand, and replace only with suitable parts.
Step 5: Test Without Speakers First
After repairs, power the amplifier through a current limiter. Measure supply rails. Check DC offset. Confirm that no output is sitting near a supply rail. If possible, inject a low-level sine wave and observe the output on an oscilloscope into a dummy load. Watch for clipping symmetry, oscillation, excessive noise, or unstable behavior at higher frequencies.
Only after the amplifier behaves correctly on the bench should it be connected to real speakers. Start with modest volume. Listen for hum, buzz, harsh distortion, channel imbalance, overheating, or protection triggering. Your ears are useful, but test instruments should get the first vote.
How a Revived Current Dumping Amplifier Should Sound
A properly restored current dumping amplifier should not sound like a vintage science project. It should sound composed, clean, and musical. The bass should be controlled rather than bloated. The midrange should feel open. The treble should be clear without turning cymbals into dental tools.
Some listeners describe classic current dumping amplifiers as slightly dry or understated compared with warmer vintage receivers. Others love their calm, unshowy presentation. System matching matters. Speakers with difficult impedance curves may challenge older versions more than friendly eight-ohm designs. Later revisions, such as the Quad 405-2, improved current delivery into lower impedances, making them more flexible partners for real-world loudspeakers.
Specific Example: A Power Supply-Centered Revival
Imagine a current dumping amplifier that powers on inconsistently, produces hum, and occasionally drops one channel. The case looks fine, but inside the main filter capacitors are original, several small tantalum capacitors are suspect, and the rectifier bridge has old thermal compound that now resembles dried toothpaste from a forgotten civilization.
The restorer begins with photos, schematic comparison, and resistance checks. No speakers are connected. The amplifier is powered through a current limiter, revealing excessive draw. The rails are measured and show ripple. The small tantalum capacitors are tested, and one has failed badly. The main filter capacitors also show elevated ESR.
After replacing the failed capacitors with correctly rated modern parts, cleaning and securing the rectifier, reflowing cracked solder joints, and inspecting the output transistors, the amplifier starts cleanly. The rails stabilize. DC offset is safe. A sine wave into a dummy load looks clean. Only then does the amplifier meet speakers again. This is not just repair; it is resurrection with paperwork.
Mistakes to Avoid During Restoration
The first mistake is replacing parts without diagnosing the problem. The second is assuming expensive boutique components automatically improve a classic circuit. The third is applying full power too early. The fourth is testing with valuable speakers. The fifth is ignoring mechanical details such as loose screws, oxidized connectors, poor grounding, or dried thermal compound.
One more mistake deserves its own little chair in the corner: changing the amplifier’s design philosophy. A current dumping amplifier is not a blank canvas. It is a carefully engineered system. Sensible restoration preserves the topology, improves reliability, and avoids turning an elegant circuit into an unstable science fair entry.
Experience Notes: What Bringing One Back Teaches You
Restoring a current dumping amplifier teaches patience faster than almost any other audio project. At first glance, the circuit can seem too simple to be intimidating. There are not thousands of parts. There may not be complicated bias adjustments. The boards are often compact and logical. That simplicity can trick you into moving too quickly. Then the amplifier reminds you that clever engineering hides in relationships between parts, not just in the number of parts on the board.
The most useful habit is to slow down and create a baseline. Before changing parts, measure what is happening. Are the rails balanced? Is one channel warmer than the other? Is there DC at the output? Does the fault follow a board, a connector, or a power supply rail? This kind of thinking saves time. It also prevents the classic beginner’s journey from “bad capacitor” to “new capacitor installed backward” to “why is the room spicy?”
Another lesson is that old amplifiers often fail in layers. A dead tantalum capacitor may be the obvious problem, but weak filter capacitors, cracked solder joints, dirty connectors, and tired thermal compound may be waiting behind it like backup singers. A good revival does not stop at the first sign of sound. Sound is encouraging, but reliability is the real finish line.
There is also a strong emotional side to this work. When a vintage amplifier comes back to life, the reward is not only technical. You hear music through a machine that might have sat silent for years. The transformer hums gently. The rails settle. The first clean signal appears on the scope. Then a speaker plays, and suddenly all the measuring, cleaning, desoldering, and cautious power-ups feel worthwhile. It is hard not to grin. The amplifier has returned from the electronic afterlife, and it brought bass.
Current dumping amplifiers are especially satisfying because they represent an engineering idea with personality. They are not brute-force monsters. They are not flashy. They are clever, compact, and a little eccentric. Restoring one feels like preserving a chapter of audio history. The goal is not to make it into something else. The goal is to let it be itself again, only safer, cleaner, and ready for another few decades of service.
The best practical advice is simple: use proper tools, respect mains voltage, replace failed parts with appropriate modern equivalents, test under controlled conditions, and avoid unnecessary modification. If you do not understand a part of the circuit, pause and research it before heating the soldering iron. Vintage audio repair rewards humility. The amplifier does not care how confident you are; it only cares whether the circuit is correct.
Conclusion: A Smart Revival for a Smart Amplifier
Bringing a current dumping amplifier back to life is a blend of electronics, history, and careful listening. The design is famous because it solved crossover distortion with an elegant partnership between a precise Class A stage and a powerful current-dumping output stage. Restoring one means respecting that balance.
The smartest approach begins with documentation and safety, moves through careful power supply diagnosis, treats capacitors as likely suspects rather than automatic villains, checks output devices and correction networks, and tests thoroughly before speakers ever enter the story. Done properly, the result is more than a repaired amplifier. It is a revived piece of audio engineering that still has something musical to say.